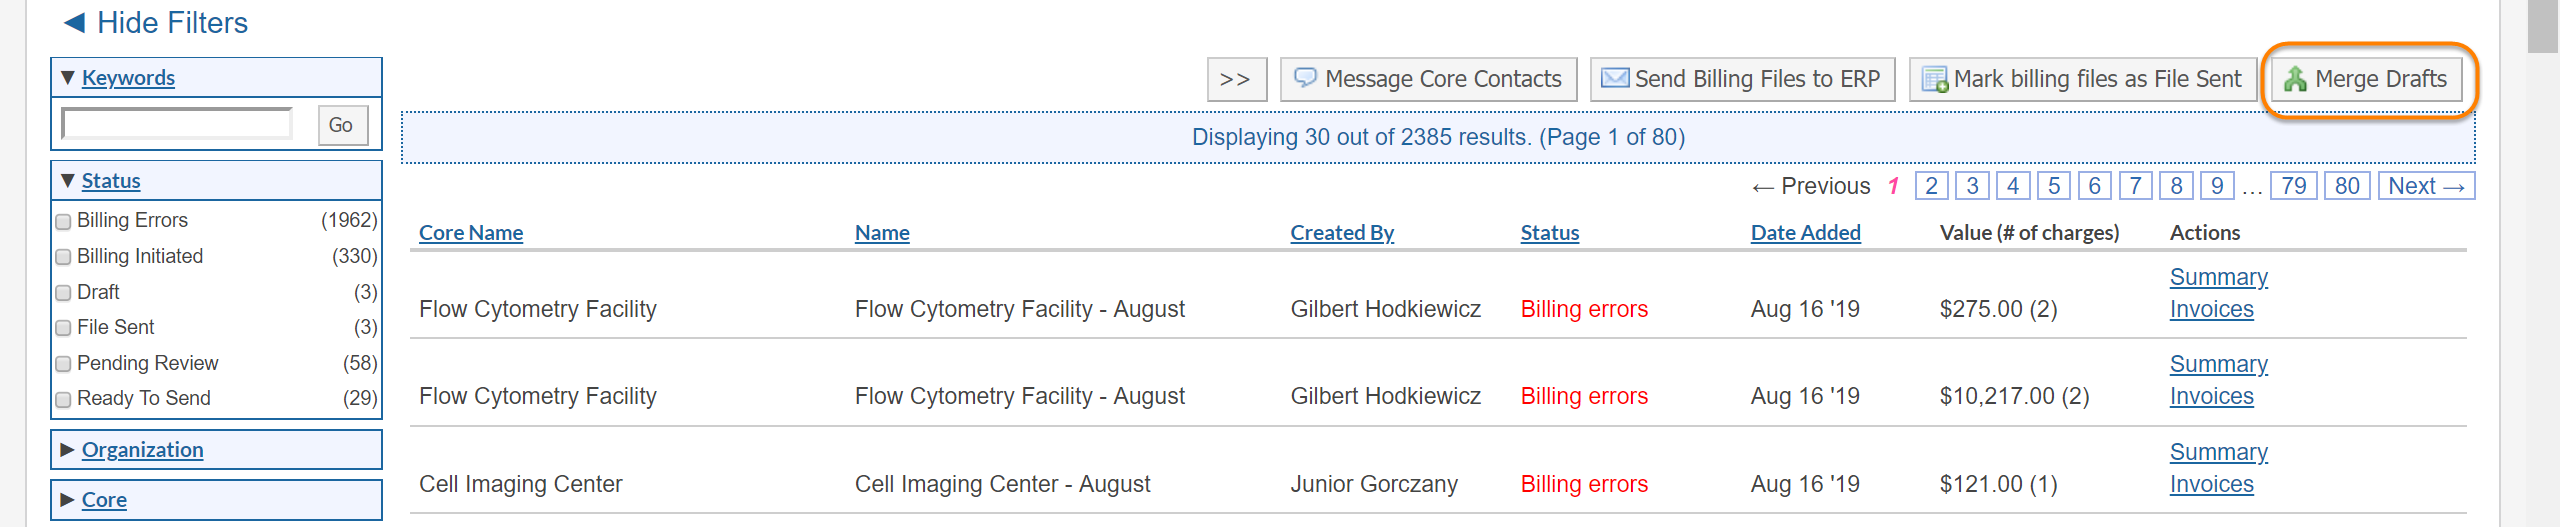
As the Institution Administrator, you may view and take action on billing events across all cores in your institution, by clicking on the Billing tab on your Institution Dashboard.
Layout of Billing tab
On this tab, you will see basic information for each billing event created by each core. Each section is described below.
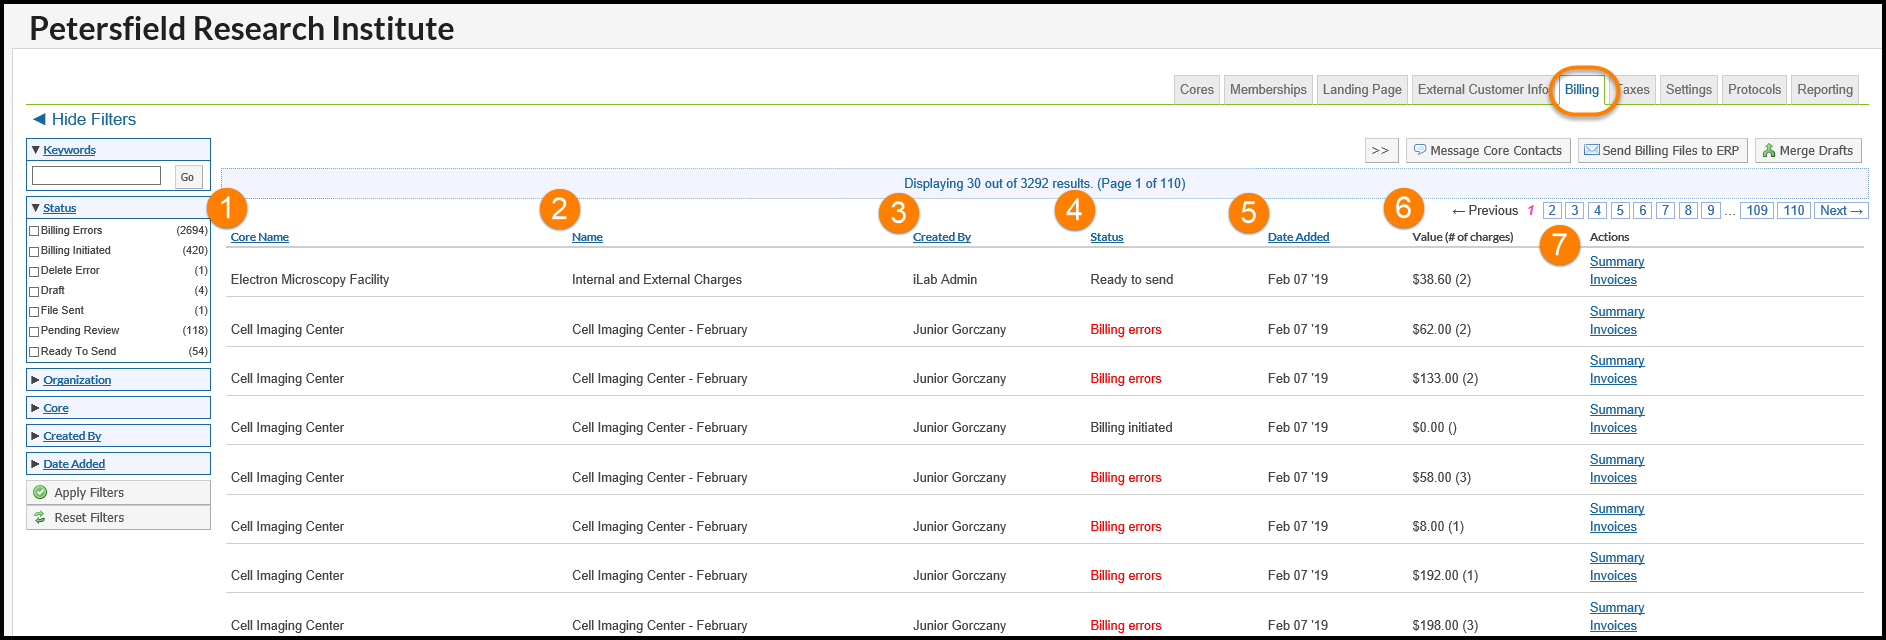
- Core Name: The name of the core where the billing event was created.
- Name: This is the name of the billing event. The name can be edited by hovering over the text.
- Created By: The name of the core staff who created the billing event.
- Status: The current status of the billing event.
- Date Added: When the billing event was created.
- Value (# of charges): The total amount of the charges in the billing event along with the number of individual charges in the billing event.
- Actions: The summary link allows you to see the breakdown of charges per price type and billing status. The invoices link allows you to see the invoices created in the billing event.
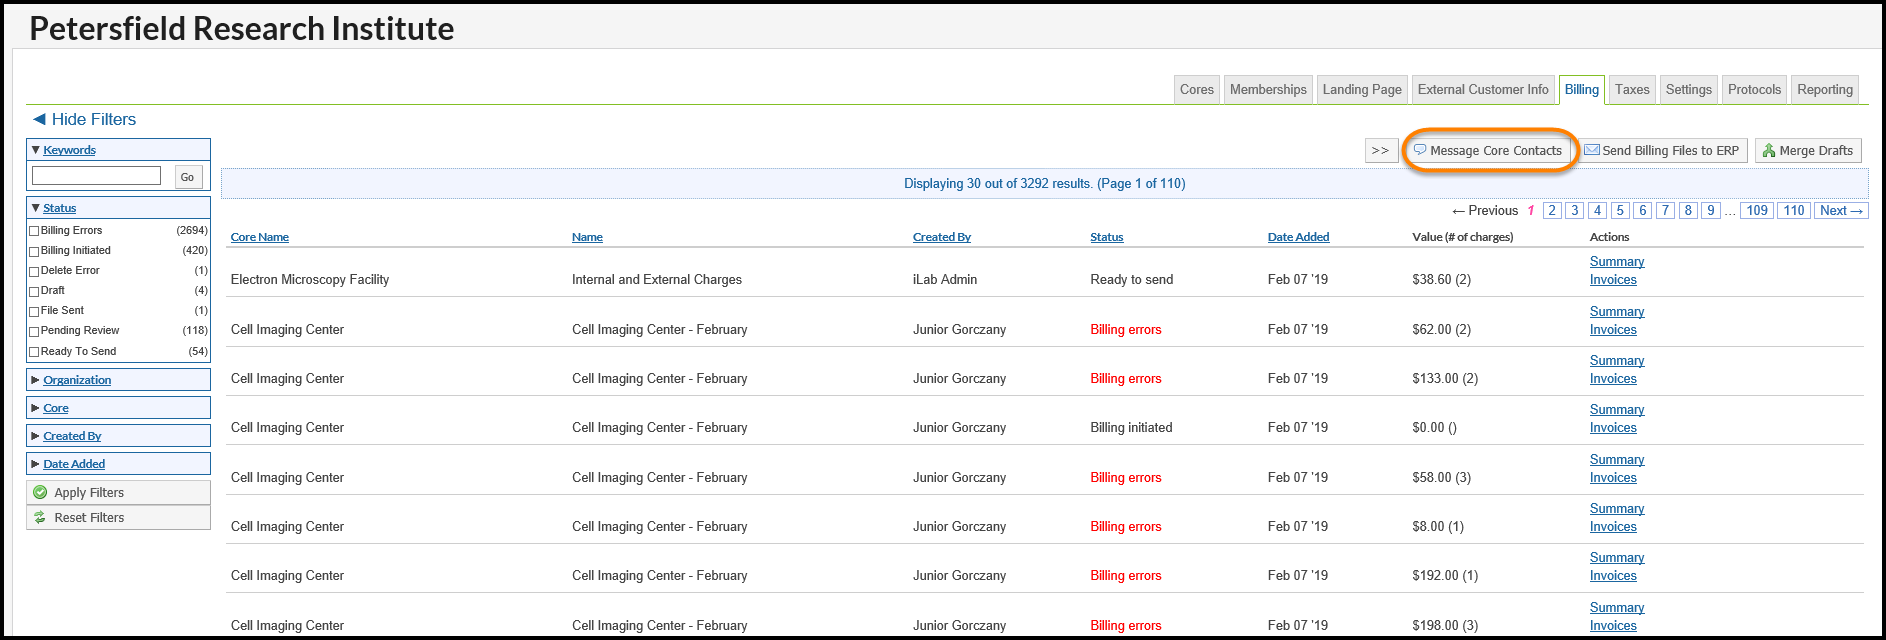
Also, on this tab are additional Navigation buttons: message core contacts, send billing files to ERP and merge drafts. These buttons can be viewed by clicking on the bulk actions button. Each is described below.
Message Contacts
After expanding the bulk actions you can click the Message Core Contacts button will to send an email to all the core contacts for your institution.
You may choose to select all the contacts of all cores, or specific contacts within specific cores by using the check boxes. You can also enter a name in the text box to search for an individual core contact.
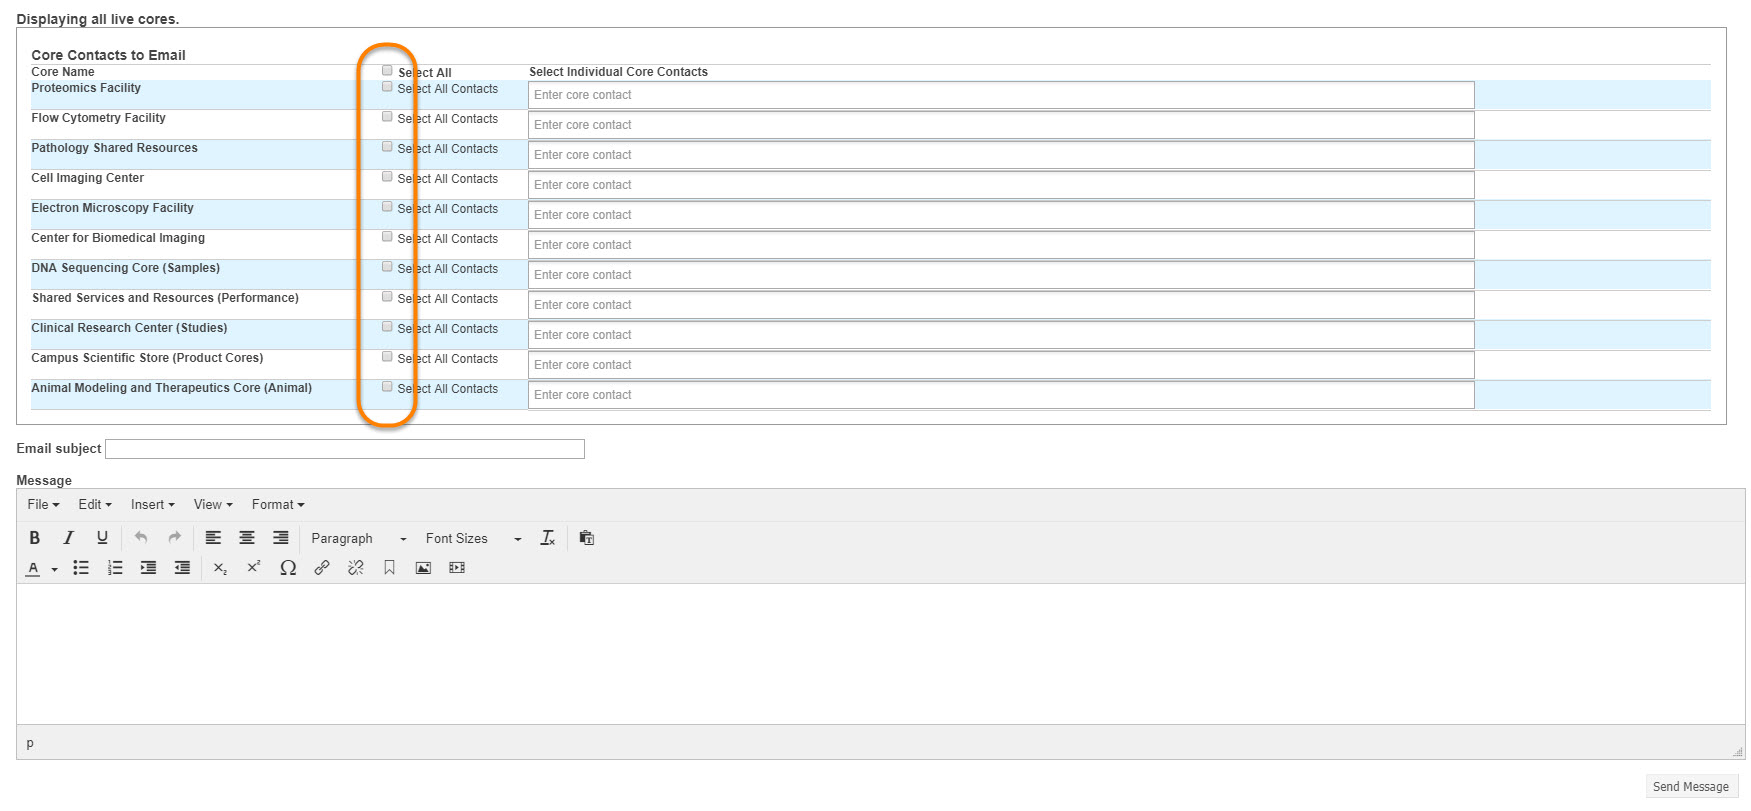
Below the contacts list there is the free text box to enter your message. Once you have completed your message click Send Message.
Send Billing Files to ERP
If your institution has been configured to send iLab billing files to your ERP system, you can do so by clicking on Send Billing Files to ERP once you have expanded the Bulk Actions.
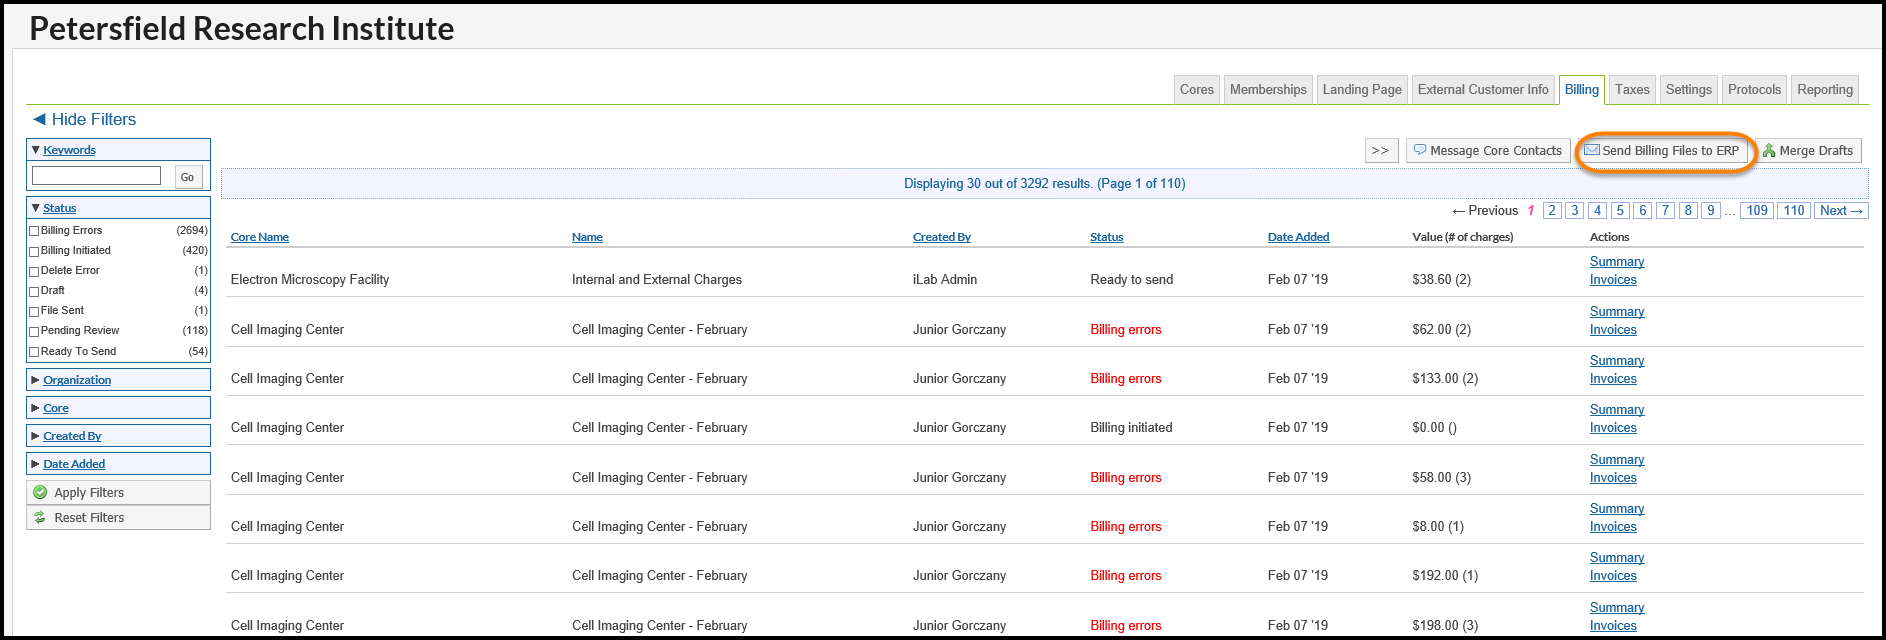
You will be able to select which specific billing files you would like to send by either clicking the Select All check box or the individual check boxes for the . By default, they are all selected. To select specific files, deselect the Select All checkbox. Then check the ones you would like to send.
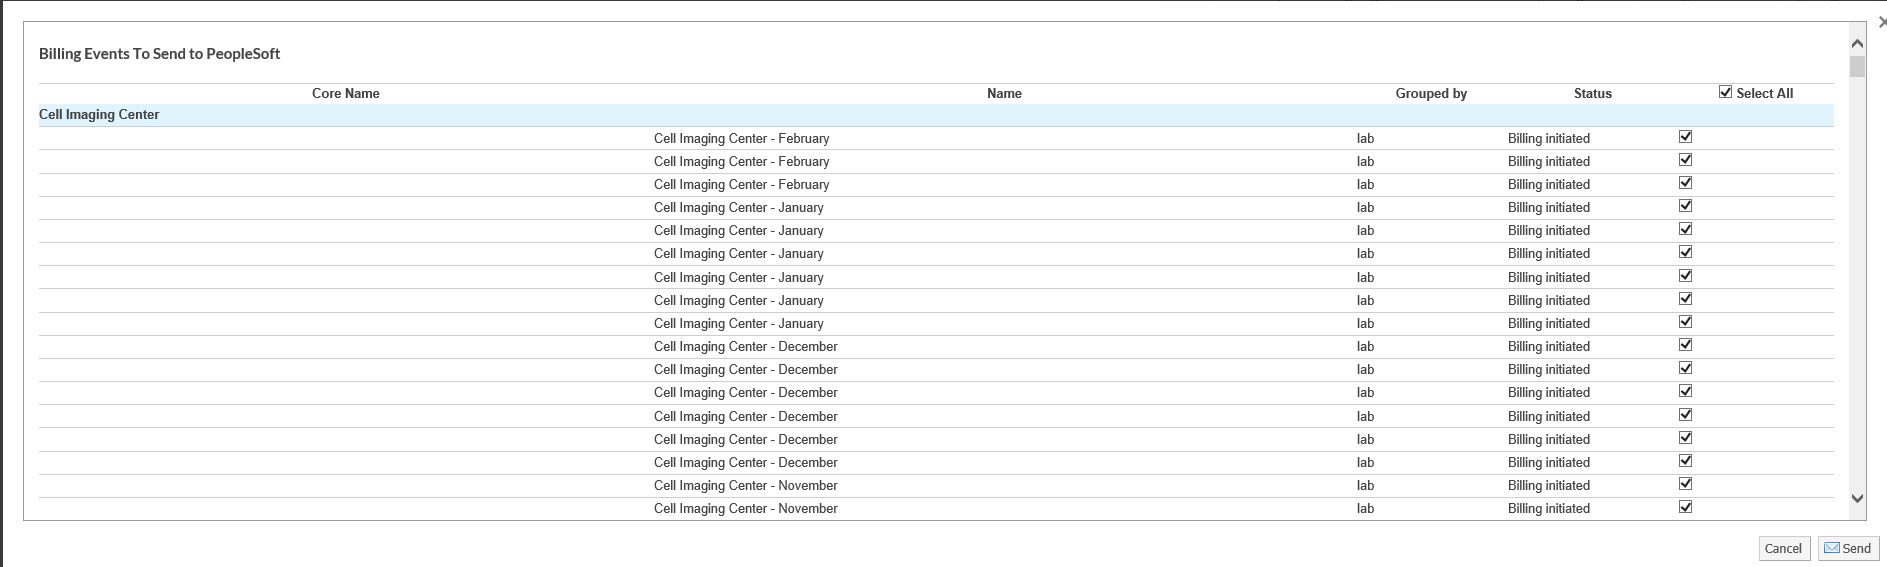
Then click Send.
Merge Drafts
There might be times where a core has multiple draft billing events that need combined into one final billing event. To do this you will click the Merge Drafts button once the Bulk Actions are expanded.
A new box will then show all the available draft events. Click the check boxes next to the draft events you would like to merge, keeping in mind only billing events from the same core with the same charge grouping on invoices can be merged.
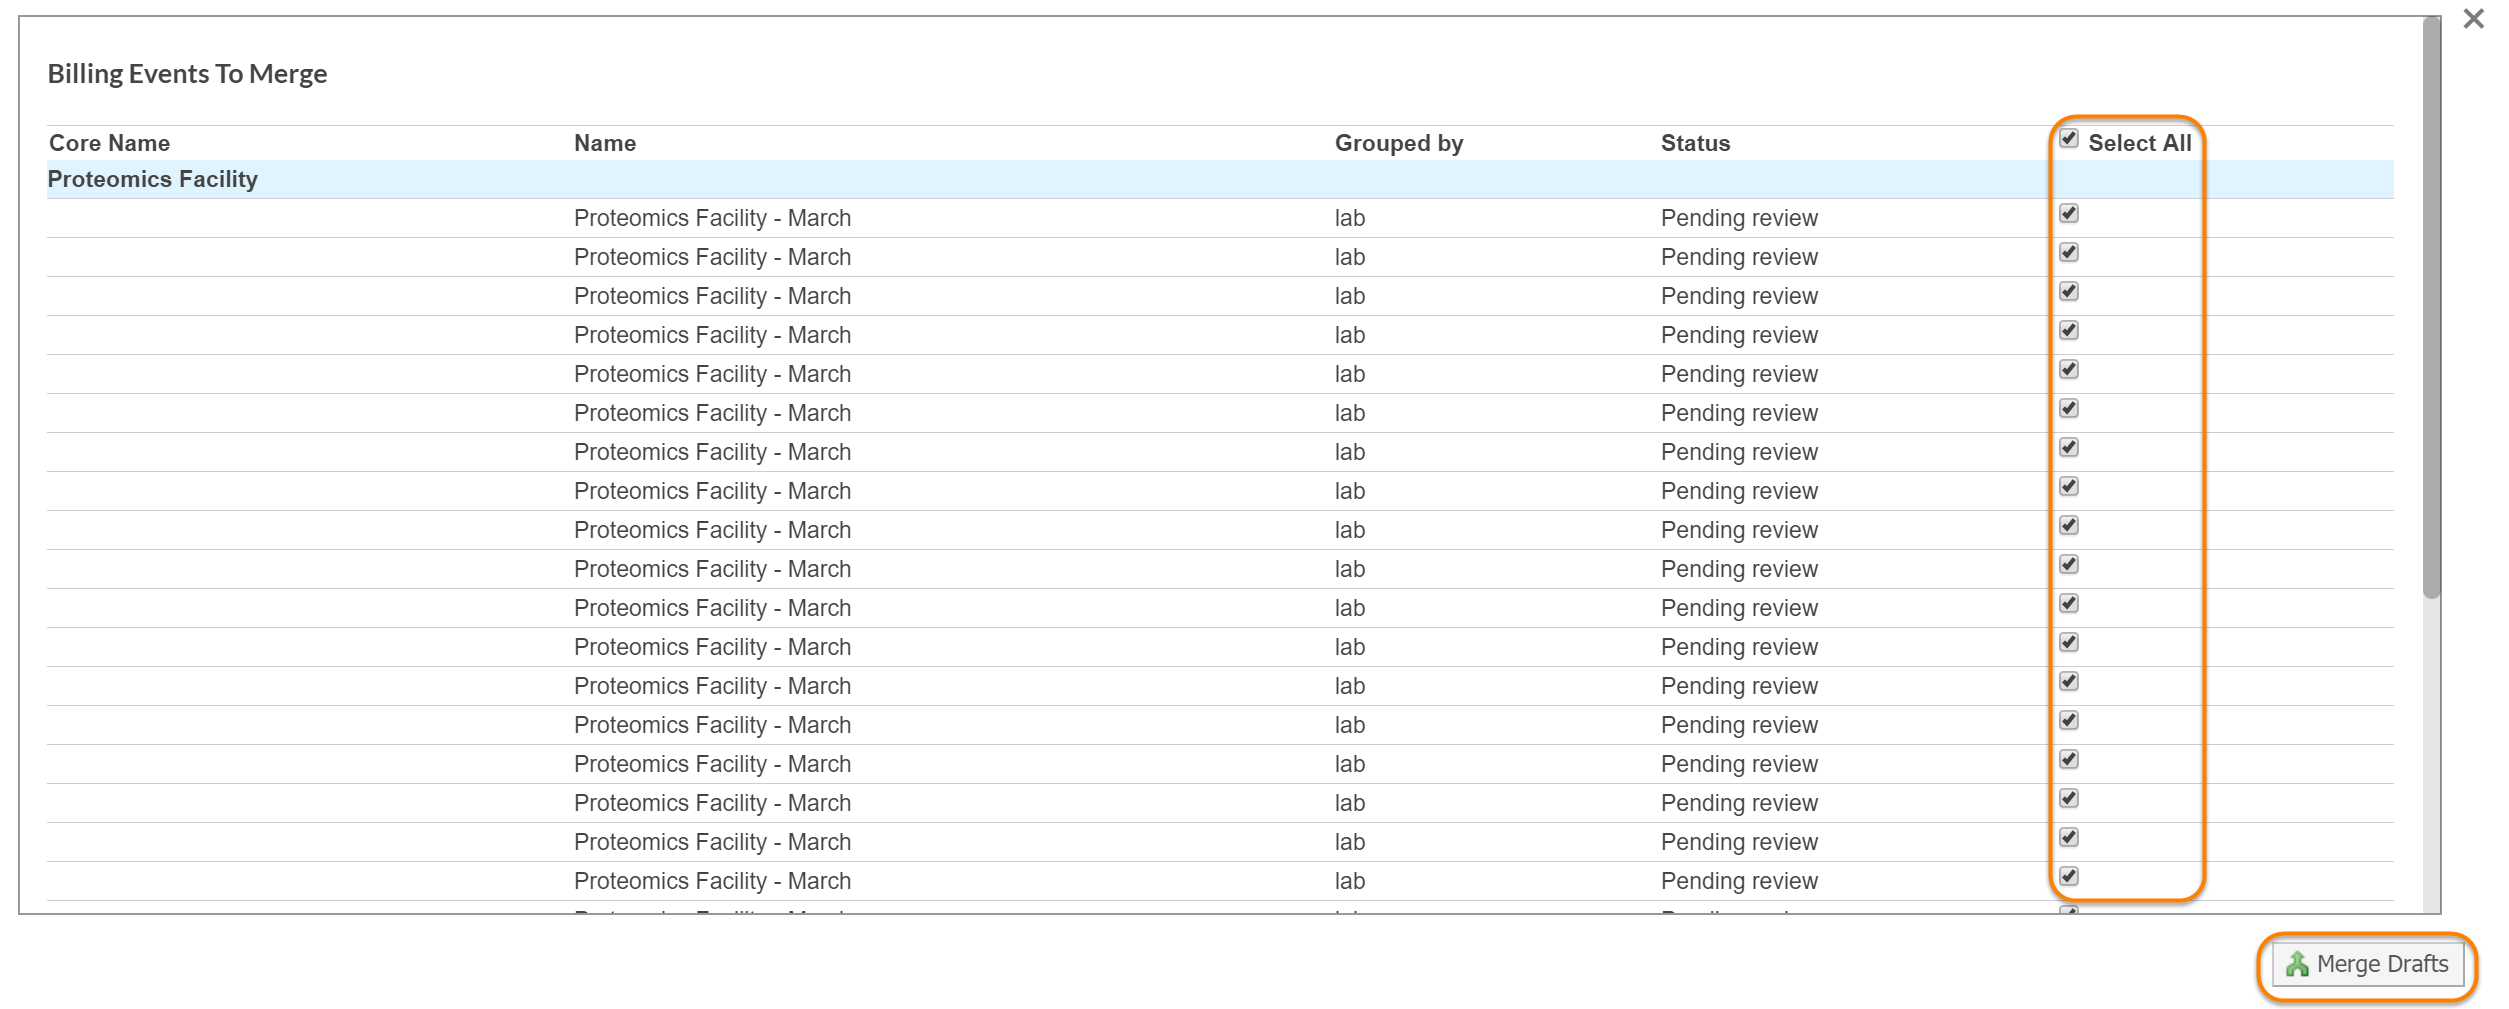
Once you have selected the billing events you would like to merge, click the Merge Drafts button.
Draft billing events can also be managed at the core level, Merge Drafts.
Using Filters
Similar to many of the other pages in iLab you have the ability to filter the results shown by using the filters along the left side.
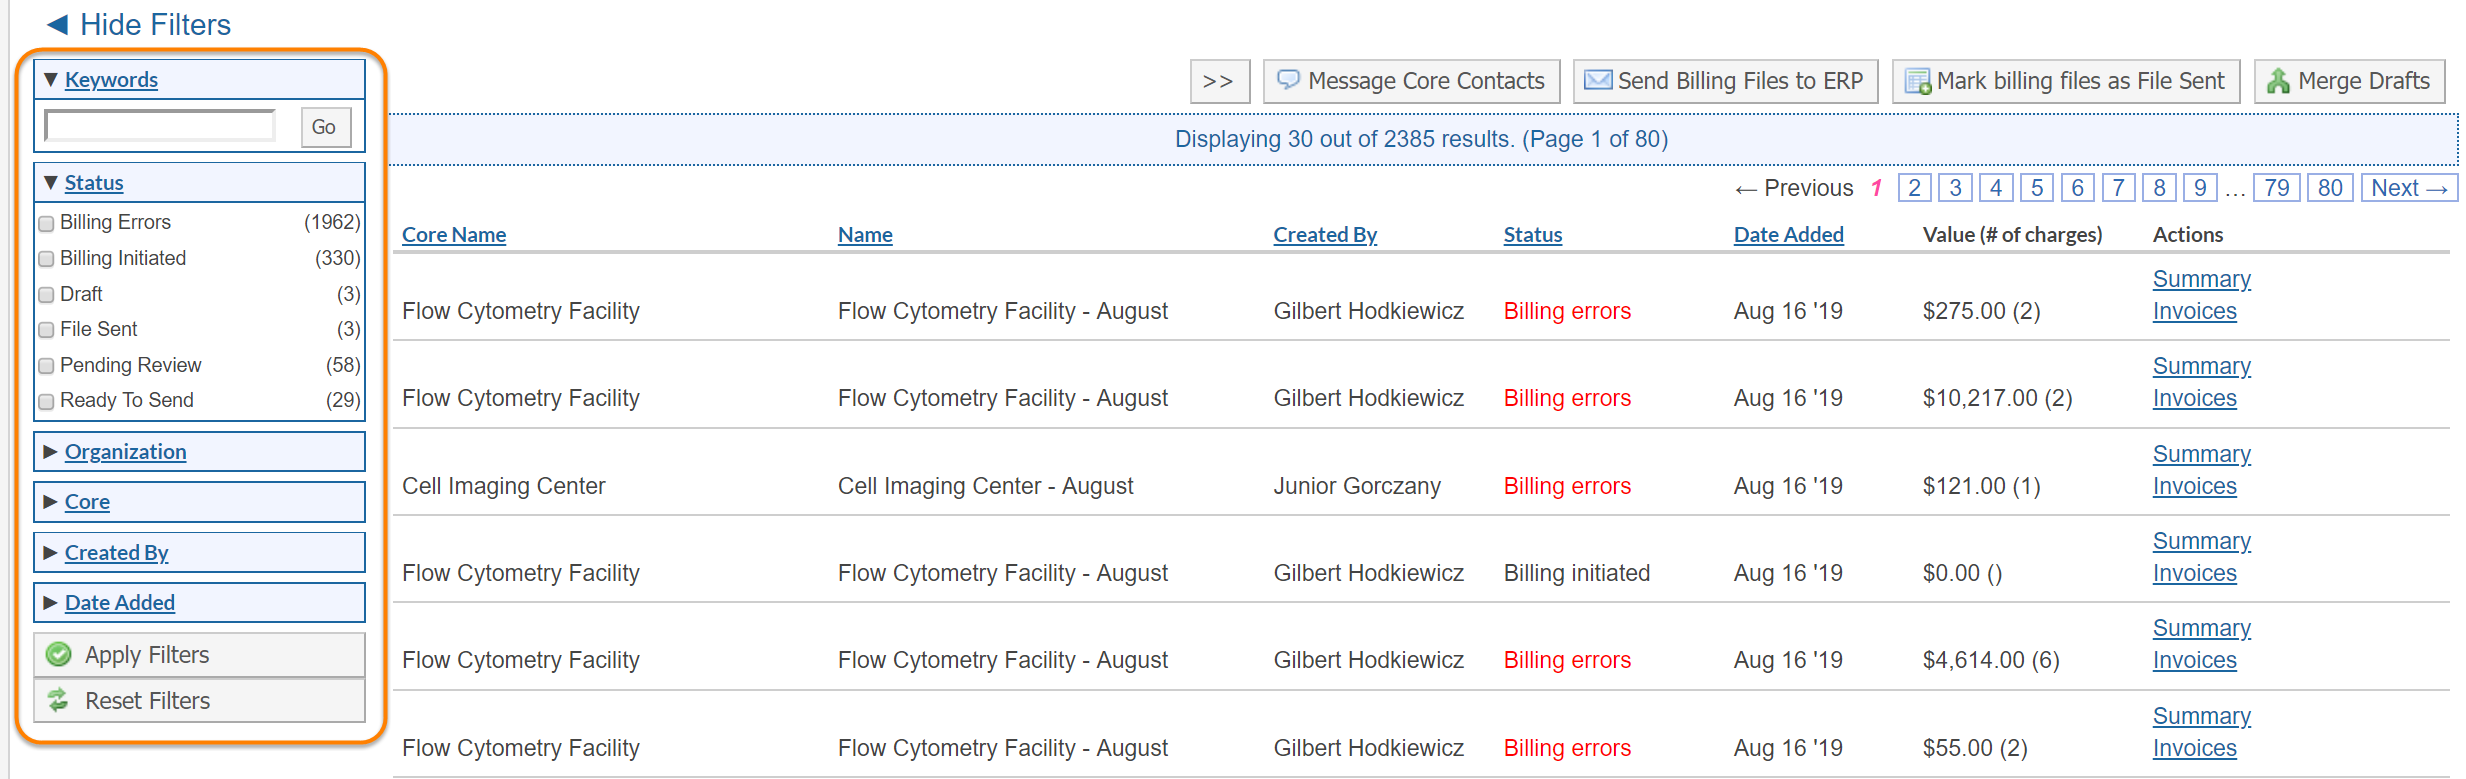
For more information on using filters, please see Using Filters.