The Review Usage button on the Schedule Equipment tab allows core administrators to view all usage - confirmed and unconfirmed - for a specific resource. You may also choose to confirm the usage from this interface.
NOTE: The Review Usage button allows for confirming usage for a single piece of equipment ONLY. For details on how to confirm usage across a core for ALL core resources, please see Confirm Usage.
Review Usage Overview
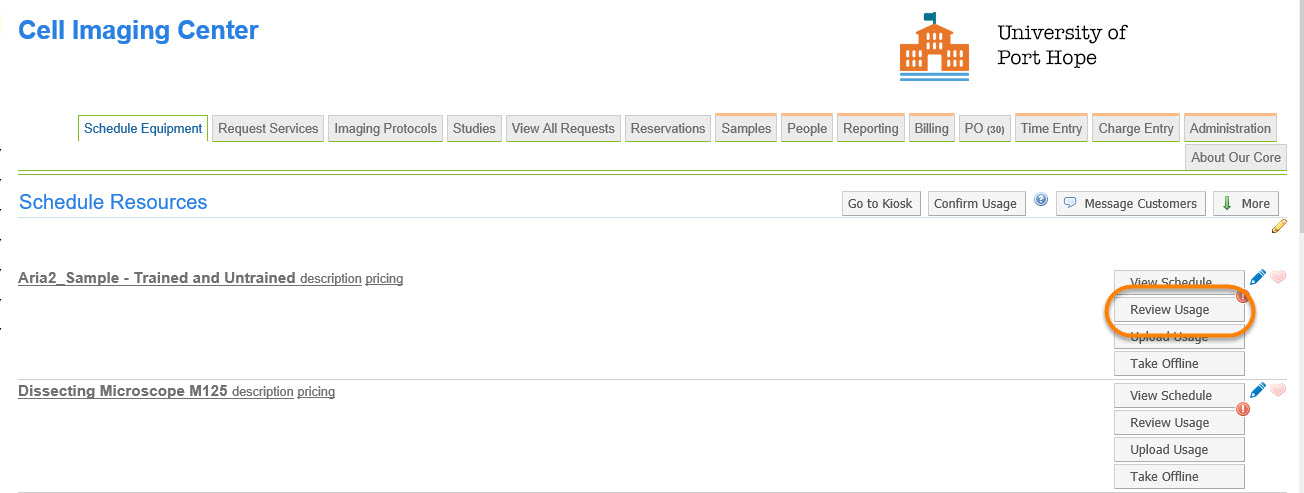
To review usage, click on the "Review Usage" button beside the resource you would like to view.
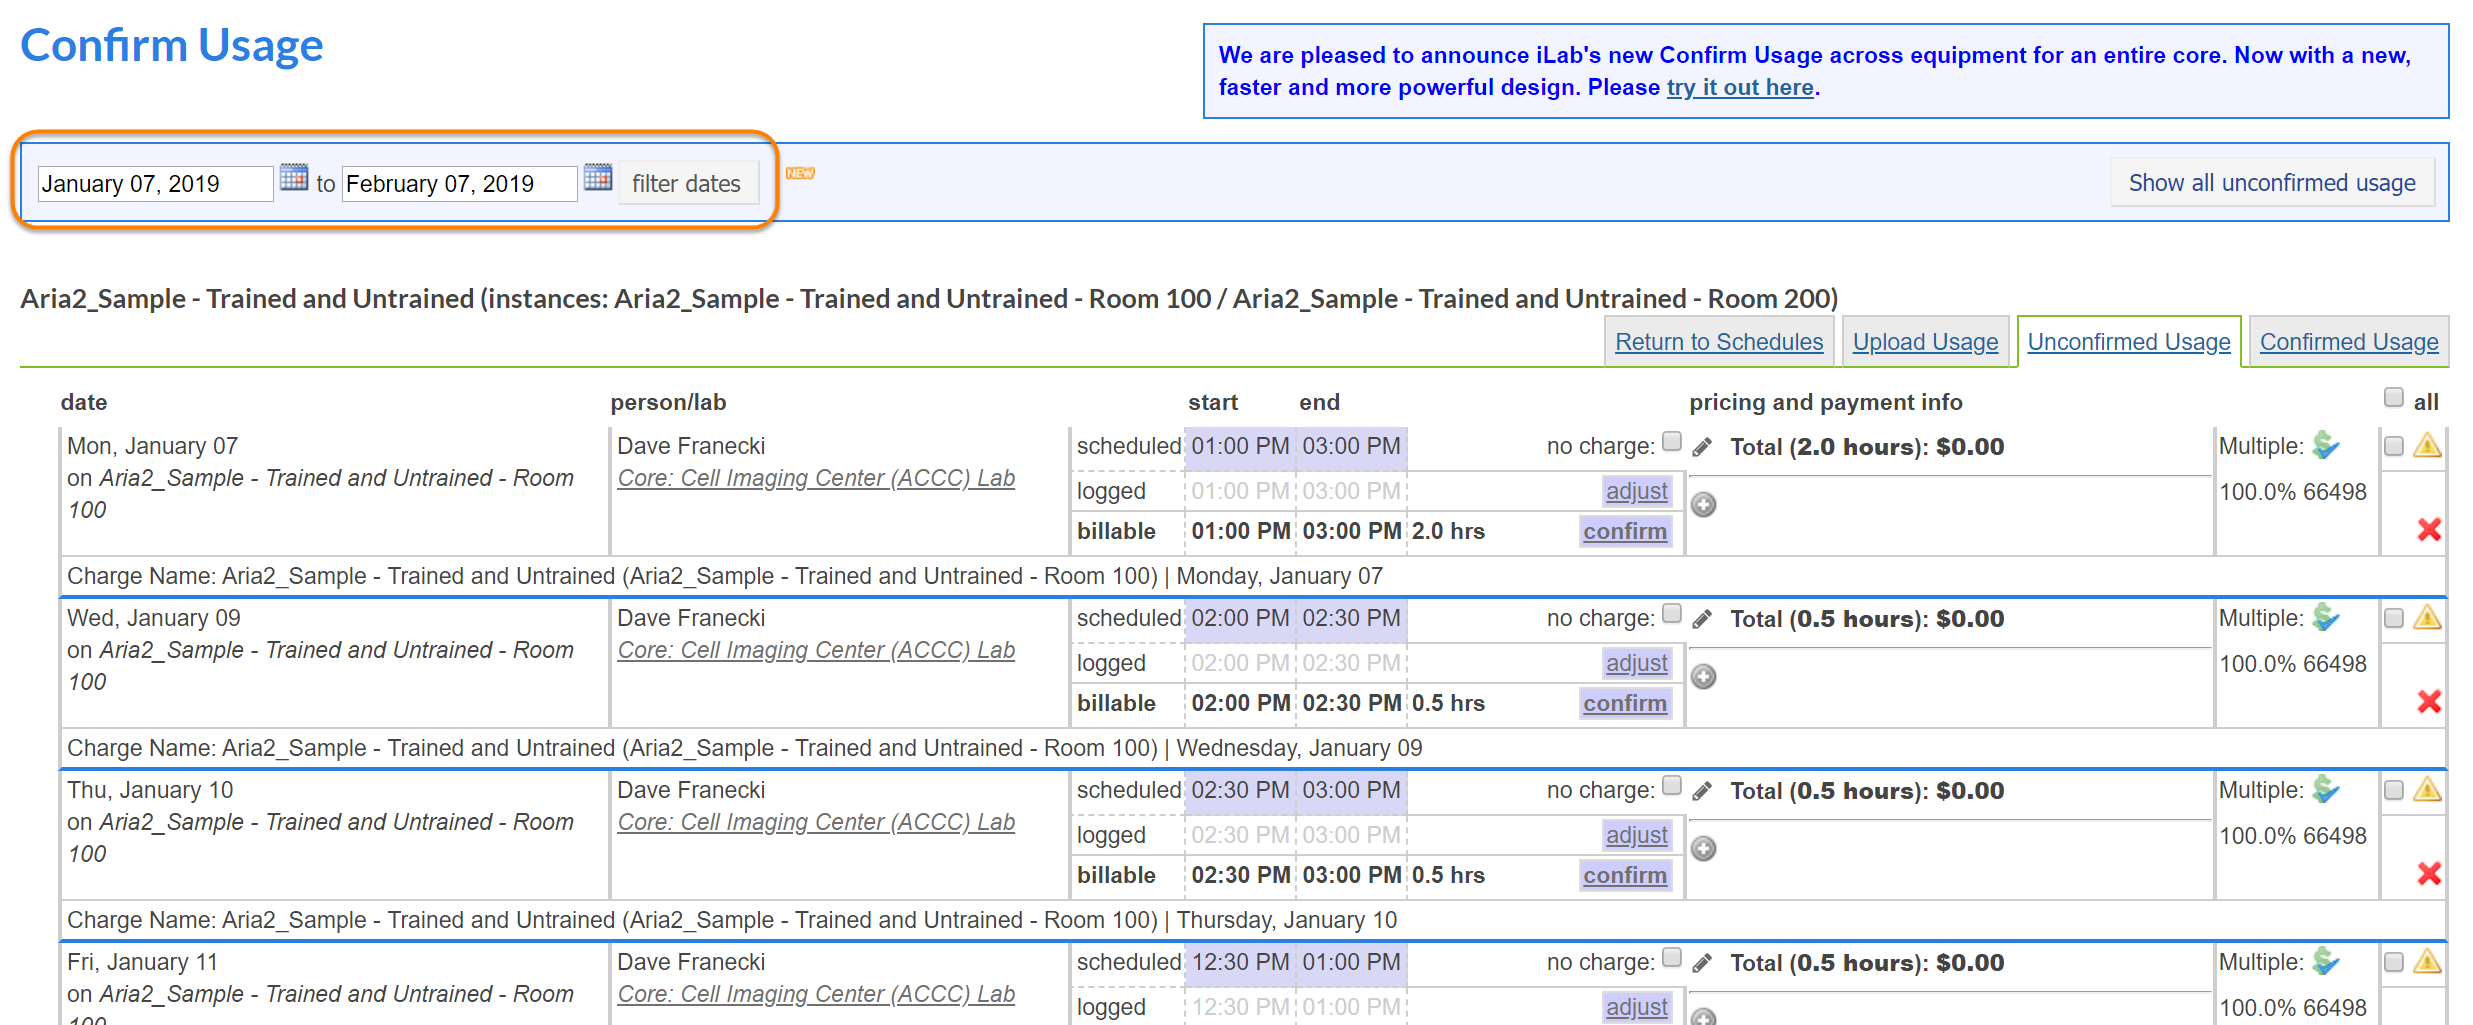
A screen will open displaying all usage for that resource. Notice the date range on the top. You may change the dates to broaden or narrow your search results. This filter will apply to each tab.
You may switch views by clicking on an alternate tab.
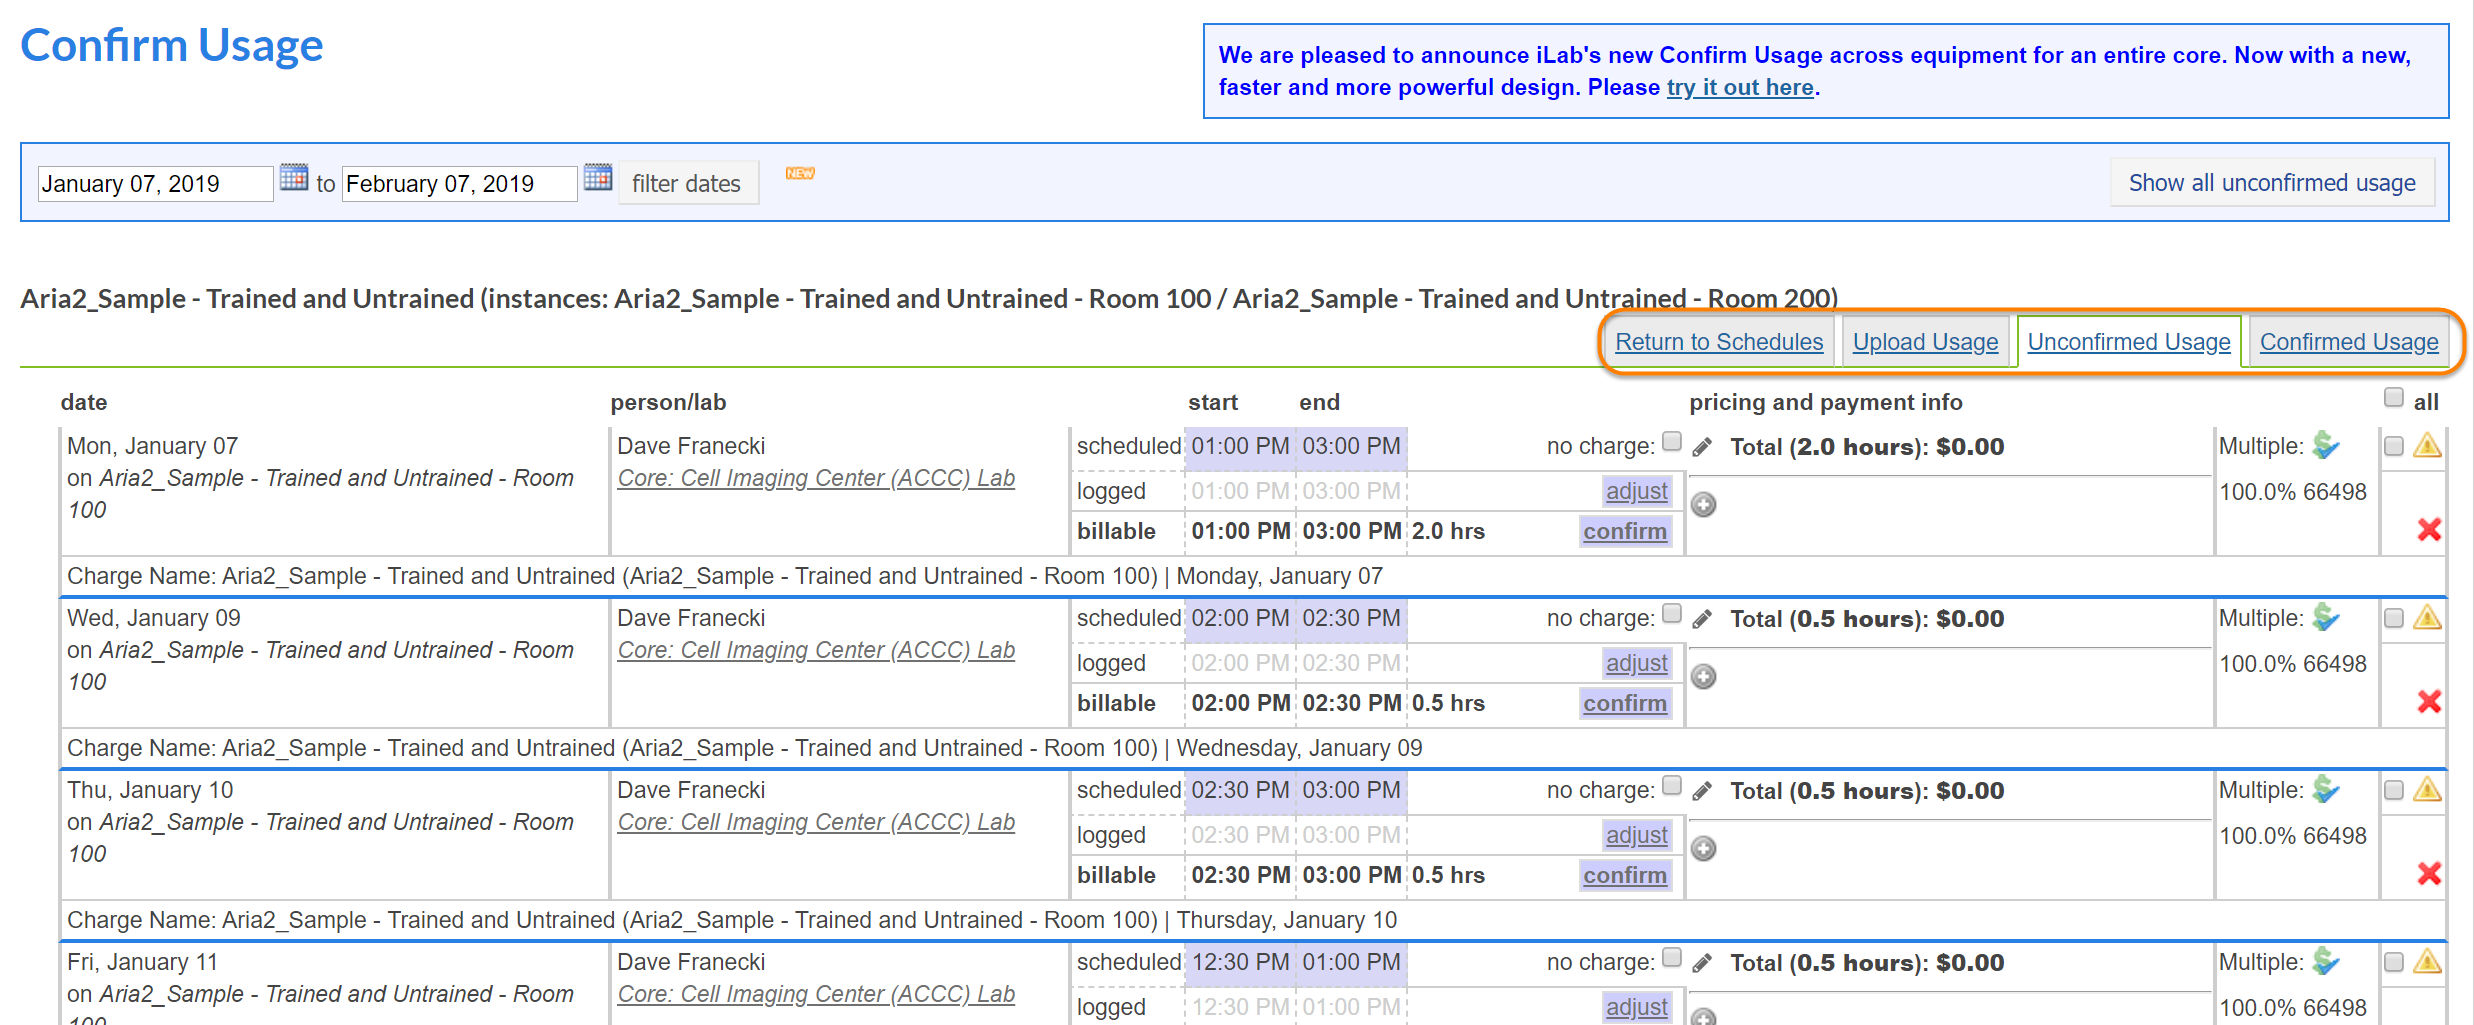
A detailed description of each tab follows.
Upload Usage
The Upload Usage tab allows you to confirm usage gathered in another medium; for instance, a manual log file. It will display any usage files that have already been uploaded but are not yet confirmed.
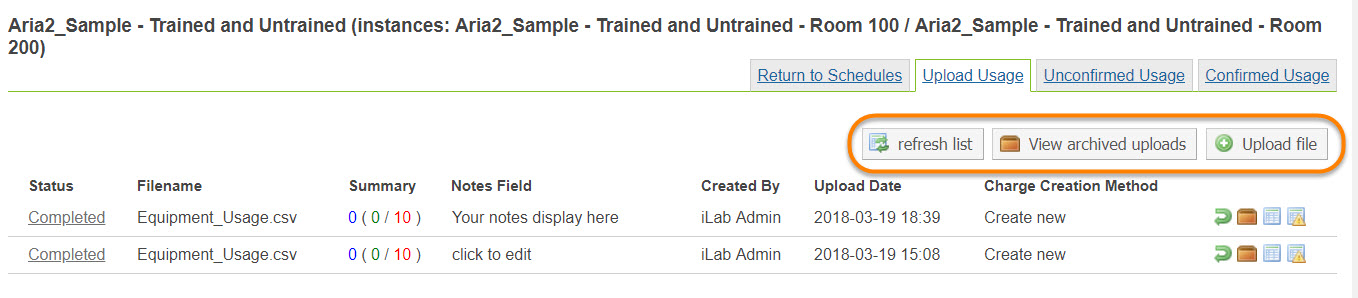
The first button you will see is the "refresh list" button. Clicking this will refresh the list of uploaded usage files to include any that have uploaded since you logged on.
The "View archived uploads" button allows you to view all usage files that have been archived. Archived files have been processed and will no longer display in the standard Unconfirmed Usage or Confirmed Usage searches. It will be searchable ONLY through the "View archived uploads" on the Upload Usage tab.
Last, you may upload additional usage files by clicking the "Upload File" button.
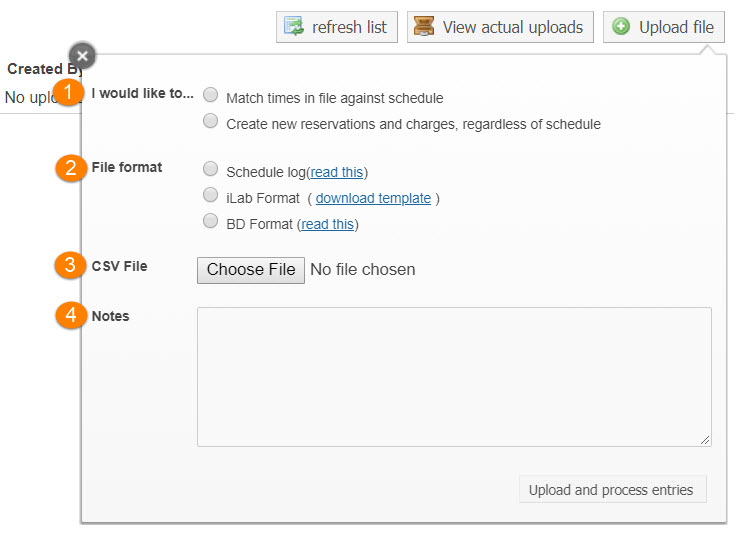
There are several options when uploading user files:
- If you would like the system to match the reservations in your file with reservations in the system, click "Match times in the file against schedule". This could eliminate possible duplicate charges. If you would not like to match schedules but create new reservations for every entry in the file, check the option, "Create new reservations and charges, regardless of schedule".
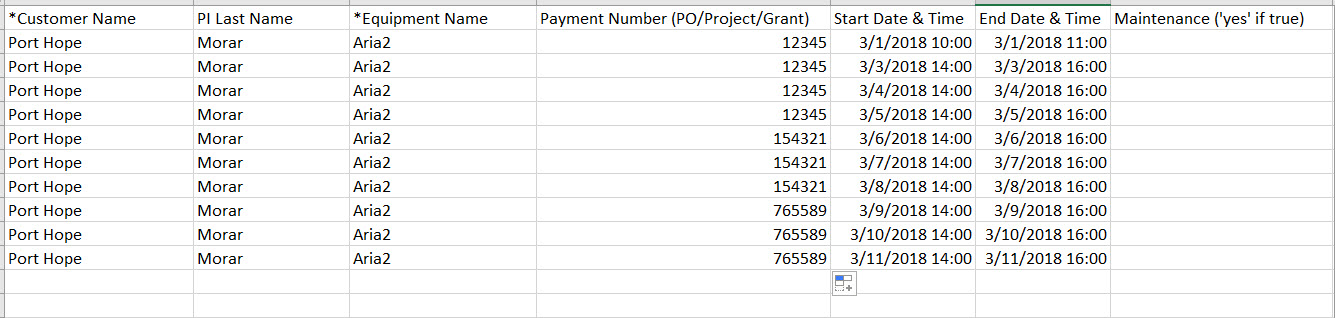
- Select your file format. The "Schedule" option is reserved for users of iLab's usage tracker. "iLab format" is an excel spreadsheet with headers. You may download a template by clicking in the link. "BD format" is iLab format without the header rows. Below is an example of what a usage file might looks like.
- Once you have selected fields one and two above, the "Choose File" button will become active. Browse your system to upload your file.
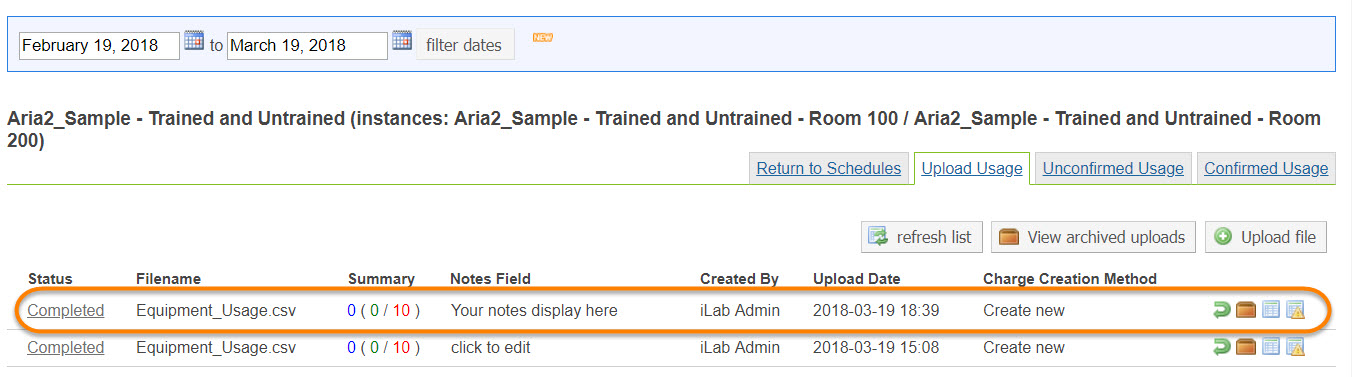
- You may add a note if necessary. The note will display in the summary of the upload as shown below.

When you have completed all the entries, click "Upload and process entries".
Your new new uploads will now display on the Upload Usage tab.
Note that you may use the action icons to take several actions on your downloads.
- Remove all reservations created by this upload
- Archive this upload
- Download the original file
- Download the original file with error indicators
Manage Unconfirmed Usage
When you first click on the Unconfirmed Usage tab, a list of all unconfirmed usage within the dates specified in the date filter will display. There are several actions you may take on a usage entry before confirming them, detailed in the numbered image below.
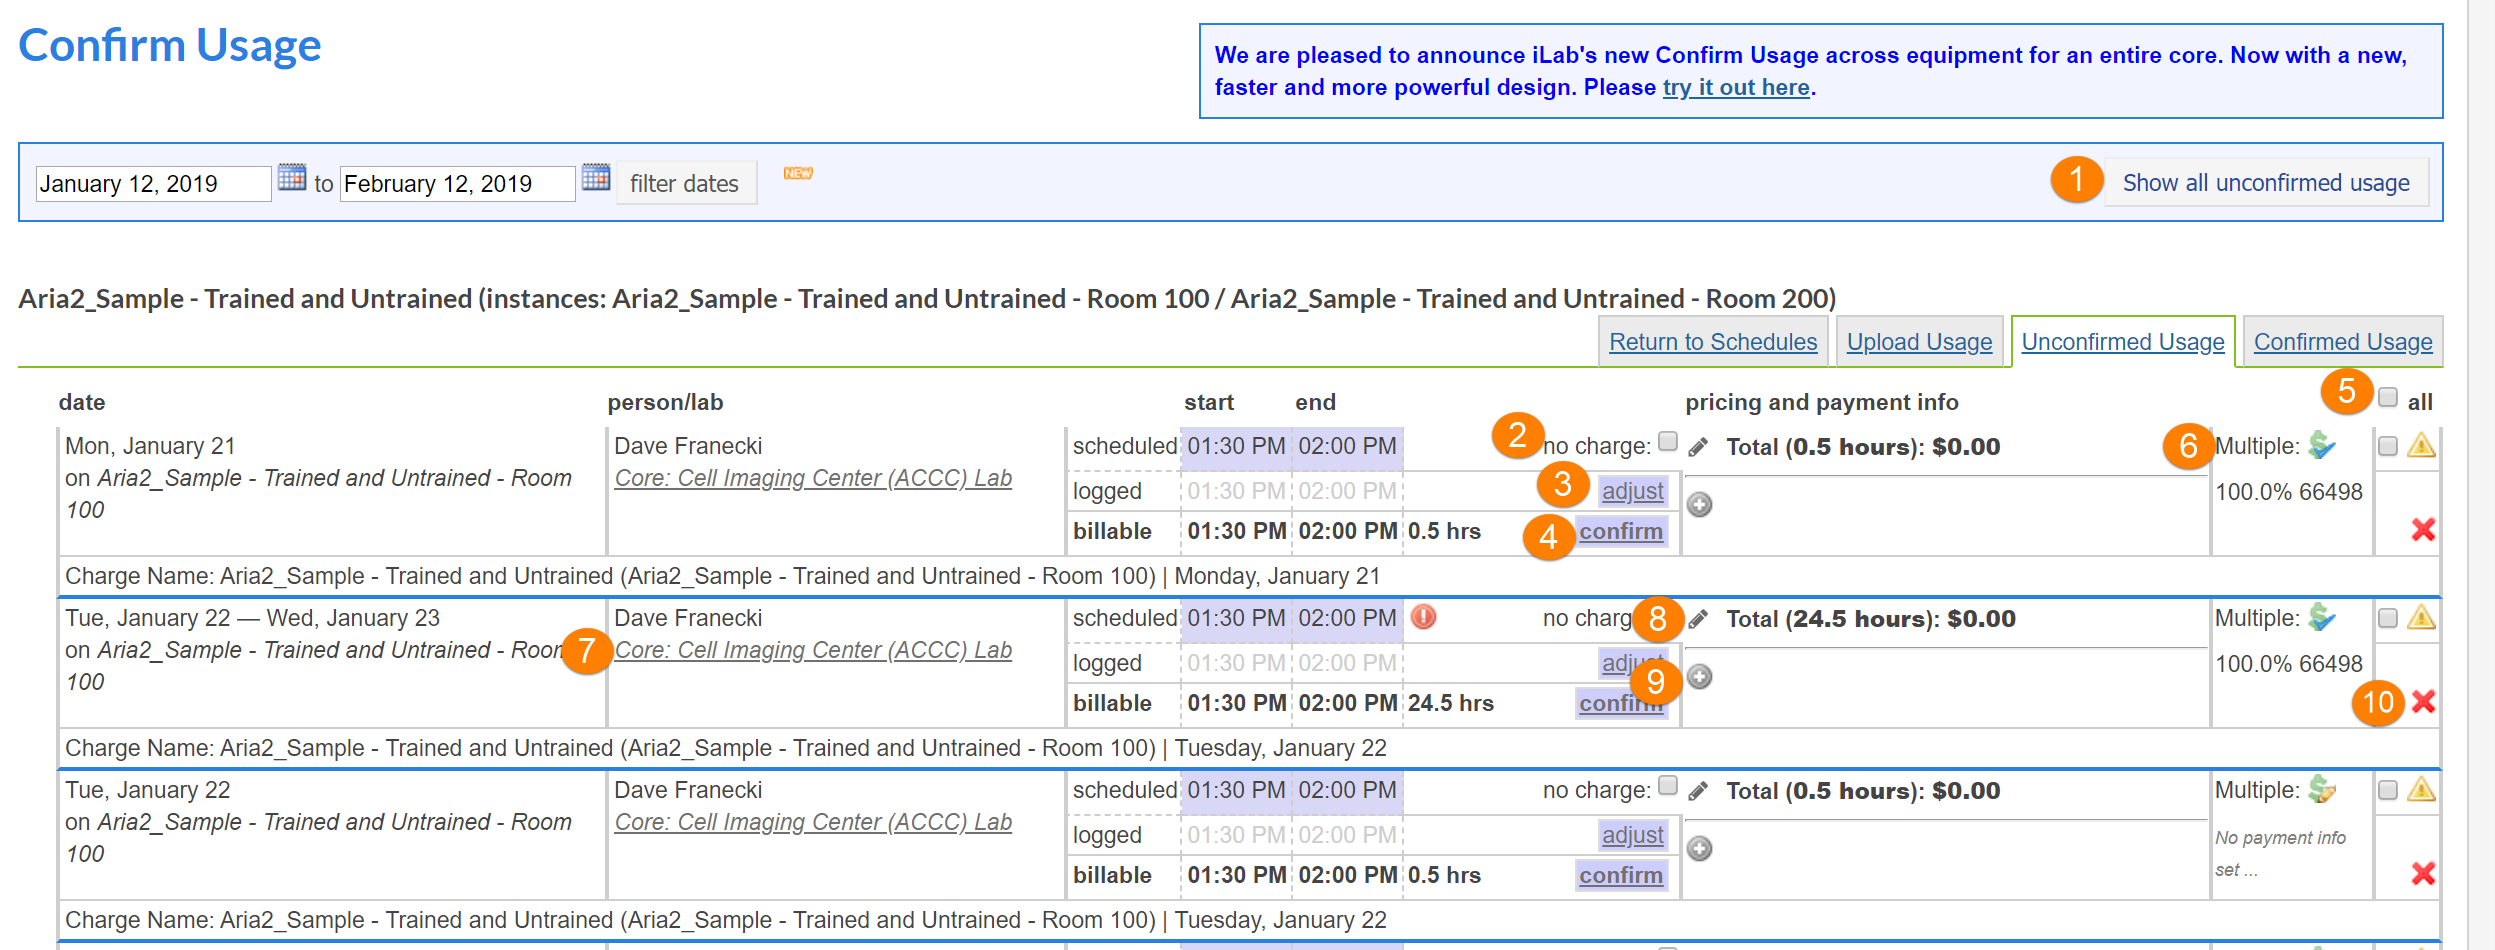
- Click on "Show all unconfirmed usage" button to override the date filter and display ALL unconfirmed usage for the resource.
- Check this box to mark as a "no charge" entry.
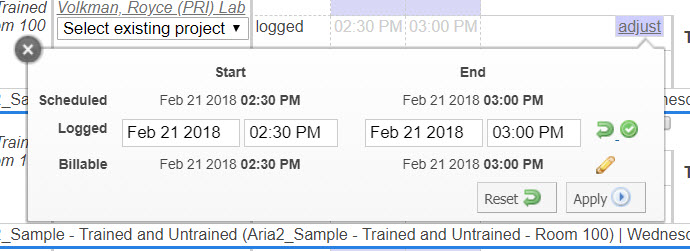
- Click on "adjust" if you would like to adjust the time on the entry. The window below opens. Click on the pencil icon to edit the time and dates. You may choose to reset the changes or save them by clicking the green check icon. When you have completed you updates, click on apply.
- Click on the "confirm" link to confirm this usage entry. The entry will be removed from the unconfirmed list and moved to the confirmed list.
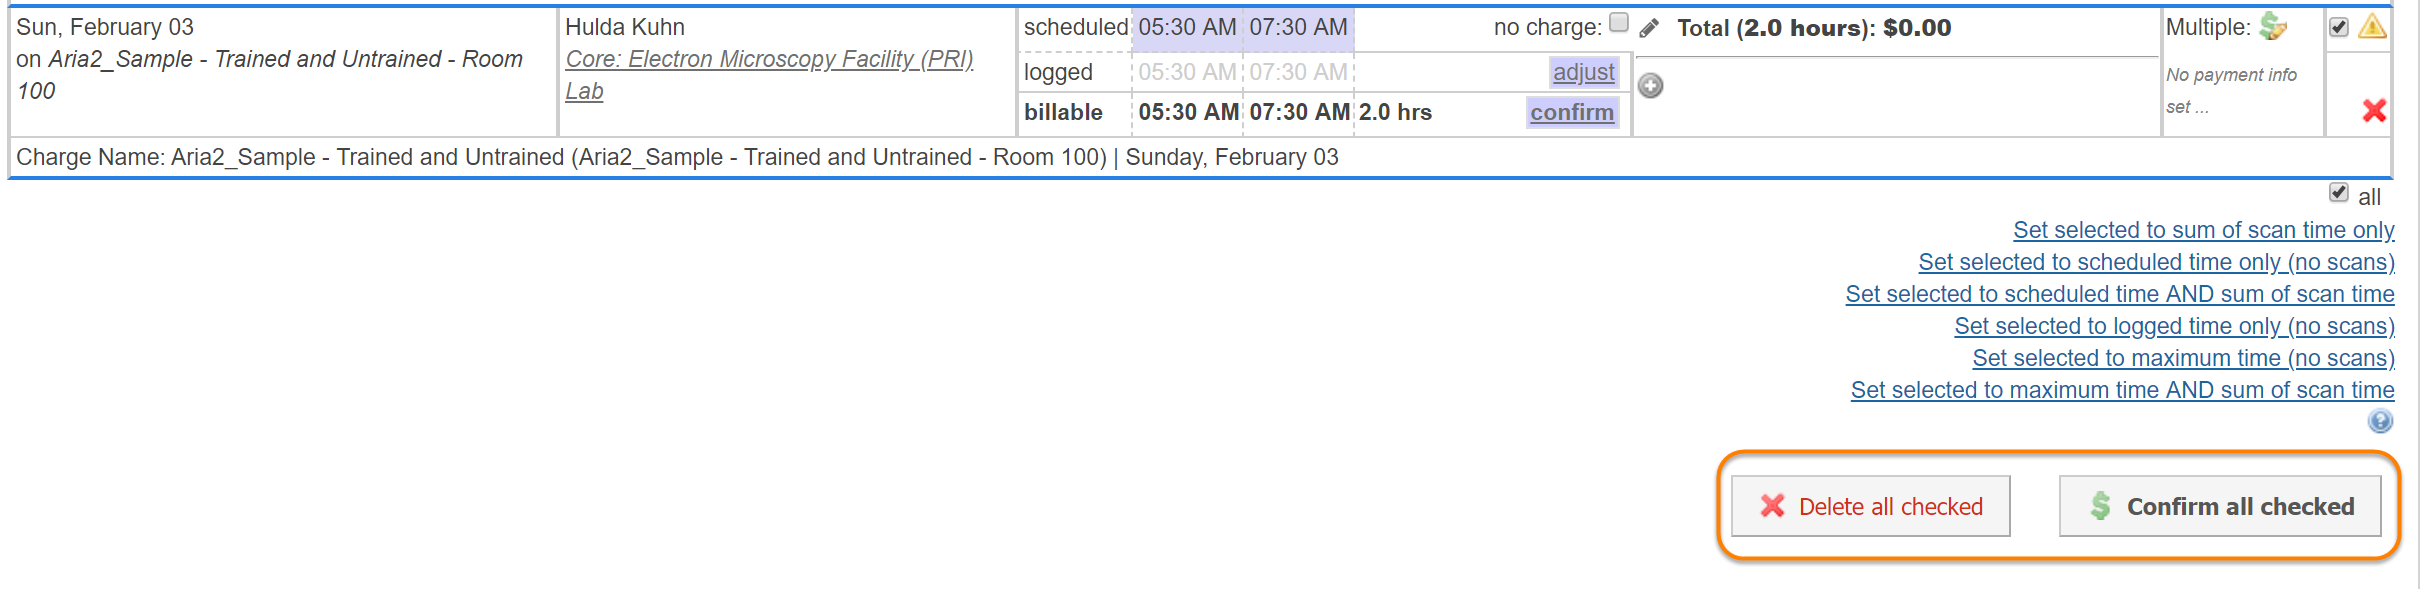
- Check the "all" checkbox selects ALL the usage entries in this view. Then you may confirm them all or delete them all by scrolling to the bottom and clicking the "Confirm all checked" box or the "Delete all checked" box.
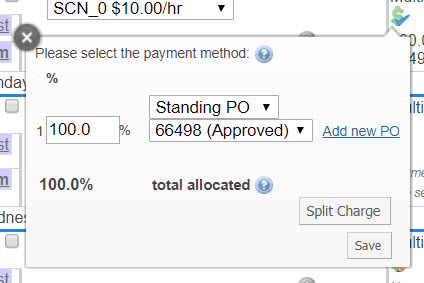
- Click on the dollar icon to view and update payment information. This allows you to update payment information or split payment between multiple funds if needed.

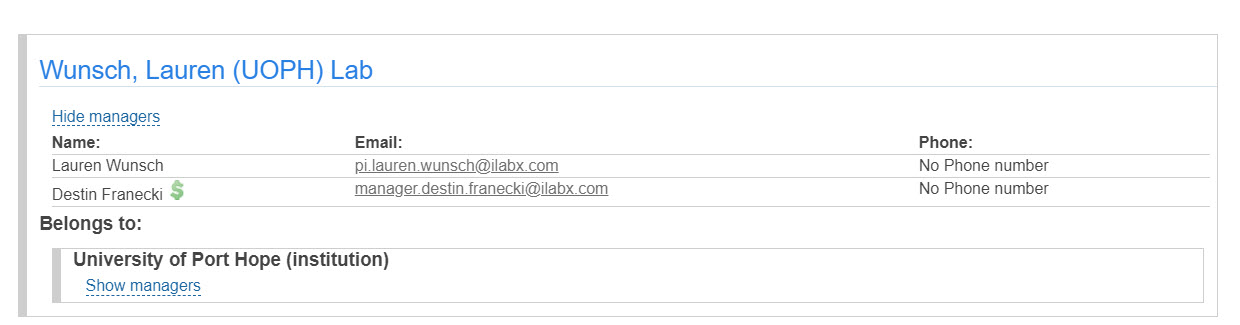
- When you click on the lab link, a window displaying lab information displays.
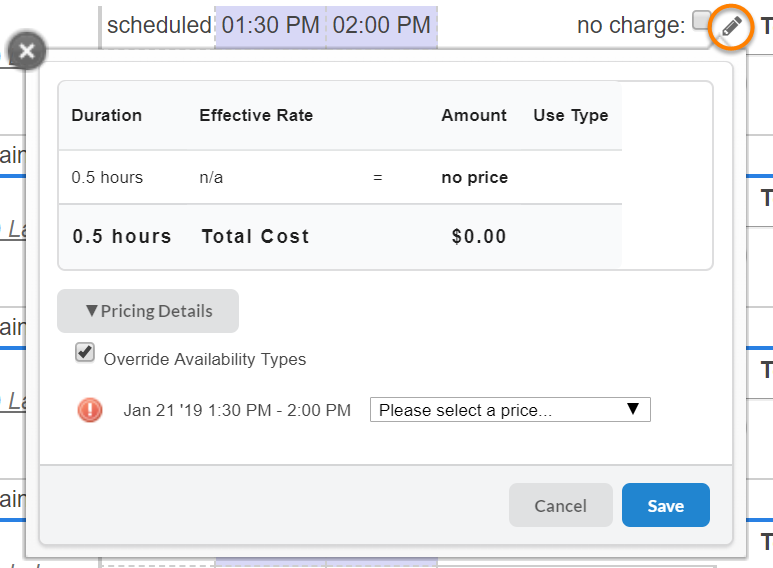
- Click on the pencil icon to view and/or select a different usage type.
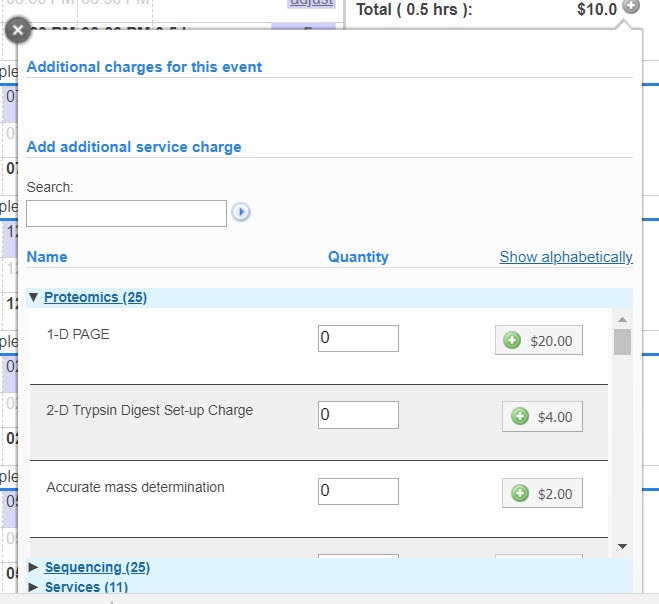
- Click on the plus icon to add services to this usage entry. The services window will display.
- You may click on the red X icon to delete the selected usage entry.
You may use the check boxes on each entry to carry out additional actions located at the bottom of the screen.
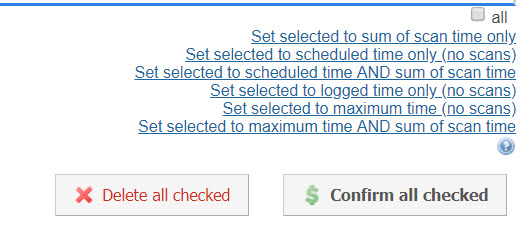
Select specific entries to which you would like to apply the specific action, then click on the action.
Manage Confirmed Usage
Once usage has been confirmed, the entry will be moved to the Confirmed Usage tab. From here, there are still a few more actions you may take.
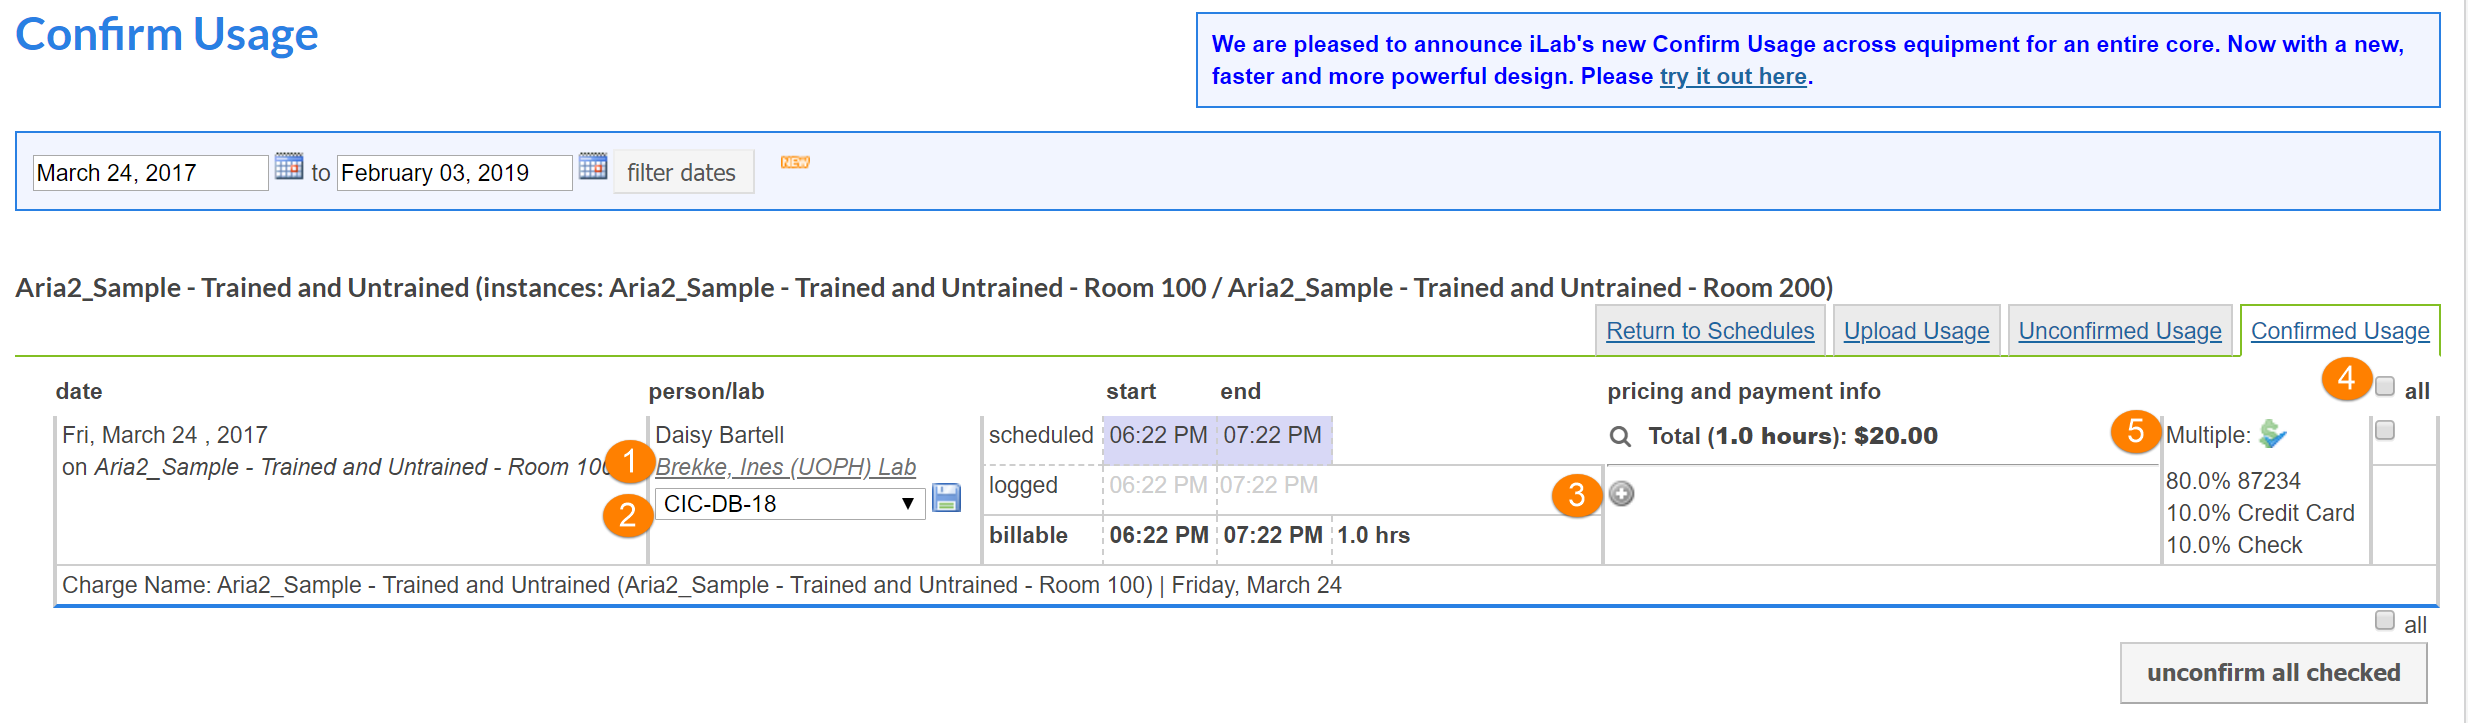
- When you click on the lab link, a window displaying lab information displays.

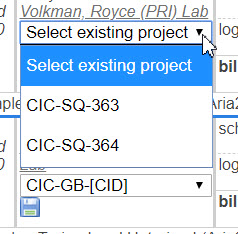
- You may choose to attach this usage to an existing project in the processing status. To do so, click on the down arrow to select an available project, then click on the disc icon to save.
- Click on the plus icon to add services to this usage entry. The services window will display.

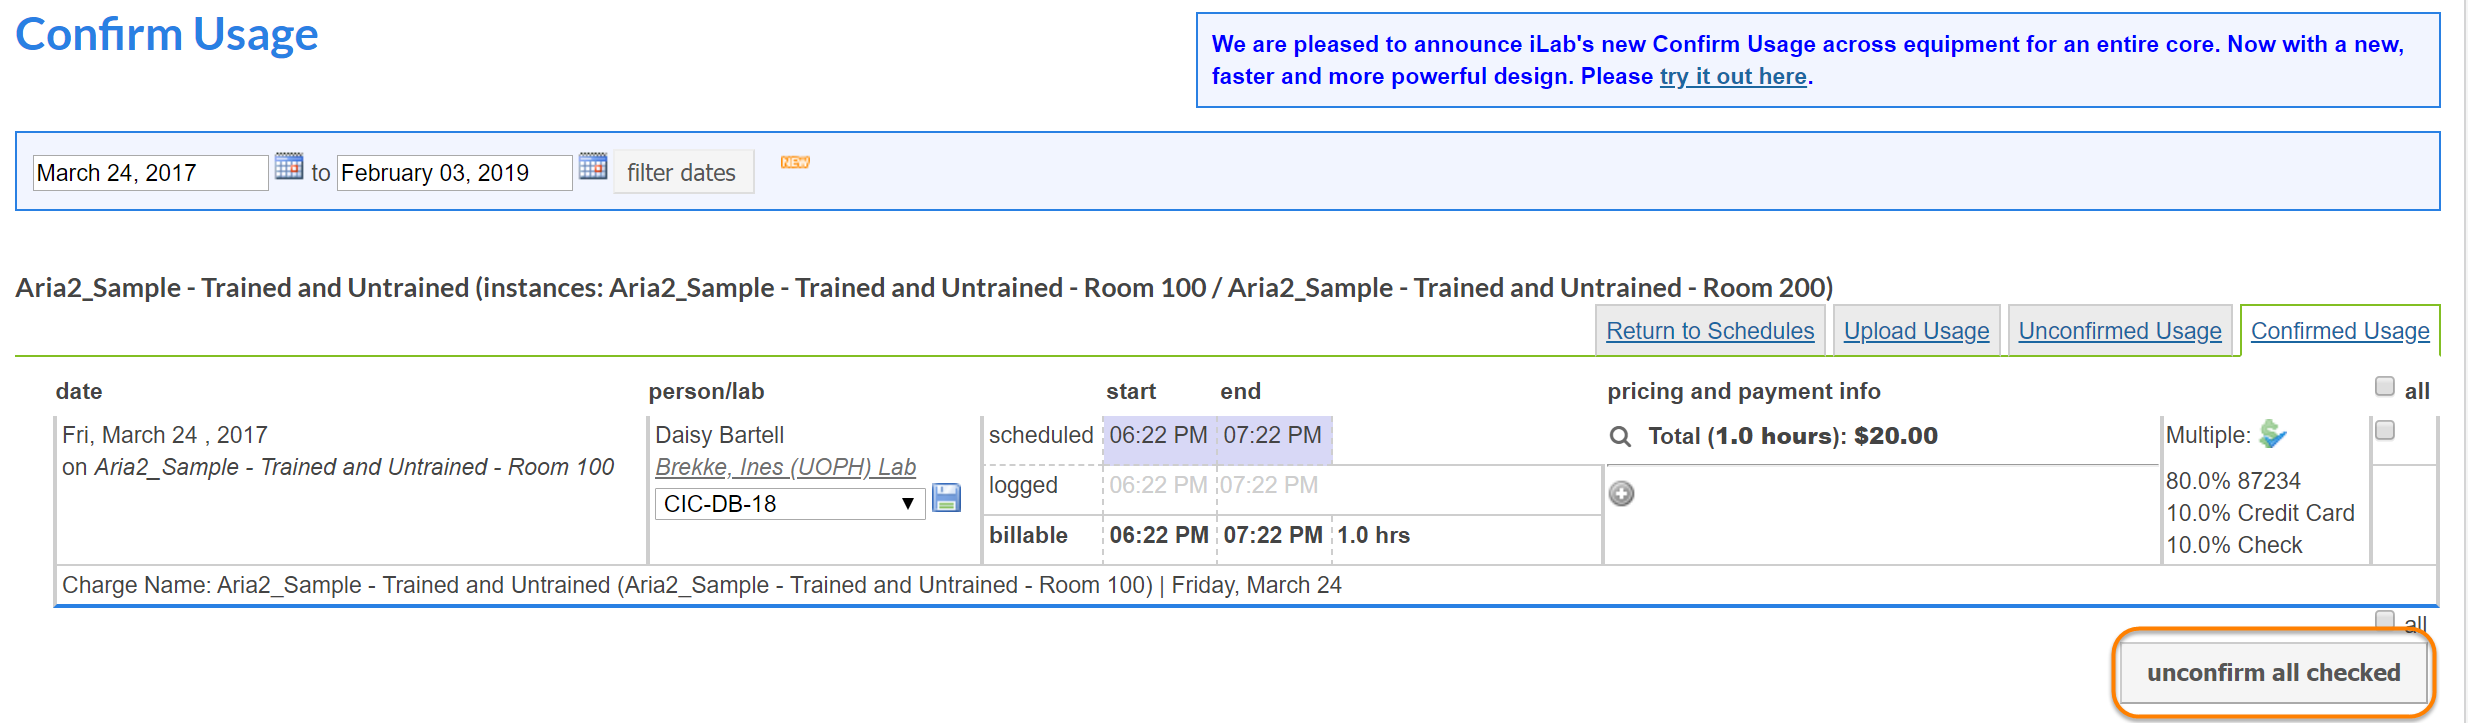
- Check the "all" checkbox selects ALL the usage entries in this view. Then you may un-confirm them all by clicking the "unconfirm all checked" box. These entries will now be moved back to the Unconfirmed Usage tab.
- Click on the dollar icon to view and update payment information.