The Quick Add function of the Charge Entry interface allows you to manually add charges to the system. It offers two Quick Add options - one is to create a new service request, the other is to add a charge to an existing request in the status of processing.
- Add charges to new service request
- Add charges to existing service request
- View and update added charges
- Daily billing link
Add Charges to New Service Request
There are two ways of adding charges using Quick Add: adding them to a new request or adding them to an existing request.
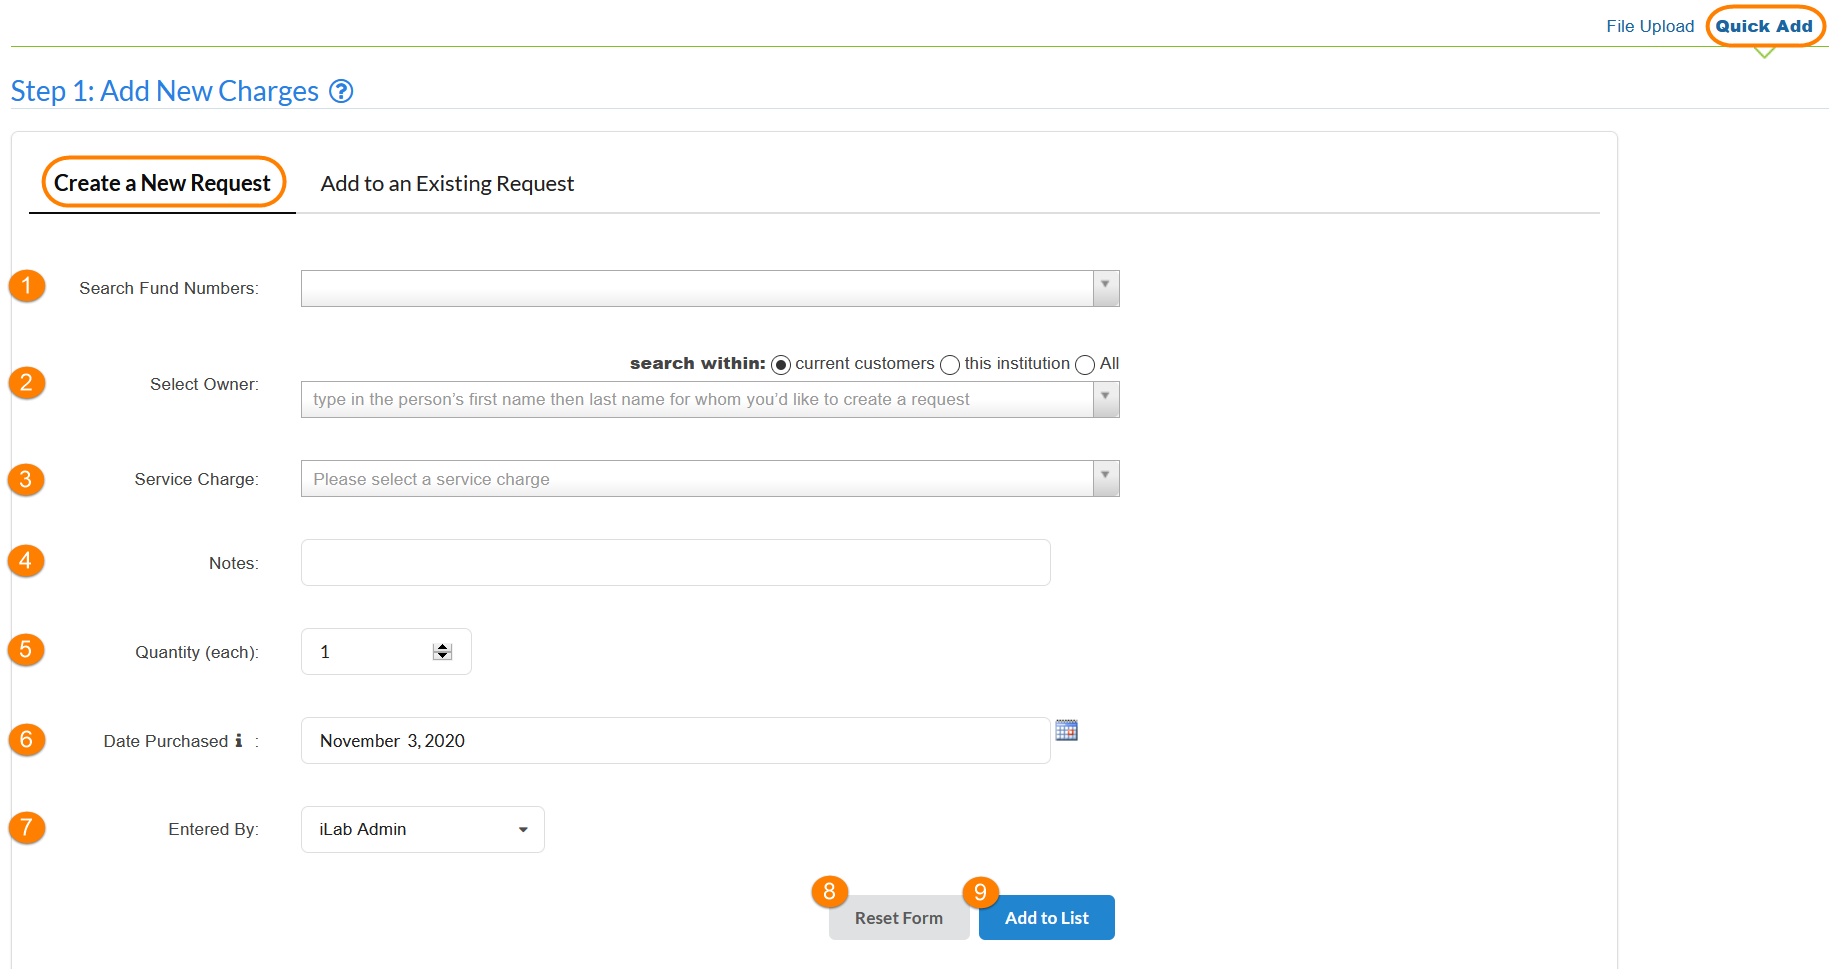
To Quick Add a charge to a new service request, select the Create a New Request tab and complete the fields below:
-
Search Fund Numbers: When you begin typing the fund number, results will start to display below the search, click on the desired fund number once it appears. Once the fund number is selected, you will choose an owner and lab for the request, these fields will only populate owners that are assigned the fund number and labs that the owner and fund number associated with.
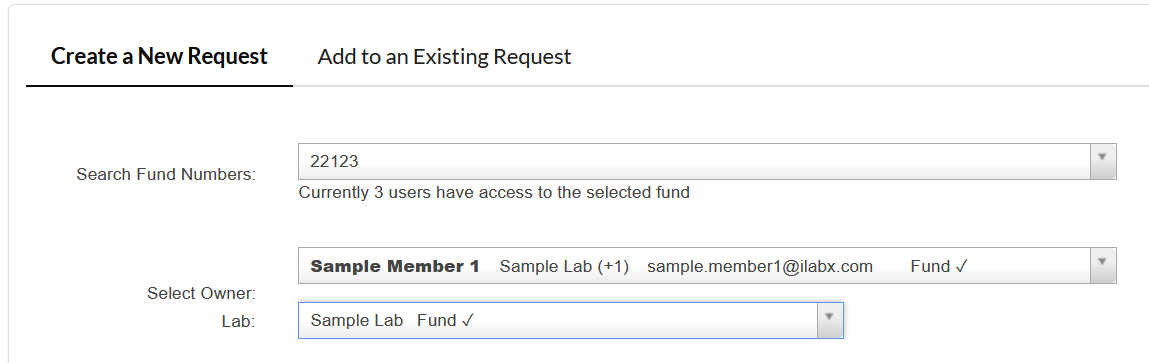
- Select Owner: Select a user as the owner for the new request. Note that you can change the scope of the search between current customer, this institution and all users (including external users).
-
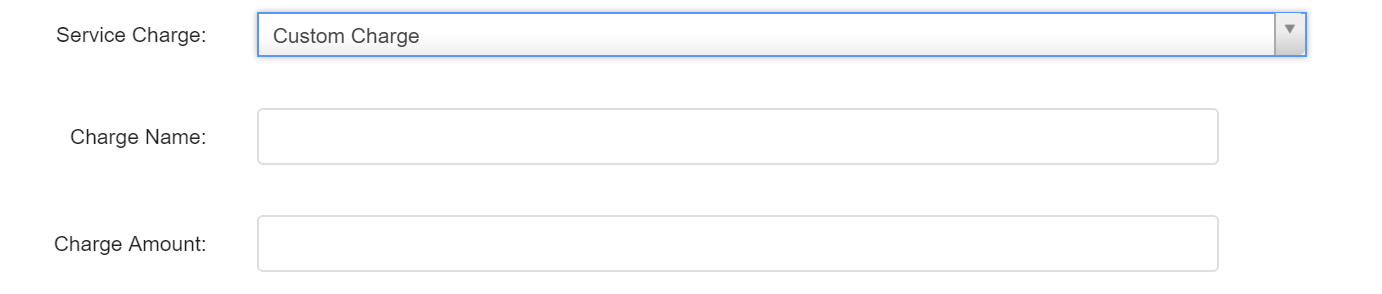
Service Charge: Select the service you want to add a charge for (as defined in your core's Services). You can also add a custom charge, by selecting the Custom Charge option at the bottom of the list. If you select this option, you need to populate two additional fields: Charge Name and Charge Amount:
- Notes: Any notes you would like to associate with the charge, the notes will be displayed with the line item on the request and on the invoice.
- Quantity: The quantity of services charges.
- Date Purchased: The date of purchase (the time will be set to 12:00am in the institution's time zone)
- Reset Form: This will clear the all above fields.
- Add to list: Click to add the charges to the list in Step 2.
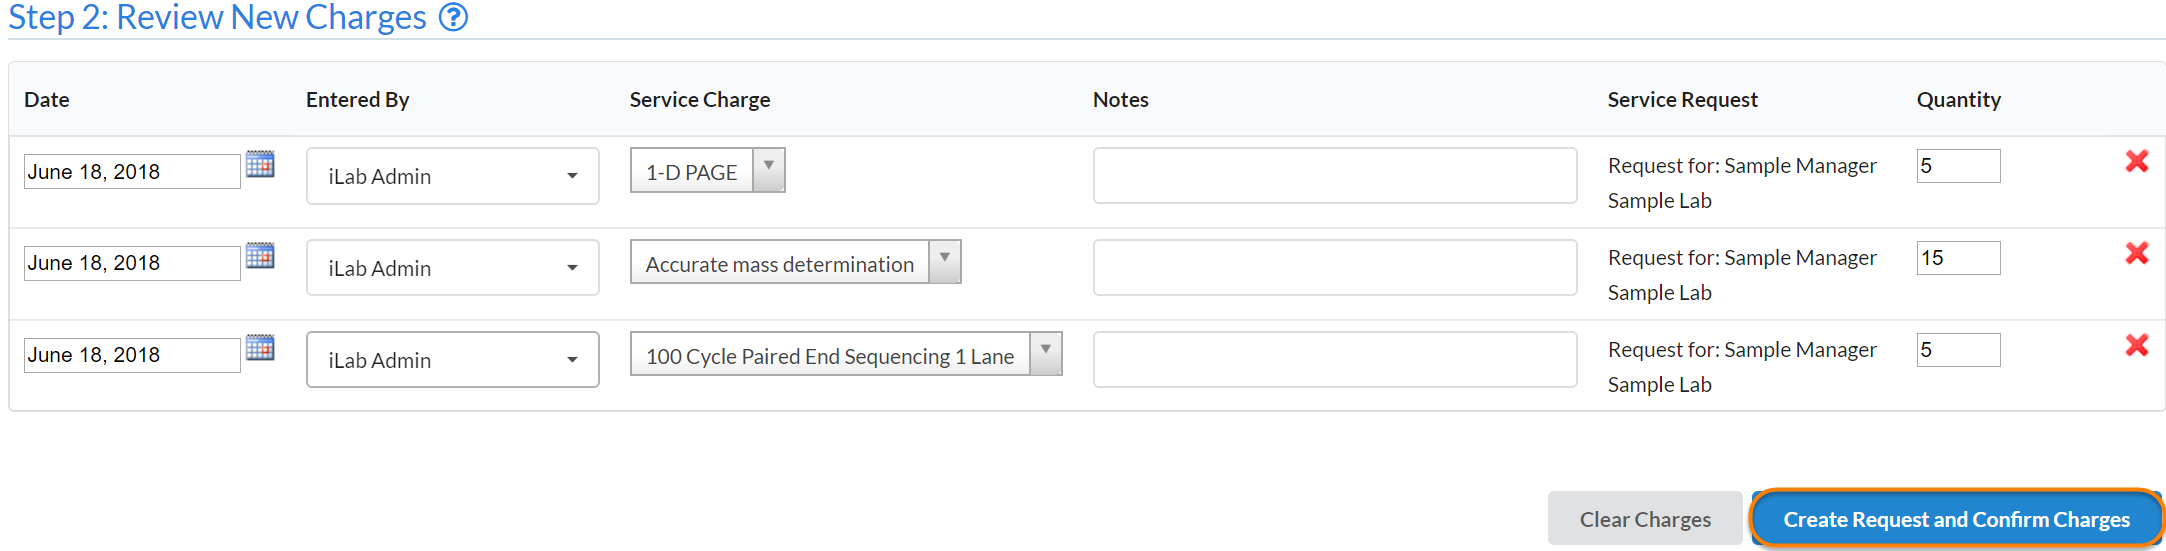
When you have added the charges to the list, review them in the panel below and make any modification or delete them with the red "X" on the right. Once finalized, click Create Request and Confirm Charges.
Next, select the Payment Method for the new request. Indicate if you want to skip financial approvals (if this option is enabled for your institution) and if you want to mark the charges on this request as completed. Finally, click Submit Request to finalize the service request and added charges.

You can now review and modify the added charge is in the bottom panel.
Add Charges to Existing Service Request
To Quick Add charges to an existing service request, select the Add to Existing Request tab (your core may only allow for adding charges to existing request, in which case the Create a New Request option is not visible). Then, complete the fields below:
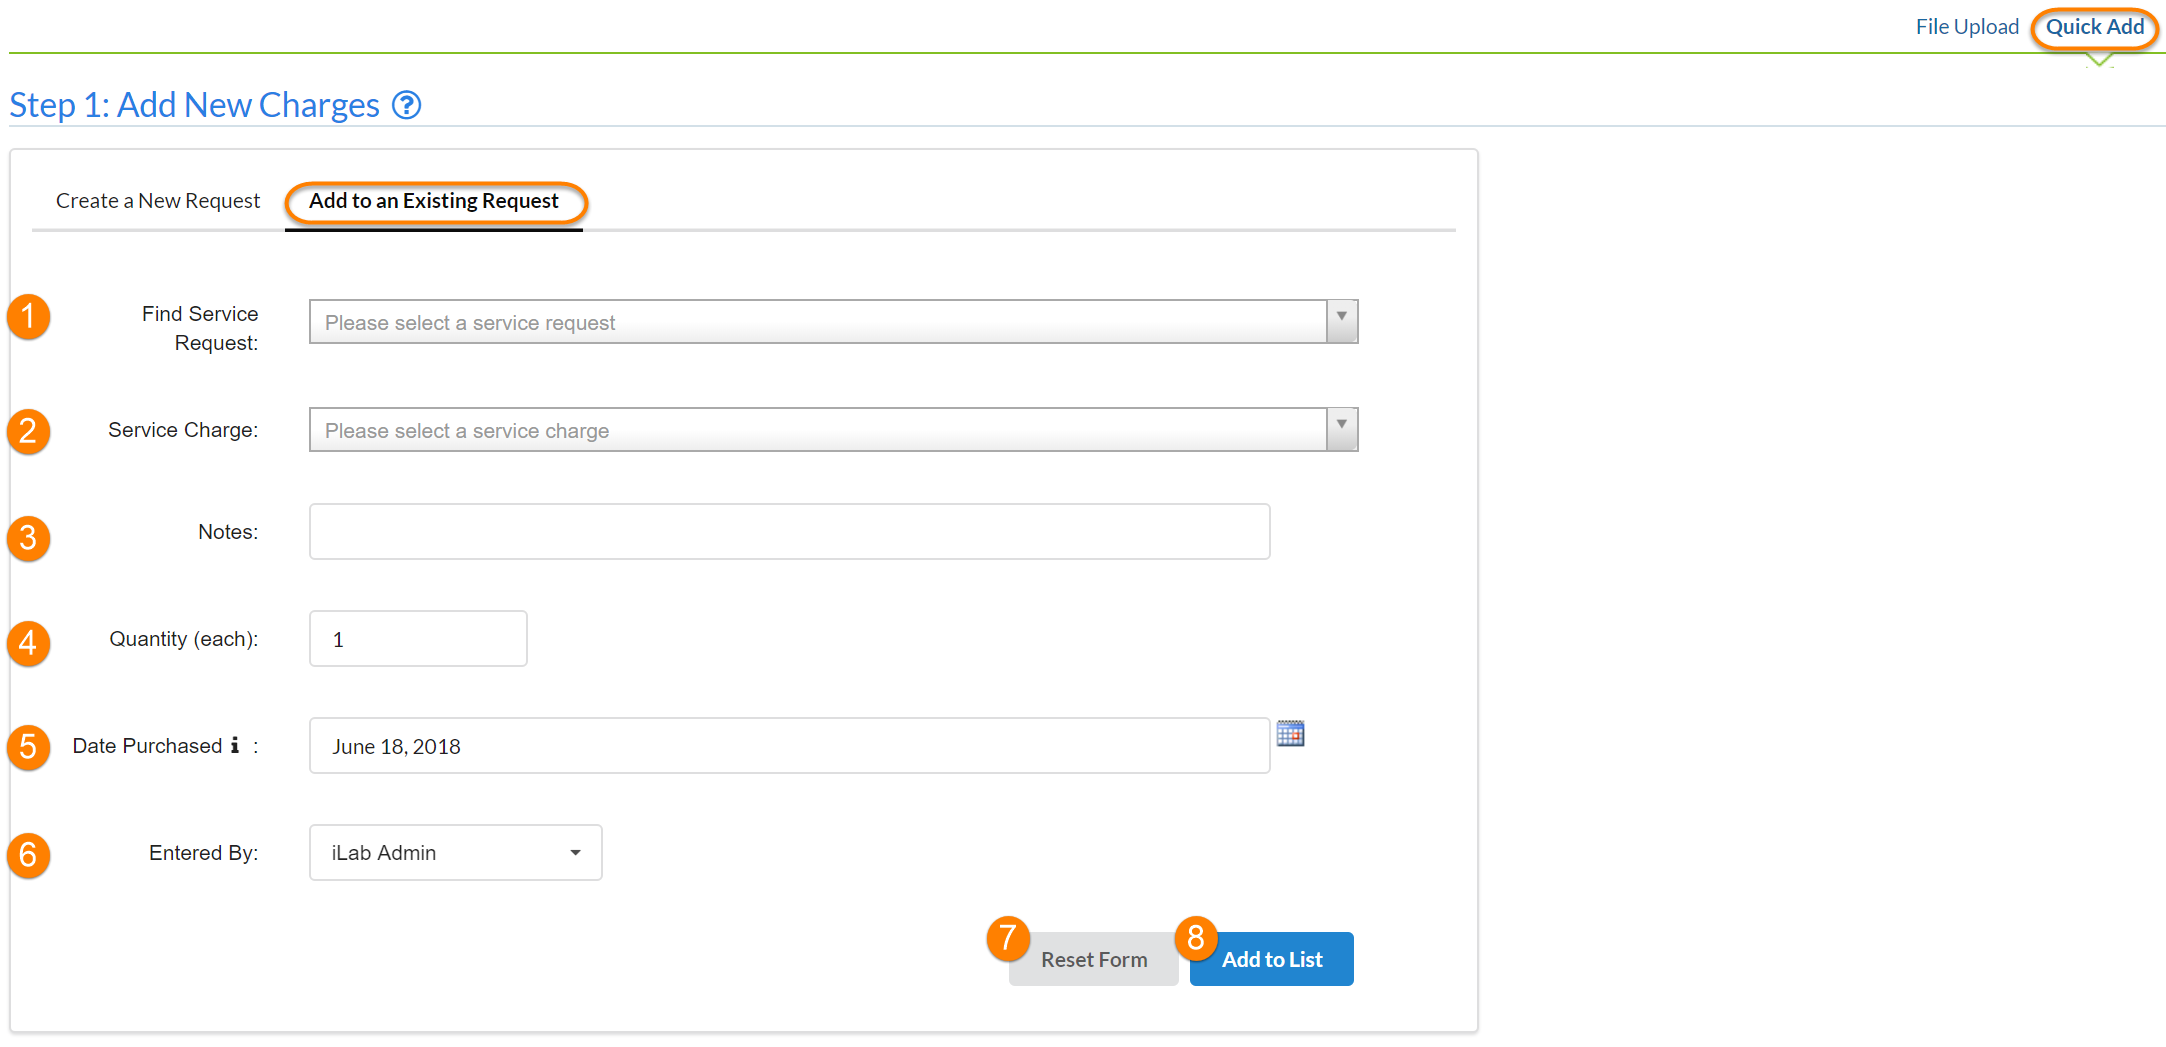
- Find Service Request: Select an existing service request, the request must be in the status Processing.
-
Service Charge: Select the service you want to add a charge for (as defined in your core's Services). You can also add a custom charge, by selecting the Custom Charge option at the bottom of the list. If you select this option, you need to populate two additional fields: Charge Name and Charge Amount:
- Notes: Any notes you would like to associate with the charge, the notes will be displayed with the line item on the request and on the invoice.
- Quantity: The quantity of services charges that will be added to the request.
- Date Purchased: The date of purchase (the time will be set to 12:00am in the institution's time zone)
- Reset Form: This will clear the all above fields.
- Add to list: Click to add the charges to the list in Step 2.
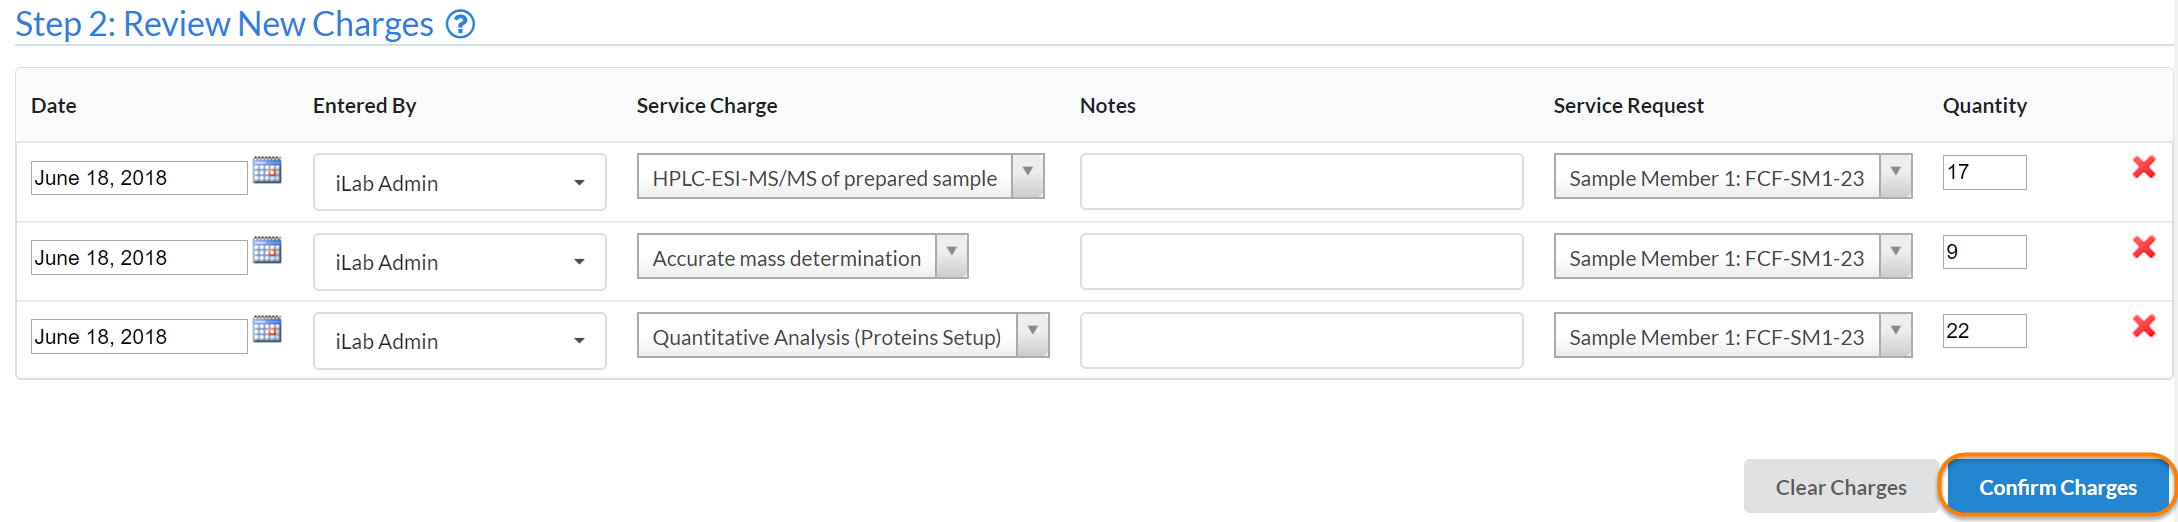
When you have added the charges to the list, review them in the panel below and make any modification or delete them with the red "X" on the right. Once finalized, click Confirm Charges.
You can now review and modify the added charge is in the bottom panel.
View and update added charges
When charges have been added using Quick Add, you can view and modify them in the bottom panel of the interface:
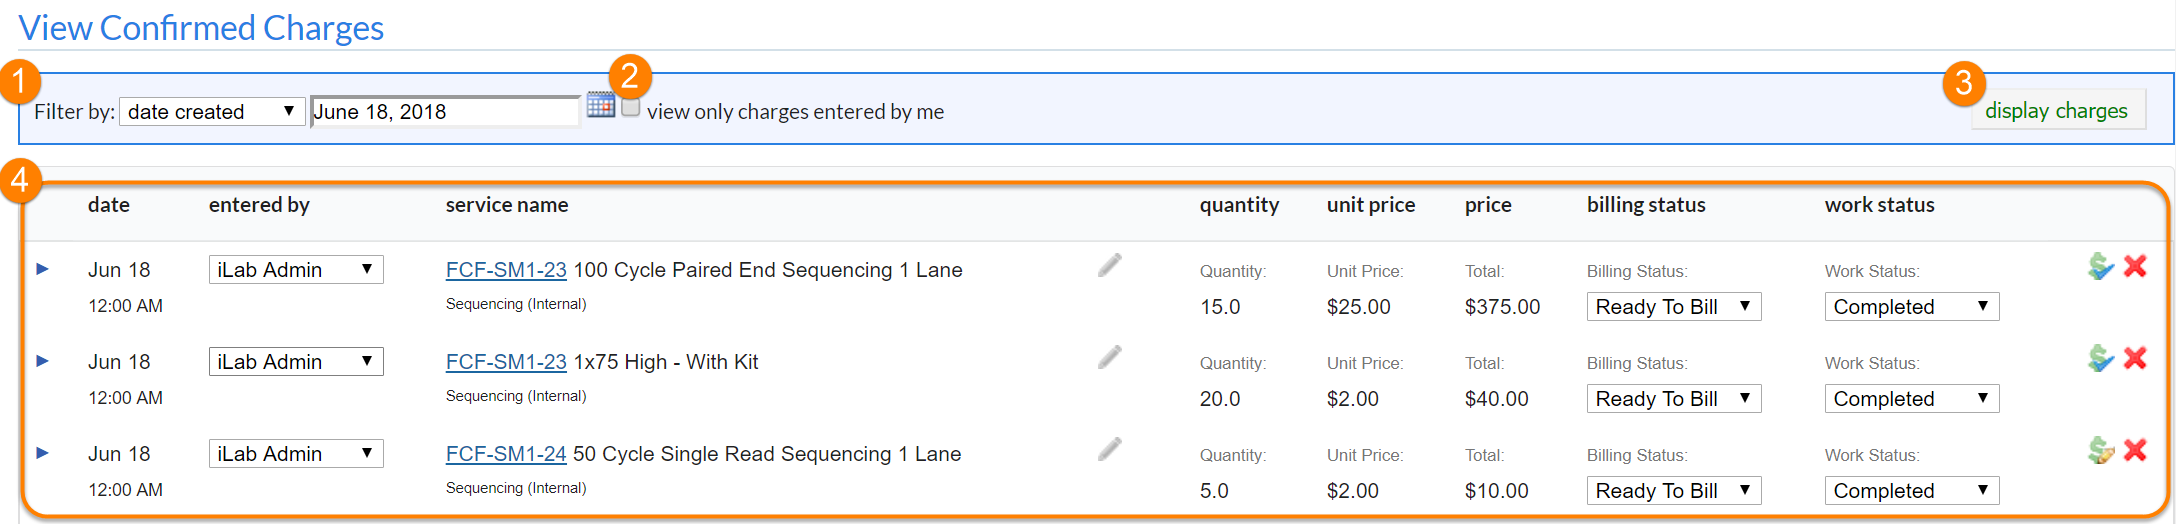
- Date filter: toggle whether you want to view charges by date created (when they were added using the Quick Add interface) or date purchased (the date assigned to the charges), and pick the specific day you would like to review. Then, click display charges (item 3) to update.
- View only charges entered by me: Toggle if you want to charges entered by all users, or only ones you created. Again, click display charges (item 3) to update.
- Display charges: refresh the list of charges with the current filters and options.
- Charges list: List all charges that were successfully added. This panel lets you directly make modifications to the uploaded charges, including the user who entered the charges, service notes, billing status, work status and billing information. For more information, see View All Requests Overview (the functionality directly mirrors that of the Request Detail panel).
Daily Billing Link
The View All Requests tab has a short-cut link to the Quick Add interface, called Daily Billing.

When Daily Billing is clicked you will be directed to a blank Quick Add form.