Confirming usage on calendars provides core administrators the opportunity to review and prepare each reservation for billing by confirming the charges associated with the reservation. Confirming usage on resources is the responsibility of core administrators and can be found on the Schedule Equipment tab.
- Access confirm usage manager
- Layout of confirm usage
- Confirm events
- Adjust events
- Match actual usage
- Fix an invalid event
Access Confirm Usage Manager
To confirm usage across multiple calendars and users from one interface, click on the "Confirm Usage" button on the core’s Schedule Equipment tab.

Within the confirm usage interface, you can view, filter, search, edit and confirm all unconfirmed reservations.
Layout of Confirm Usage
The confirm usage manager has three primary sections (as shown below).
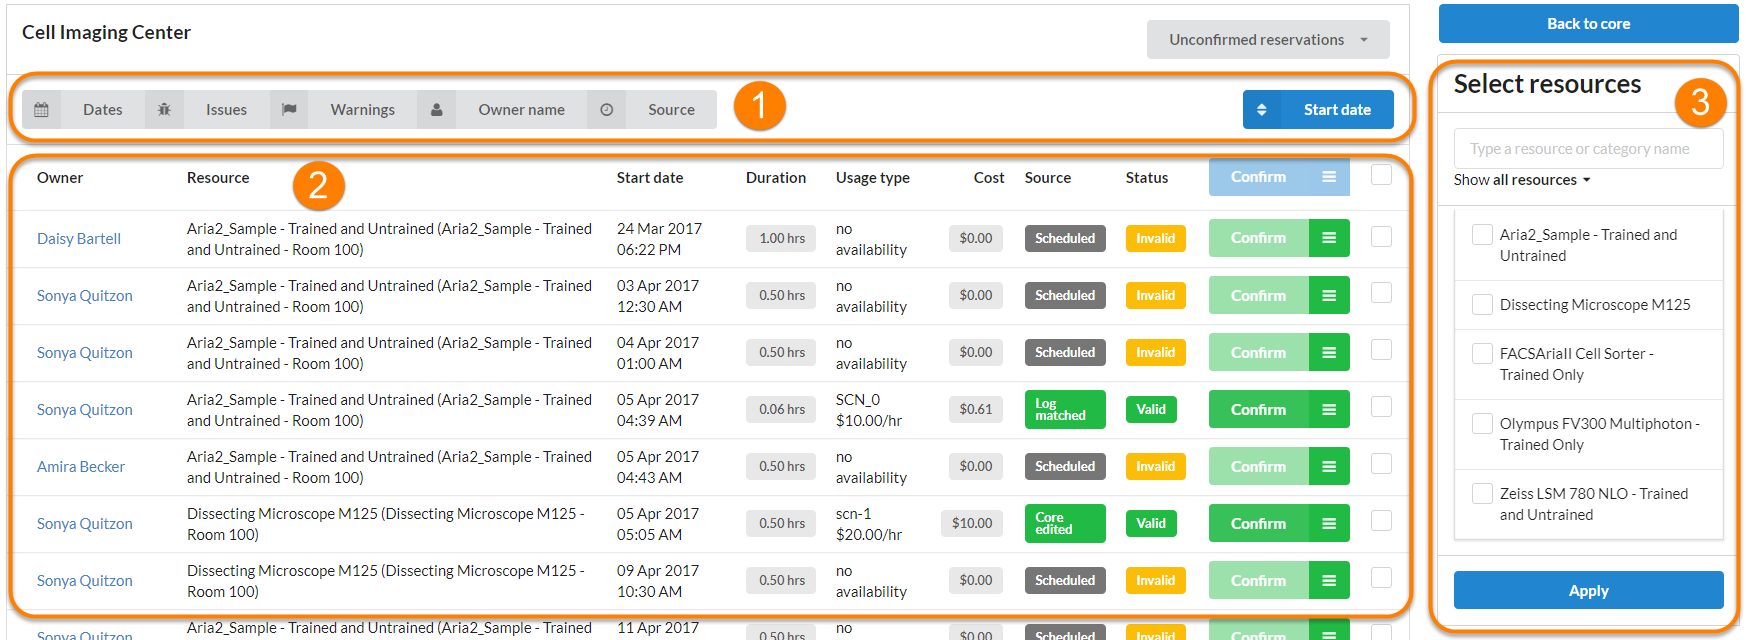
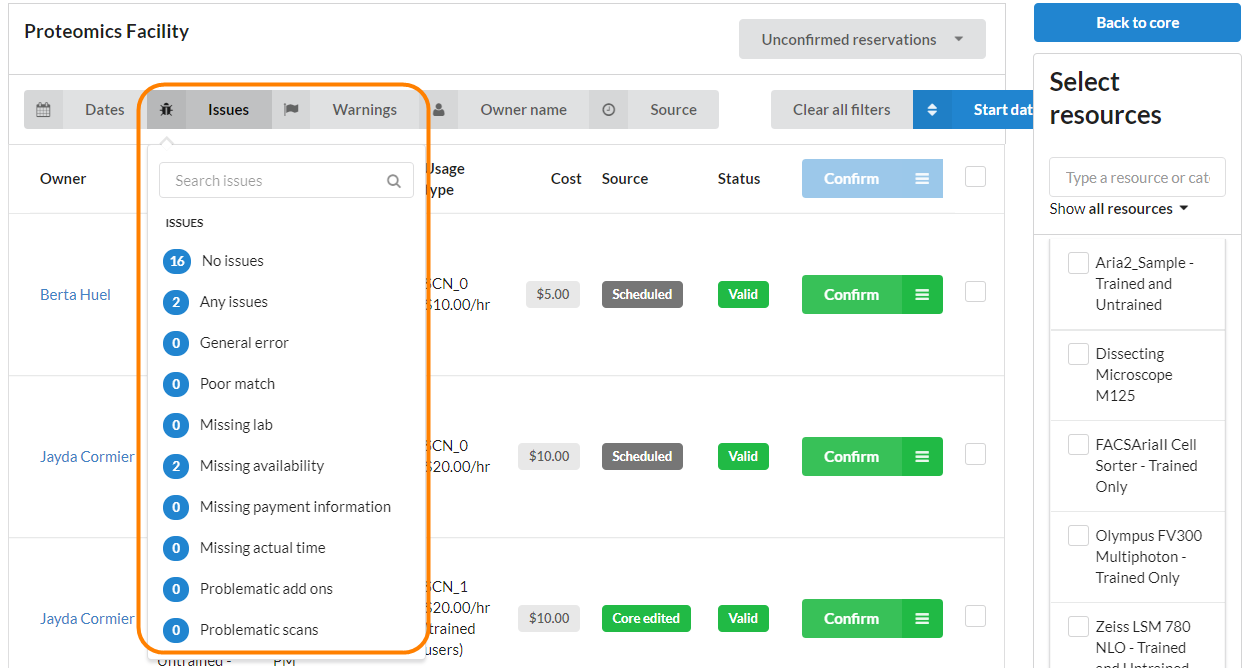
- Table filters and sort: The filter and sort options across the top of the page allow you to filter reservations by date, issues, warnings, reservation owner, and source. Select a filter and click apply to see an updated reservation list. To clear the filter, click the 'clear filter' button.
- Usage records and confirmation tool: The usage records and confirmation tool section displays the list of reservation records resulting from the filters applied. In this section you can update the details of the reservation and confirm the usage, as discussed below.
- Resources (equipment) list panel: The 'Select resources' panel to the right of the page will display all calendars available at the core. Use the select resources panel to filter for specific resource reservations. Select a resource and click 'Apply'. Your filtered list will display.
Confirm Events
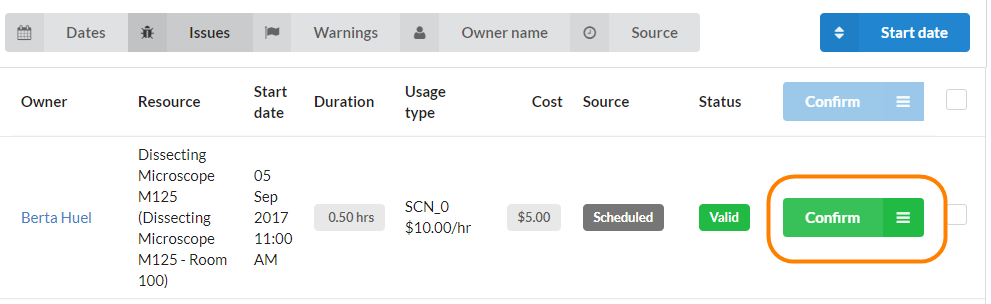
To confirm an individual reservation, click on the green "Confirm" button.
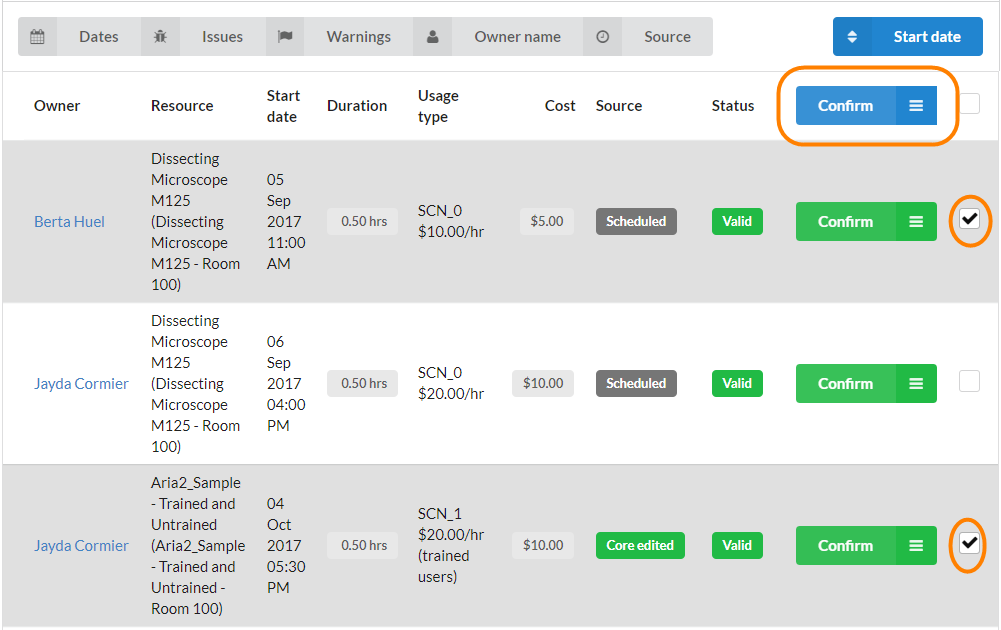
To confirm multiple reservations, check the box to the right of the events you would like to confirm. Next, click the blue bulk Confirm button.
Adjust an Event
If edits need to be made to a reservation, click on the menu icon (three bars) on the right hand side of the "Confirm" button. Select the reservation details category you would like to edit.
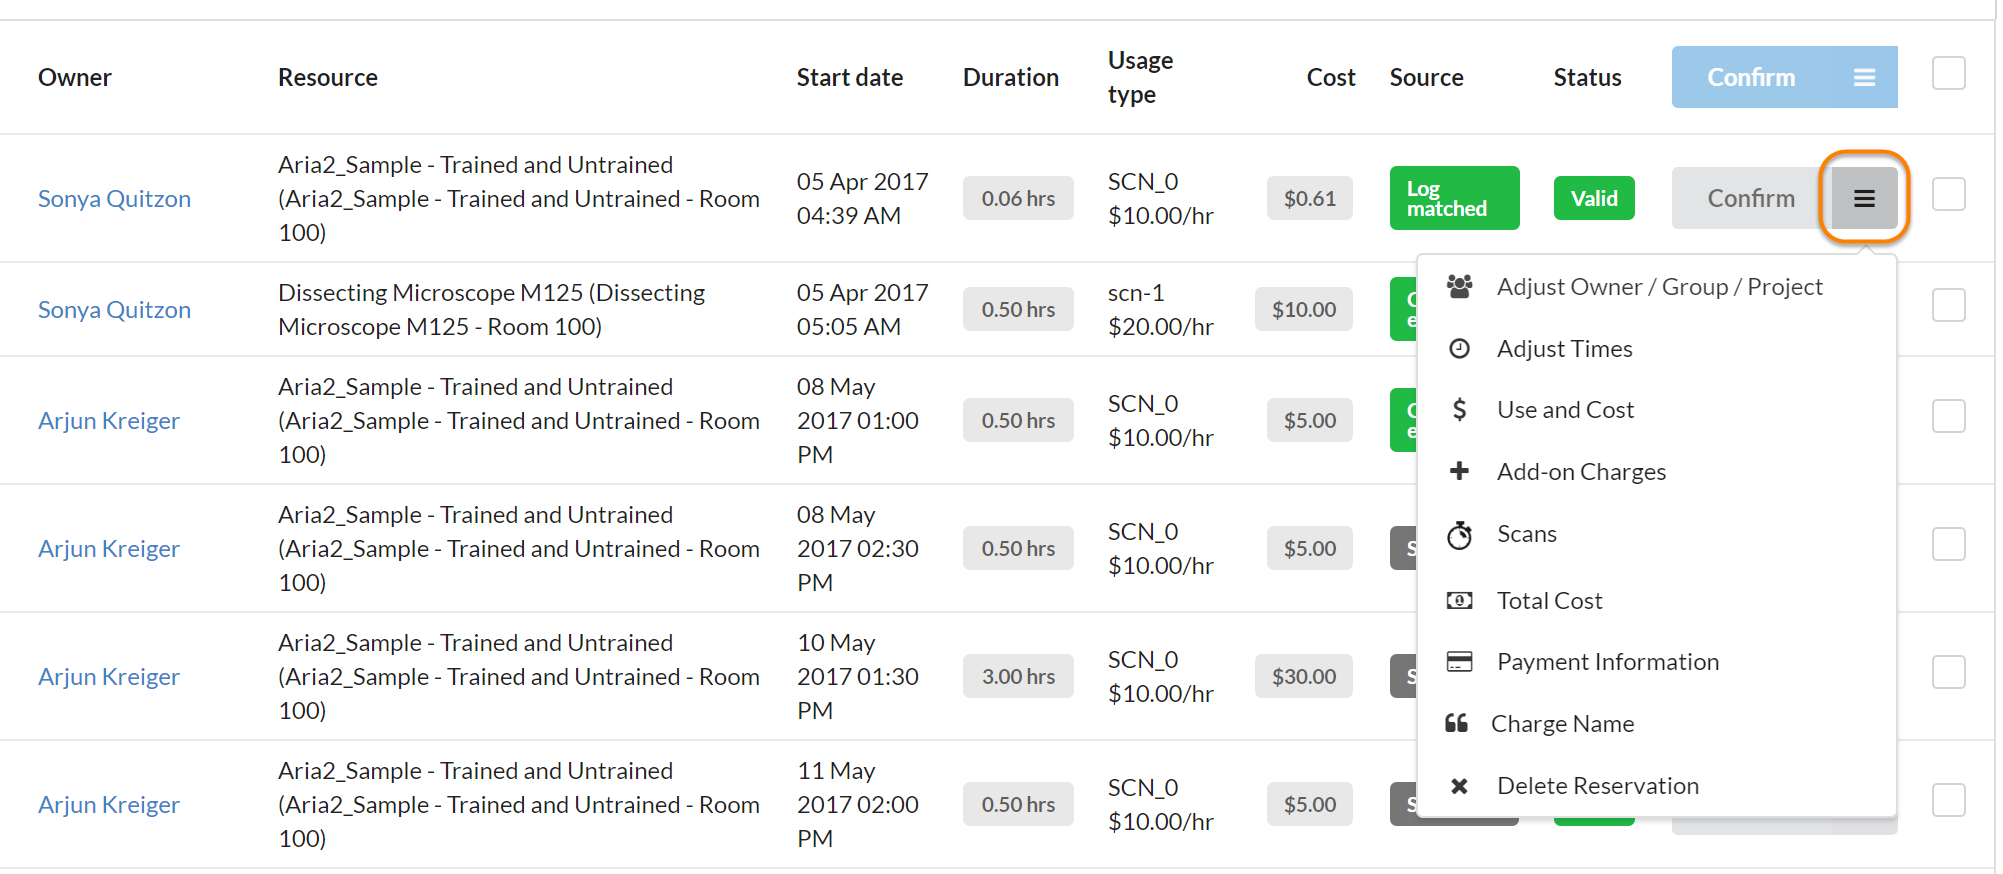
The details window will display your selection and you can begin making edits.
From this window, you can navigate to other detail sections that need updating. When you have finished your changes, click "Save".
Match Actual Usage
If you have actual usage entered into iLab through a Upload Usage (or the legacy Usage Tracker), you are able to manually match this actual usage with scheduled usage and merge the data.
Records that can be merged will display a “handle” (i.e., three vertically aligned dots) on the very left of the row on hover. Click the row and hold down the cursor. Then drag the record up or down to match the usage records.

The outlines will indicate which rows are possible to merge. A green outline indicates a possible matching action. A red outline indicates an impossible match.
The requirements for being able to match are as follows:
- The usage record and the reservation must be on the same equipment.
- The records must be within one week of each other, start or end-time.
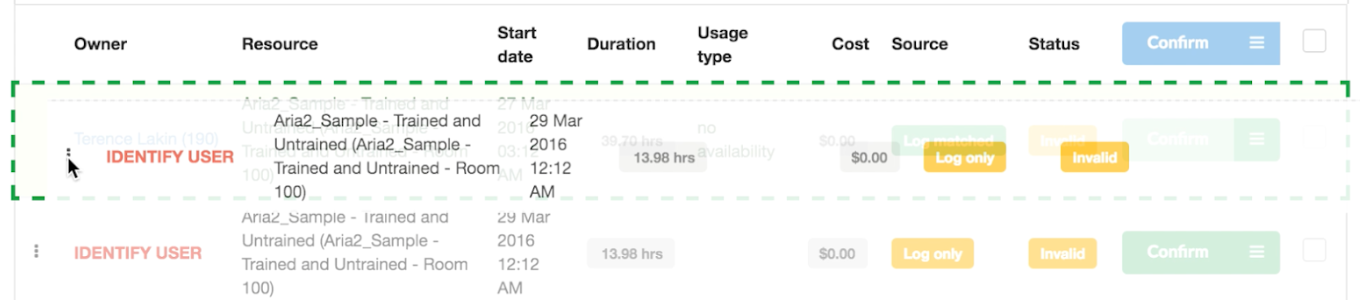
- If the user is not recognized in the upload, you may identify them normally through the confirm usage interface.
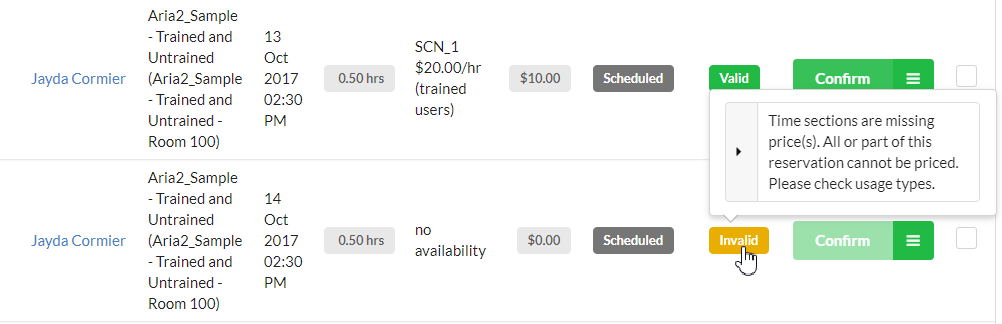
Fix an Invalid Event
Invalid records will display in yellow. When an invalid record is identified, hover over the "Invalid" button to display suggestions on how to edit the reservation so it can be confirmed.
Filters can be applied to display events with specific errors.
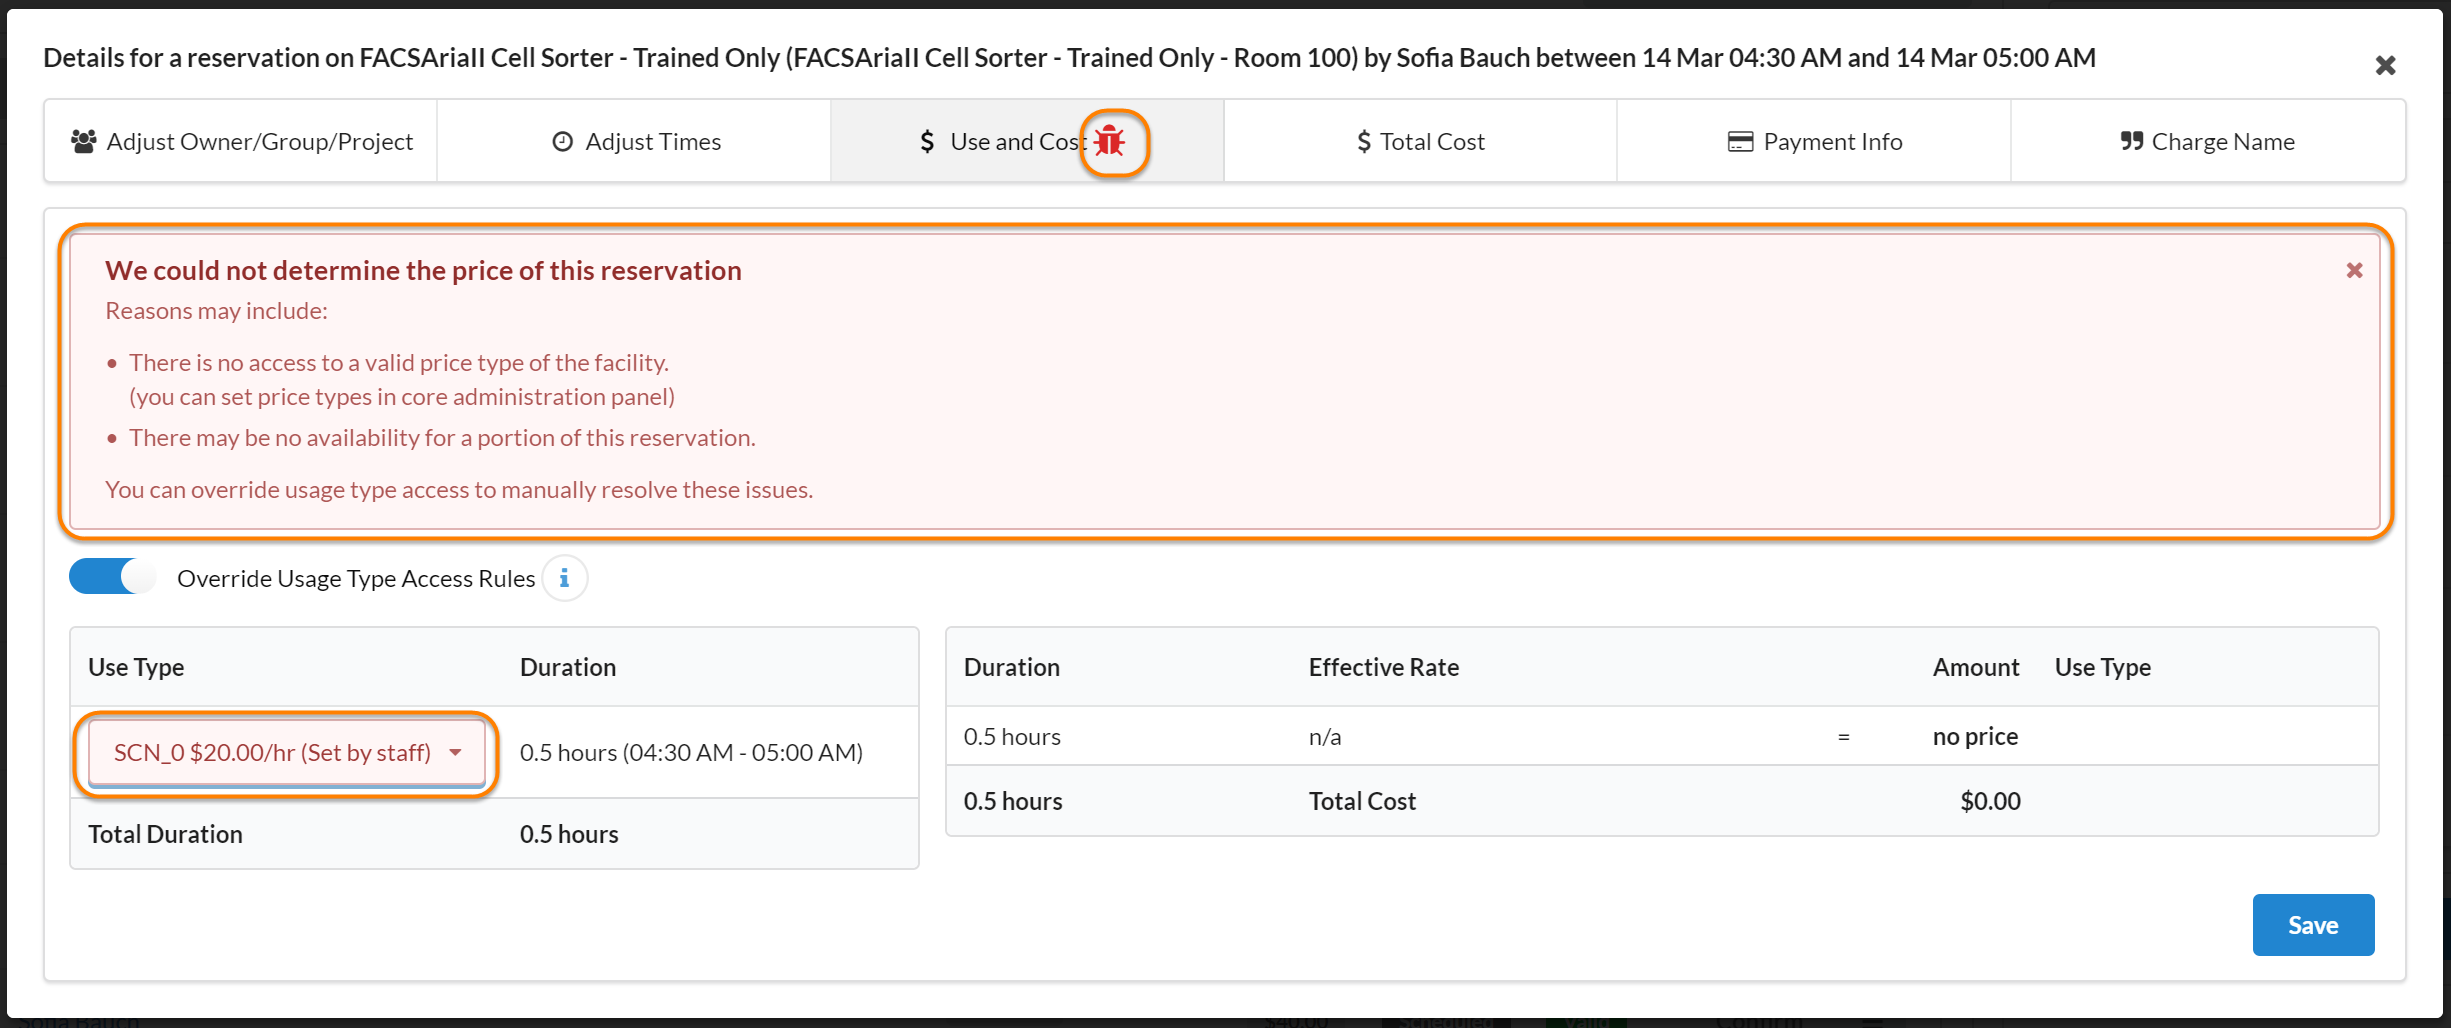
Click on the menu icon (three bars). The red lady bug indicates the area that needs to be updated. In the case above, the user needs to correct the usage type for the customer. When we click on the three bars, we are automatically taken to the Use and Cost section, where the error is highlighted in red and explained in more detail.
You can edit additional areas of the reservation by selecting a category from the top panel.
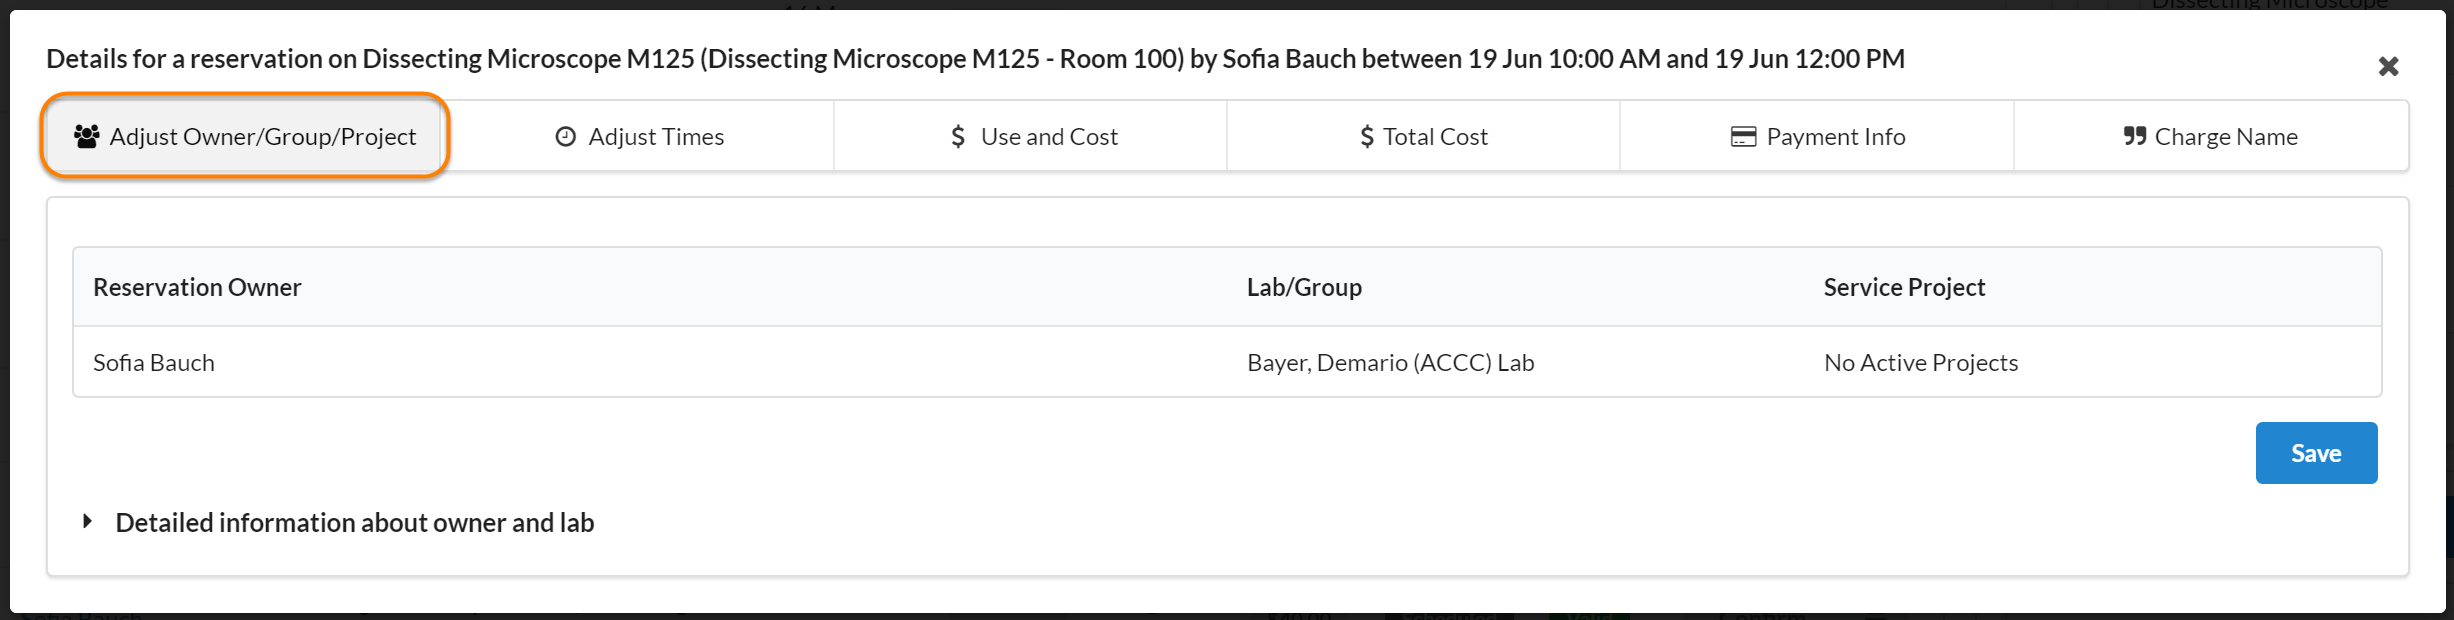
- Adjust Owner/Group/Project allows you to view the reservation owner, their lab, lab contacts or assign this reservation to a processing service request.
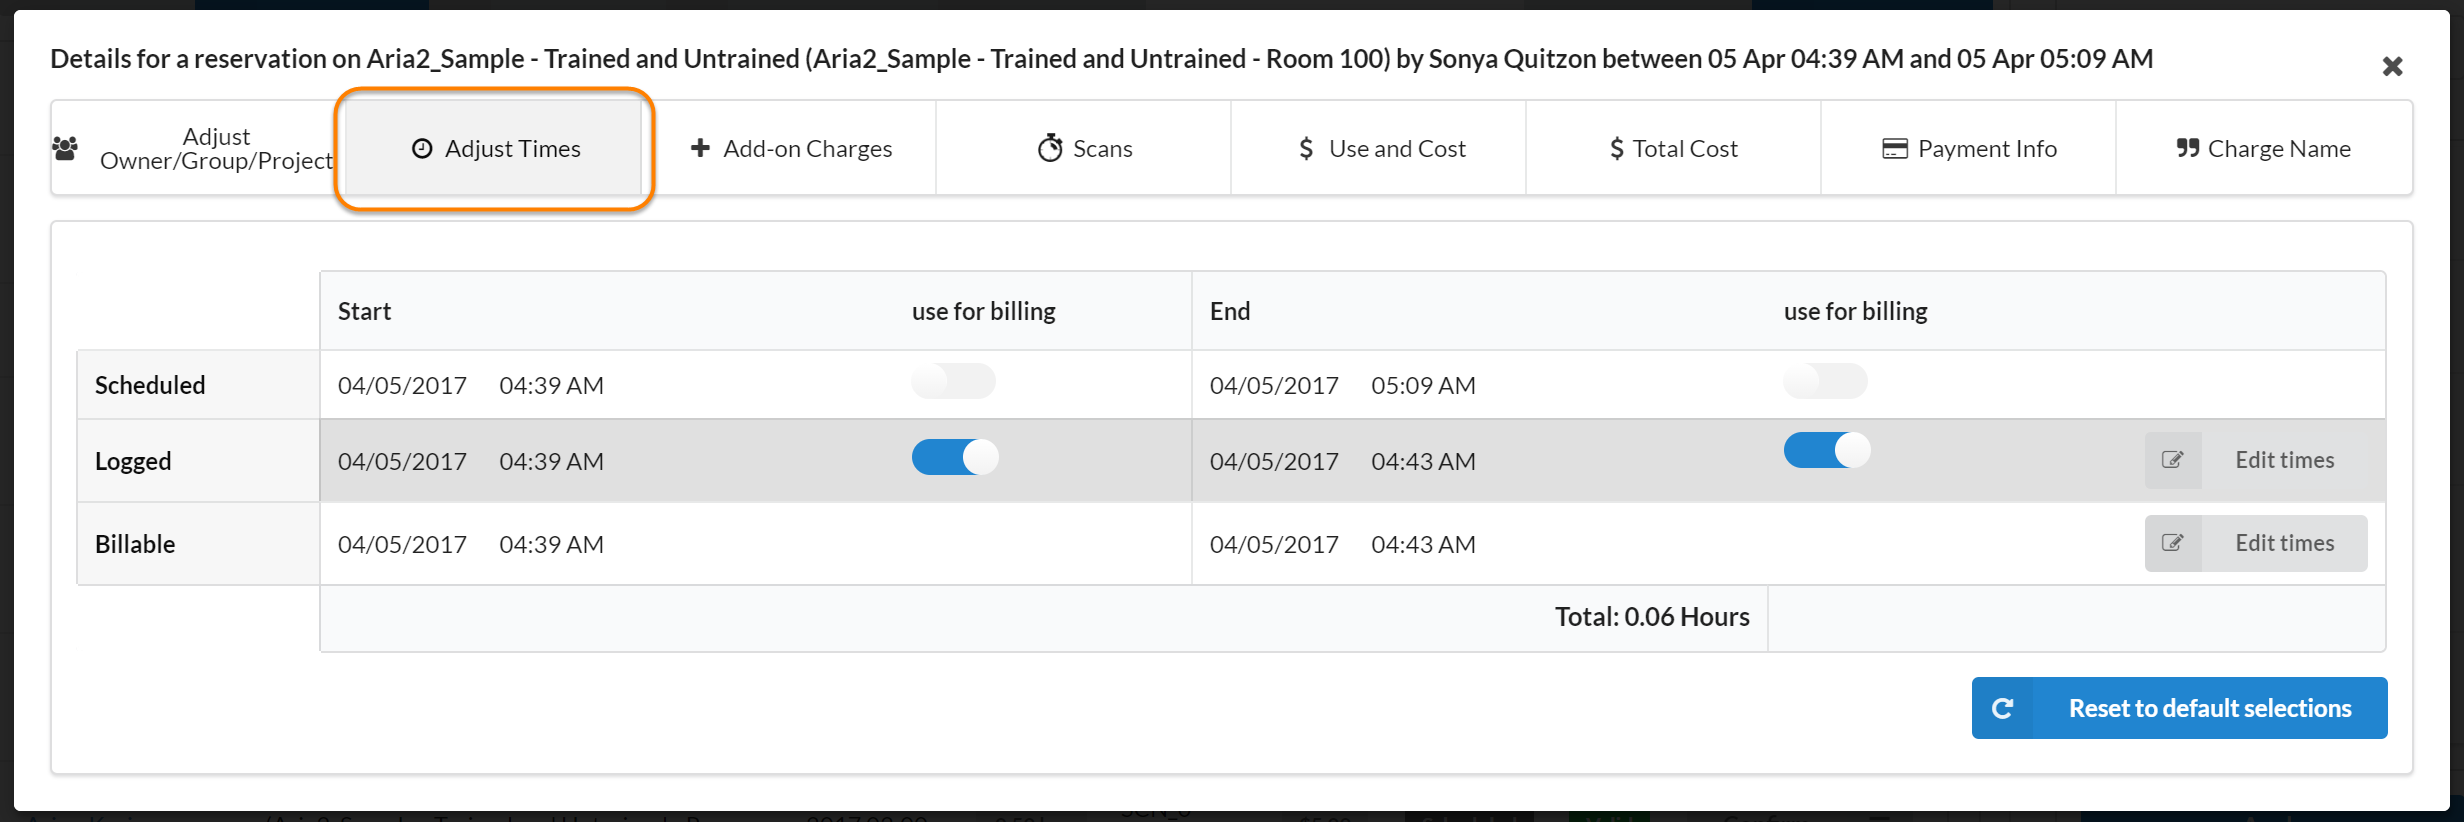
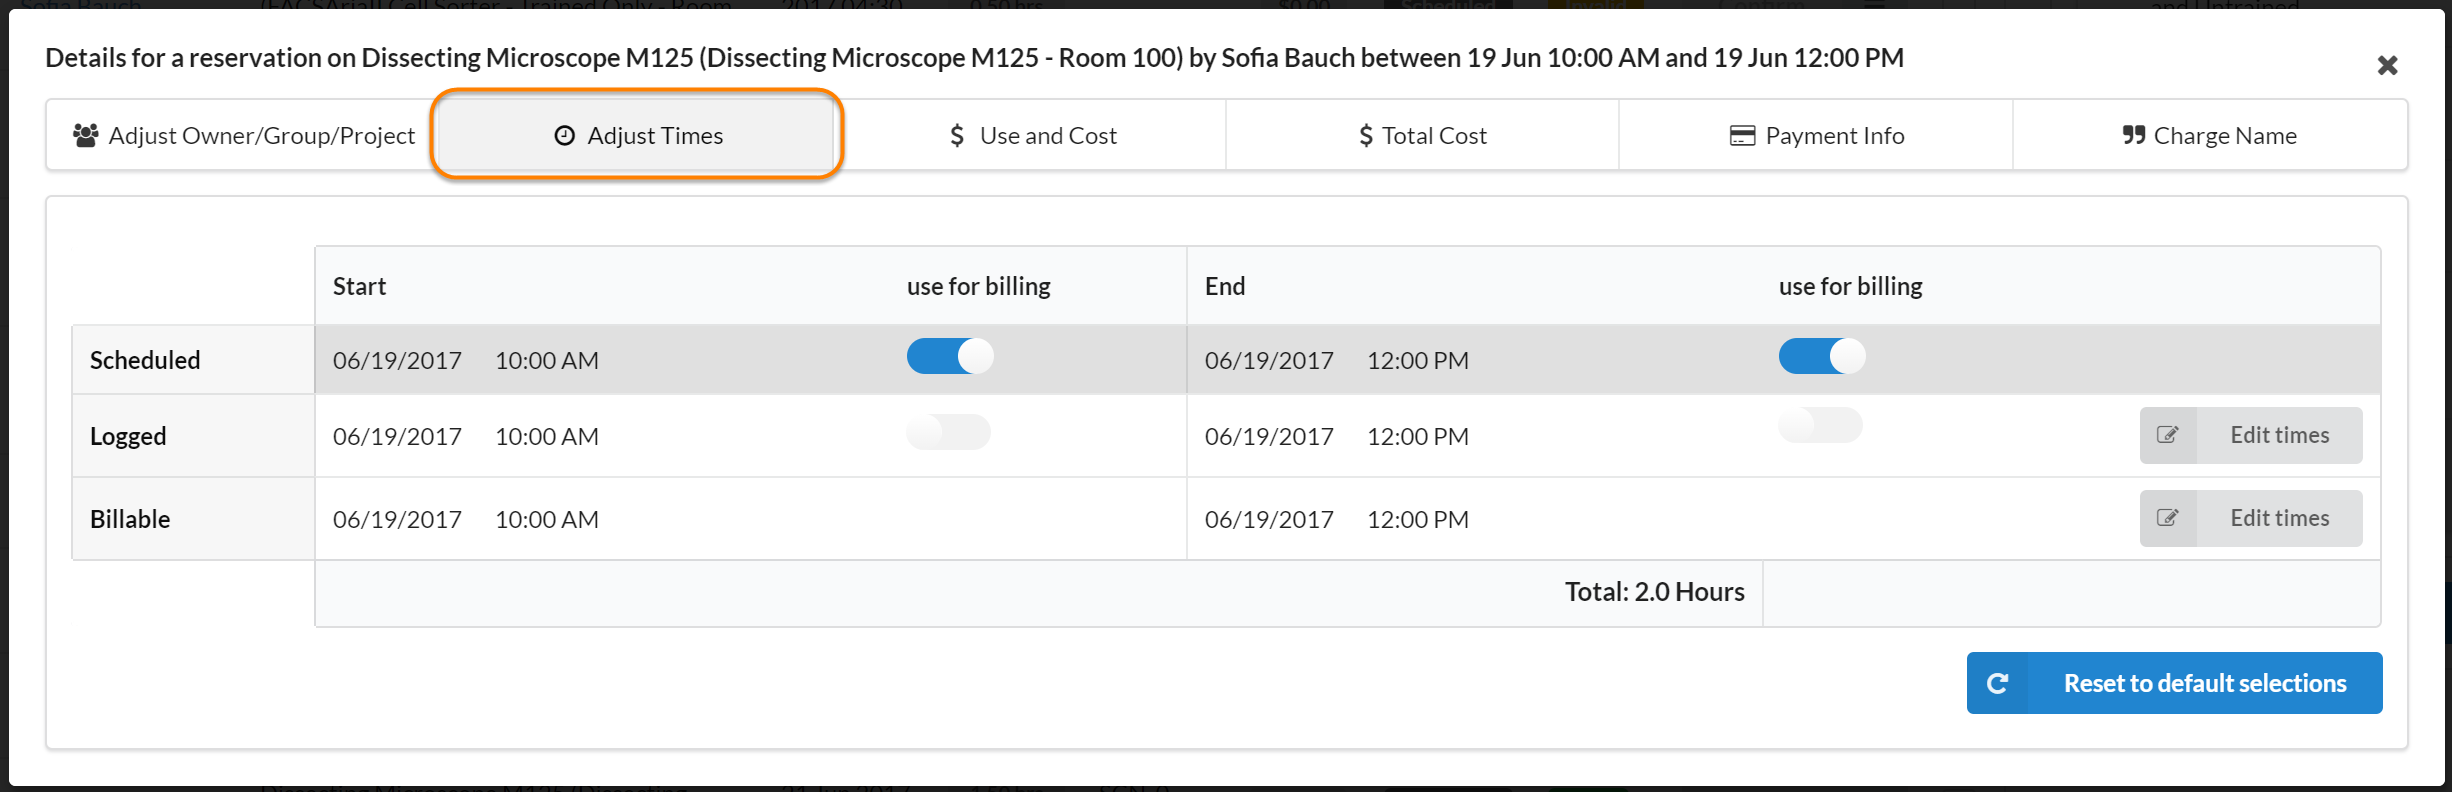
- Adjust Times allows for you to adjust the scheduled, logged, or billable time of the reservation.
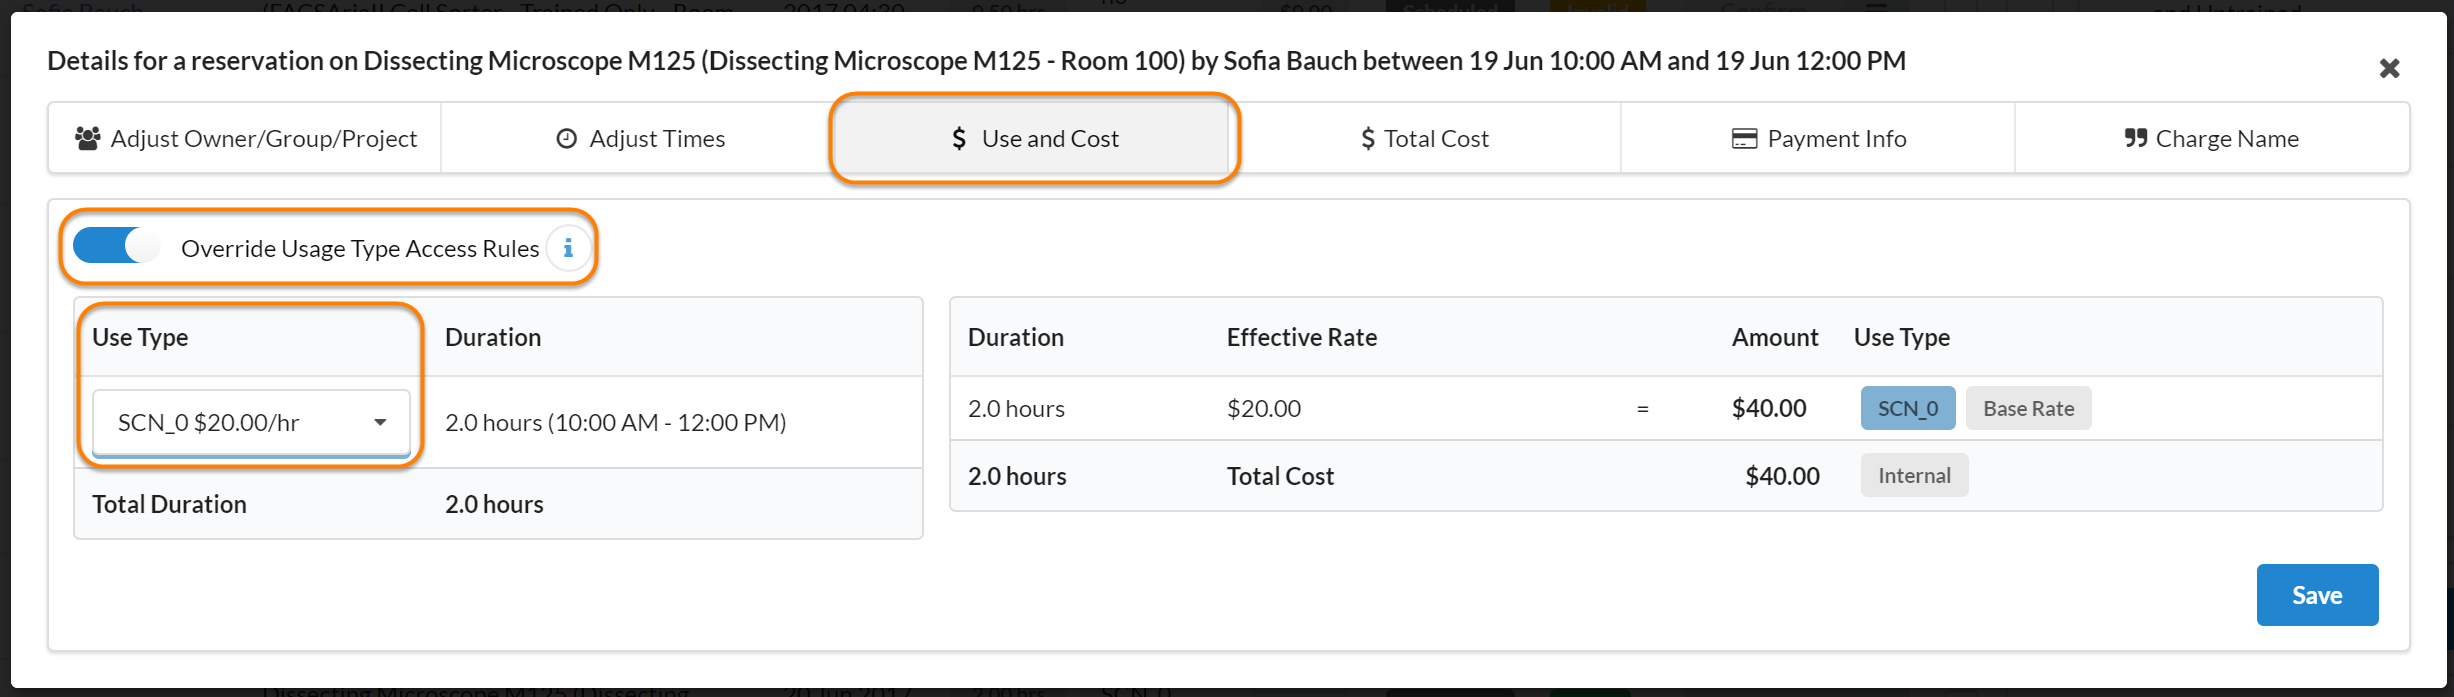
- Use and Cost allows you to view the usage type and price associated with that usage. If the usage type is incorrect, you can override the usage type and pick the correct availability for the reservation by toggling the blue Override Usage Type Access Rules button and selecting the new usage type.
-
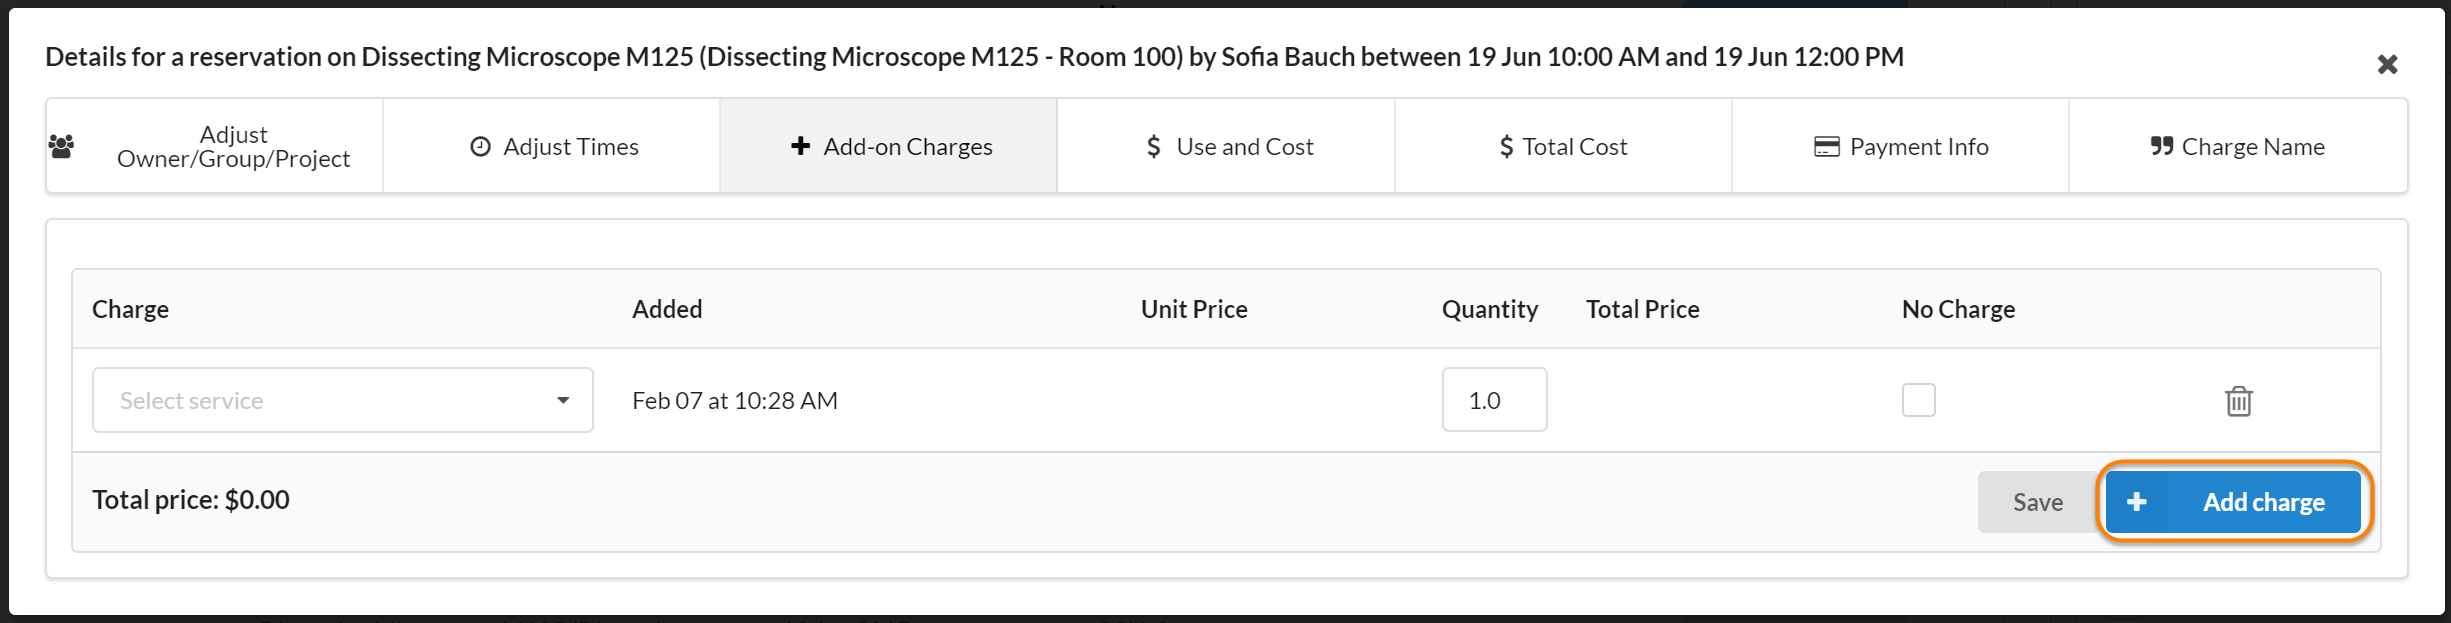
Add-on Charges are available if your facility allows for additional charges to be added to reservations. From this tab you can view, update and add charges to a reservation.
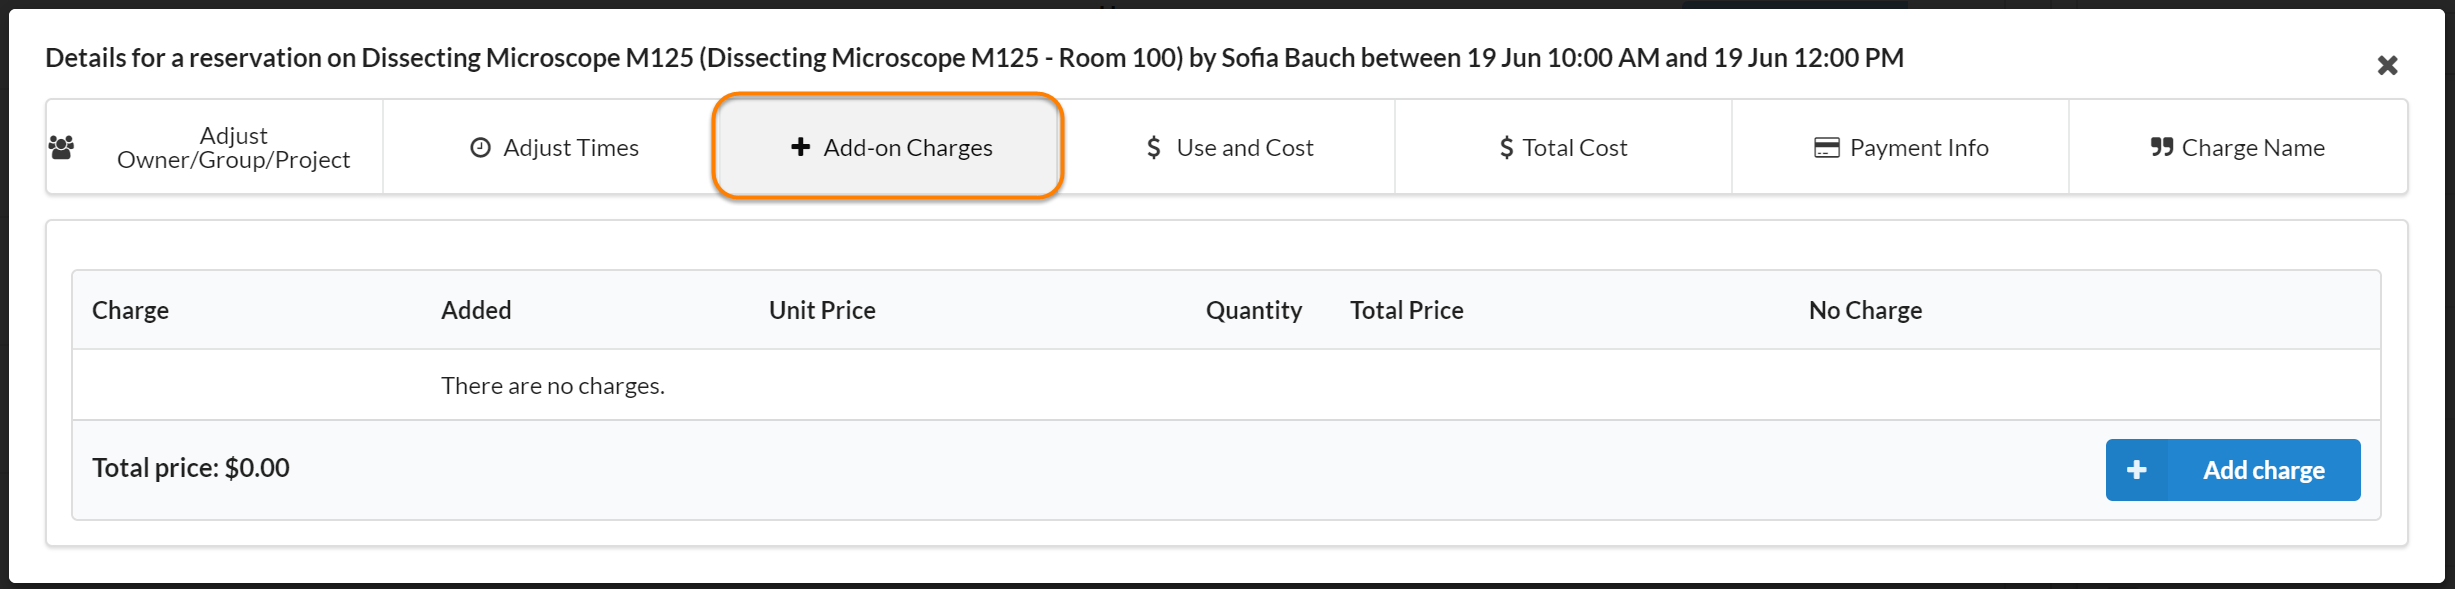
To add a charge, click the "Add charge" button. Select the charge you would like to add from the Select service drop down on the left hand side. Update the quantity and click save.
The new charge displayed will be added to the total charge of the reservation.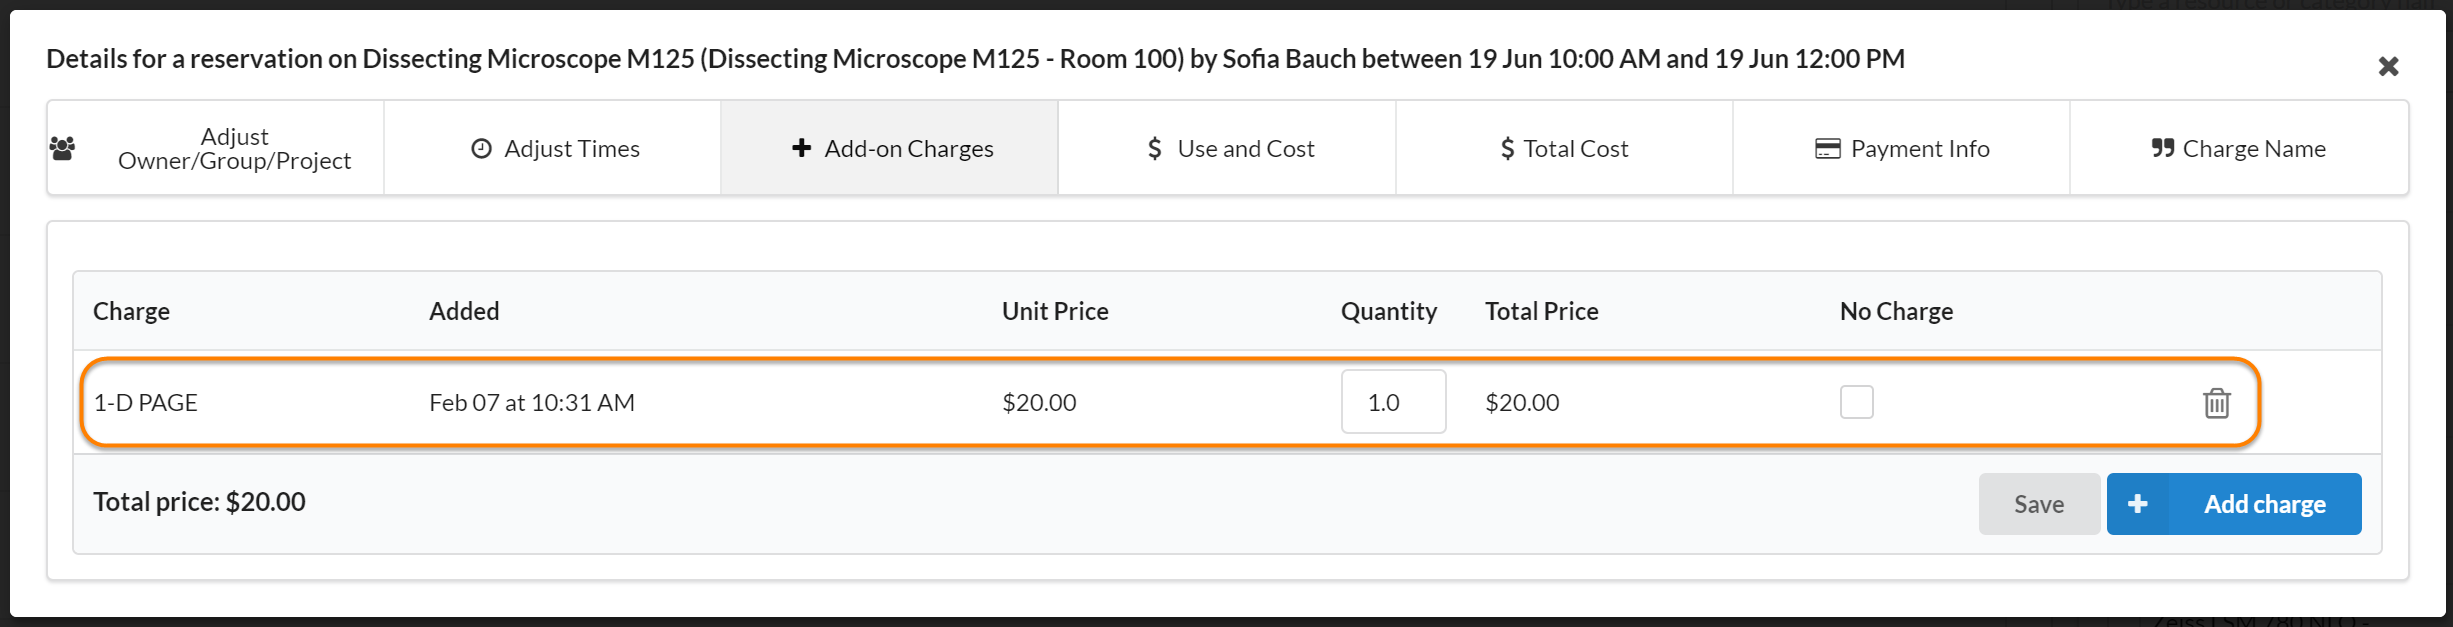
5. Use the Total Cost tab to view all of the details about the reservation that leads to the total amount charged. This includes add on charges, scans and no charge options.

- Hover over the red icon to view charging rules
- Selecting the No Charge option will generate a 'non billable' charge for this reservation, but still allow you to report on the usage type.
6. Payment Info can be viewed and edited.

- Charge Name will display the name for the charge also displayed on invoices and billing files. The charge name is set at the core level and can be edited by core staff or the iLab support team.
