A processor is a core-built automator that defines how to process/manage samples, and creating one is the final step in constructing your sample processing workflow. The creation of a processor allows you to flexibly combine a container type with a sample request form for different types of customer project requests.
To create a processor, first click on the "administration" button from your Samples tab.

Then, click on the "New Processor" button.

The "Create new processor" form will display. Descriptions of each field follow the image.
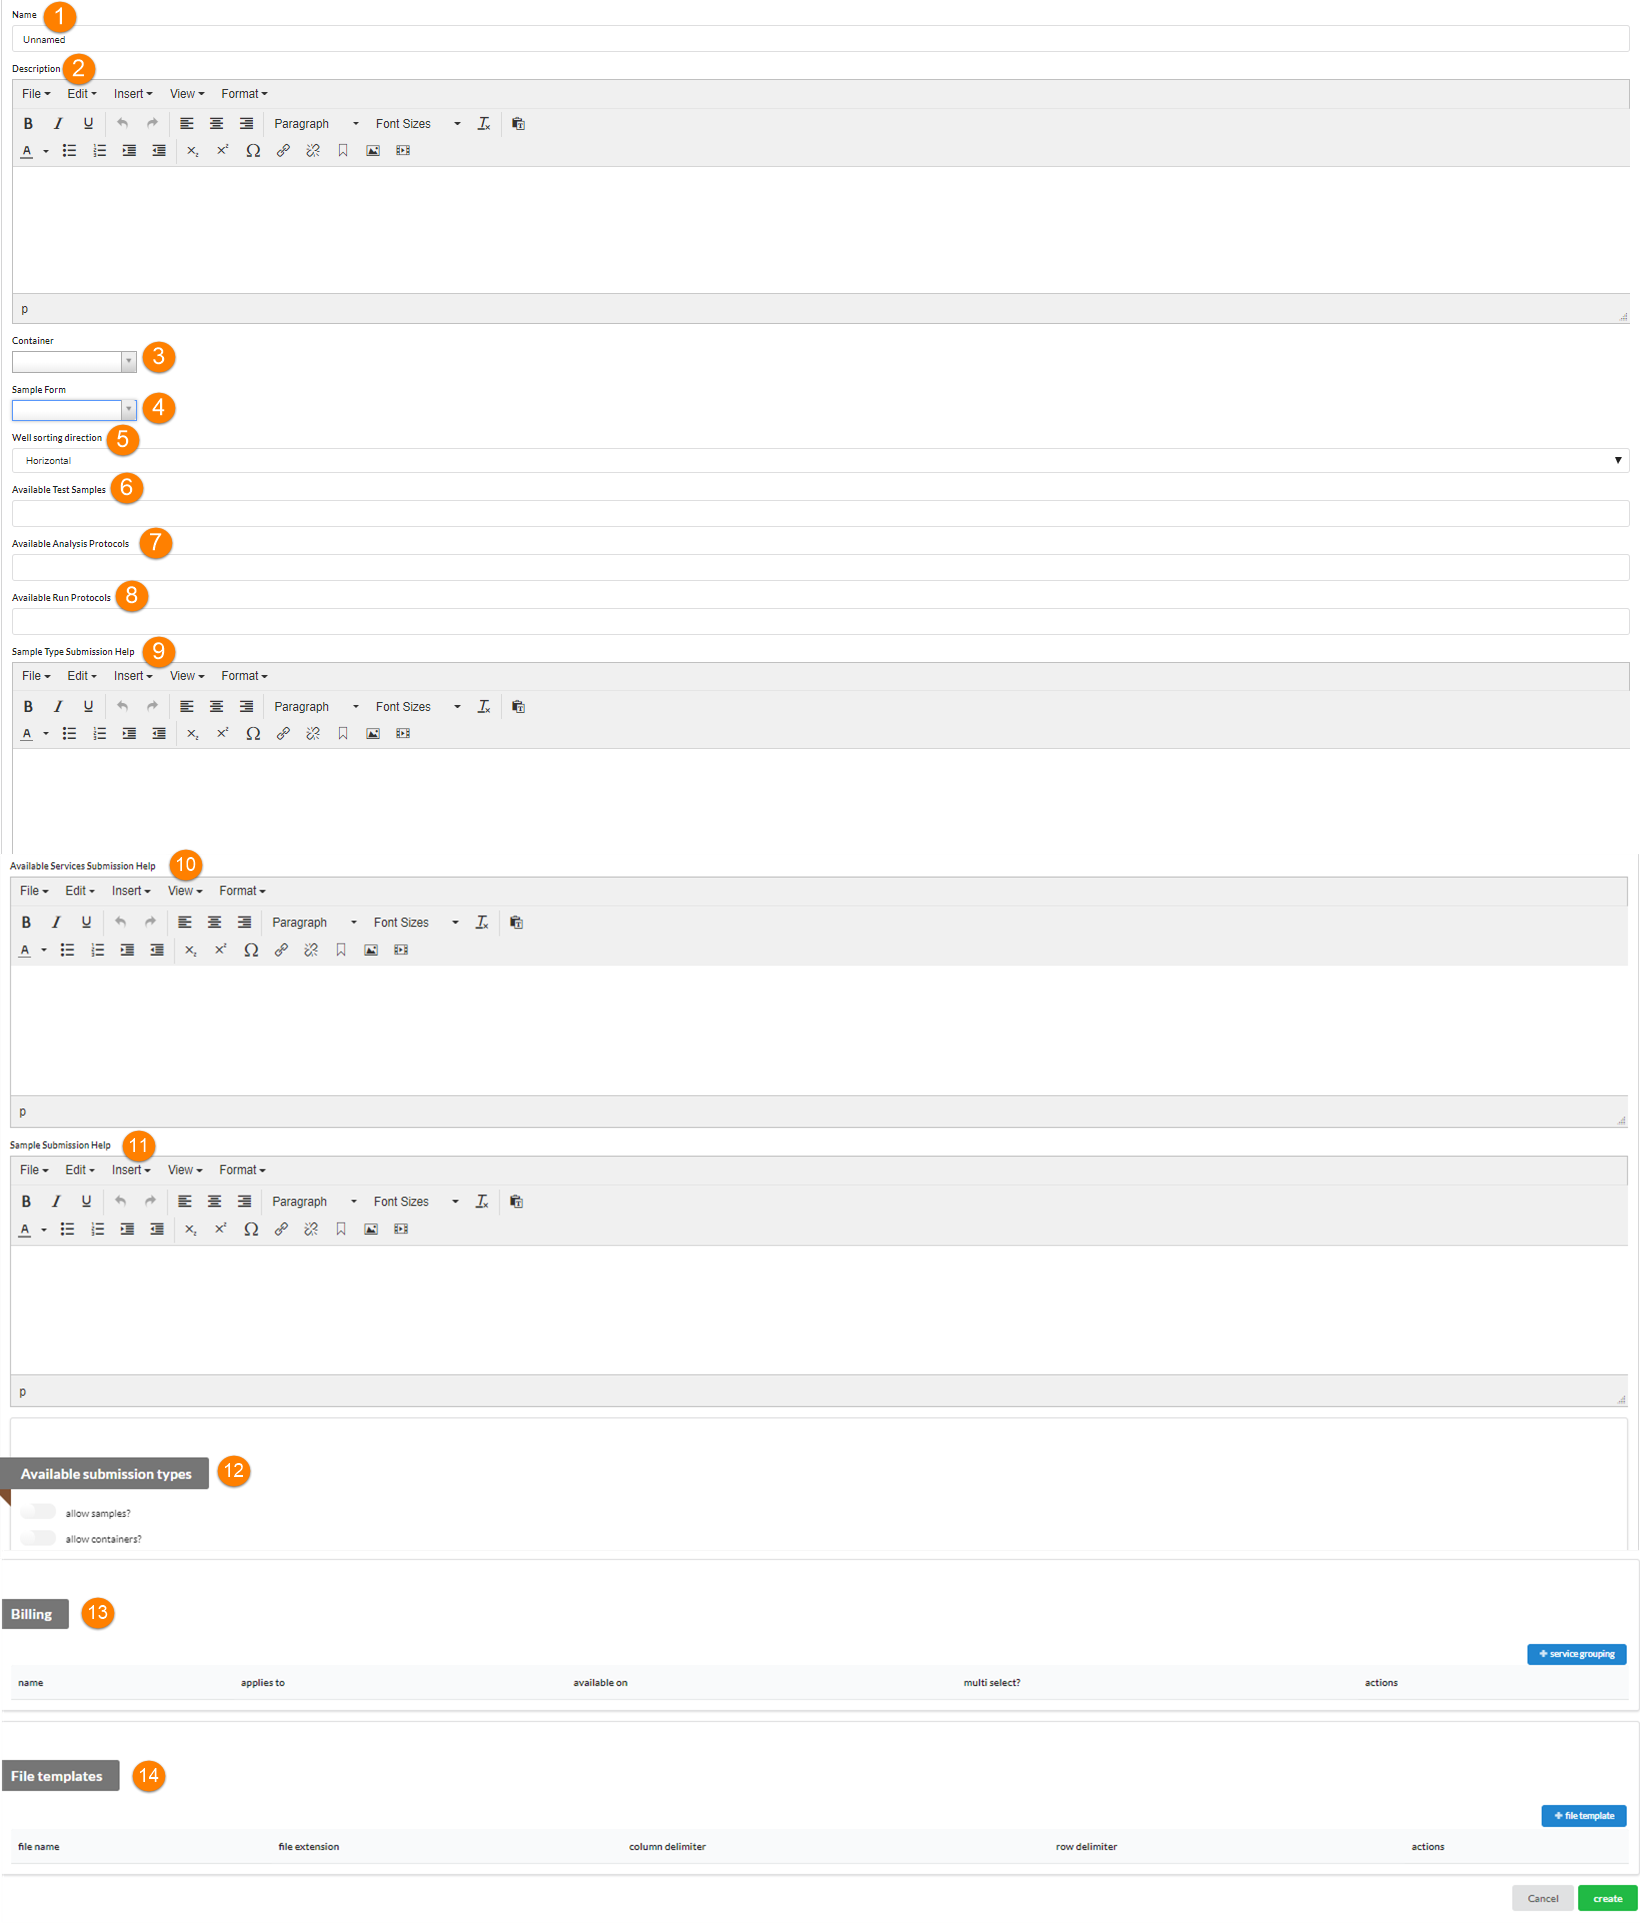
- Name: Assign a descriptive name to your new processor
- Description: Using the rich-text editor provided, you can optionally add a description of the processor.
- Container: This is a live search field. Start typing the name of the container you wish to associate to this processor or search through the drop-down menu that displays.
- Sample Form: This is a live search field. Start typing the name of the sample request form you wish to associate to this processor or search through the drop-down menu that displays.
- Well Sorting Direction: Assign the wells for sample submitted as a plate to sort either vertically or horizontally by default.
- Available Test Samples: These are specific sample types, defined by the core, that may be inserted into the container along with customer samples. These may include entities such as “controls”, “blanks”, “water” etc. Type in the name of each test sample you would like to have available, separating each sample type with a comma.
- Available Analysis Protocols: Enter available analysis protocols.
- Available Run Protocols: Enter available run protocols.
- Sample Type Submission Help: Add text here to help a customer decide whether to submit individual samples or full containers.
- Available Services Submission Help: Add text here to inform customer about available services they can associate with their request.
- Sample Submission Help: Add text here to assist a customer in filling out their sample request form.
- Available Submission Types: Choose whether you wish to allow customer to submit: individual samples, samples in full containers, or both. Switching the button to blue indicates that type of sample submission is allowed.
- Billing: Also referred to as “service groupings”, this is where pricing and additional services can be associated with a processor. Multiple service groupings can be associated with a processor, and flexibly tailored to accommodate different types of service requests. Please see Create a Service Grouping section for more.
- File templates: Set up files to upload into your instruments. Please see Creating a File Template section for more.
When you have completed all fields, click on the green "Create" button to save the processor and return to the Samples home.