The kiosk interface is an easy-to-use tool to help cores monitor real-time usage and compare against scheduled time through a kiosk-style computer interface. Reservations will automatically reflect both the scheduled and logged time allowing for a more efficient confirmation and billing process. You can think of Kiosk without Interlock as an “honor system” tracker, as there is nothing requiring users to login to the Kiosk to use the equipment. The advantages of using kiosk is to allow users to start an existing reservation or begin a walk-up reservation, and log real-time usage. Kiosk is free of charge and can be used on a core by core basis within an institution. Contact your IA or PM to enable kiosk for your core.
Access the Kiosk
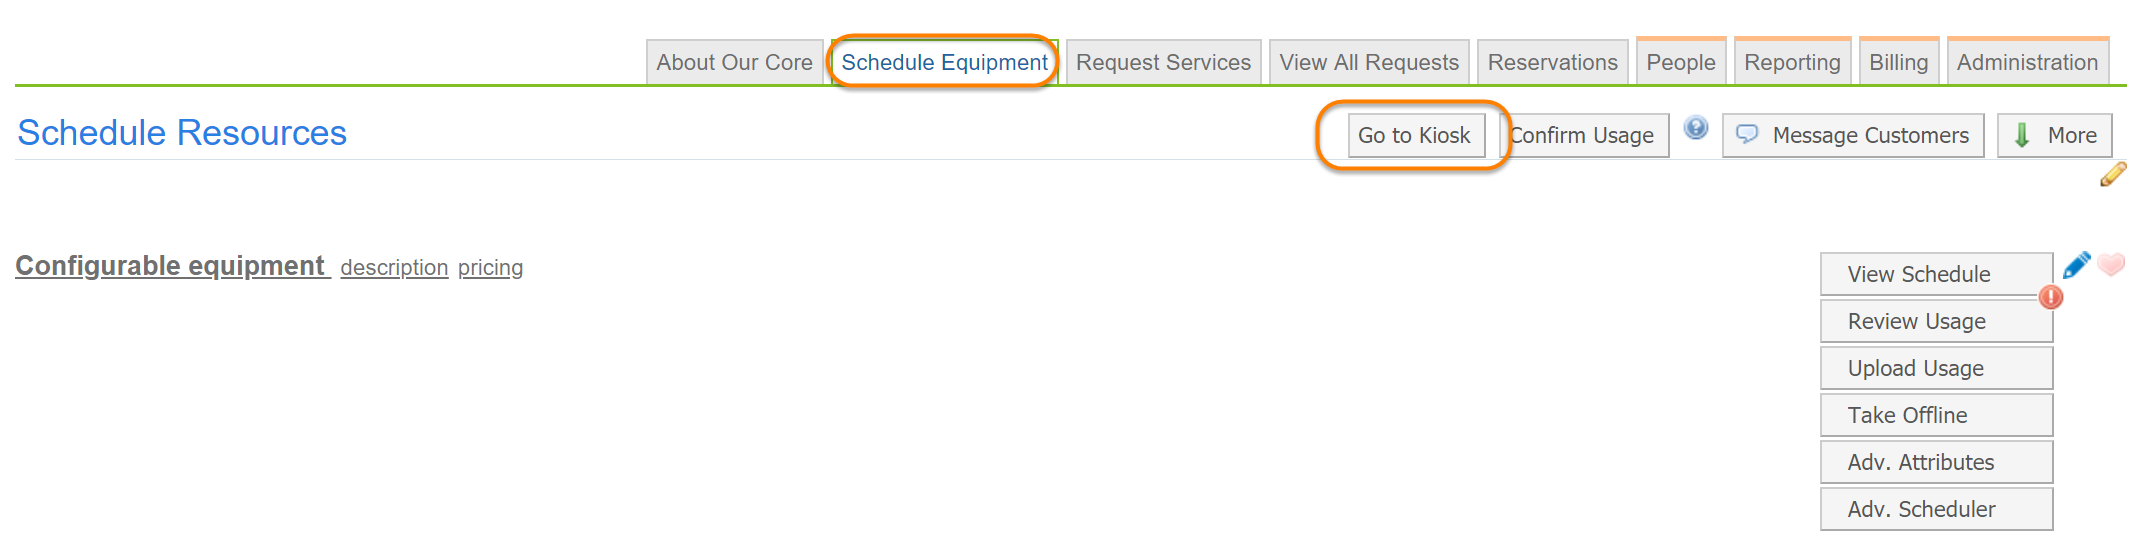
You can access the kiosk dashboard from the "Go to Kiosk" button on your Schedule Equipment tab
Set Up the Kiosk
As an administrator, you can determine individual settings per instrument, or use the core calendar default settings. To access kiosk settings, navigate to your name in the upper right corner. From the drop down, select "Settings".

The screen will display your service center settings, which are the default settings for each piece of equipment.
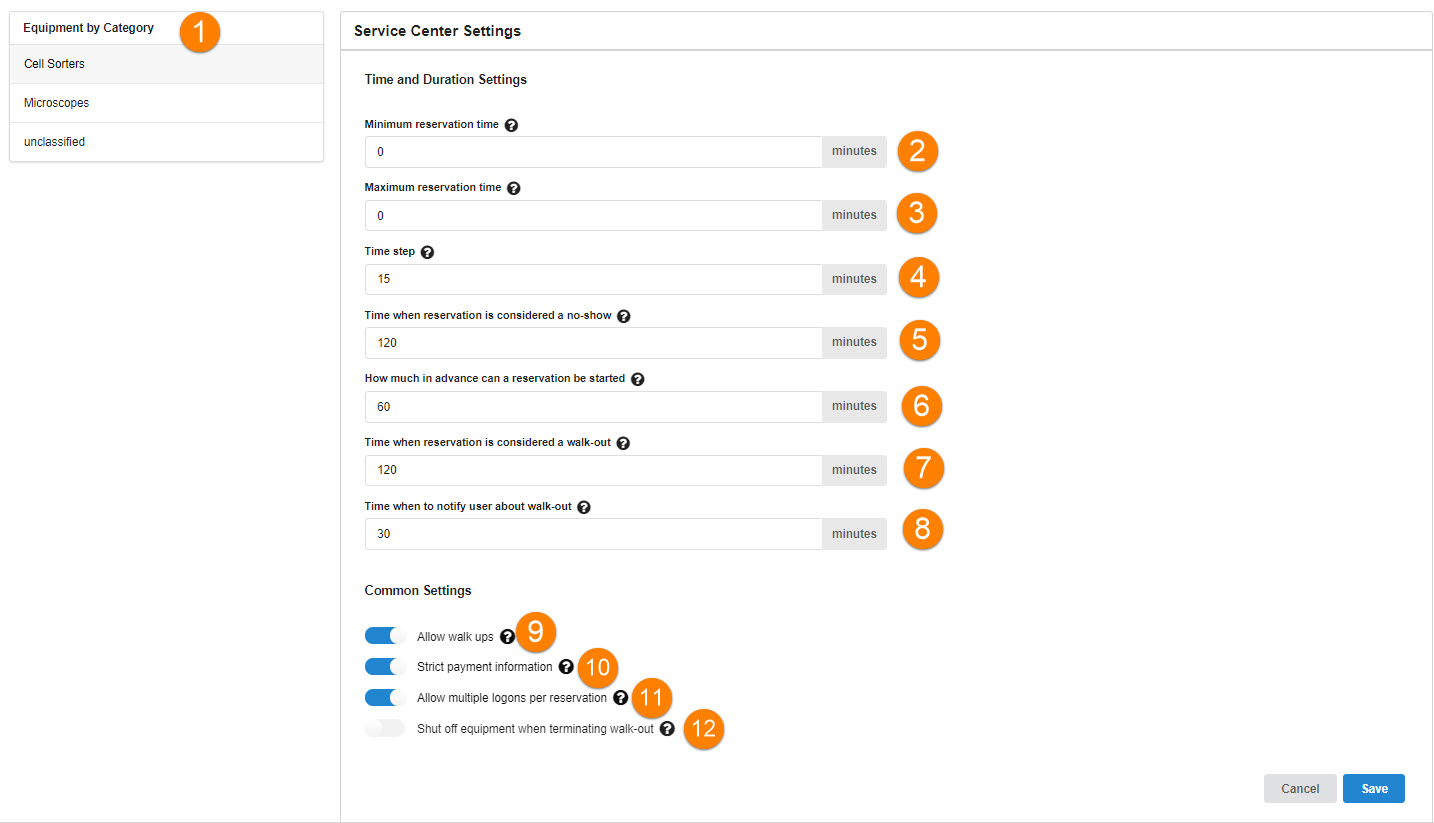
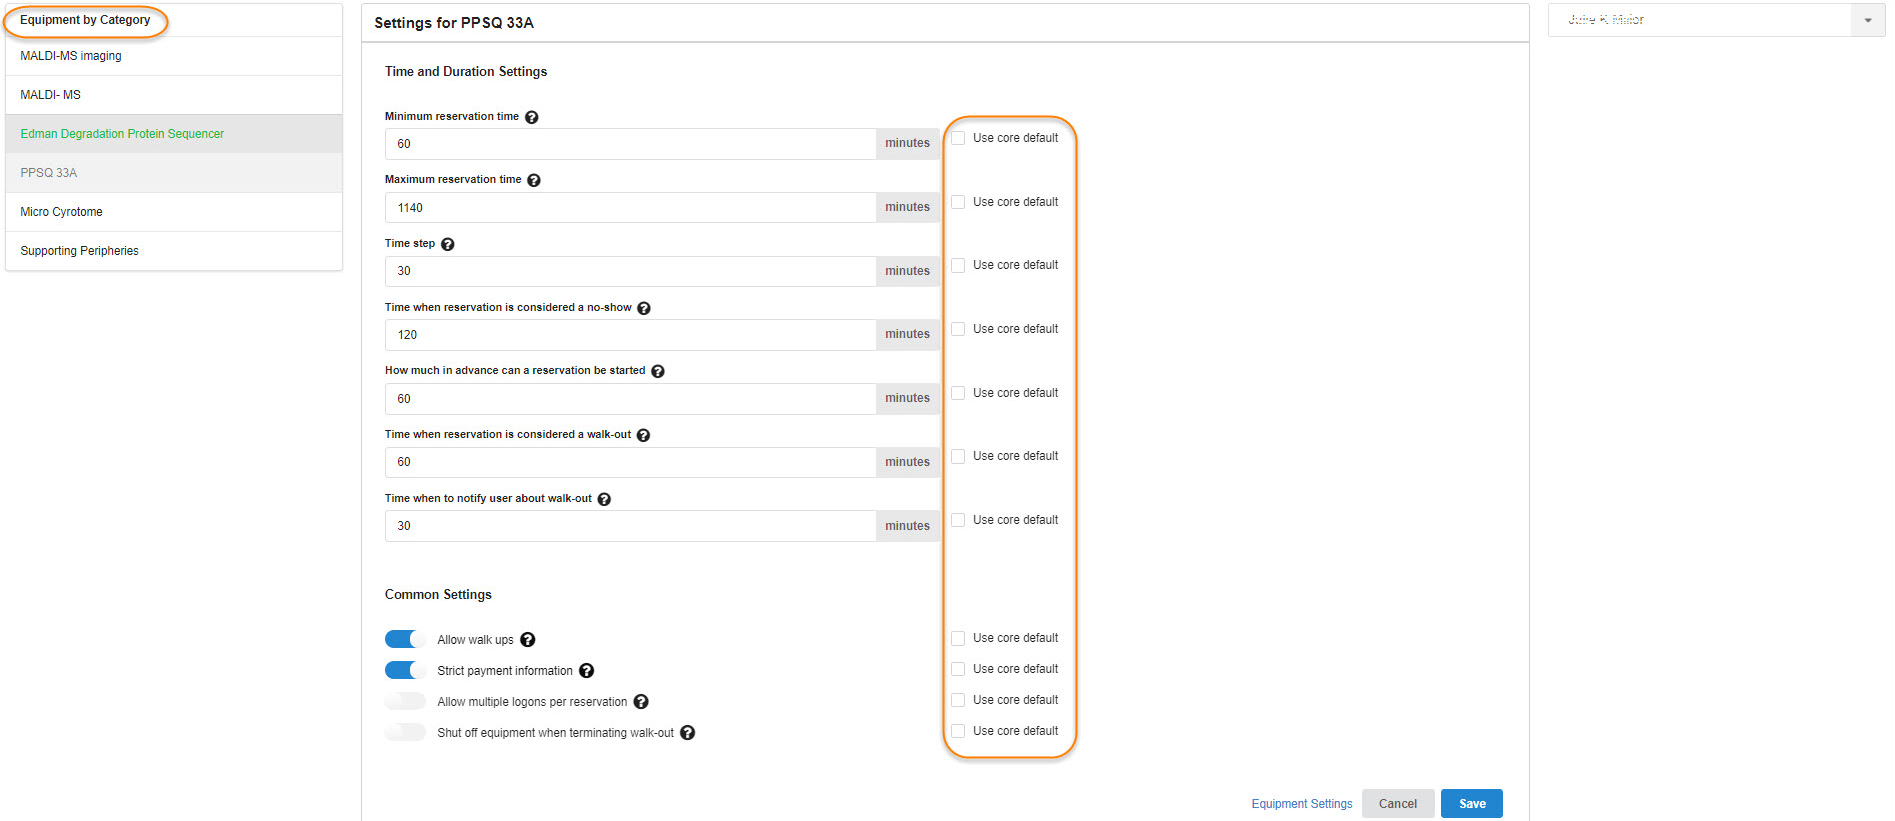
- Equipment by Category: The default display is the general service center settings page. From here, you can define default settings for each resource within your core. To manage kiosk settings individually for resources, click on the equipment category and select an individual resource from the drop-down menu.
- Minimum reservation time: Enter the minimum amount of time (in minutes) required for a reservation.
- Maximum reservation time: Enter the maximum amount of time (in minutes) that can be scheduled for a reservation.
- Time step: The amount of time the reservation can be increased or decreased.
- Time when reservation is considered a no-show: How long after the start of the reservation and the original user not showing up should a reservation be considered a no-show? After this time, the next person is allowed to use the equipment or create a walk up reservation.
- How far in advance can a reservation be started: How soon in advance can a user start their reservation?
- Time when reservation is considered a walk-out: How long after the end of the reservation is a user considered to have walked away even if their session is still running and the next person is allowed to start a session. This addresses the issue of people forgetting to end their session on the kiosk after their work is done.
- Time to notify user about a walkout: Enter the amount of time before a user is notified of their walk-out via email.
- Allow walk-ups: You can allow users to start a session even if they did not make a reservation in advance on the calendar.
- Strict payment information: Whether a payment number or fund code is required before a session can begin.
- Allow multiple logins per reservation: Whether a user can have multiple sessions within one reservation. If this is turned off the user will not be allowed to restart a reservation after ending it.
- Shut off equipment when terminating walk-out: The amount of time after the reservation has ended that the resource will be automatically turned off. This setting is helpful when a user forgets to log back into the kiosk to end their session.
To determine individual settings on resources, click on the resource from the equipment menu. Select the 'Use core default' option or define individual settings per instrument.
Manage the Kiosk
Upon login, the left hand menu will display a button that says 'Start Walkup Session'. Clicking on this button gives a list of core equipment and the current reservation status of the equipment. If resources are separated into categories, click on the arrow to expand the included resources.
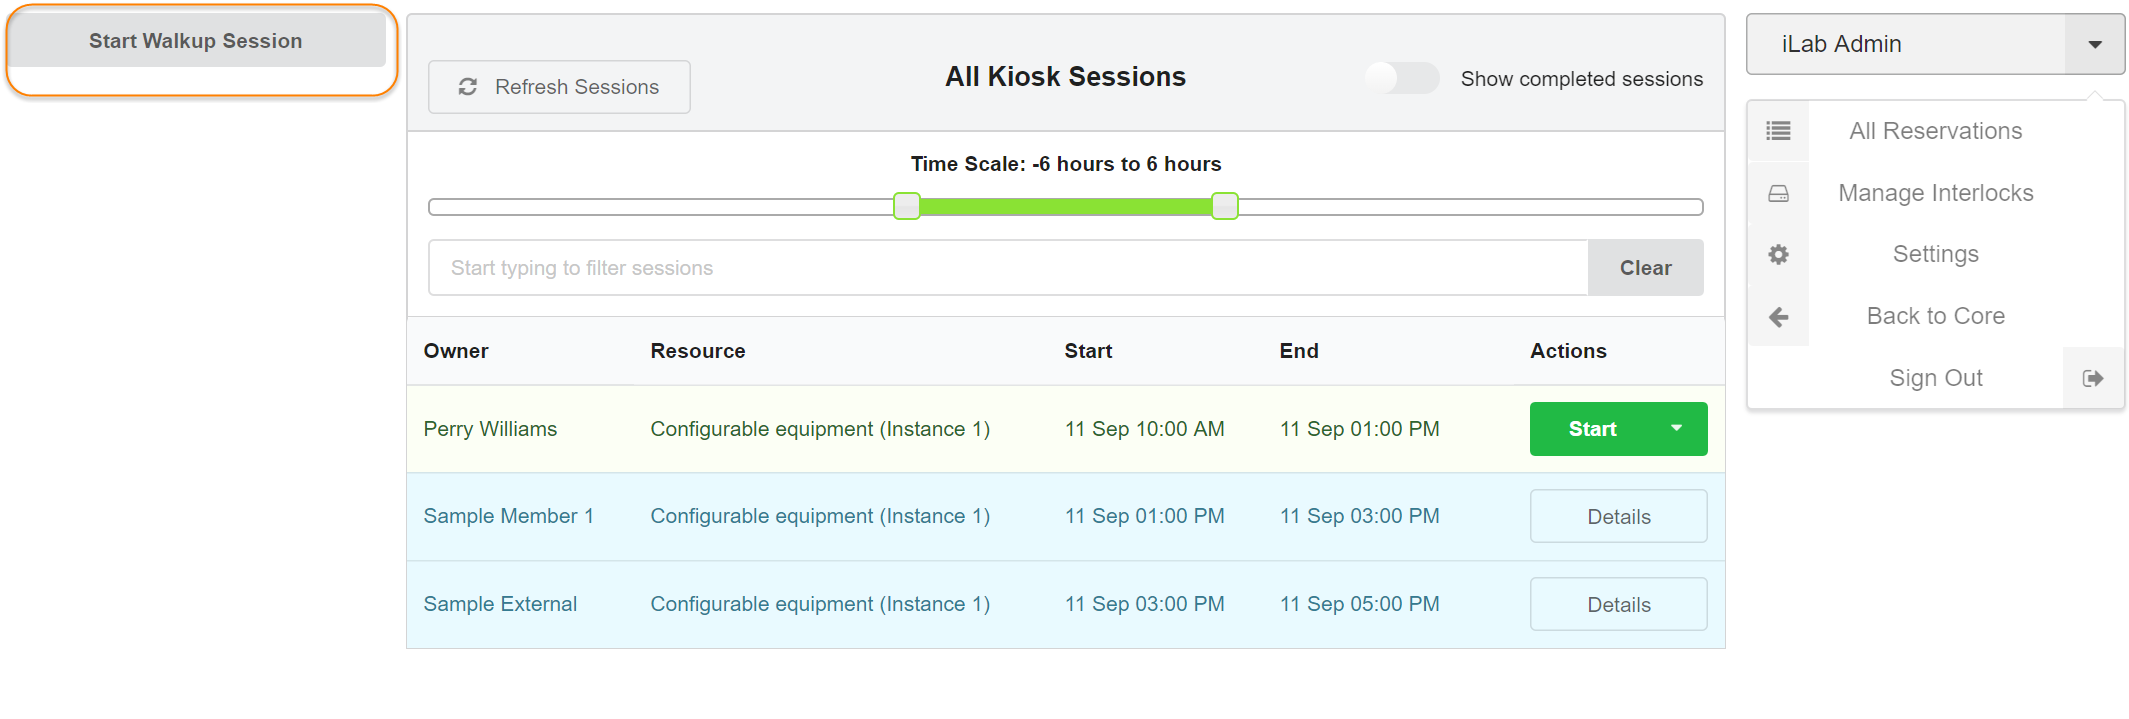
The middle panel displays all reservations from all of your users. Reservations within a 6 hour period will display.
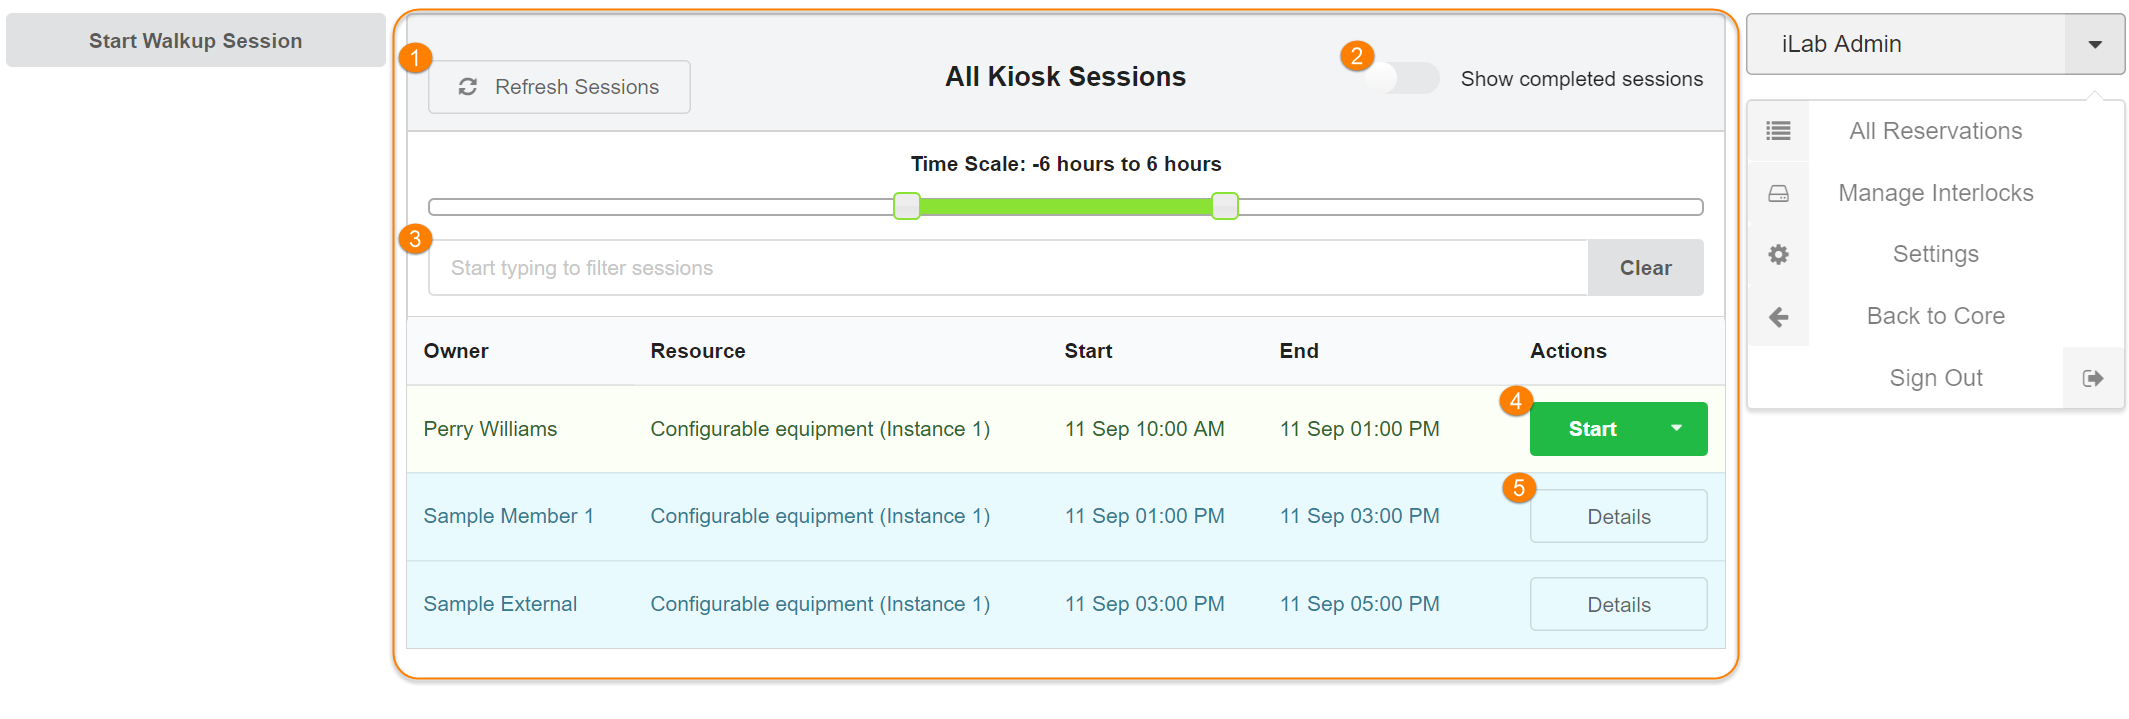
- Refresh Sessions: Allows you to refresh the session and displays any new reservations.
- Include completed sessions: The default view displays future sessions. Click this button if you would like to view completed sessions as well.
- Filter: The filter option allows you to search on any data point of a reservation.
- Start: The Start button allows you to begin a session. This option will only display if a session is within the acceptable time frame to start a reservation early based on kiosk settings.
- Details: Details can be seen by clicking on the details button to view the details of a reservation without starting it. You can also click on the arrow on the right side of the Start Button to bring up the "details" option.
The top right corner will display the name of the user logged in. Click on the name to expand the menu options:
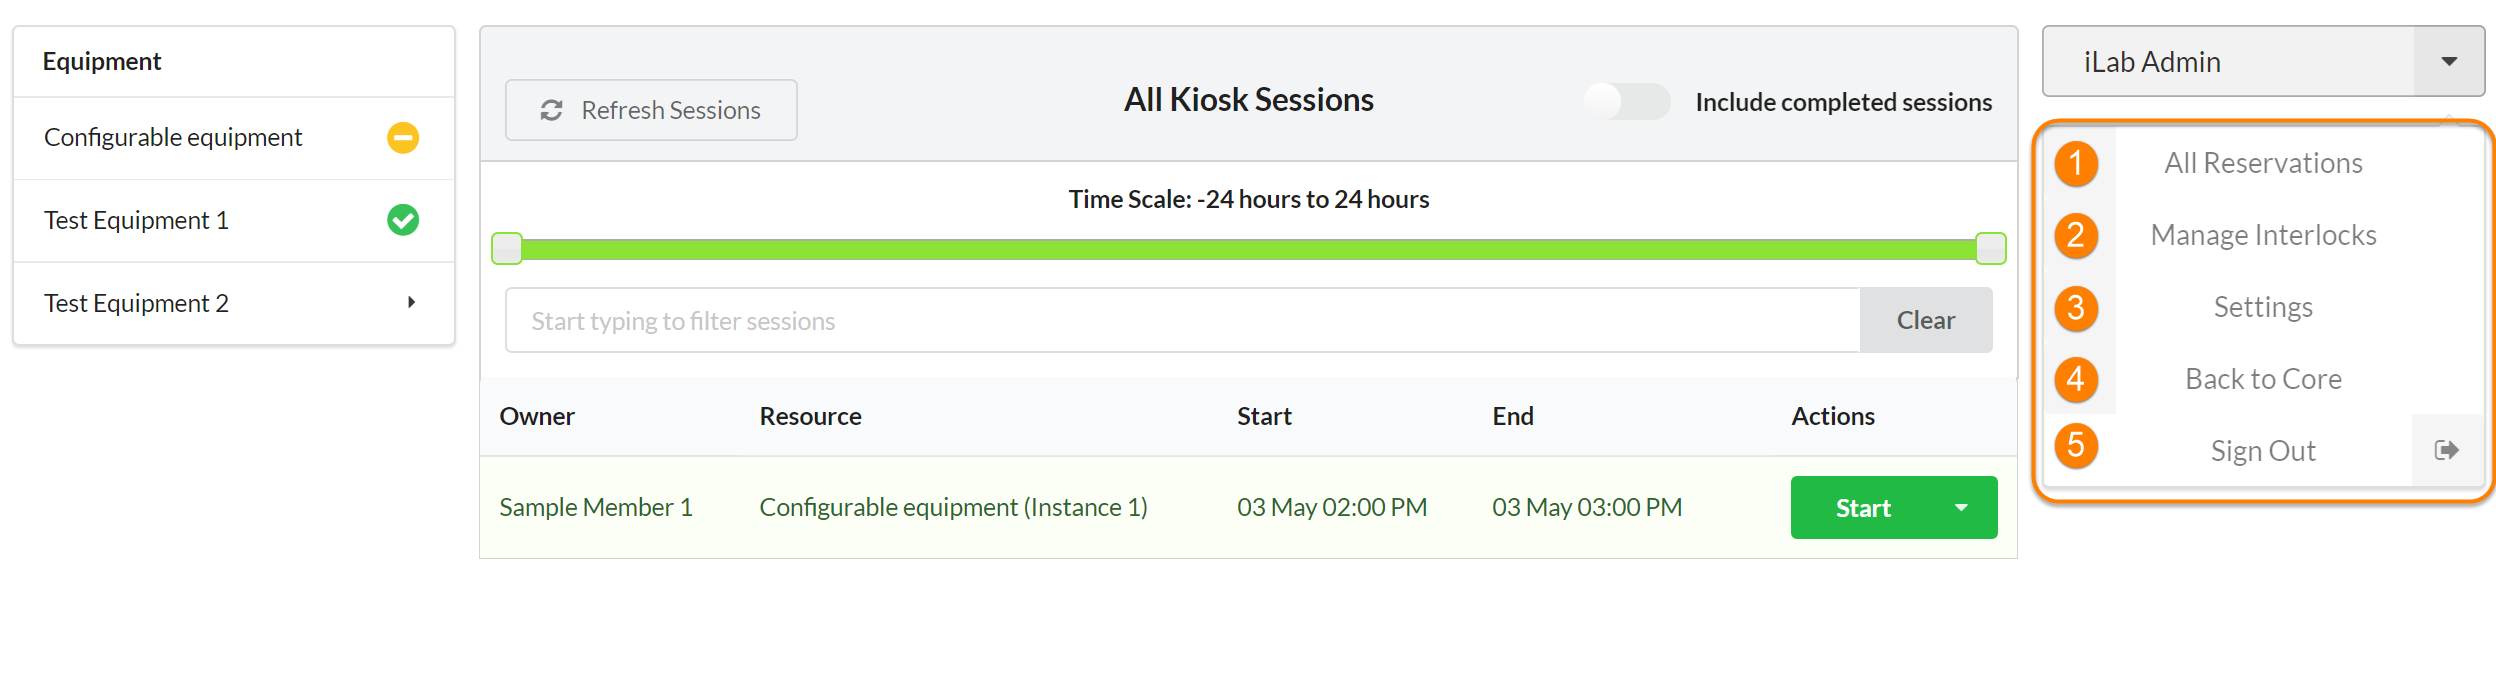
- All Reservations: Allows you to navigate back to the reservations page.
- Manage Interlocks: Allows you to Manage your interlock settings for each piece of equipment, as discussed in Managing Interlock.
- Settings: Allows you to edit kiosk settings, described above.
- Back to Core: Click here if you would like to go back to your main iLab site.
- Sign out: Choosing logout will log you out of the kiosk so a new user can log in via the kiosk dashboard.
Allowing Add-on Charges in the Kiosk
Add-on charges allow for a facility to add in a fee in addition to the equipment charge. The most common use for these add-on charges are consumable services or equipment that is charged per sample.
Add-on charges can be default added by the core, or the core may allow users to add in additional charges when they make a reservation. To activate this feature, you must turn on the setting 'Allow add on charges for reservations' from the administrative tab in the core (Scheduling Settings). The remaining settings below can be found on the individual calendar interface (Schedule Settings). Once activated, the Add-on charges will now show in the kiosk interface.
There are 3 additional settings related to this feature.
-
Let users add charges to reservation: This allows users to be able to update quantities, delete charges, and add any additional available services to the reservation from the kiosk interface.
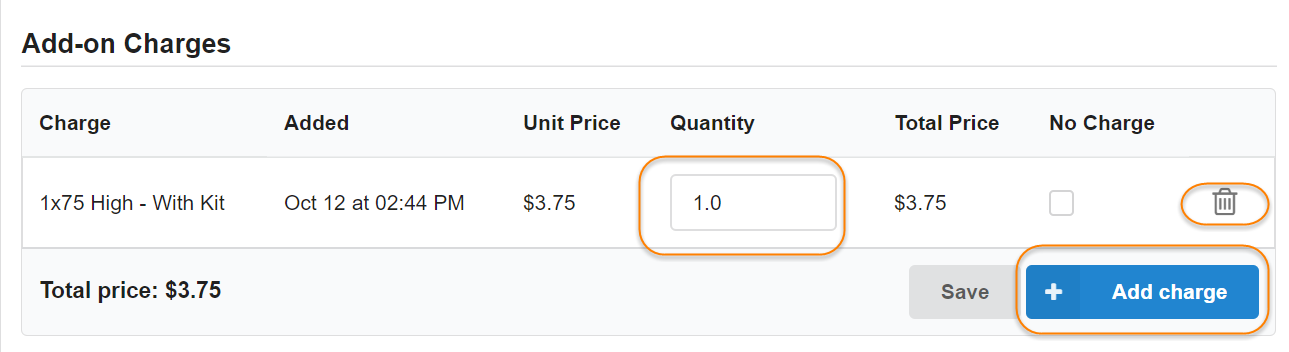
- Default add on charges: This allows the core to add charges by default that will always show up. If the above setting is set to on, then users will be to adjust and delete charges.
-
The last setting is to 'require at least on add on charge for the event to be valid': This setting is mainly for the core and the core will not be able to confirm usage until and add-on charge is applied. An error will show on the reservation if no add-on charge is present but this will not prevent the reservation from being started.
