The People interface allows users to find other users in iLab and access various management functions (depending on their role). There are two related but slightly different versions of the People interface:
-
People Search (all users): accessed from the people search link in the left-hand navigation, this version is available to all users. However, the scope of users that can be found (and certain available management functions) depends on role:
- PIs, Group Manager and Lab Members: Find other members in your lab.
- Core Administrators: Find core customers and lab members. Access Request tools are available.
- Institutional Administrators: Find users across you entire organization.
- People Tab (Core Administrator): Accessed from the People Tab of your core. This version is functionally identical to the People Search described above, but only shows core customers and provides a tool to Manage Training Status.
The People Interface has a number of panels and action buttons. Note that you may need to click the "<< Bulk Actions" button to see all available actions. For the various actions at the top of the interface, individual users need to be selected using the check boxes on the far right hand side of the screen. All listed users can be selected at once by clicking on the top-right check-box.
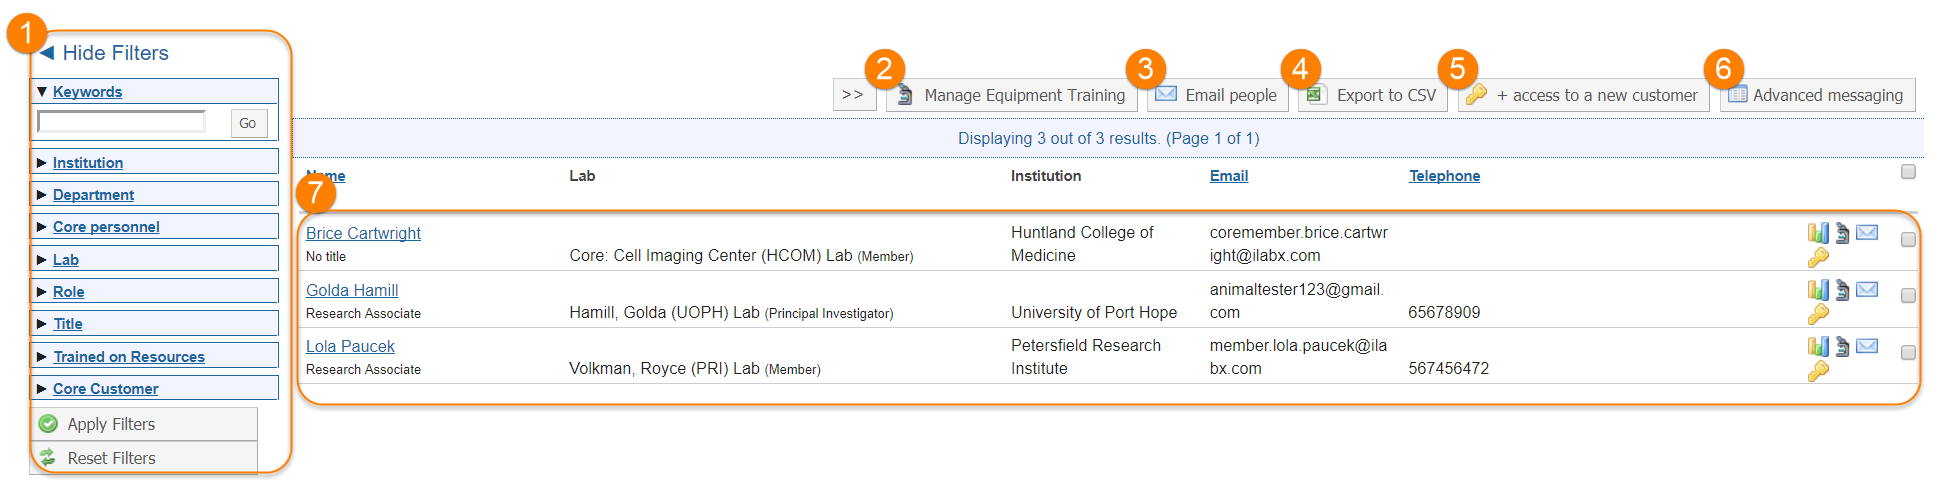
- Filters: Click on Hide Filters / Show Filters at the top of this panel to hide/show the filter interface. Core customers can be filtered based on all of the listed criteria by clicking on the desired criterion to show the list of available options, clicking the appropriate check boxes, and then choosing "Apply Filters" at the bottom of the filters panel. Note that only criteria options that apply to the current set of people are available.
- Manage Equipment Training (Core administrator): Set the training levels of the customers at your core. For more information see Managing Training Status.
-
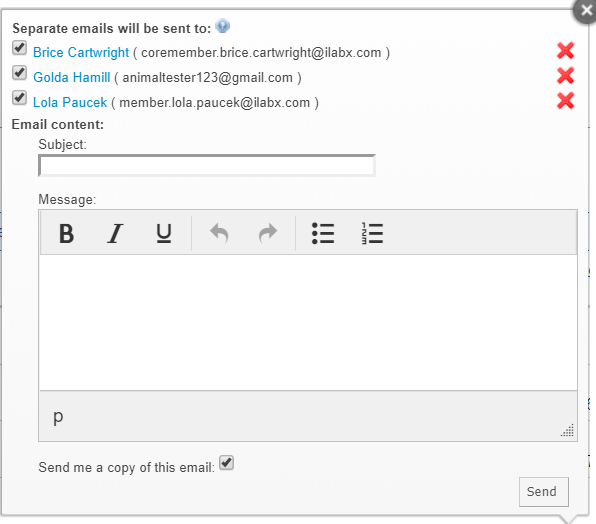
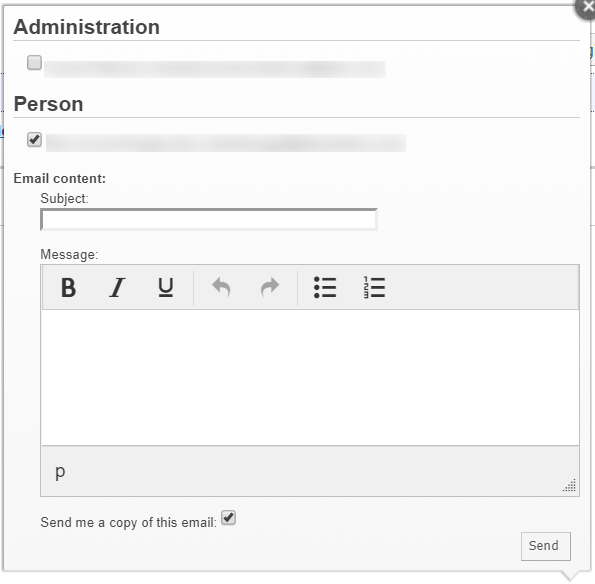
Email People: Send an e-mail to all selected users. Complete the Subject and Message, and then click "Send".
-
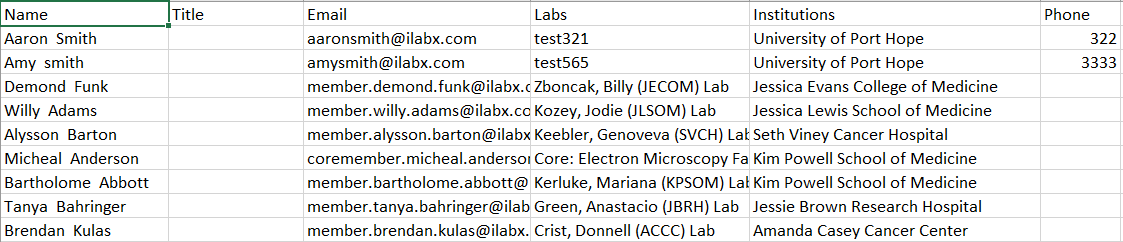
Export to CSV: Create a CSV file with the key contact information (name, title, lab(s), institution and phone number) of the selected users. The file will be formatted similar to the example below:
- Access to new customer (Core administrator): Grant core access for cores that have Access Requests enabled. For more information, see Managing Access Requests.
-
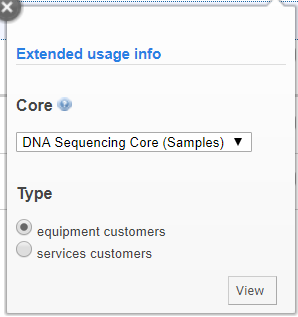
Advanced messaging: The Advanced Messaging tool enables Core Administrators to send a message to a selection of customer based on various selection criteria. Selecting "equipment customers" will bring you to the Message Customers (Reservations) interface of the selected core, while selecting "services customers" will bring you Message Customers (Requests) interface.
-
People Detail: The main panel lists all core customers that fit the filter criteria. The People Detail panel provides key information on the listed people and provides a number of functions:
-
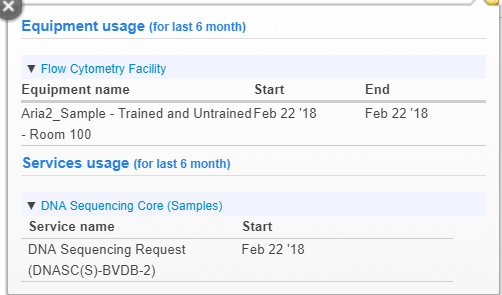
Recent activity (bar graph icon): Provides a quick summary of recent activity of this user at your core:
- Equipment training (microscope icon): Core administrators only. Manage the Training Status for this person.
-
Send e-mail (letter icon): Use this option to send an e-mail the the person, as well as optionally their financial administrators (lab managers who are marked as financial contacts). Select the recipients, complete the Subject and the Message, and click "Send":
- Access requests (key icon): Core administrators only. Manage the Access Request status of the user.
-
Recent activity (bar graph icon): Provides a quick summary of recent activity of this user at your core: