As a Core Administrator and/or Institution Administrator, the Publication Tracker module was developed to help you view publications that your facilities and researchers have contributed to. This module reduces the amount of time you spend manually tracking publications and accurately captures the number and type of contributions made by the core. Additionally, Publication Tracker provides tools that can help institutions, cores, and lab administrators download and then layer the publication data on top of other reporting data captured by iLab.
NOTE: If you are interested in adding Publication Tracker to your institution, contact your iLab PM for more information.
Getting Started
Once Publication Tracker has been enabled for your institution, all institution administrators and core facility administrators can use the left hand navigation panel to navigate to the publication tracker link.
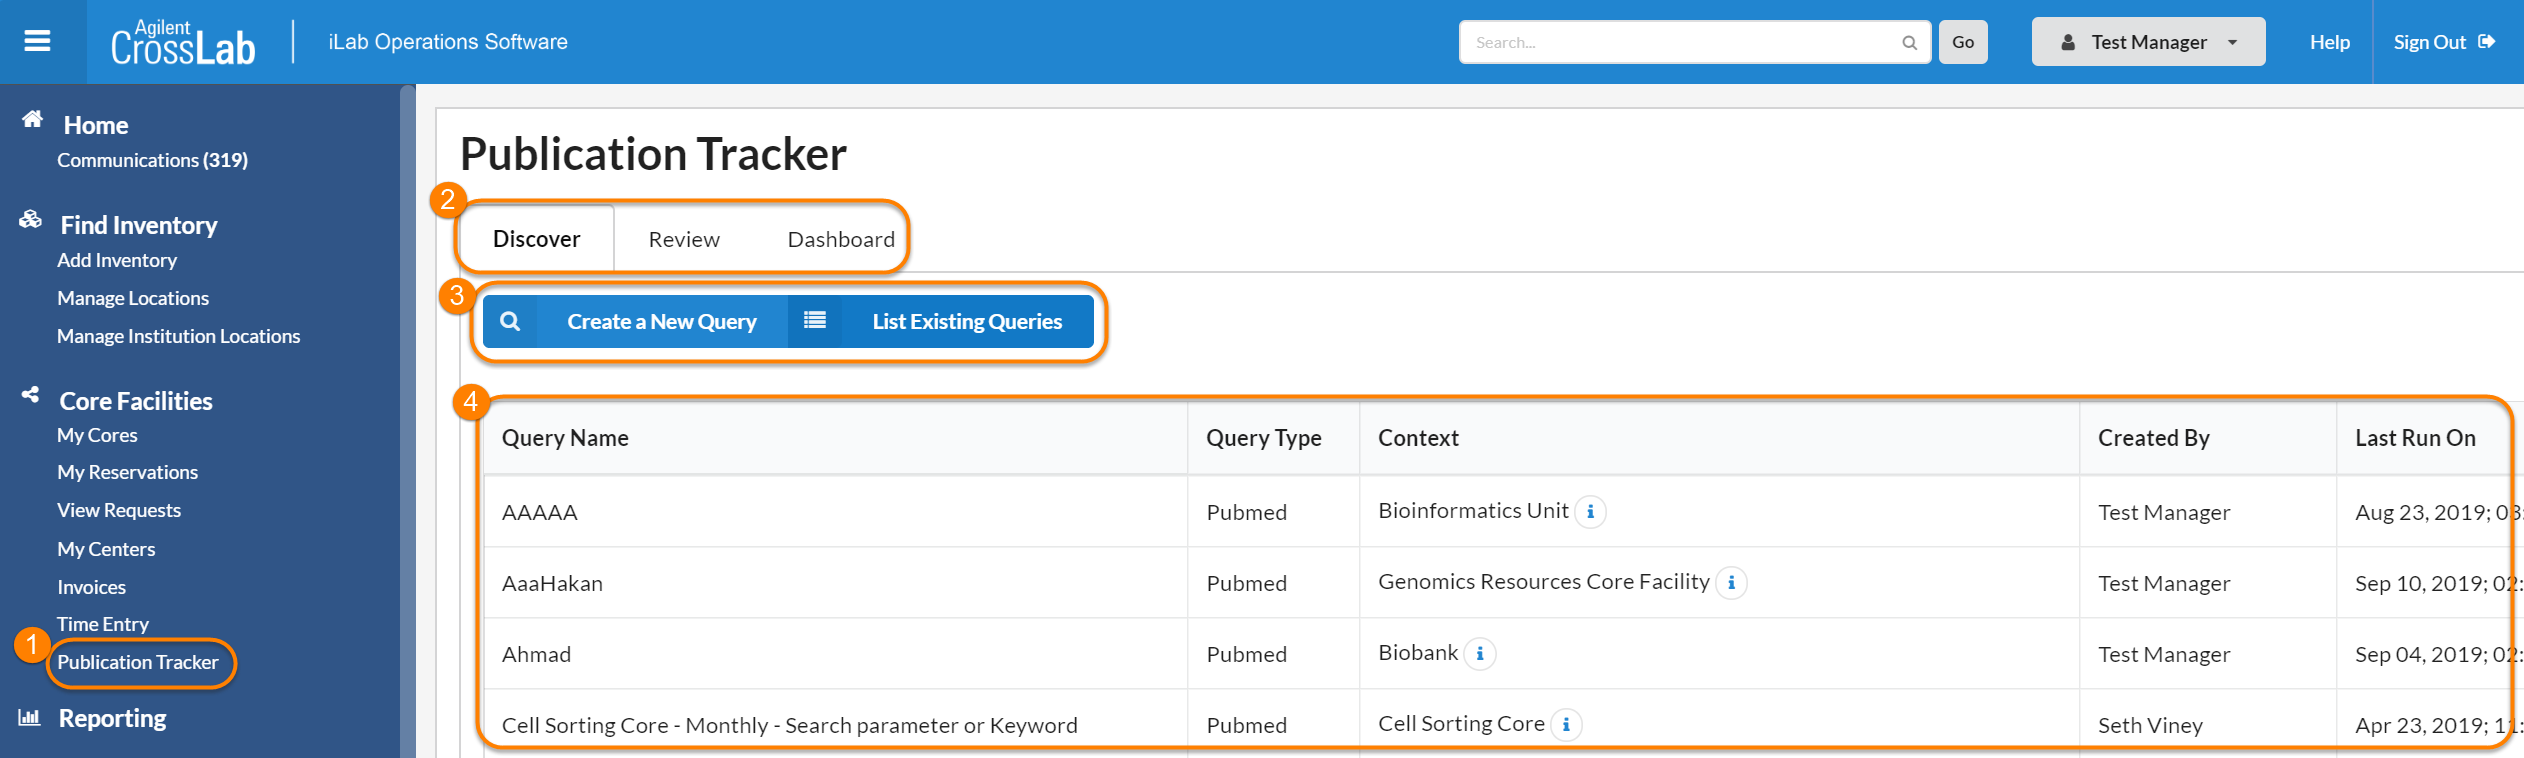
- Publication Tracker Link: Clicking this link in the left side menu will load the module.
- Navigation Tabs: PubTracker consists of three tabs, Discover, Review, and Dashboard
- Discover Buttons: By default, the Discover tab opens displaying the Create a New Query or List Existing Queries buttons. The default is set to the List Existing Queries view.
- List Existing Queries: If queries have been created, the List Existing Queries default view will list all queries in alphabetical order.
Discover Tab
List Existing Queries
When viewing the List Existing Queries, the queries are listed in alphabetical order and there are several actions that can be taken.
![]()
- Help icon: Hovering over the help icon on a query will display the basic query parameters.
- Blue Carrot: The Play icon will run the query and display all matching articles on the bottom half of the page.
- Pencil icon: Allows for editing and opens the query to expose any parameters that may be edited.
- Export icon: Allows exporting of the query results into an Excel spreadsheet.
- Delete icon: Permanently deletes the query.
To create a new query, Click on the button Create a New Query.

A pop up screen will ask you for all information needed to run a new query. 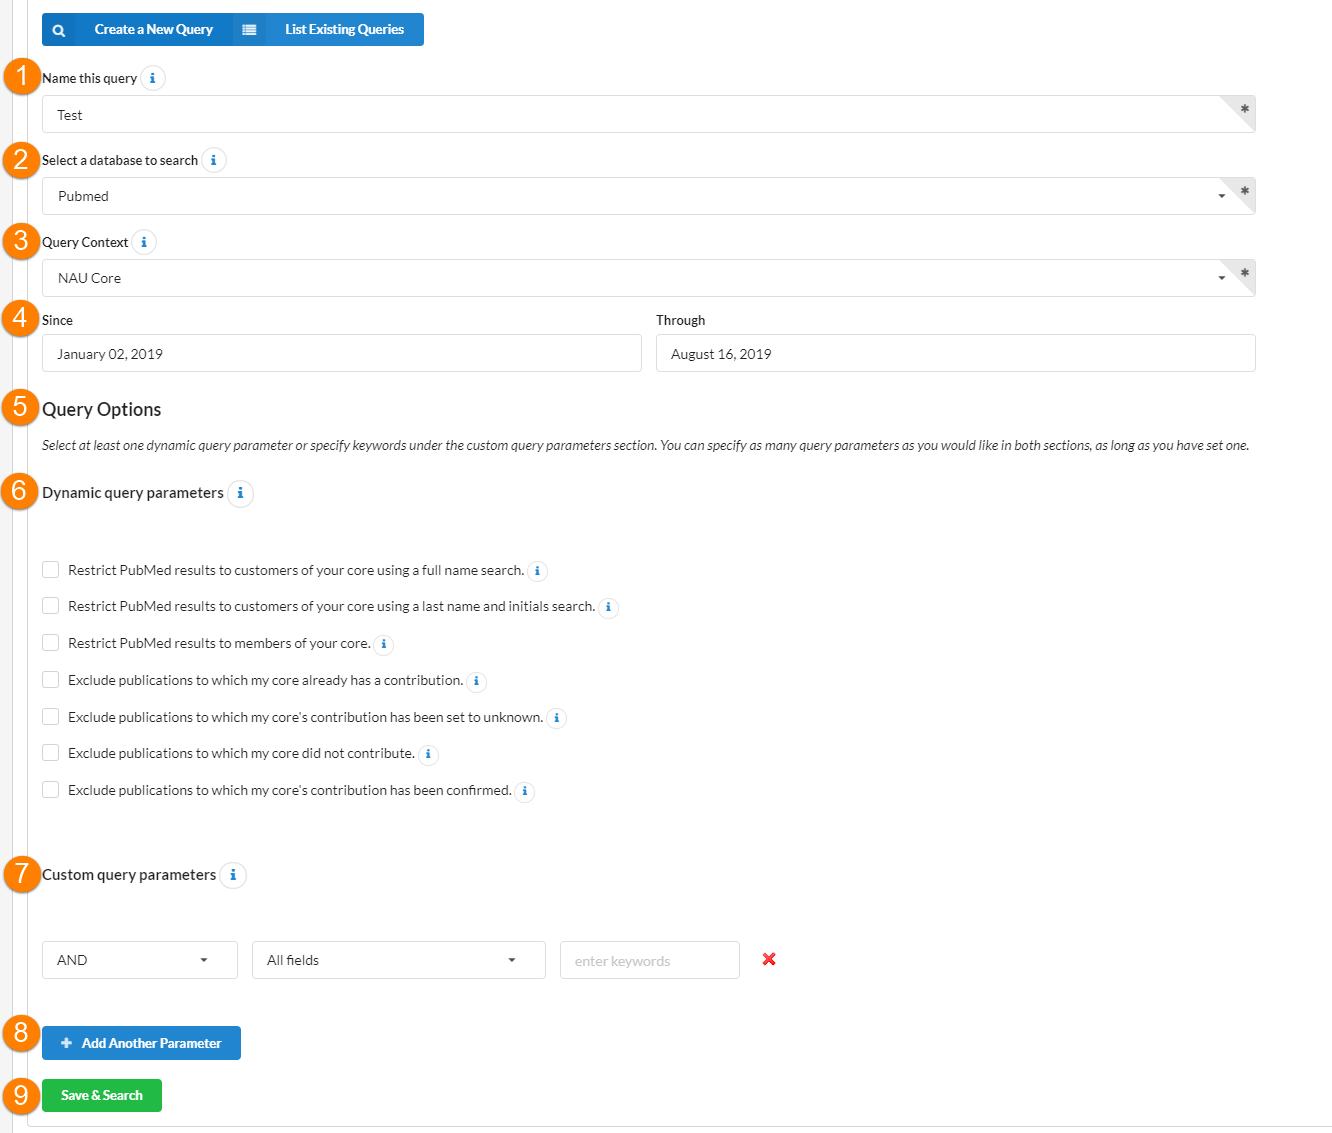
- Name this query: Choose a name that will make your query easily identifiable.
- Select a database to search: Currently, the system allows only the PubMed database to be searched but more publication databases may be added in the future.
- Query Context: Select the core facility for which you are configuring the query. NOTE: When you enable this field, the Dynamic Query Parameters options will display.
- Date Range: Set a range of dates for the publications using the Since and through fields.
- Query Options Section: There are two query options Dynamic query parameters or Custom query parameters. You must select an option from at least one of the two groups for any articles to show.
-
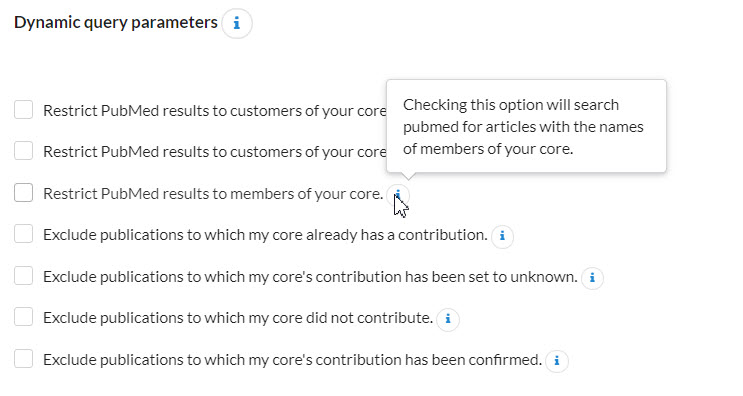
Dynamic query parameters: Allows for directed queries to return the most relevant results. Each of the dynamic query options has a help icon. Hover over this icon to learn more about the setting.
-
Custom Query Parameters: Allows for an additional search using specific PubMed terms and custom keywords. Note: The default in the middle dropdown is All Fields, scrolling up exposes Affiliation which allows for more refined results.
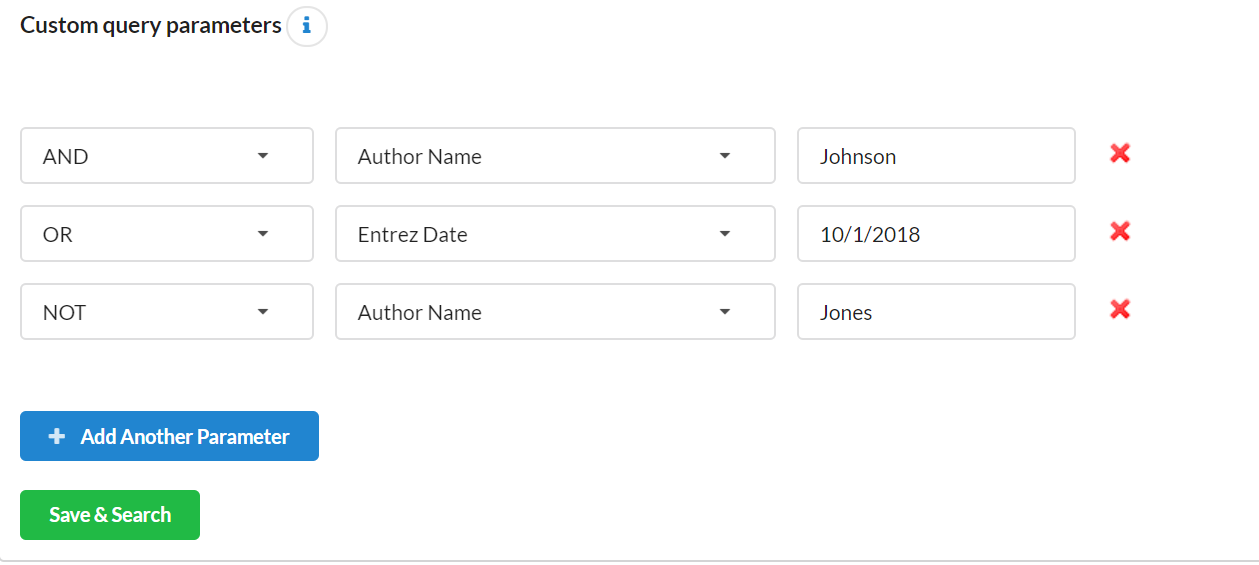
8. Add Another Parameter: You can add additional parameters to your search to customize your search. There is no limit on the number of parameters that can be added.
9. Save & Search: This button will execute your search and display all results. The query will also now show under the List existing queries button when navigating to the Discover tab.
Executing a query returns a paginated list of queries from PubMed that match the dynamic and custom query parameters you set. The queries are displayed in a list order with high-level information present.
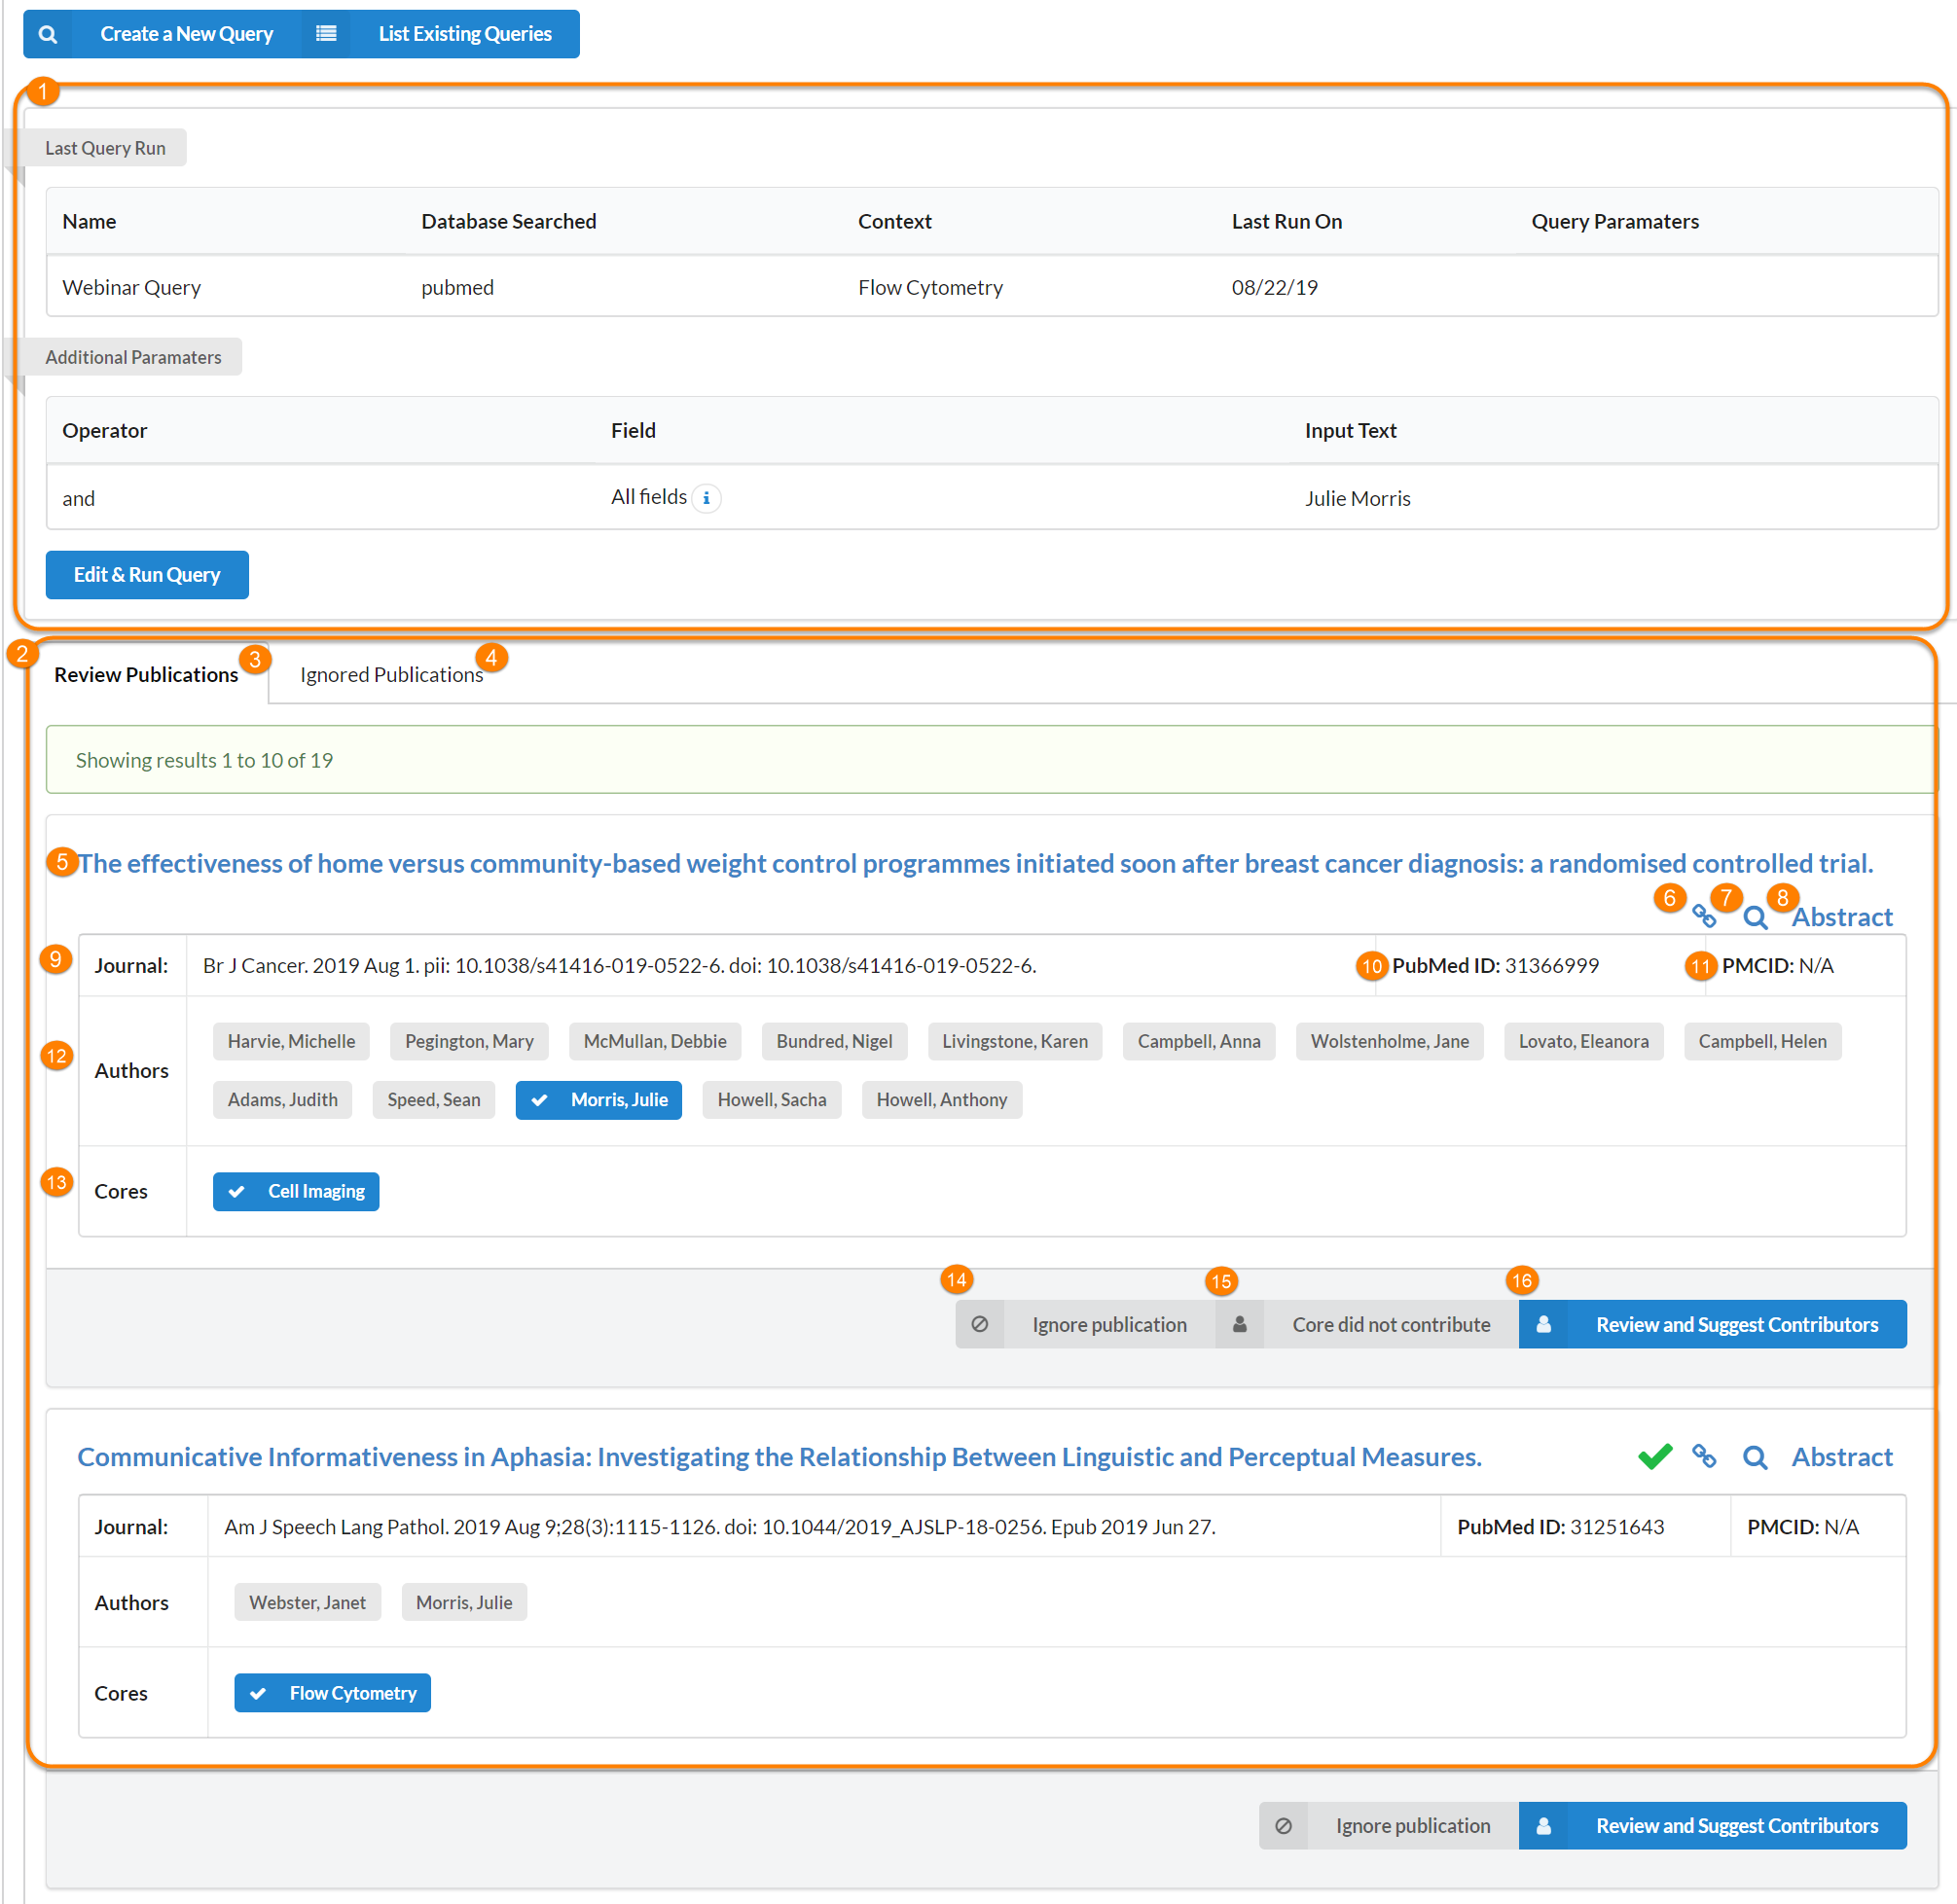
- Last Query Run: This section shows the list parameters.
- Publications List: This section shows all the publications found in the search.
- Review Publications: The default view in the publications list. A list of all publications pulled from your search parameters.
- Ignored Publications: Any publications that have been marked as ignore publication in previous queries will be listed under this tab. Note: This list is specific to each user.
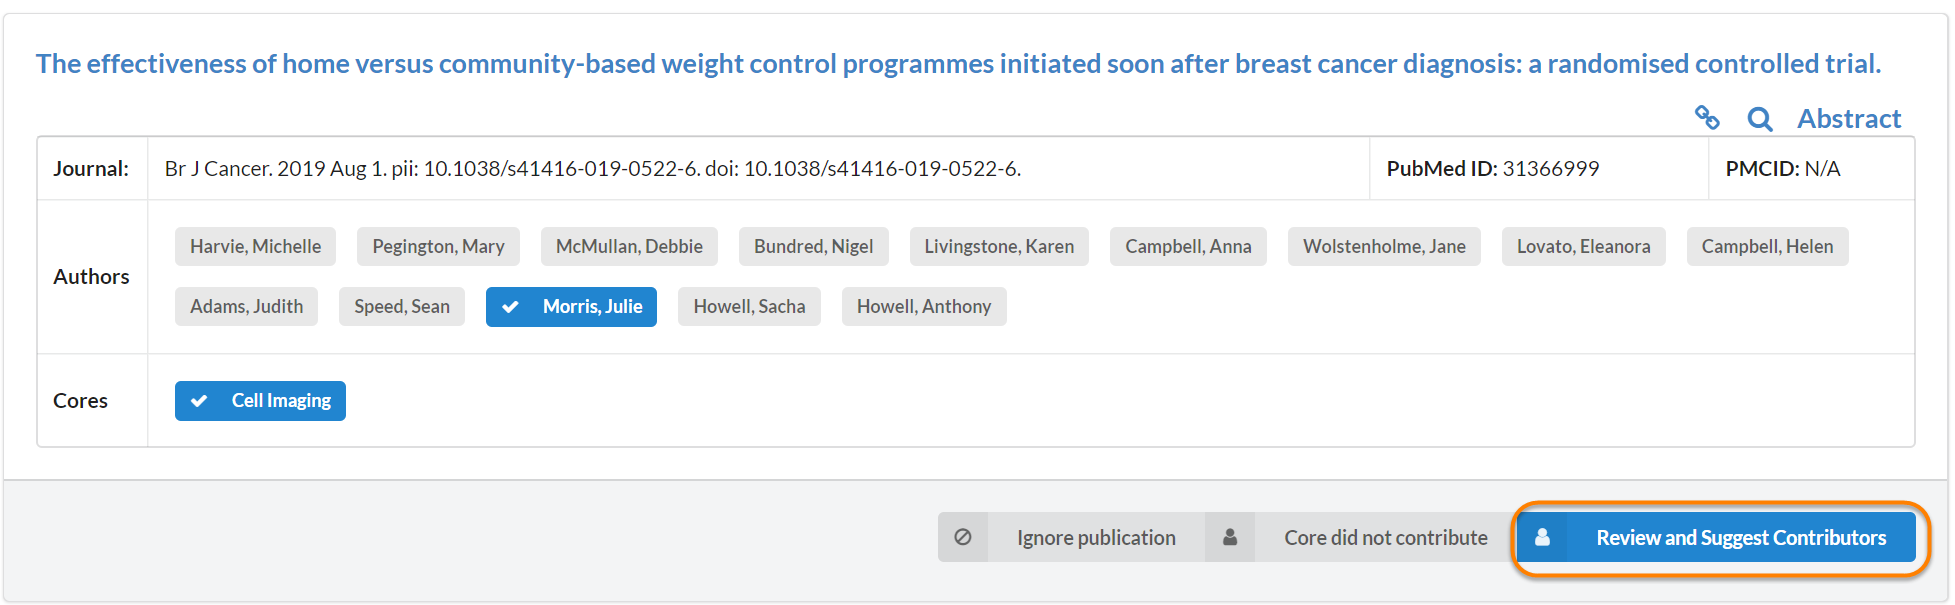
- Title of Article: The article title as listed in PubMed.
- Abstract Link: Links to the article in PubMed in a new tab.
- Magnifying glass: Opens this article in a new tab.
- Abstract: Displays the abstract of the article in the current screen.
- Journal: Lists the journal and the issue the article is listed in.
- PubMed ID: Unique identifier assigned to every PubMed record.
- PMCID: PubMed Central Identifier which is the identifier for all works published in the free-to-access PubMed Central.
- Authors: Any authors of the article that are listed in the article are pulled up.
- Cores: Any referenced facilities used in the article that belong to the institution will show here.
-
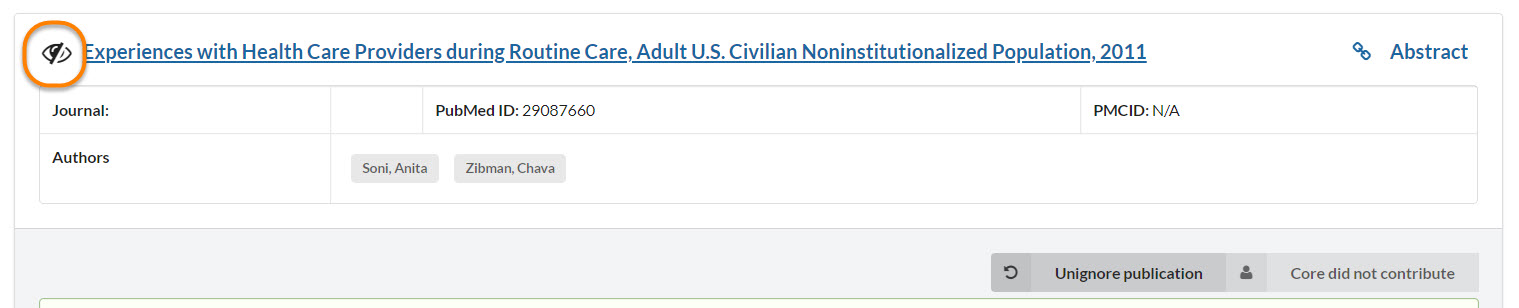
Ignore Publication Button: Clicking the button moves the article to the Ignored Publications tab. The eye icon indicates the publication has been ignored. To reverse the ignore action, click on the Unignore publication button.
-
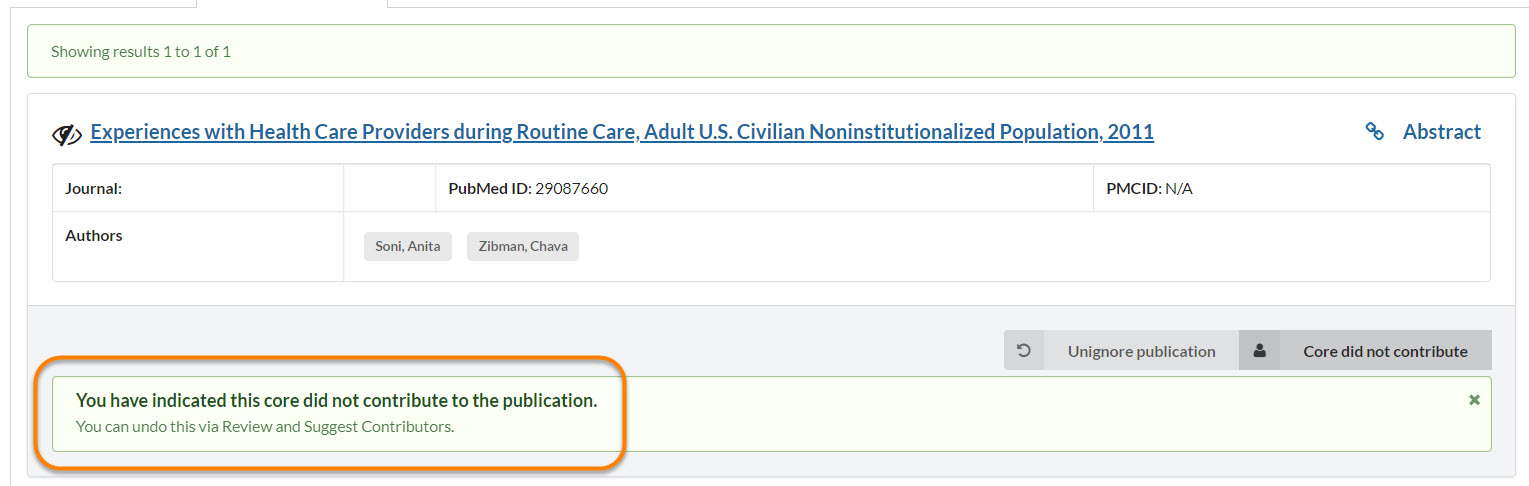
Core did not contribute: If looking at the publication you realize that your core did not contribute to the publication, you can simply click the "Core did not contribute" button. This adds an entry to the iLab database. If you’ve configured your publication query to ignore publications to which you don’t have a contribution, you will not be presented this publication the next time you run your query.
-
Review and Suggest Contributors: If you believe that the publication is relevant to your core, click the "Review and Suggest Contributors" button. This will expand the individual query to allow you to confirm contributions.
Confirming Publications
Clicking on Review and Suggest Contributors, will expand the screen, giving various options within each article. The article is split into 3 sections.
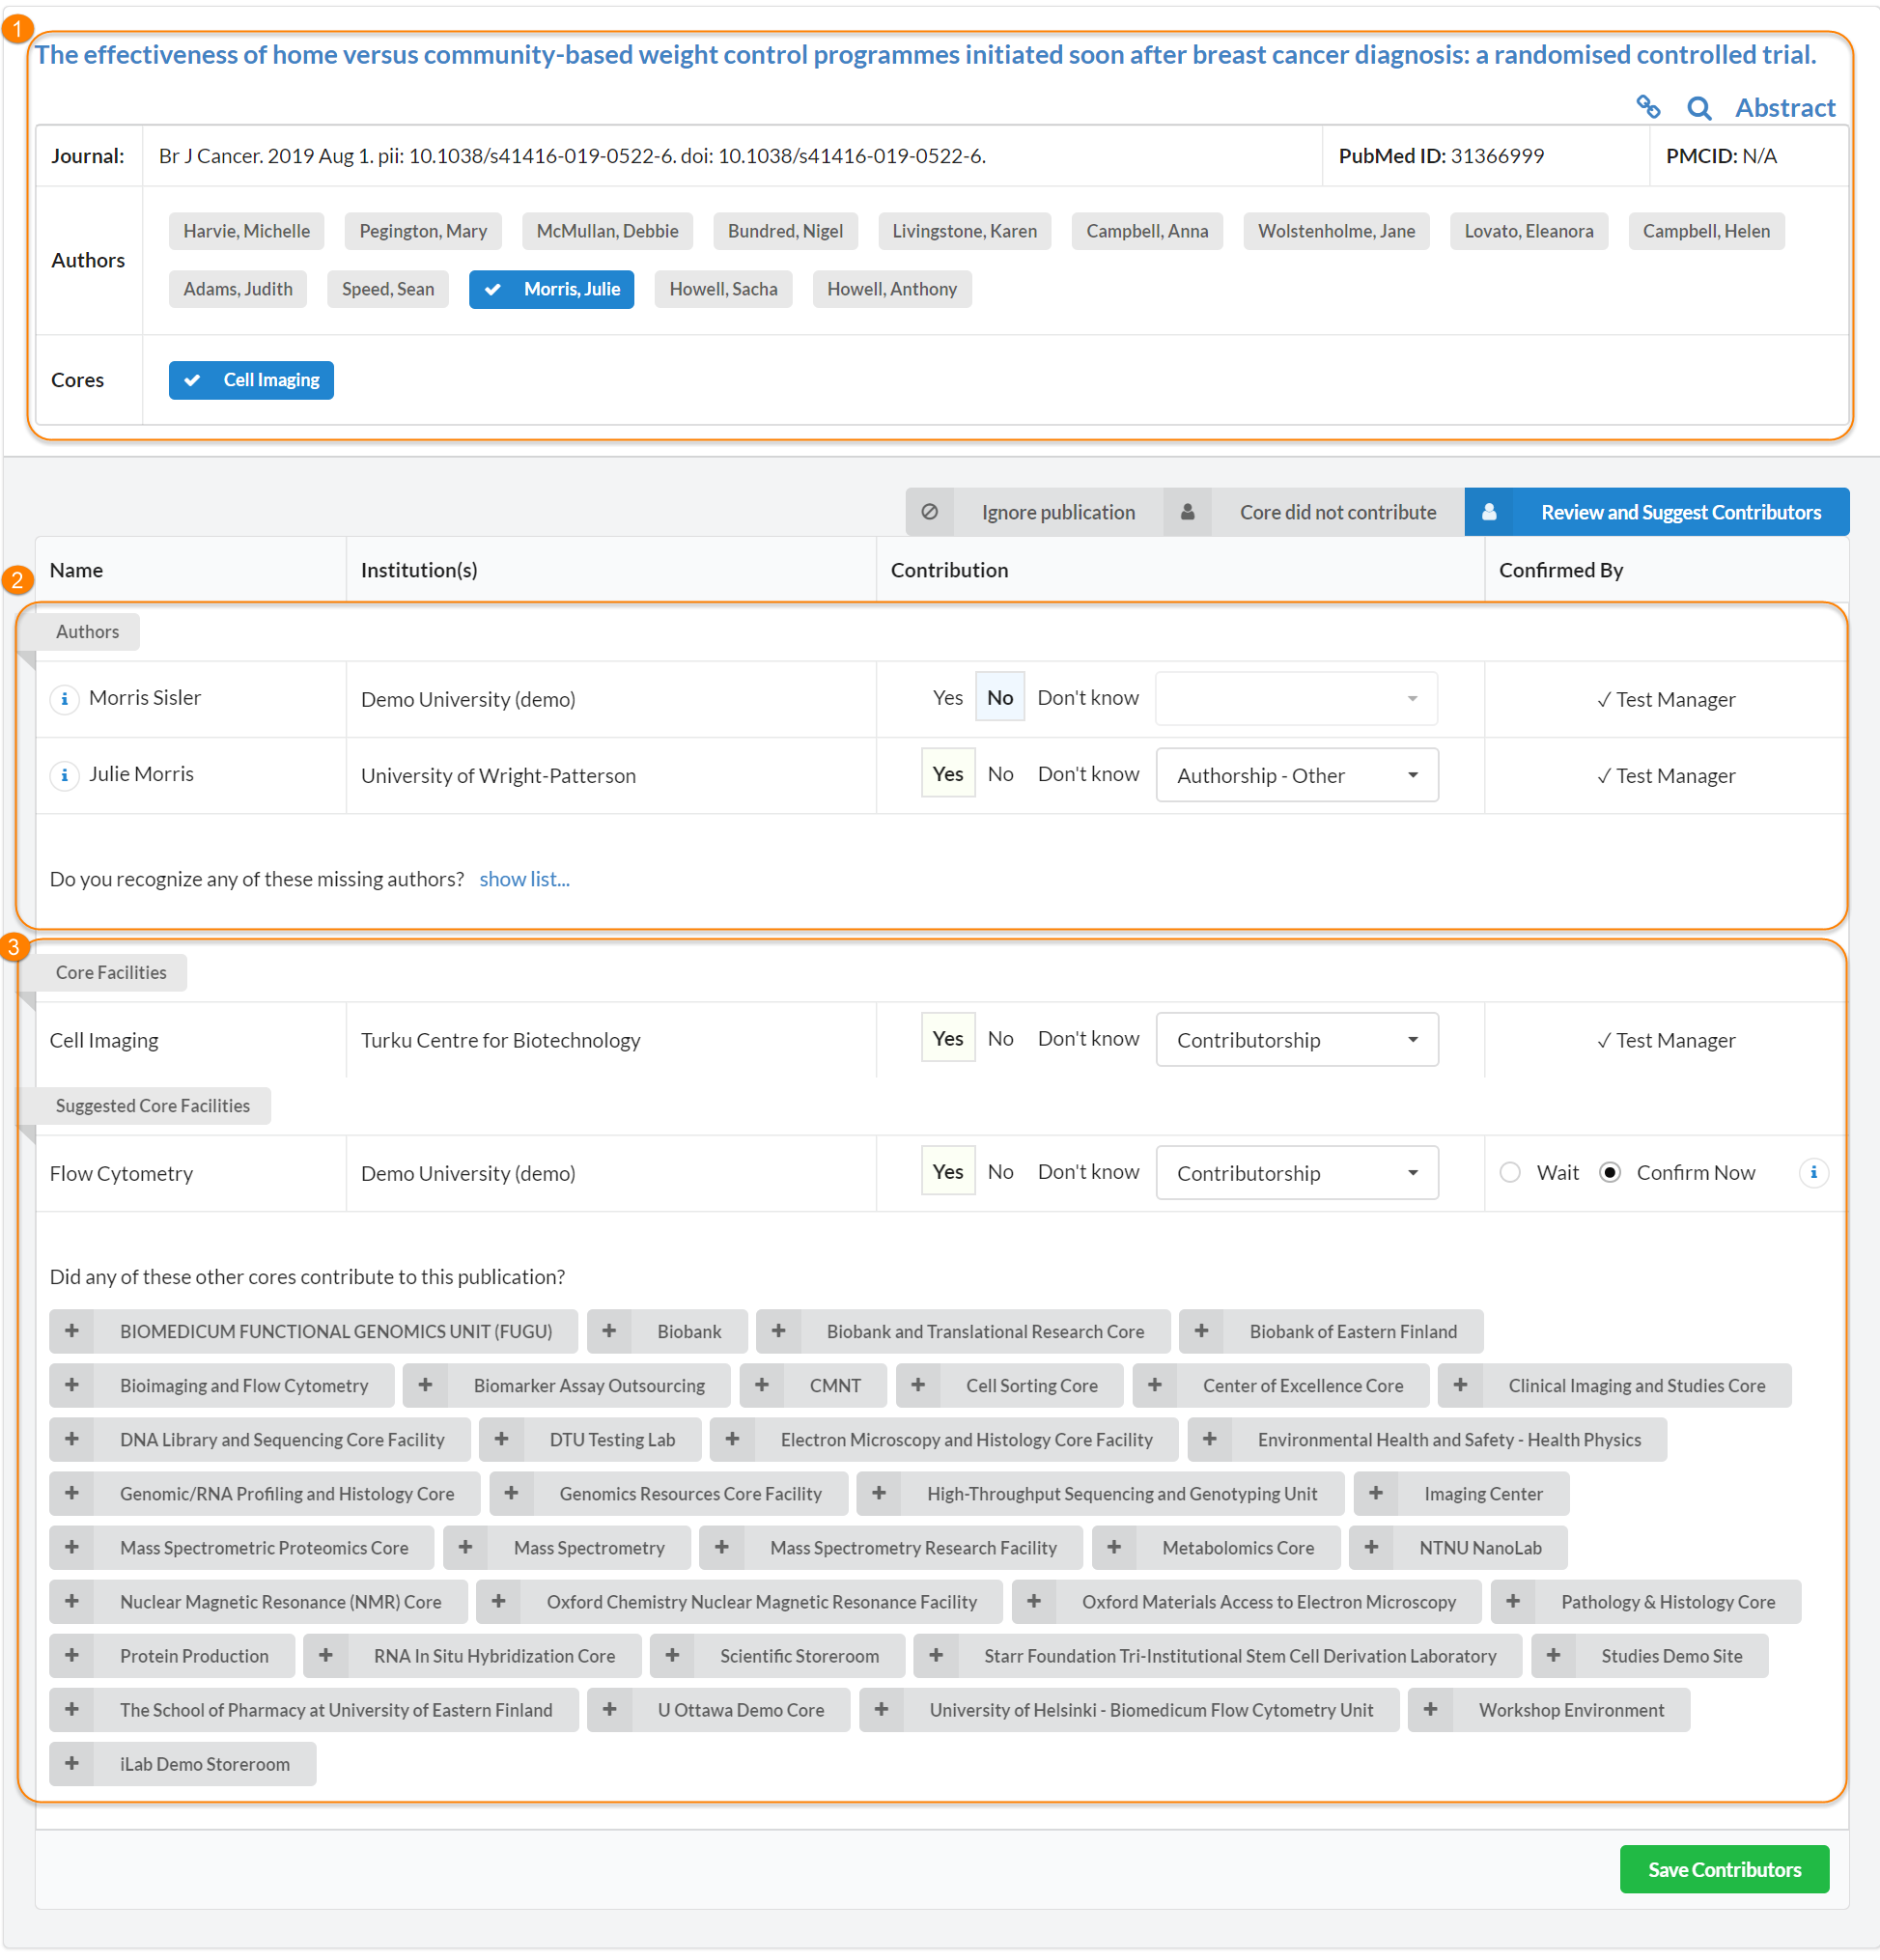
- Article Summary: The shortened version of the article information from the previous page.
- Authors: A list of the Authors that are recognized by iLab.
- Core Facilities: A list of all core facilities at the institution.
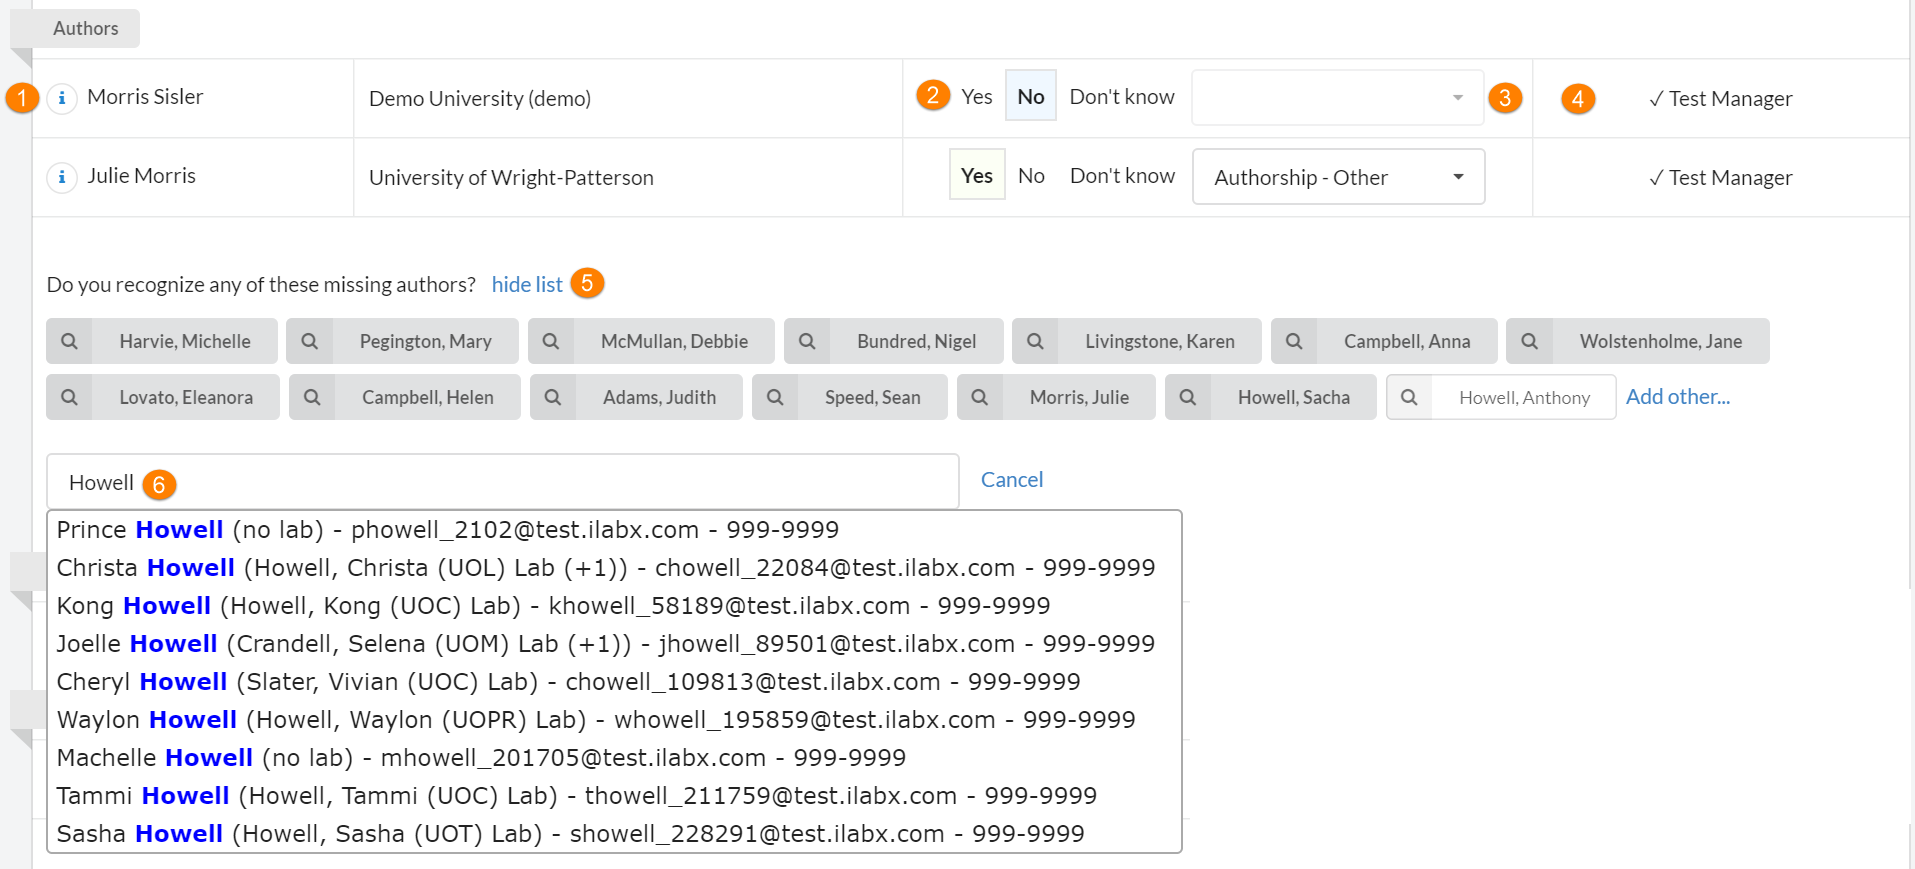
- Author Name: This is the author's name as recognized by the iLab system.
- Contribution: Select if the author contributed by using the Yes, No or Don't know buttons.
- Contribution Level: Select the level of Authorship for the selected author. For reference, authorship is defined by the ICMJE and levels of authorship may be found here.
- Confirmed By: The system will track the person responsible for confirming authorship.
- Missing Authors: Review the other authors to determine if any other should be added. If you see an author listed, click on their name and you will be able to associate them to an iLab account (see #6). To add additional authors, click the "Add other..." link. Then, begin entering a name and select from the options in the drop-down box.
- Associate the author to iLab: Select the appropriate user to associate the user to their iLab account and add them to the list above for confirmation.
Institutions will have a chance to confirm that core facilities that contributed to the research in the article are recognized.
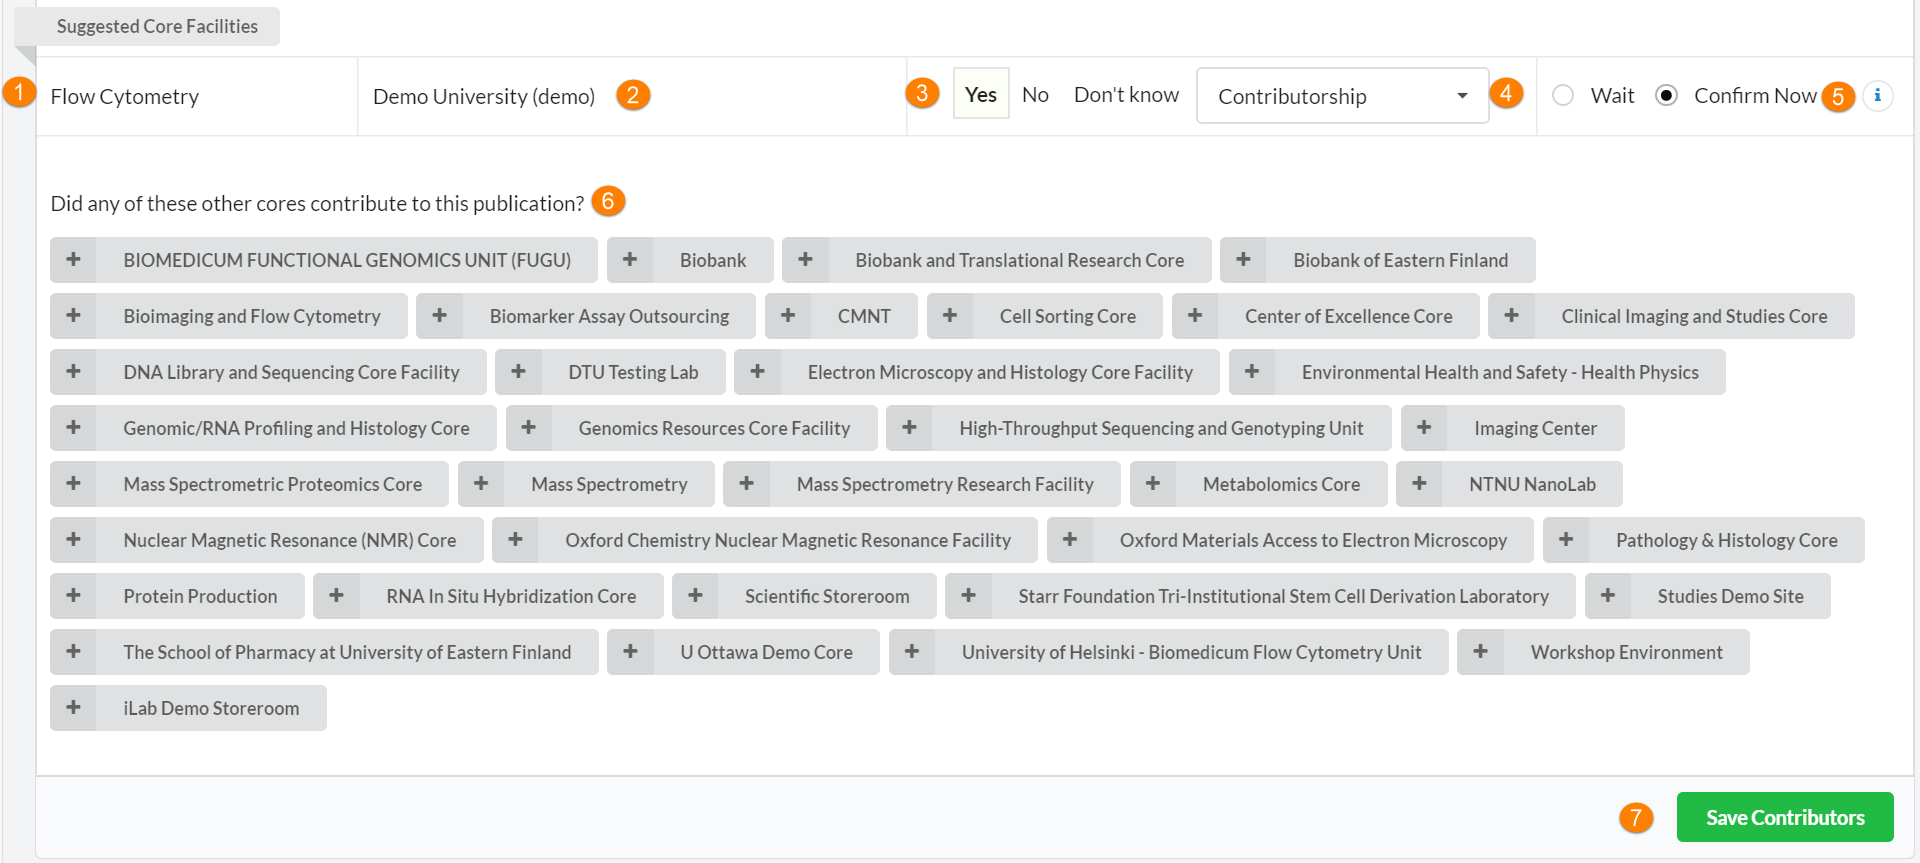
- Name of Facility: This is a recognized name of a facility within the iLab system that is linked to this article.
- Name of Institution: The name of the Institution to which the Core facility belongs.
- Contribution: Select if the author contributed by using the Yes, No or Don't know buttons.
- Contribution Level: Select the level of Contributorship for the selected facility. For reference, contributorship is defined by the ICMJE and levels of non-author contributorship may be found here. Options are Contributorship, Acknowledgement, and Other
- Confirmation Choices: Wait or Confirm Now can be selected. Wait sends a notification to the core manager to confirm any confirmation from the core. Confirm Now will mark this core as having contributed to the level selected and place the person's name that confirmed to the right.
- Additional facilities that may have contributed: This list of additional cores allows you to select an additional group that has contributed to the research in an article. To add new contributing cores, simply click on the appropriate core from the interface. Then, define the same parameters from 3 and 4 above.
- Save Contributors: Clicking this button saves both the authors and core facility sections.
After reviewing a publication and saving both authors and facilities, these contributions will be indicated by the blue notification in the overview information for that publication. Further review of the publication can be done at any point.
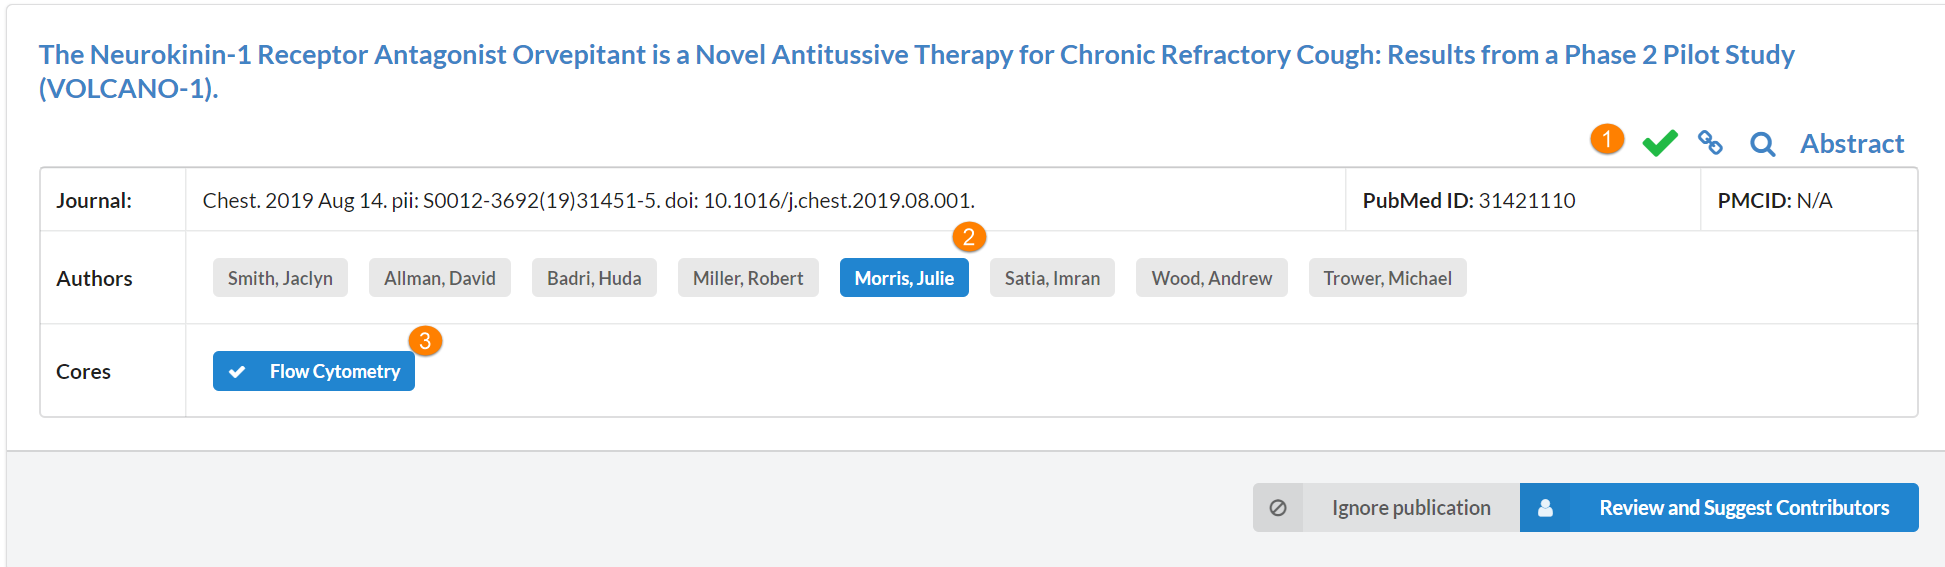
- Green check mark: Indicates that contributors have been marked in some way within the publication.
- Blue author name: Indicates this author has been confirmed or has is waiting to be confirmed.
- Blue facility name: Indicates that this facility has been confirmed.
Review Tab
The Review tab in the Publication Tracker interface will search across all queries that have been created at your institution and will also allow you to search via the specific parameters of Contribution and Confirmation, Facility and by Keyword.
To begin, click on the Review tab.
![]()
Now, select your search parameters:
- Contribution Level: Options are Contributed, Did Not Contribute, Contribution Unknown, and All.
- Confirmation: Options are Only Confirmed, Only Unconfirmed, and Show All.
- Facility: Use the drop down box to select which core facilities you would like to include in your search. You may choose only one or several core facilities to include.
- Keyword: Using the free text field, type in any keywords to search by. Use commas to separate words in a multi-word search.
- Search: Click the Search button to display the results that match your parameters.
- Results: Your search results will display below.
- Review and Suggest Contributors: If you have results that require action, you can click on the Review and Suggest Contributors button to mark contributions or confirm facility involvement.
Dashboard Tab
The Dashboard tab gives you the ability to view and download detailed information about publications.

There are three actions you may take on this information:
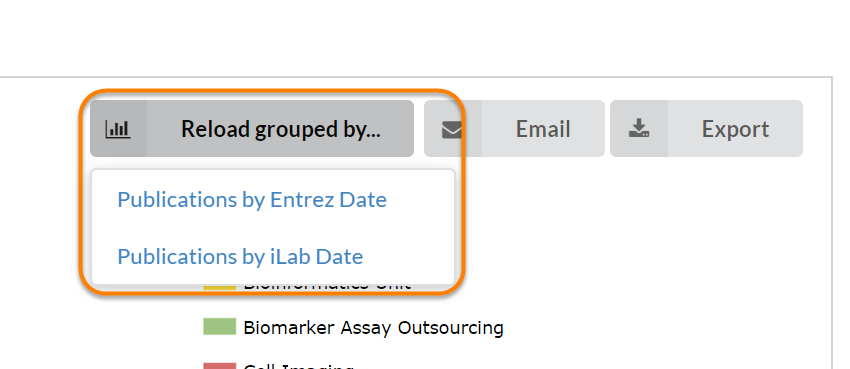
-
Reload Grouped by: When you first open the Dashboard tab, the default display is by Publication Entrez Date. You may change this by clicking Reload Grouped By... button and selecting Publication by iLab Date.
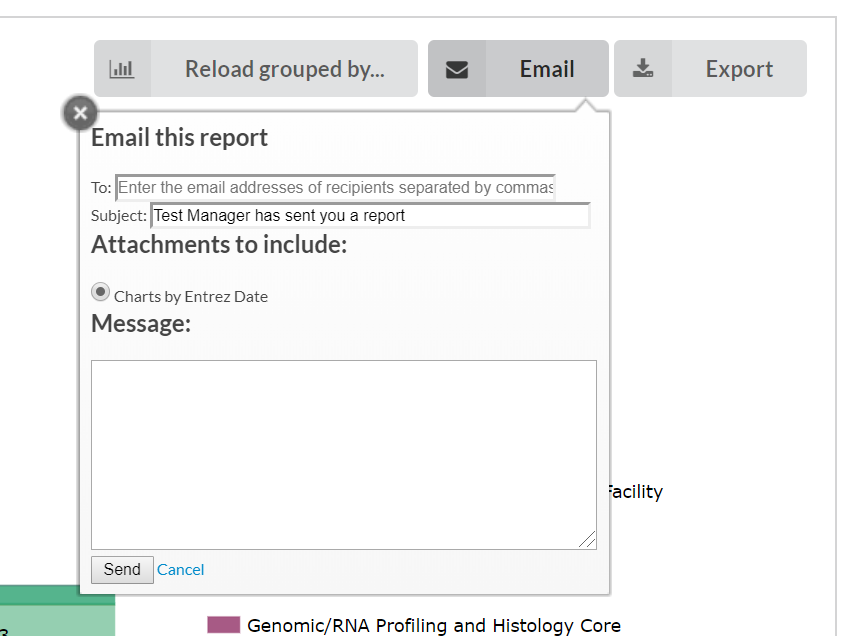
-
Email: You may email the dashboard by clicking the Email button. The Email this report box will open where you will add the email addresses of the recipients, select to include charts, and add a message. Once you have completed these, click Send.
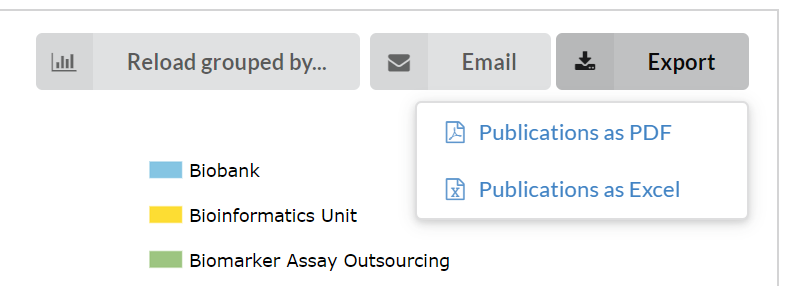
-
Export: You can export the dashboard data by clicking the Export button and selecting either Publications as PDF or Publications as Excel.