As a core administrator, the Schedule Equipment tab is used to create reservations, perform usage uploads, view and confirm usage, and edit calendar settings for core equipment. This page can also be accessed by core customers to create reservation(s) on equipment (see Schedule Equipment), though various functions and options used by administrators will not be available to customers. If scheduling has been enabled within your core, the Schedule Equipment tab will be displayed after accessing the core. The Schedule Equipment tab is accessed from your core's homepage. Because this tab can be renamed in the administrative Scheduling settings, it may be labeled differently within your core.
Layout of the Schedule Equipment tab
The Schedule Equipment interface is divided into two sections:

- A top panel of general scheduling options
- A bottom panel which includes panels for individual schedule options
General Scheduling Options
The general scheduling option panel provides several management tools:

- Description: A general description or set of instructions can be added as a header. For example, this could describe certain policies, specific instructions or other notes for the users that would help them make reservations. This panel can be edited by the Core Administrator by clicking on the pencil icon on the far-right (circled). This will display a rich-text editor. Click "Save" once you are done editing.
- Go to Kiosk: The Go to Kiosk button displays only if a core has kiosk enabled. Clicking this button will open up the kiosk interface and provide easy access to the kiosk dashboard url. It can be used by the core to manage kiosk setting and to make or start reservations from the kiosk dashboard. This button is also visible to users. For more information on the kiosk, refer to Managing Kiosk Settings .
- Timeline View: The timeline view button will show if the timeline setting has been turned on in the Scheduling Settings interface. This button allows for users and core administrators to view all instruments from a birds eye view.
- Confirm Usage: The confirm usage interface allows core administrators to review and modify usage across reservations from all customers within one viewpoint. For more information, refer to Confirm Usage.
- Message Customers: This interface is used to send e-mails to selected users who have reservations scheduled during a specific date range. For more information, refer to Message Customers (Reservations).
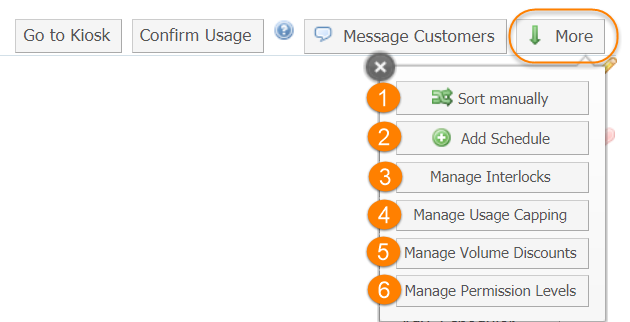
- More: Various advanced options are available under the more button, as discussed below:
-
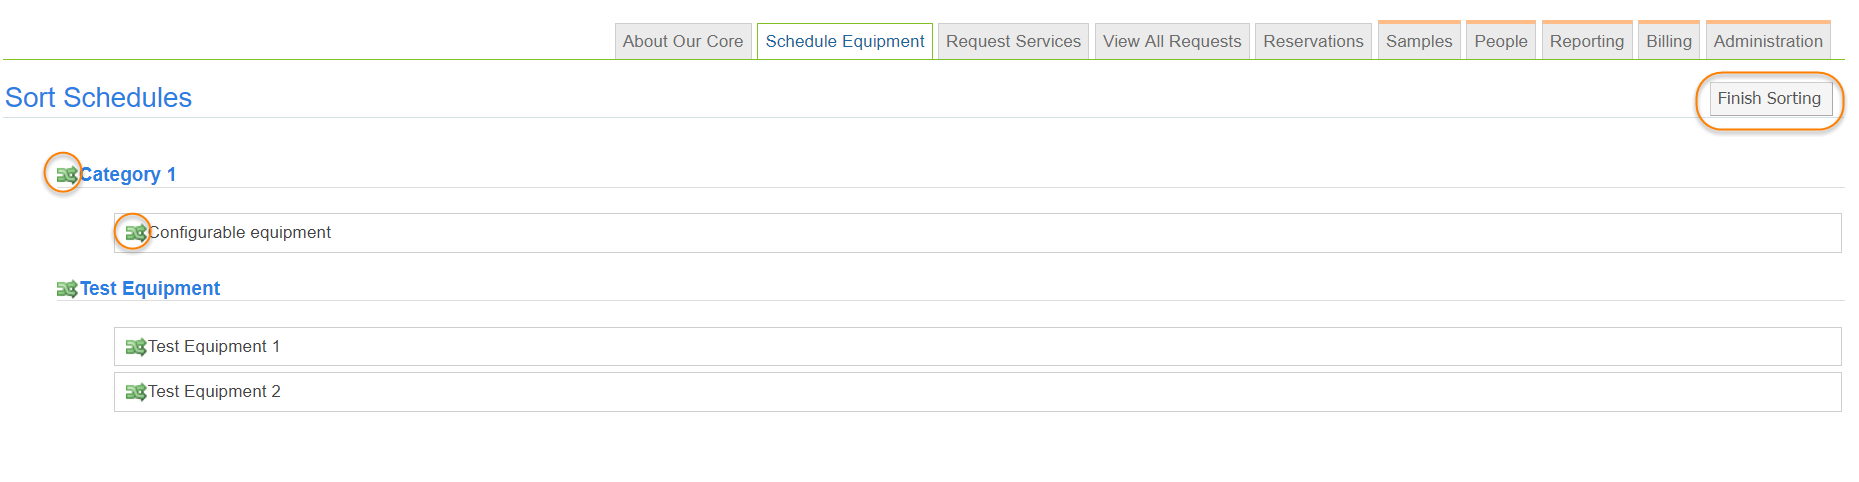
Sort manually: this option let's you organize the order of the categories, and the order of the schedules within each category. Drag either categories or individual schedules using the green crossed arrows to change their order. Note that you cannot move a schedule to another category here; this requires changing the schedule's category by Editing Equipment Settings . Click "Finish sorting" once you are done.
- Add schedule: Provides a blank template to populate for a new calendar being added. Instructions for adding a new schedule can be found at Schedule Settings
- Manage Interlocks: Provides access to interlock settings, as discussed further in Managing Kiosk Settings.
- Manage Usage Capping: Allows a core to impose a maximum amount of time on a reservation. For more information see Usage Capping Overview .
- Manage Volume Discounts: Allows a core to define discounts for larger amounts of usage. For more information see Managing Volume Discounts.
- Manage Permission Levels: Allows the core to add and sort permission groups that users can be assigned to.
Individual Schedule Options
Each piece of equipment has a number of actions and settings:

- View Schedule: Opens the calendar interface to view current reservations, edit existing reservations, or create new reservations. For more information, see Managing Reservations.
- Review usage: Provides access to the older review/confirm usage interface that allows a Core Administrator to review and confirm usage on a schedule-by-schedule basis. For more information, see Review Usage.
- Upload usage: Allows a core to upload usage data into a calendar using a specific file format, when actual usage is tracked outside of the iLab system. Refer to Upload Usage for additional information on the Upload Usage tool.
-
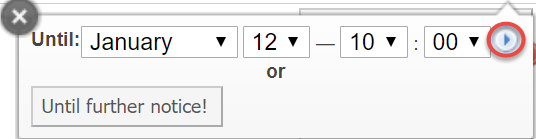
Take Offline: Takes equipment offline so it is not available for reservations during the specified time range. Click the "Take Offline" button. Select an end date and time, then click the blue arrow to set a specific date range the instrument will remain offline. You can also select "Until further notice" to take the equipment offline until manually put online again.
 For equipment that has been taken offline, the "Take Offline" button will change to a "Put Online" button that will immediatly reactivate the schedule when selected.
- Adv. Attributes: This option will only display if Configurable Reservations are enabled by an iLab Associate. A configurable reservation provides advanced attributes that allow the core to set up specific parameters for a calendar. For more information, refer to Managing Configurable Reservations.
- Adv. Scheduler: This option will only display if Configurable Reservations are enabled by an iLab Associate. For more information, refer to Managing Configurable Reservations.
- Edit schedule: Click on the "pencil" icon to edit the settings for this schedule. For more information, see Editing Schedule Settings.
- Favorite: Click on the "heart" icon to mark this equipment as a favorite for easy reference. For more information, see Managing Favorites.