Study project templates can be created by the core to standardize study data. When a customer logs into your core to initiate a study, they may only choose from pre-defined core templates.
Creating new study project templates is done through the Studies tab.
Getting Started
From the Studies tab, click on the gear icon.
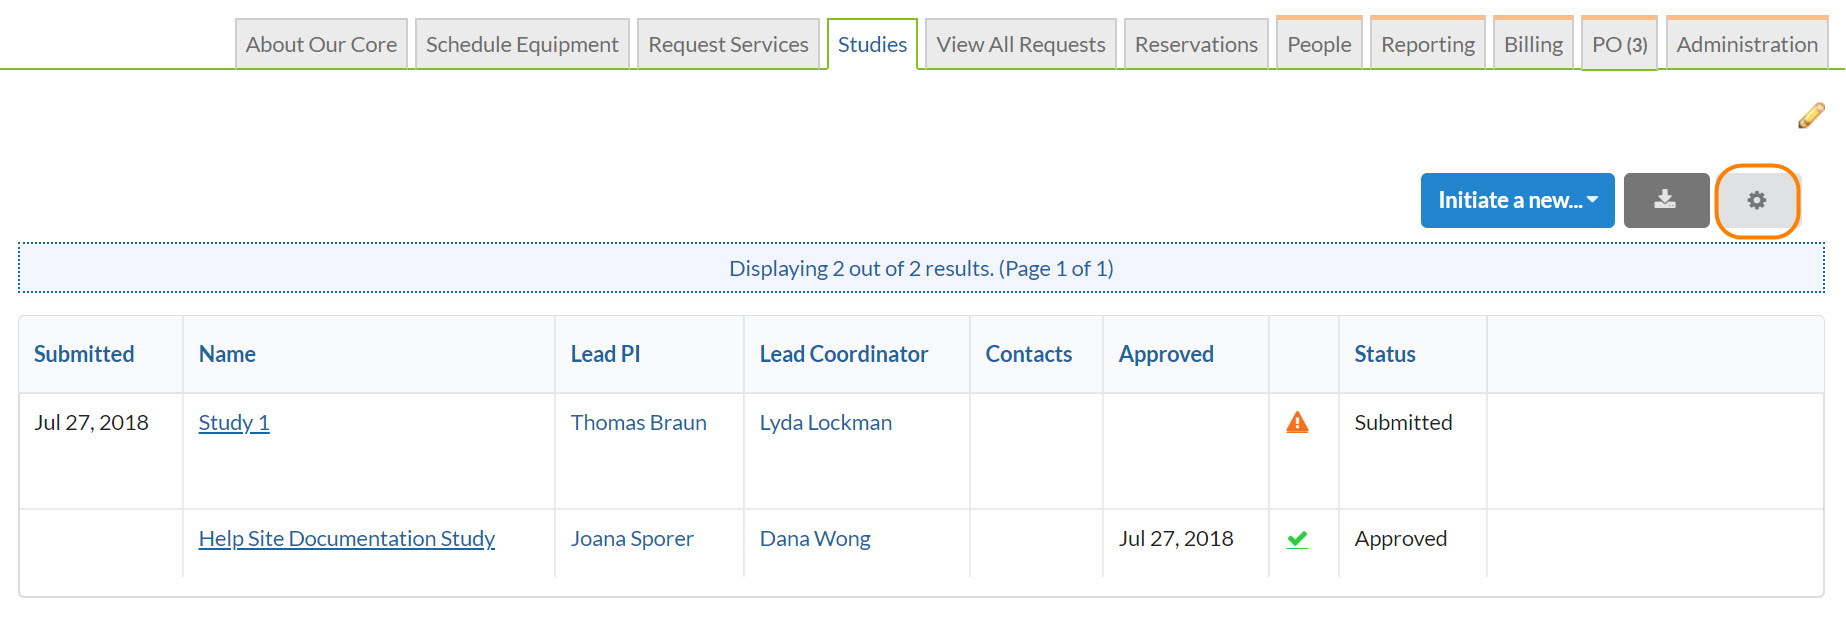
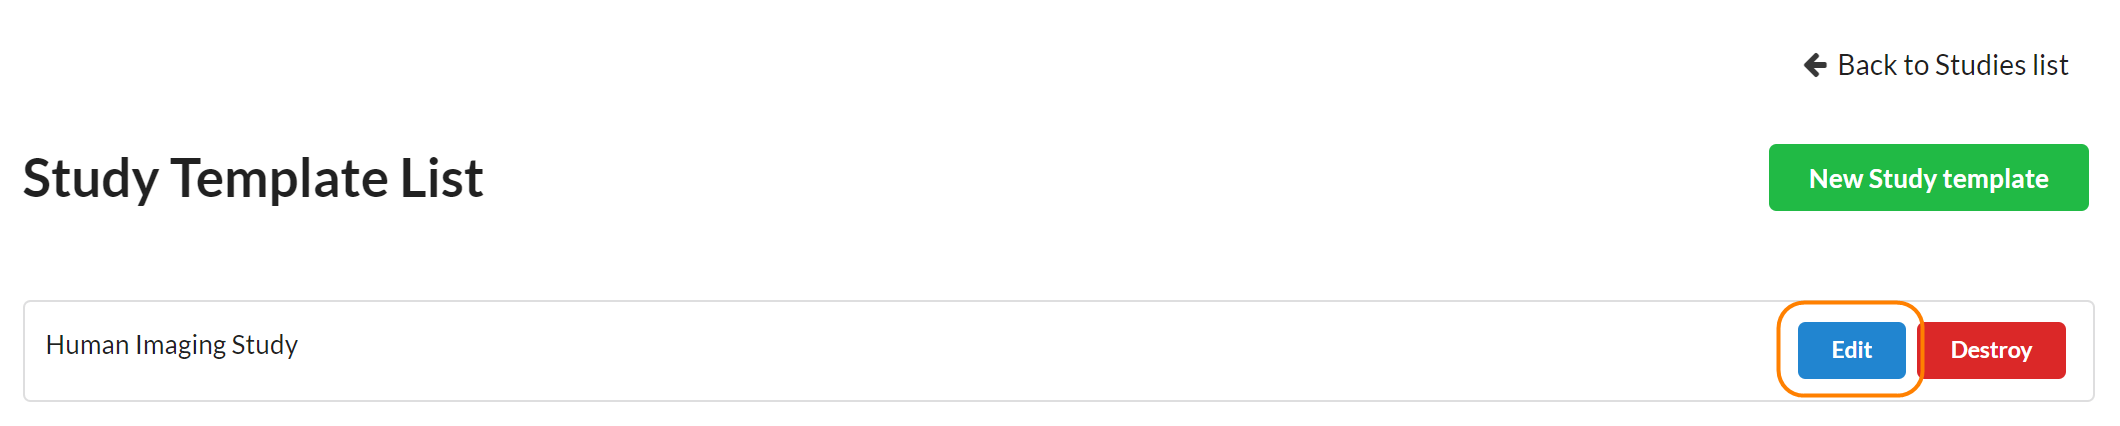
The Study Template List will display your current templates. Click on the green "New Study Template" button.

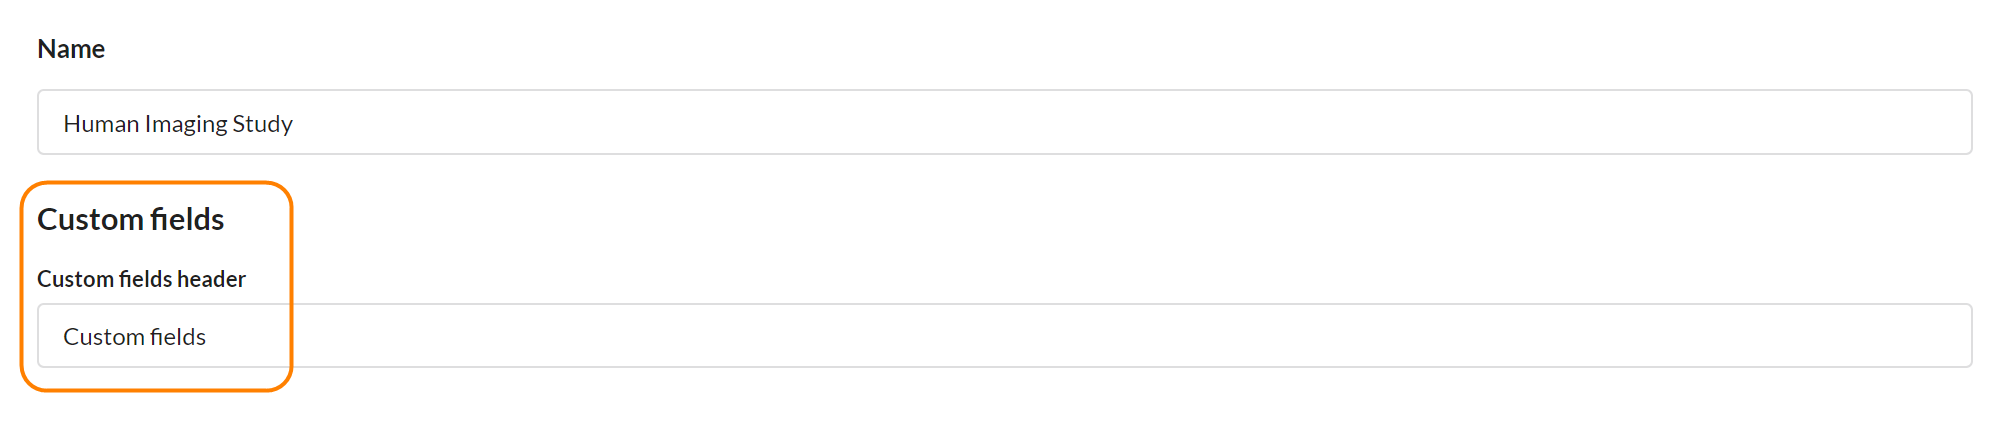
There are two sections that can be customized on a study: fields and forms.
Fields
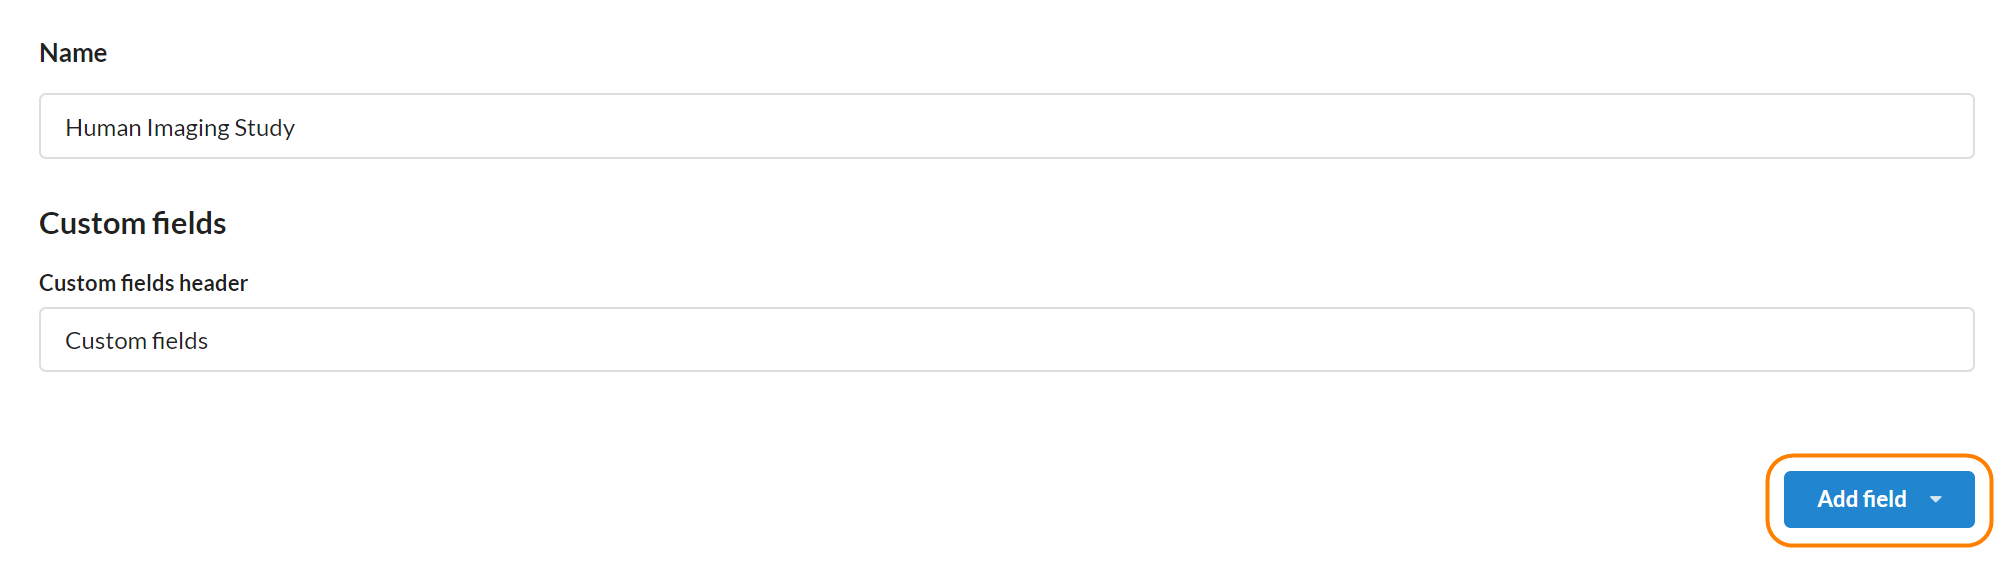
Fields are displayed prominently at the top of any new study request and provide a simple set of options that can be used to capture high-level information about the study from your customer. You may create the fields you would like to include in your study by using the the custom fields section. First, decide what you would like to name the Fields section of your template. In this case, we have named the section "Custom Fields".
Next, build your fields. Begin by clicking on the blue "Add field" button on the bottom right of the Fields section.
A drop-down box will display the types of fields from which you may select.

Your options are listed below. For each option, you will first see how the field looks while being built, and then the way the field displays within the form.
- String: A string is a free-text field without an editor.


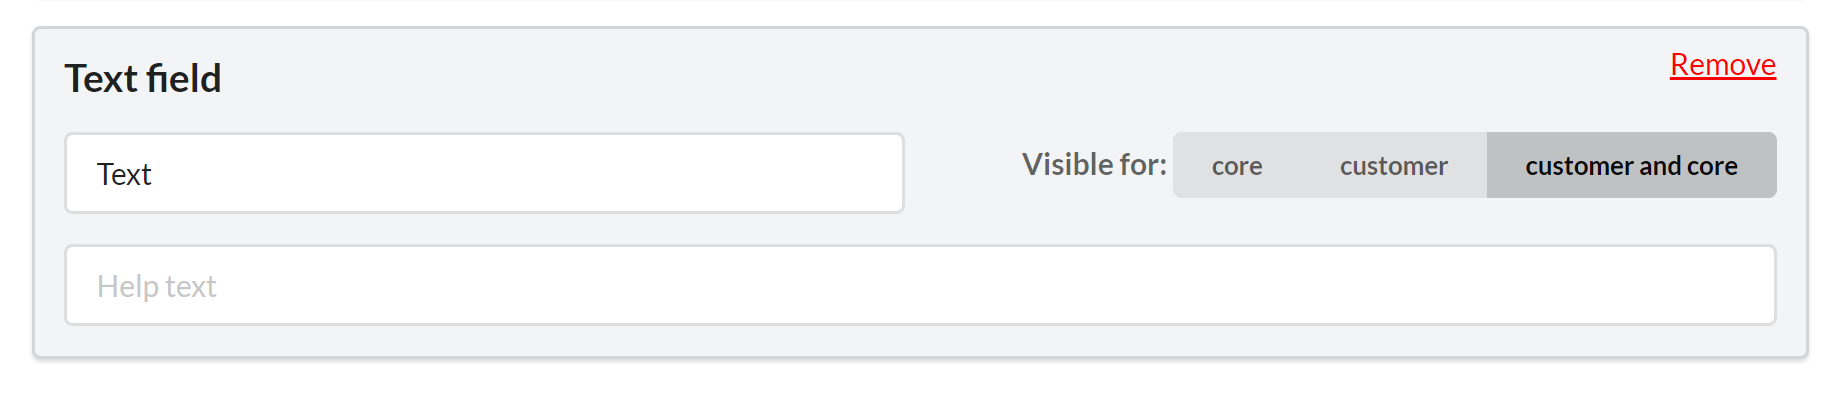
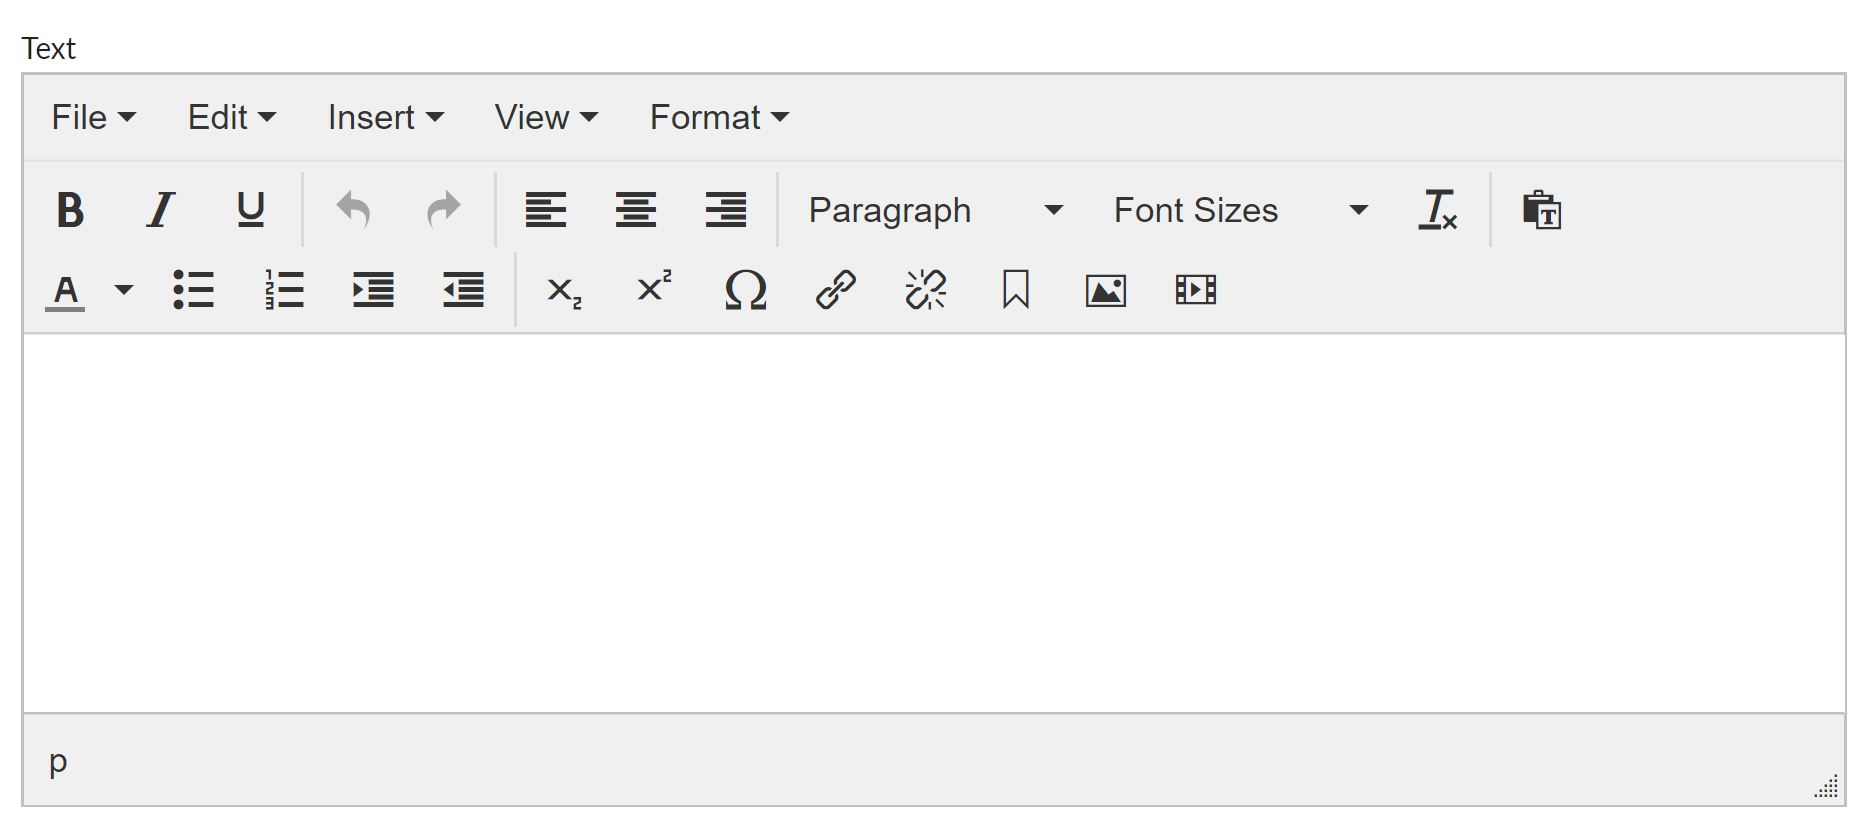
- Text: A text field is a free-text field with an editor.
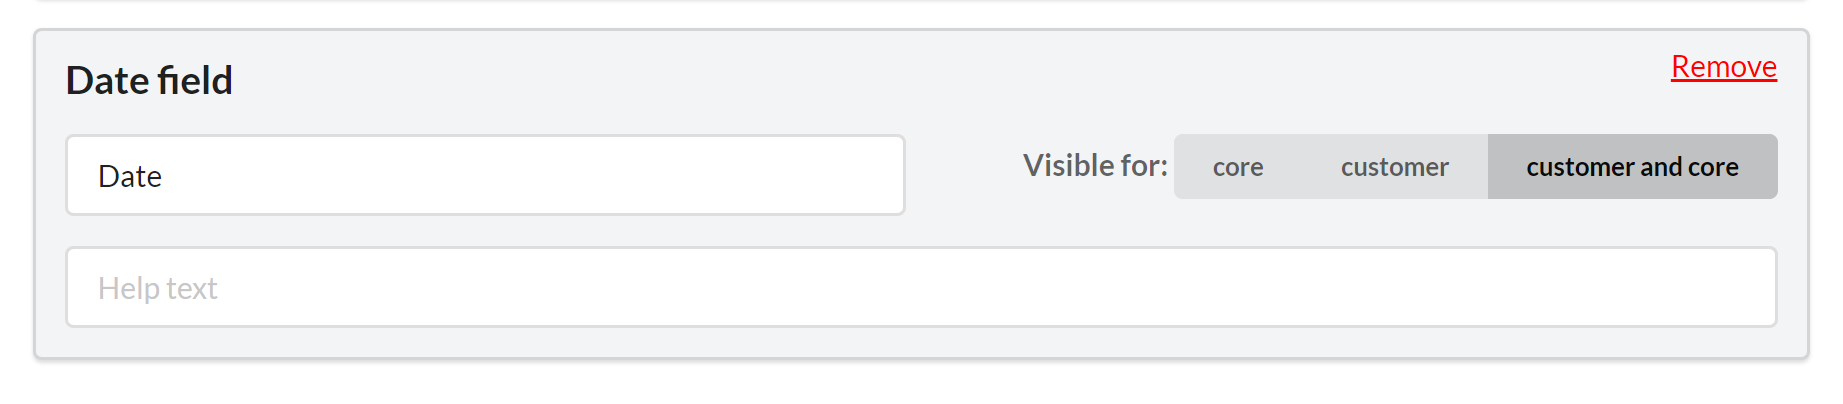
- Date: A date field will display a calendar when you click in the box. Customers then click on the appropriate date.

- Toggle: A toggle field will display with a check box.


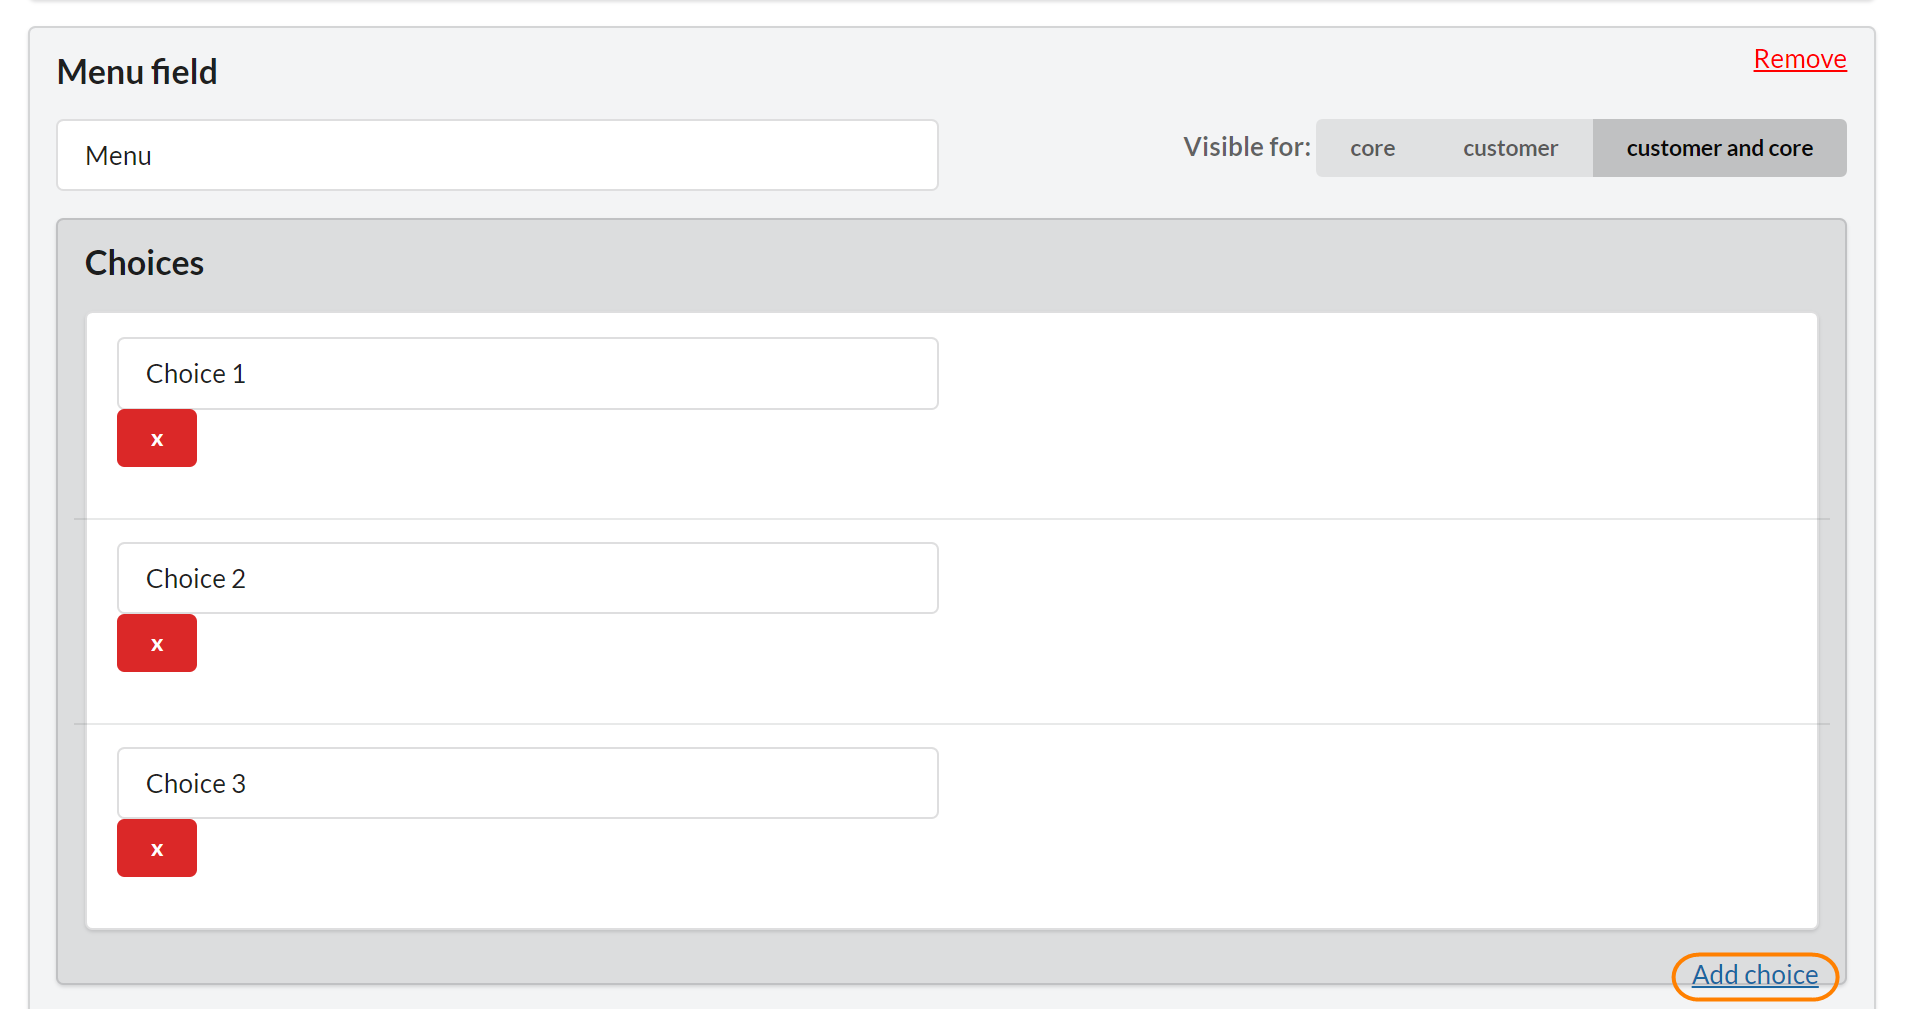
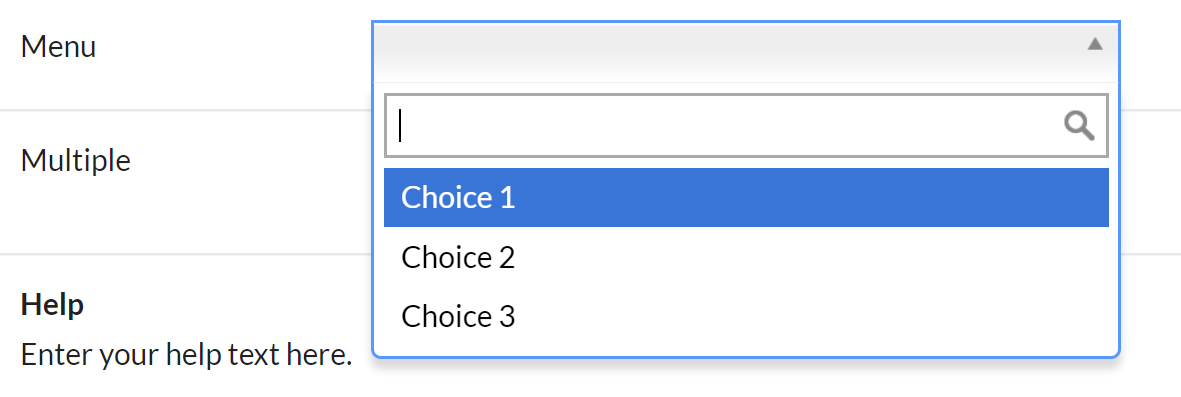
- Menu: The menu field displays a drop-down box where you may select a single option. If you would like to add more than three choices, click on the "Add choice" link on the bottom right.
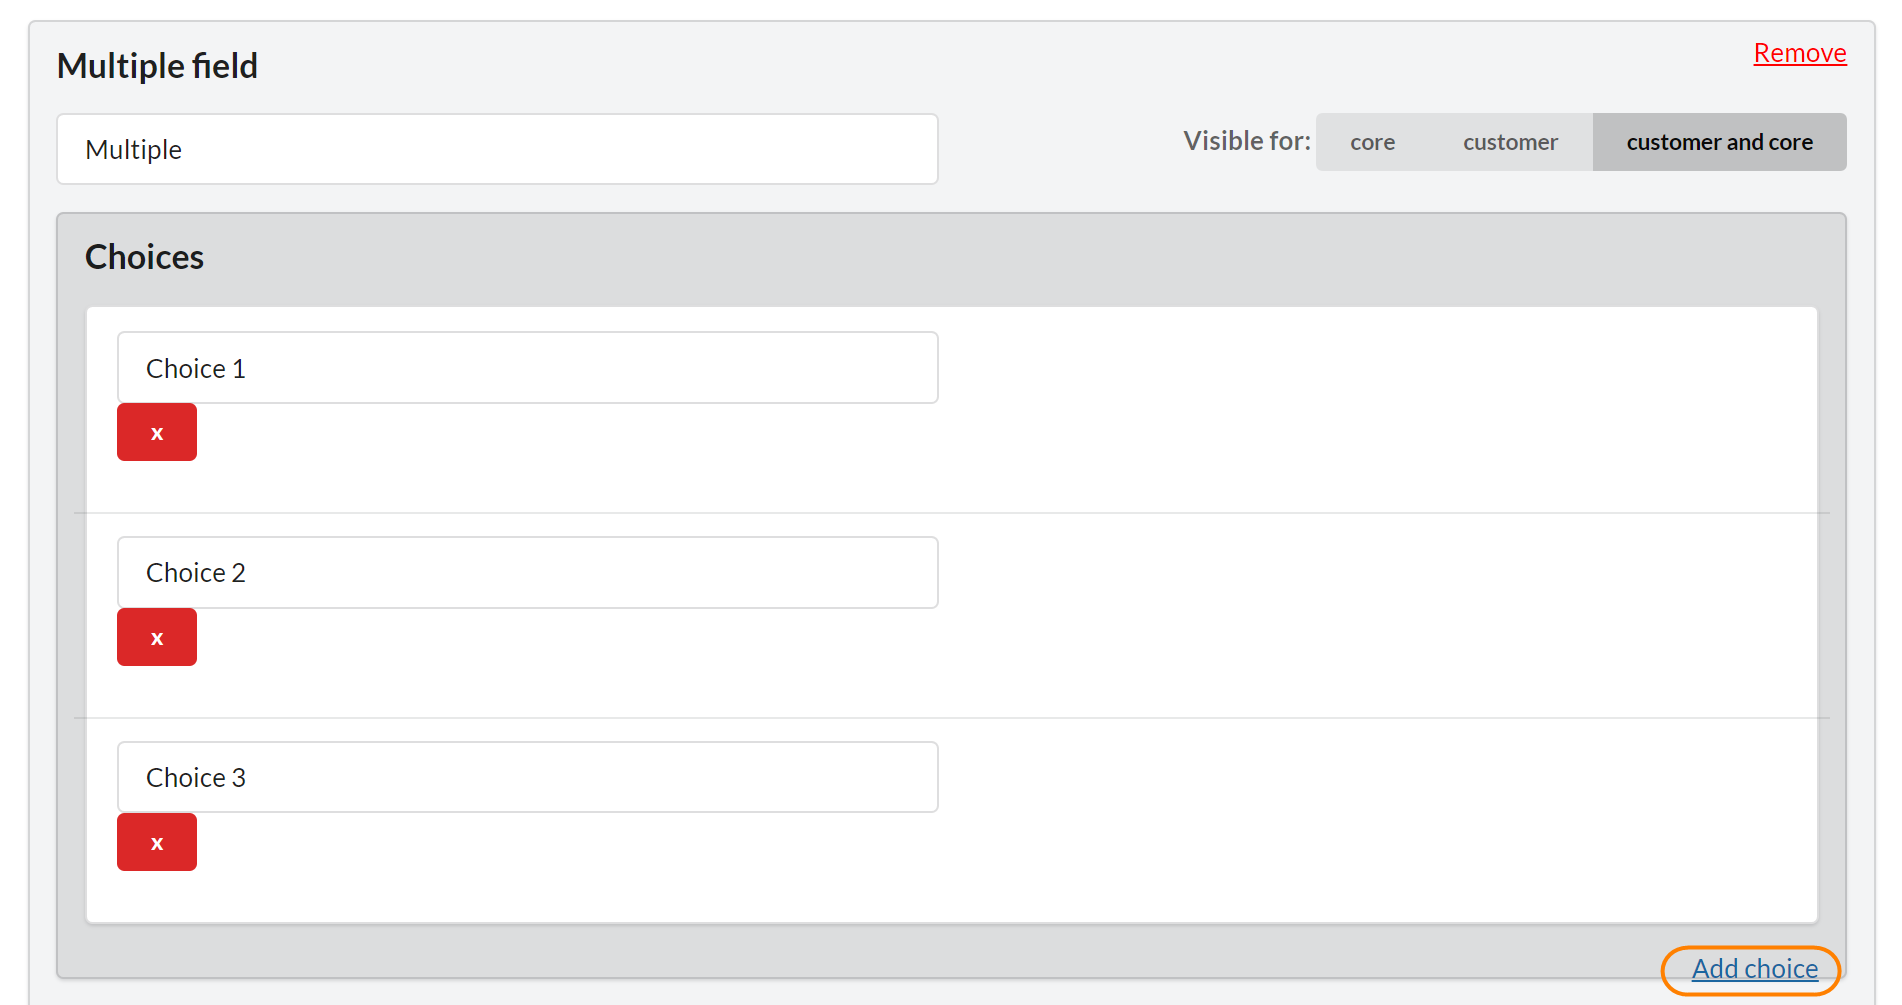
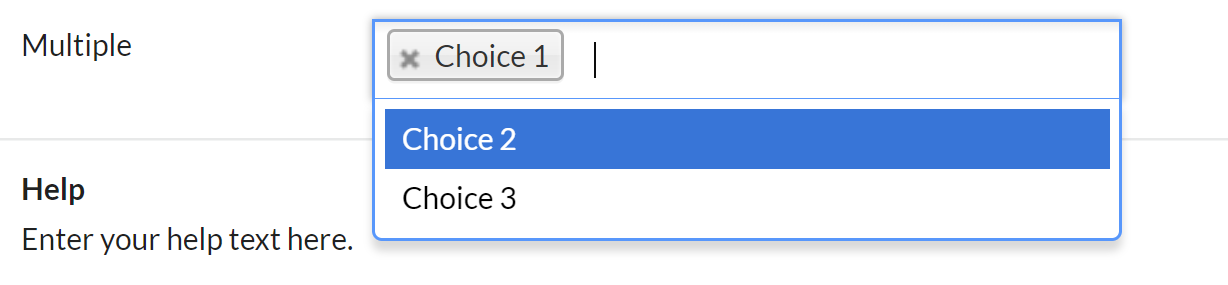
- Multiple field: The multiple field displays multiple options when you click in the box. You may select multiple responses. If you would like to add more than three choices, click on the "Add choice" link on the bottom right.
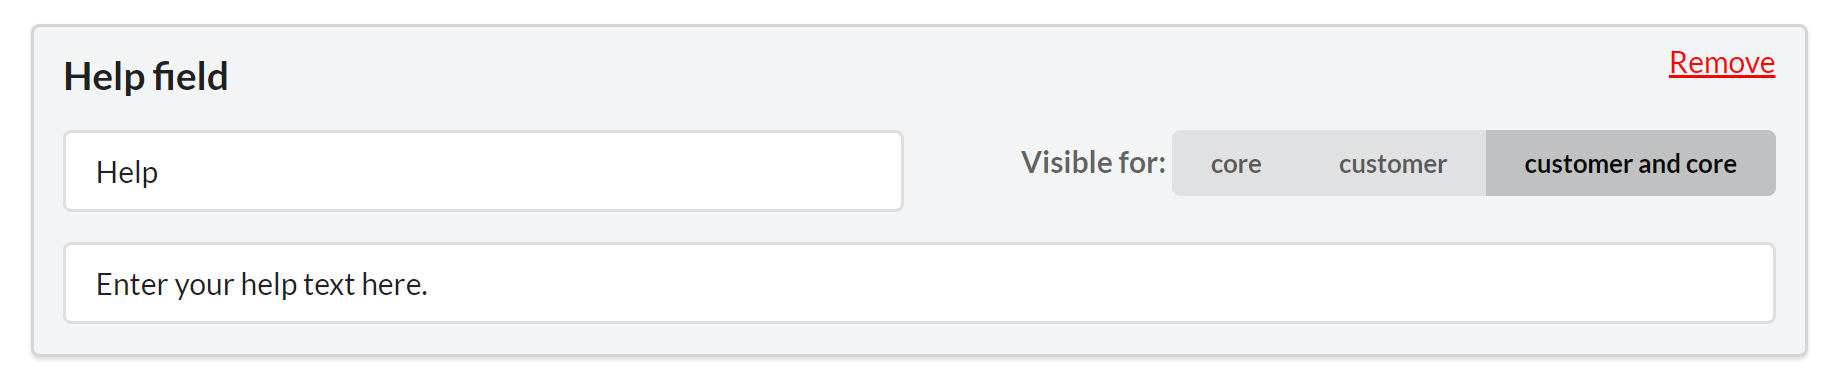
- Help: You may enter text here to assist your customers in completing the fields.

For each field, you must also indicate who should see this field:
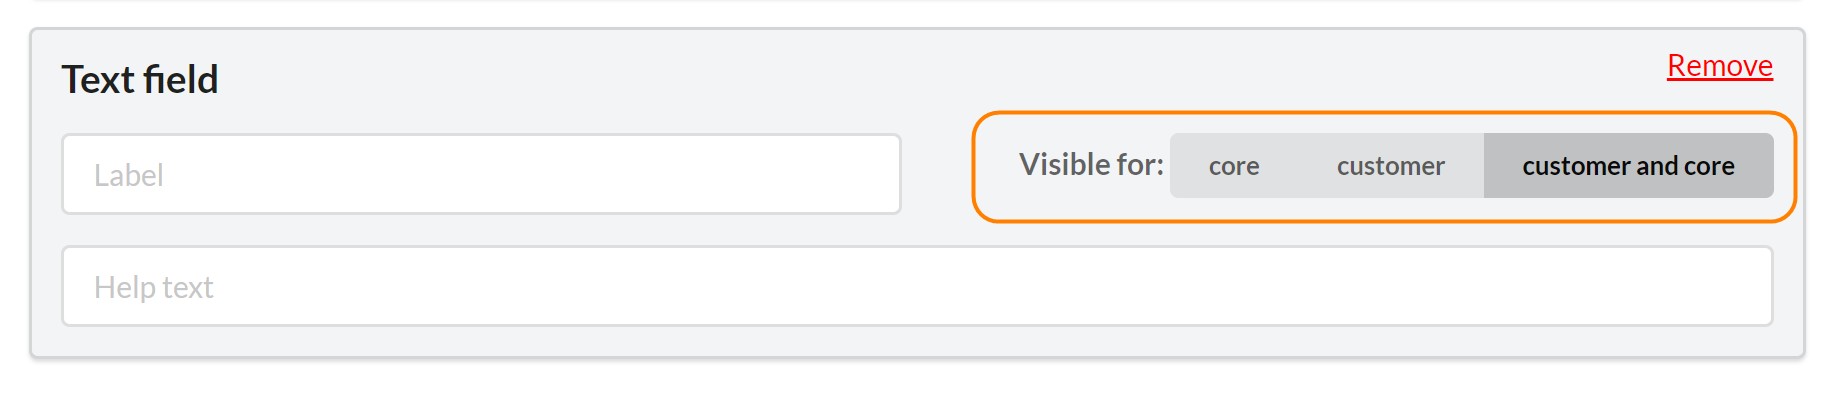
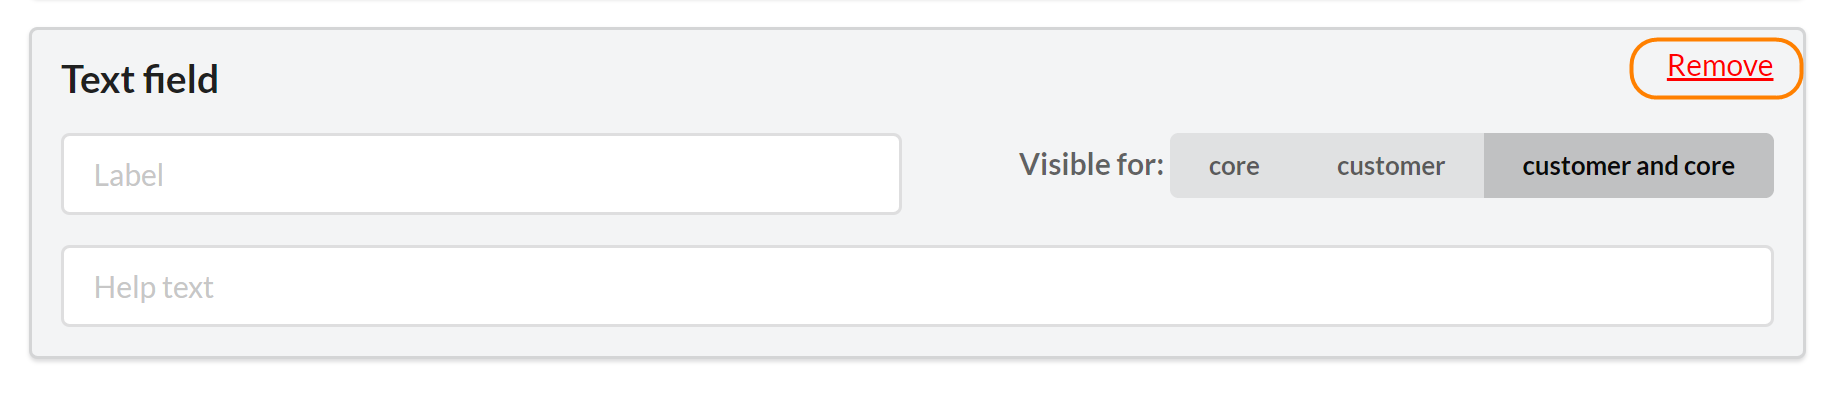
If you would like to delete a field, click on the "Remove" button at the top right of each field.
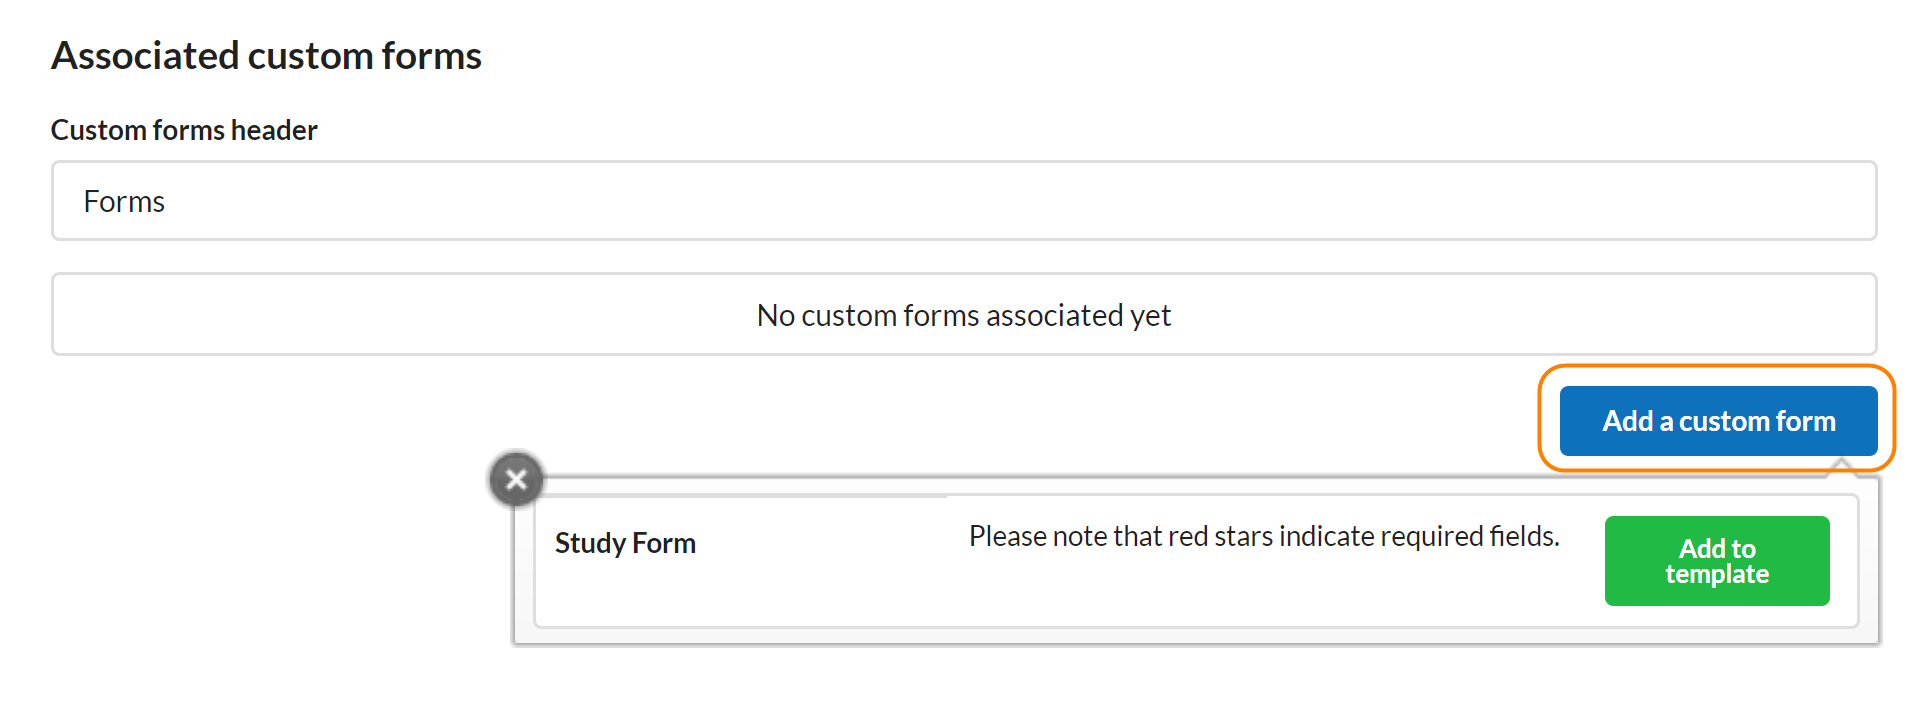
Forms
You may decide to leverage some of the core's custom forms for your study. Forms also offer the ability to collect information that is not captured on the project study template.
To add a form to your template, click the "Add a custom form" button. A list of the core's available custom forms will display. Select the appropriate form.
The form is now attached to the project font and will display for the users you designate.
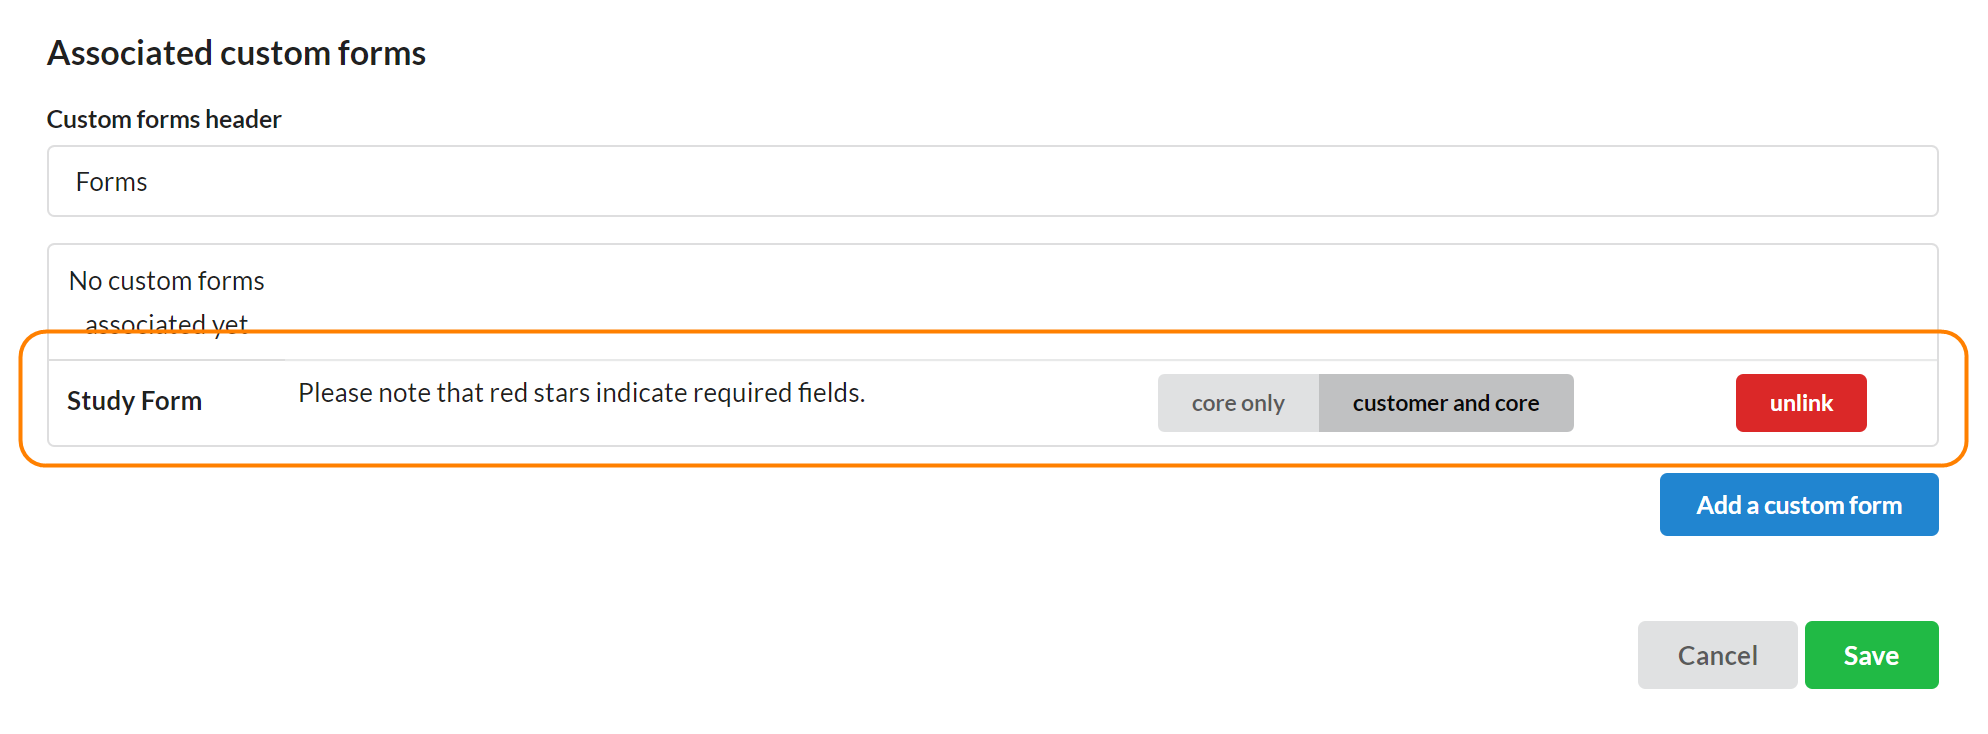
To remove the form, click the red "unlink" button.
Click "Save" when you have completed your form.
Advanced Study Template Settings
Once you have saved your new Study Template, you'll have additional editing options. To access these, click the 'edit' button to the right of the appropriate study in the Study Template edit list.
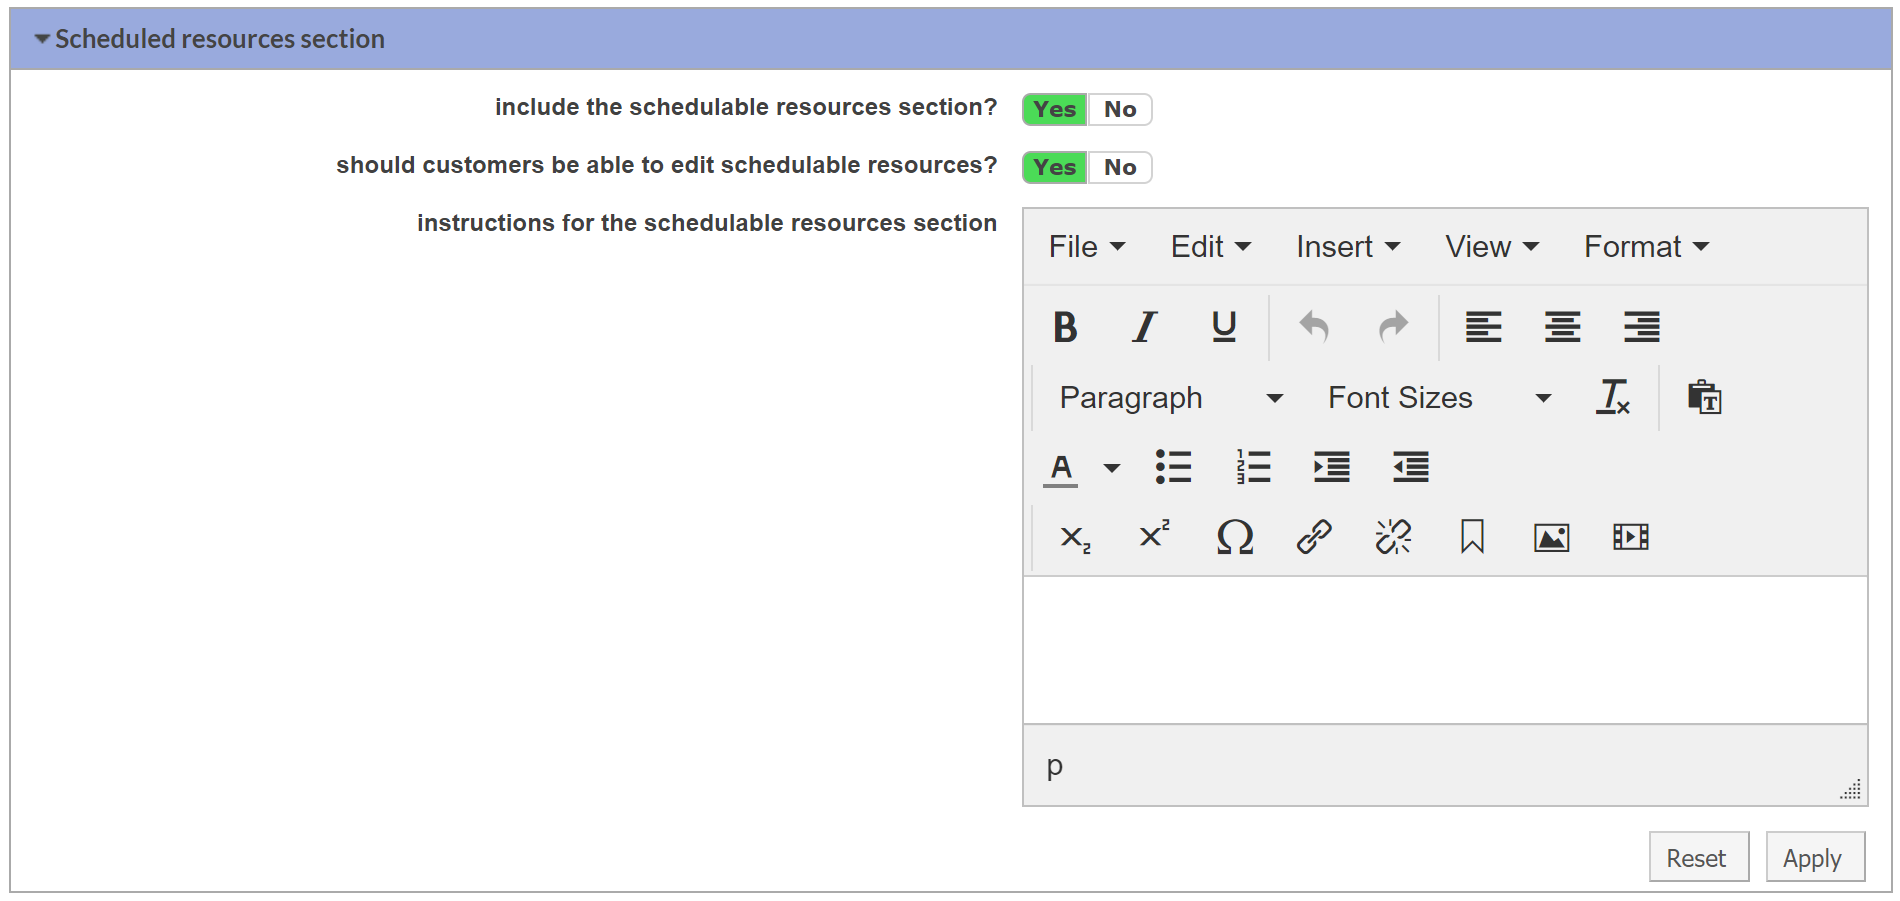
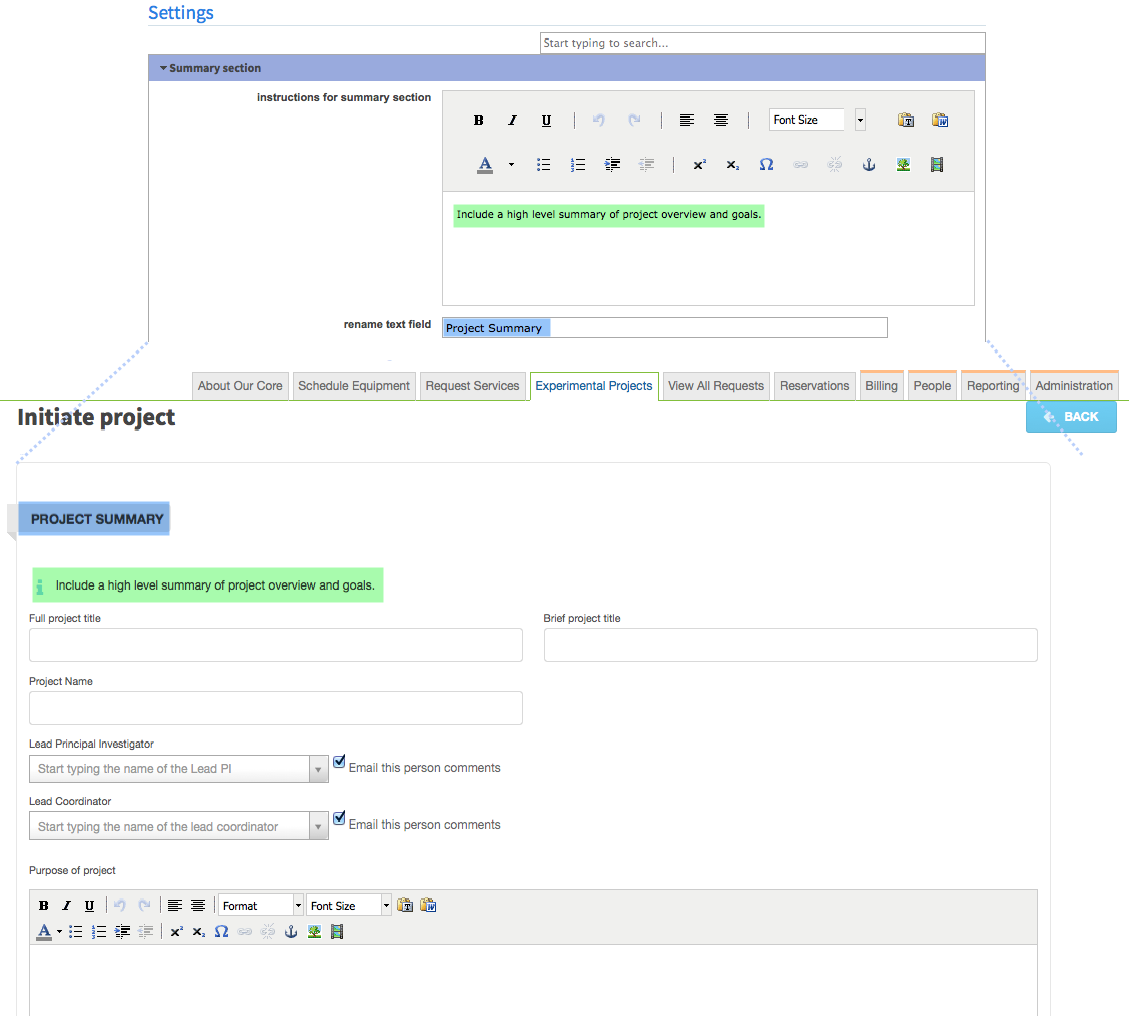
At the bottom of each study template, there are a series of advanced settings that can be used to customize your customers' experience when interacting with studies. The settings are organized into sections that correspond to the panels that are available on a study. Note that these settings cannot be accessed when you are first creating a study template. You must save the study at least once, and then they can be accessed at the bottom. The settings allow you to customize panels in in several ways (depending on the panel):
- The panel label
- A help section at the top of the panel
- Depending on the panel, panel visibility to the customer
- Additional custom settings per panel
We recommend reviewing these settings carefully with your iLab Implementation Associate or Project Manager as they will be able to help you choose which panels and features will be most helpful.
In the screenshot below, for example, you can see that the instructions for the summary panel will be displayed to the customer on study initiation.
Some sections may have settings that allow you to determine whether you would like to include a particular panel on a particular study template, and whether your customers should see that panel.