To reserve time on a calendar, access the Schedule Equipment tab through the core's direct link or your homepage, then click on the View Schedule button to the right of the calendar name to open the calendar interface. As a core administrator, you will be able to view the calendar for each resource and make edits to existing reservations as necessary. For more information, please refer to the following links on Making a Reservation or how to access the Schedule Equipment tab from your My Core Homepage.
View a Reservation
To access the calendar for a resource, click on the "View Schedule" button to the right of the calendar name, as displayed below.

This will open the calendar interface:
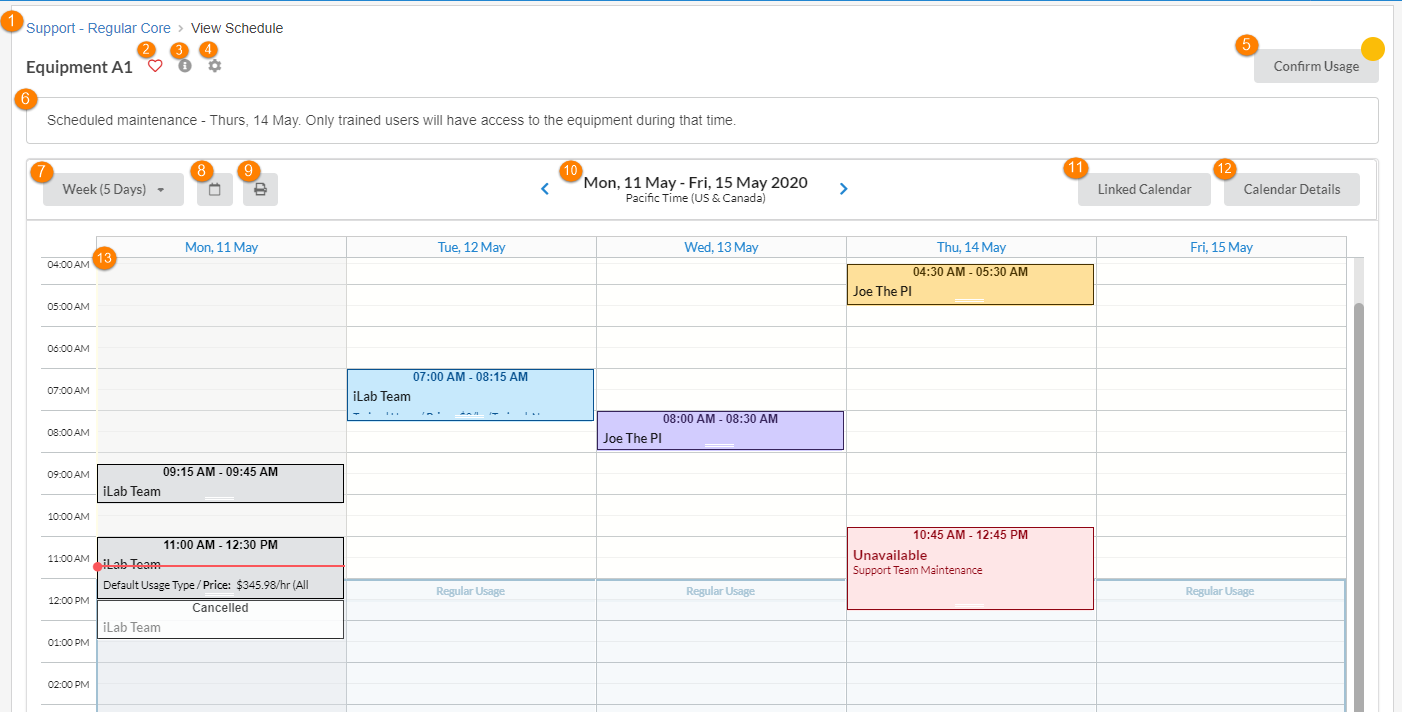
Each element is discussed below:
- Core Name: You can return to the main Schedule Equipment tab for the core by clicking the core's hyperlinked name.
- Add to Favorites: Click the heart icon to add this calendar to your favorite list. Favorites can be viewed in the My Reservations tab on the left hand menu. For more information, see Managing Favorites.
- Resource Description: Click to view a description of the equipment.
- Edit Equipment Settings: Click the gear icon to navigate to the Schedule Settings.
- Confirm Usage: The Confirm Usage button will direct you to the confirm usage page pre-filtered for the schedule you are currently viewing. The yellow circle on the Confirm Usage button indicates there are unconfirmed events.
- Calendar Notes: You may add a note to this header section in the schedule settings Calendar Notes, to display special instructions or notes you want visible to the user.
- Time Frame: Select the time frame or view in which you would like the schedule to be shown in (Day, Week, Month, or Multi View). Multi View shows a single-day view that lists all the separate instances of a resource (e.g. if a core has multiple physical instance of the same equipment, they may show them all on a single schedule and allow the user to pick a specific instance when they make a reservation)
- Calendar: Click the calendar to navigate to a specific date.
- Export to PDF: Click the printer icon to export the schedule to a PDF.
- Forward/Backward: move forward (">") or backward ("<") in time, in steps equal to the chosen time frame on the calendar.
- Linked Calendar: Click the button to show other relevant schedules.
-
Calendar Details: The Calendar Details button opens a popup with additional information on availabilities, pricing and event color codes.

- Green Events: Your future reservations.
- Purple Events: Your past reservations.
- Red Events: If the equipment is unavailable for a selected amount of time.
- Orange Events: In some cases, cores require core approval for reservations. If you have reserved time on the calendar that requires core approval, that event will be in orange. When the reservation has been approved you may receive an email and you will see the event turn to purple.
- Grey: Reservations made by others.
- White: Reservations that have been canceled or are no shows.
- Schedule: Shows all reservations on the schedule for the currently selected resource.
If your schedule shows an additional set of filters at the very top of the calendar, refer to the section on configurable reservations.
Edit a Reservation
As a core admin, you can view and edit any past or future reservations currently on your calendar. To do this, click on the menu icon to the left of the reservation or double click on the reservation to open the reservation details page (below). You may also hover over the reservation to view important event information.

The reservation details window will display, giving you access to review or edit the reservation. Refer to the Schedule Equipment article for more information on editing a reservation.
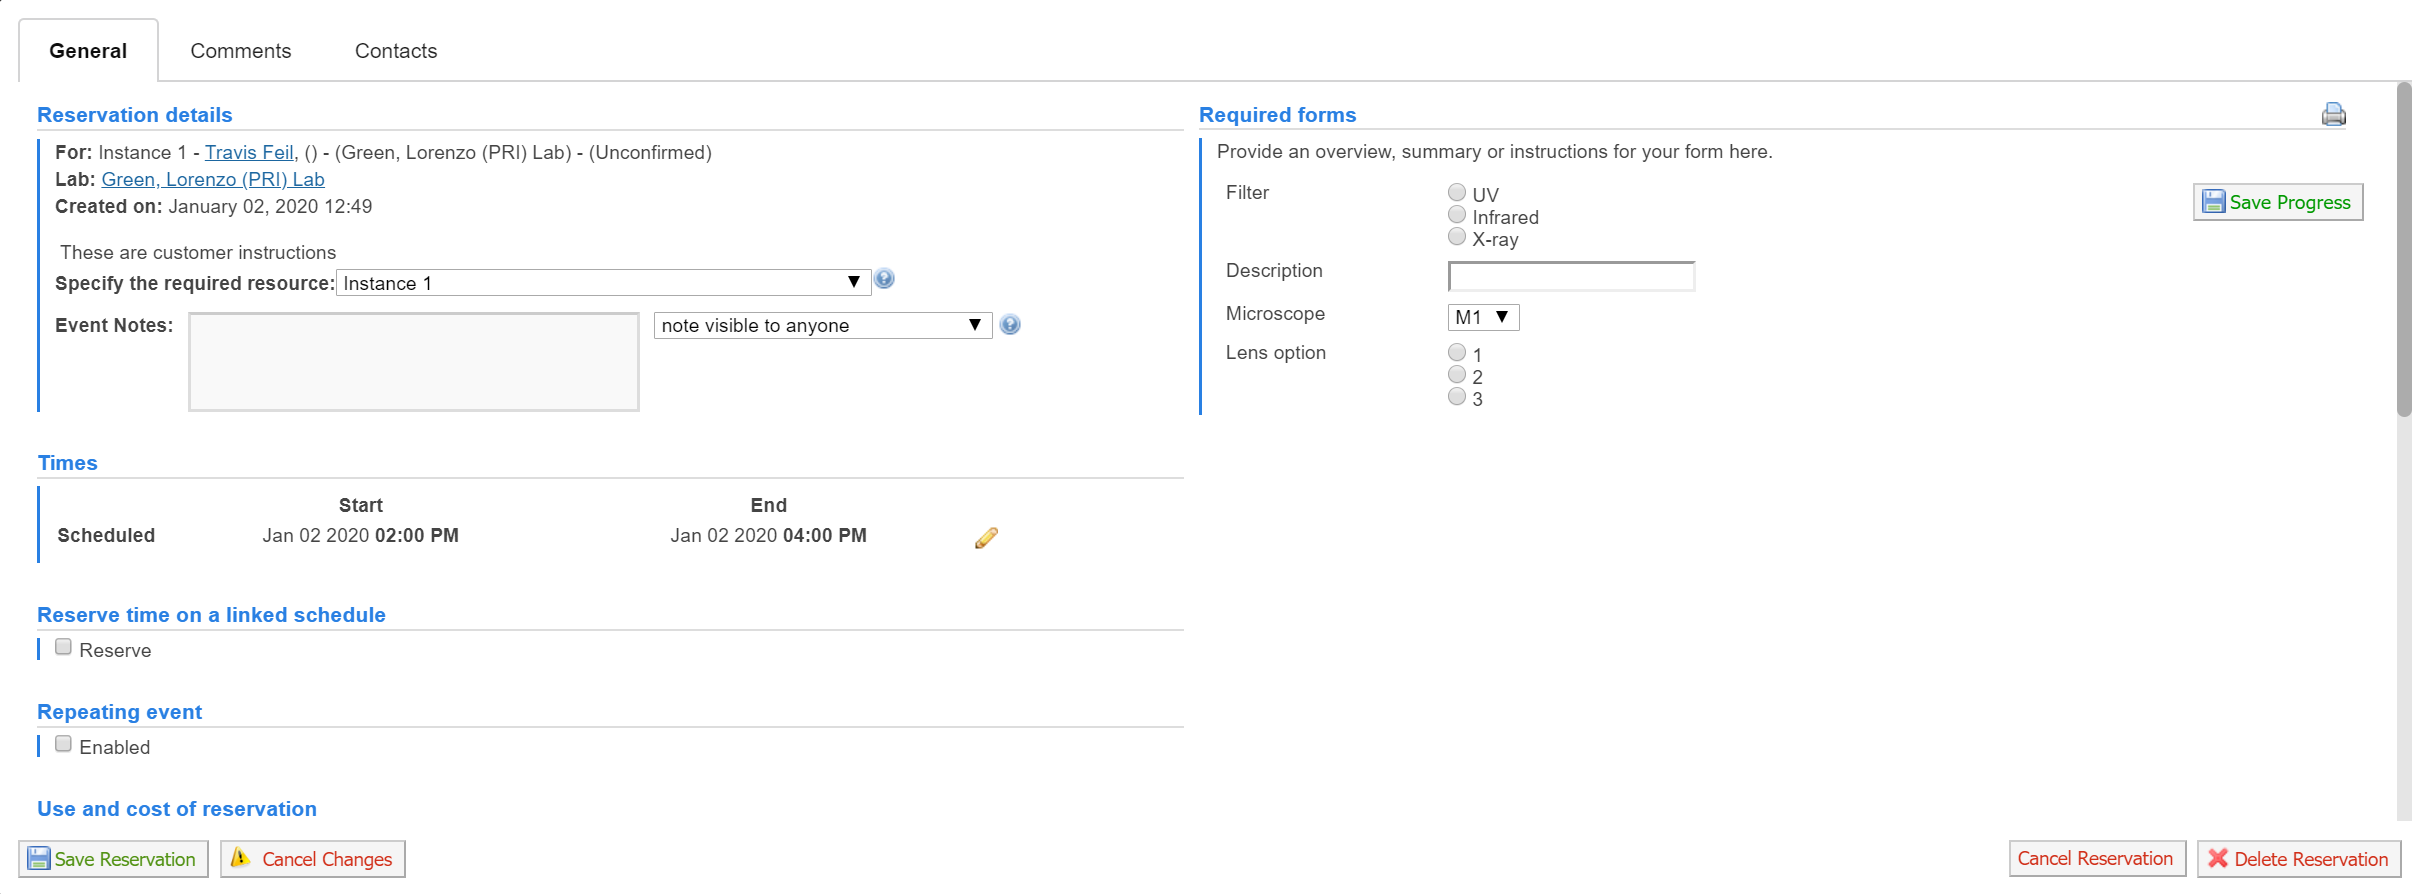
Click "Save Reservation" to save the updated reservation details.
To learn more about making reservations, please see the following topics:
Delete/Cancel a Reservation
As a core administrator, you typically have two options available to remove reservations.
- Delete reservation: This option will completely delete the reservation and release the reserved time. No record of the reservation is kept for billing or reporting purposes.
-
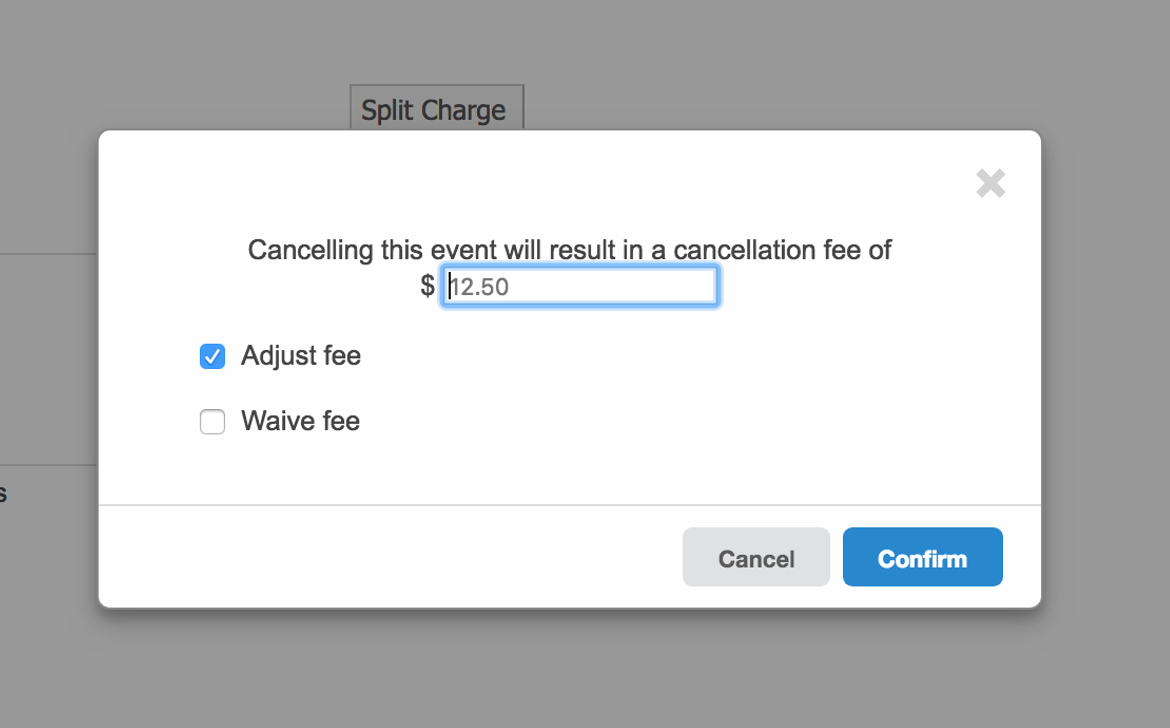
Cancel reservation: This option will cancel the reservation and release the time slot for other users. However, it will leave a "ghost" cancelled reservation in place that can be used for billing and reporting purposes. Additionally, the cancellation may trigger a cancellation fee if defined in the Scheduling Settings. As an administrator, you have some flexibility to either change the amount of the fee or waive the fee altogether: