A file template allows you to build a downloadable file that can be used to upload into an instrument’s data collection software. It can contain static and dynamic fields with information about the plate and the samples. File Templates are used in the Advanced Sample Processing module.
Create a File Template
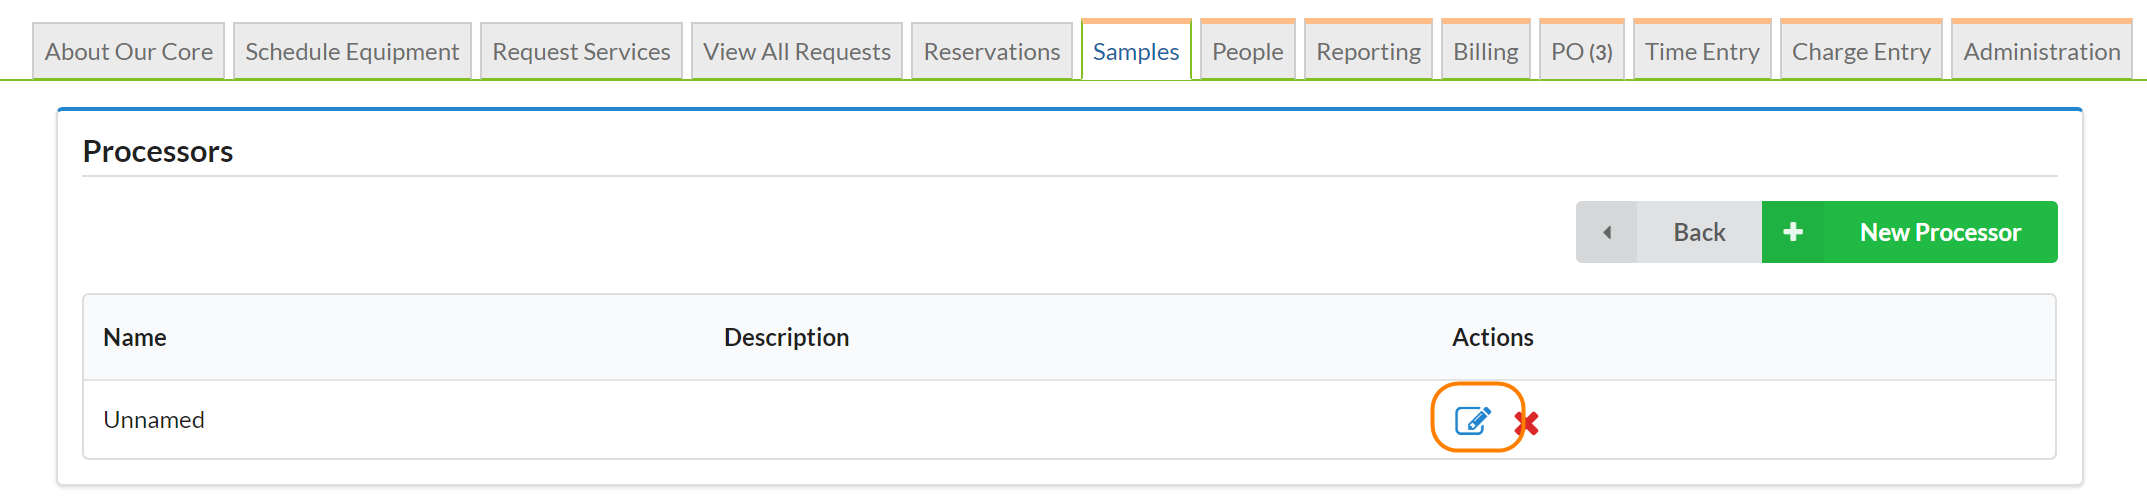
To create a file template, first click on the "administration" button from your Samples tab.

Then, click on the edit pencil icon to the right of the processor. If you do not have a pre-existing processor, please see Creating a Processor.
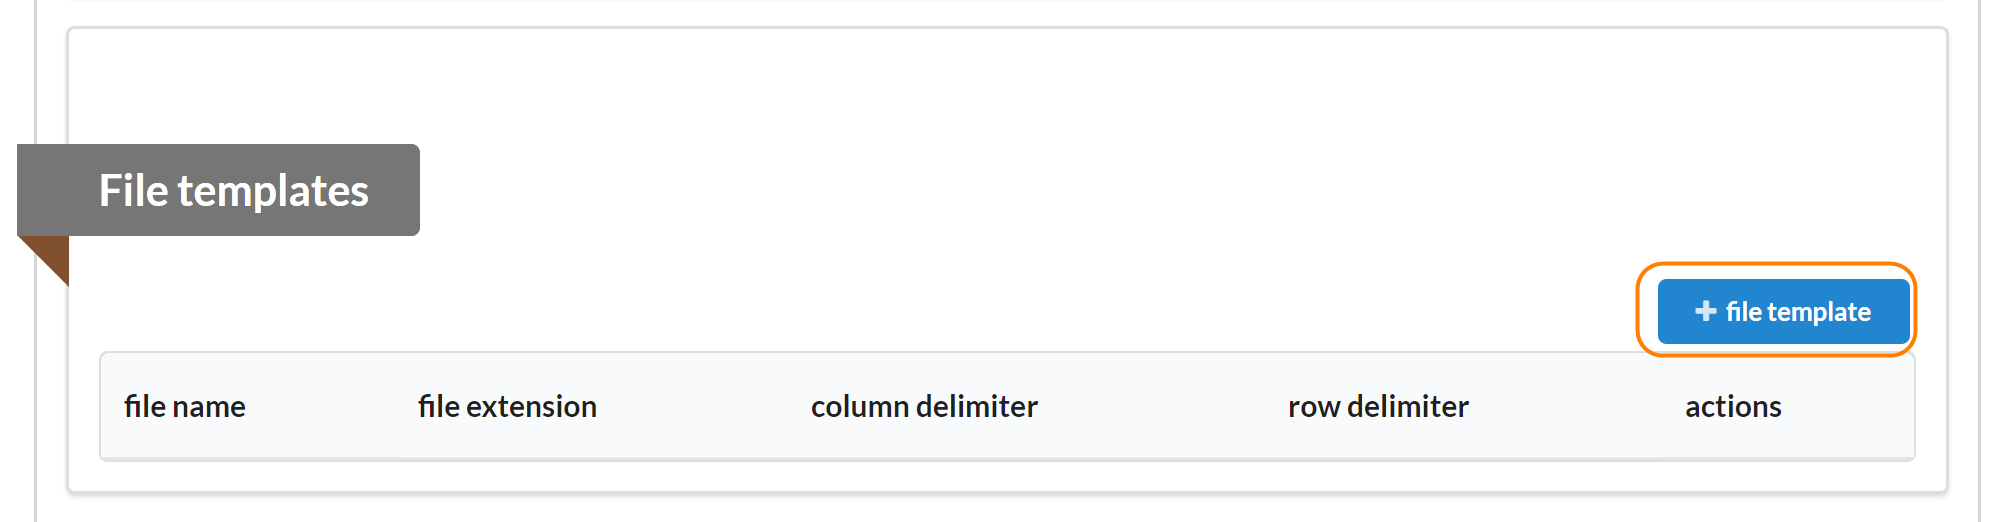
Scroll down to the bottom where the "file templates" section is located, and click the "+ file template" button.
The "New processor file" form will display. Descriptions of each field follow the image.
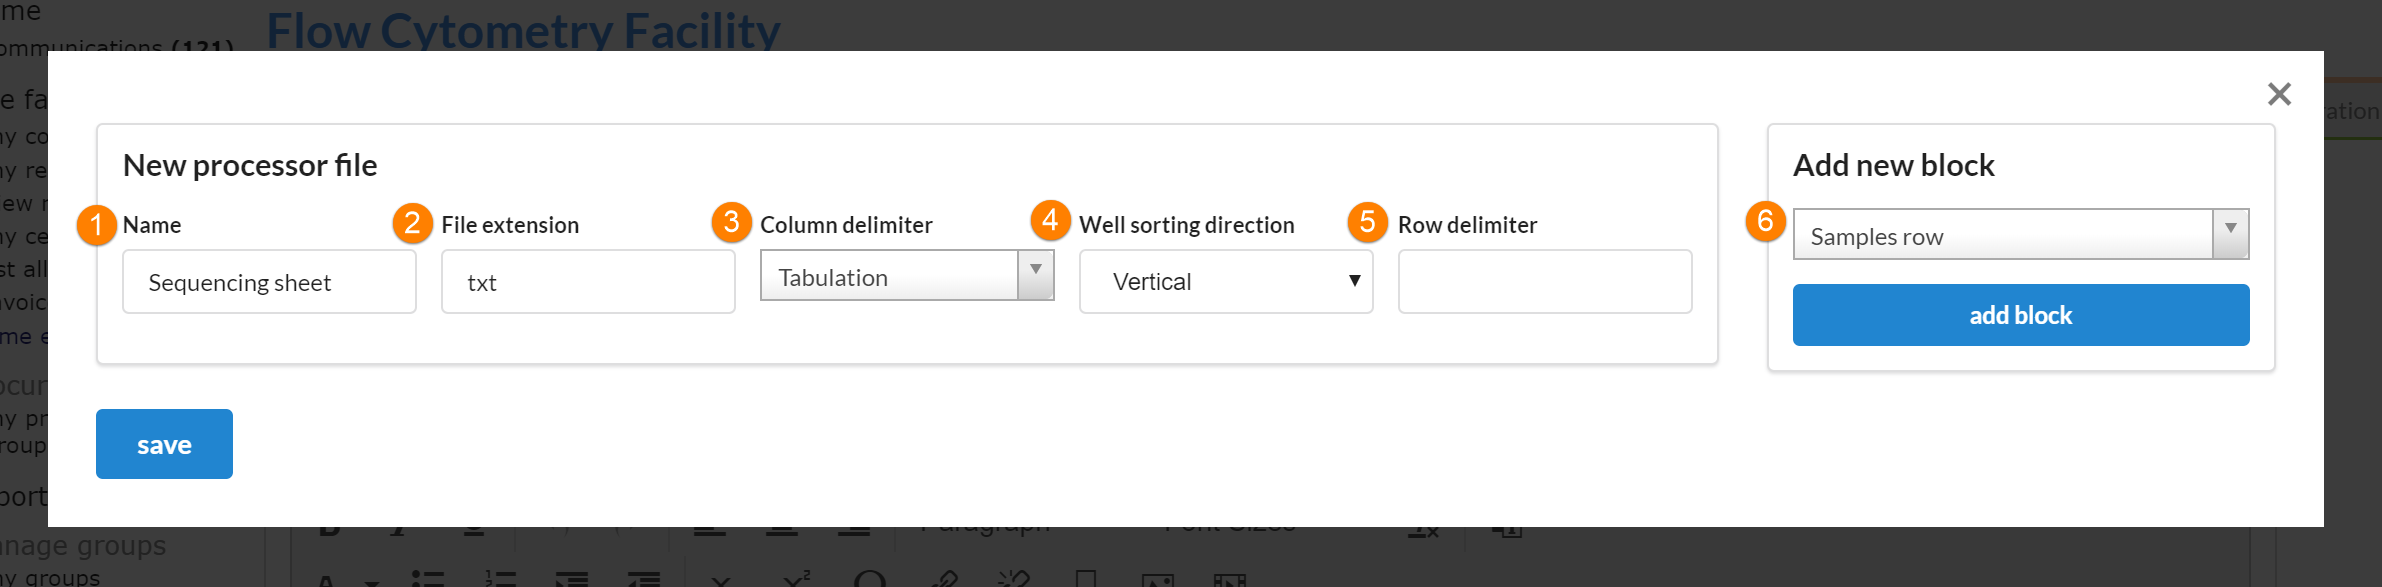
- Name: Name of your file template. This is helpful if you need more than one file.
- File extension: Your file extension should match the format requirement of the instrument’s data collection software. Possible file extensions are xlsx, csv, txt.
- Column delimiter: You can set the column delimiter to space, tabulation, or new line. Tabulation is the most frequently used option.
- Well sorting direction: If your customers submit plates rather than individual samples, this field will allow you to determine which direction the wells should automatically be sorted by upon submission.
- Row delimiter: Leave this field blank.
- Add new block: Blocks allow you to determine what columns and information populate in the file template. See adding a new block and column types for additional information on setting up the blocks in your file.
Add a new block
Blocks are parts of the file that follow a similar pattern. They comprise the file in a vertical order and could consist of different number of columns. Each block has a column label and column value. There are three types of blocks: raw, single row, and sample row. Some files may have just one block, while others could have a combination of the block types.
Start by adding blocks from top to bottom. While it is easy to rearrange columns within a block, entire blocks can't be moved up or down.
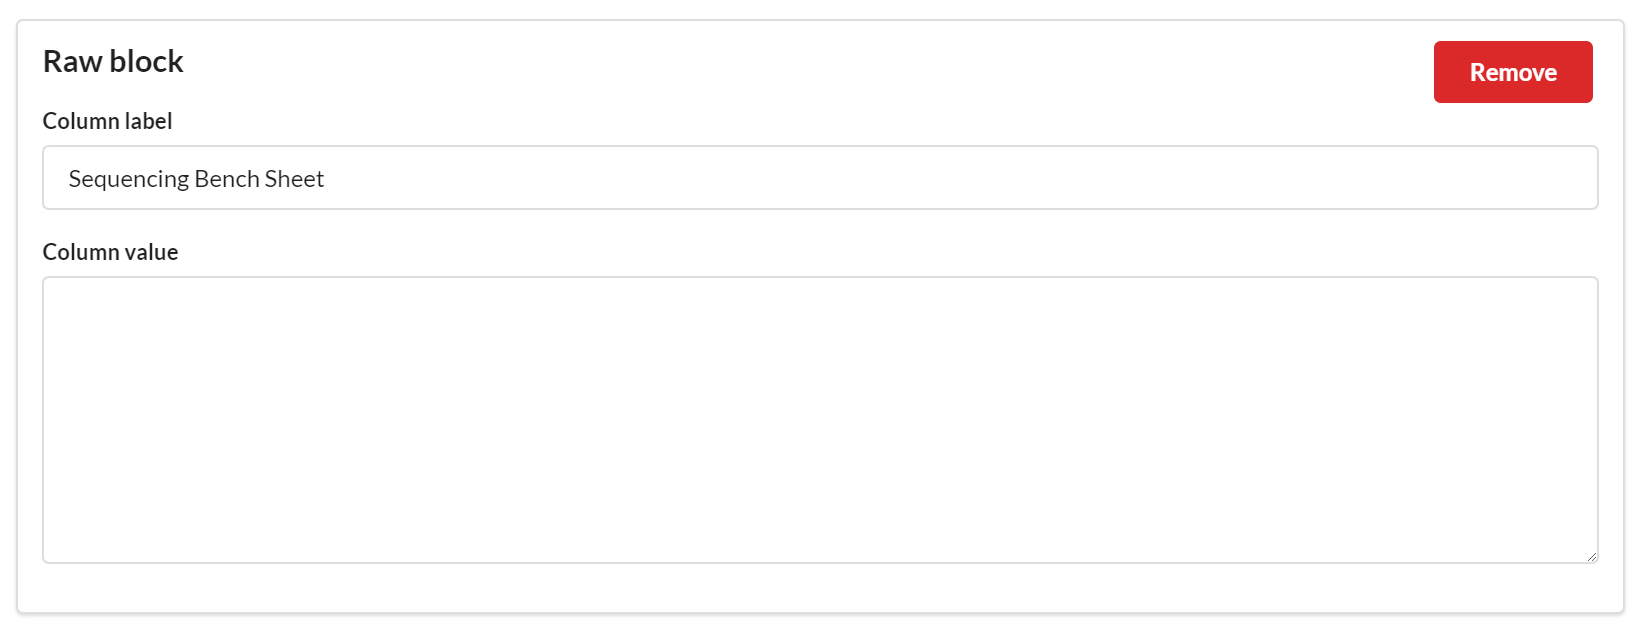
Raw Block
The raw block is part of the file that has a single label or value that doesn’t span more than one column. It is a static part that doesn’t change. If your file has a title or some sort of initial text, this may be a good example of a Raw block.
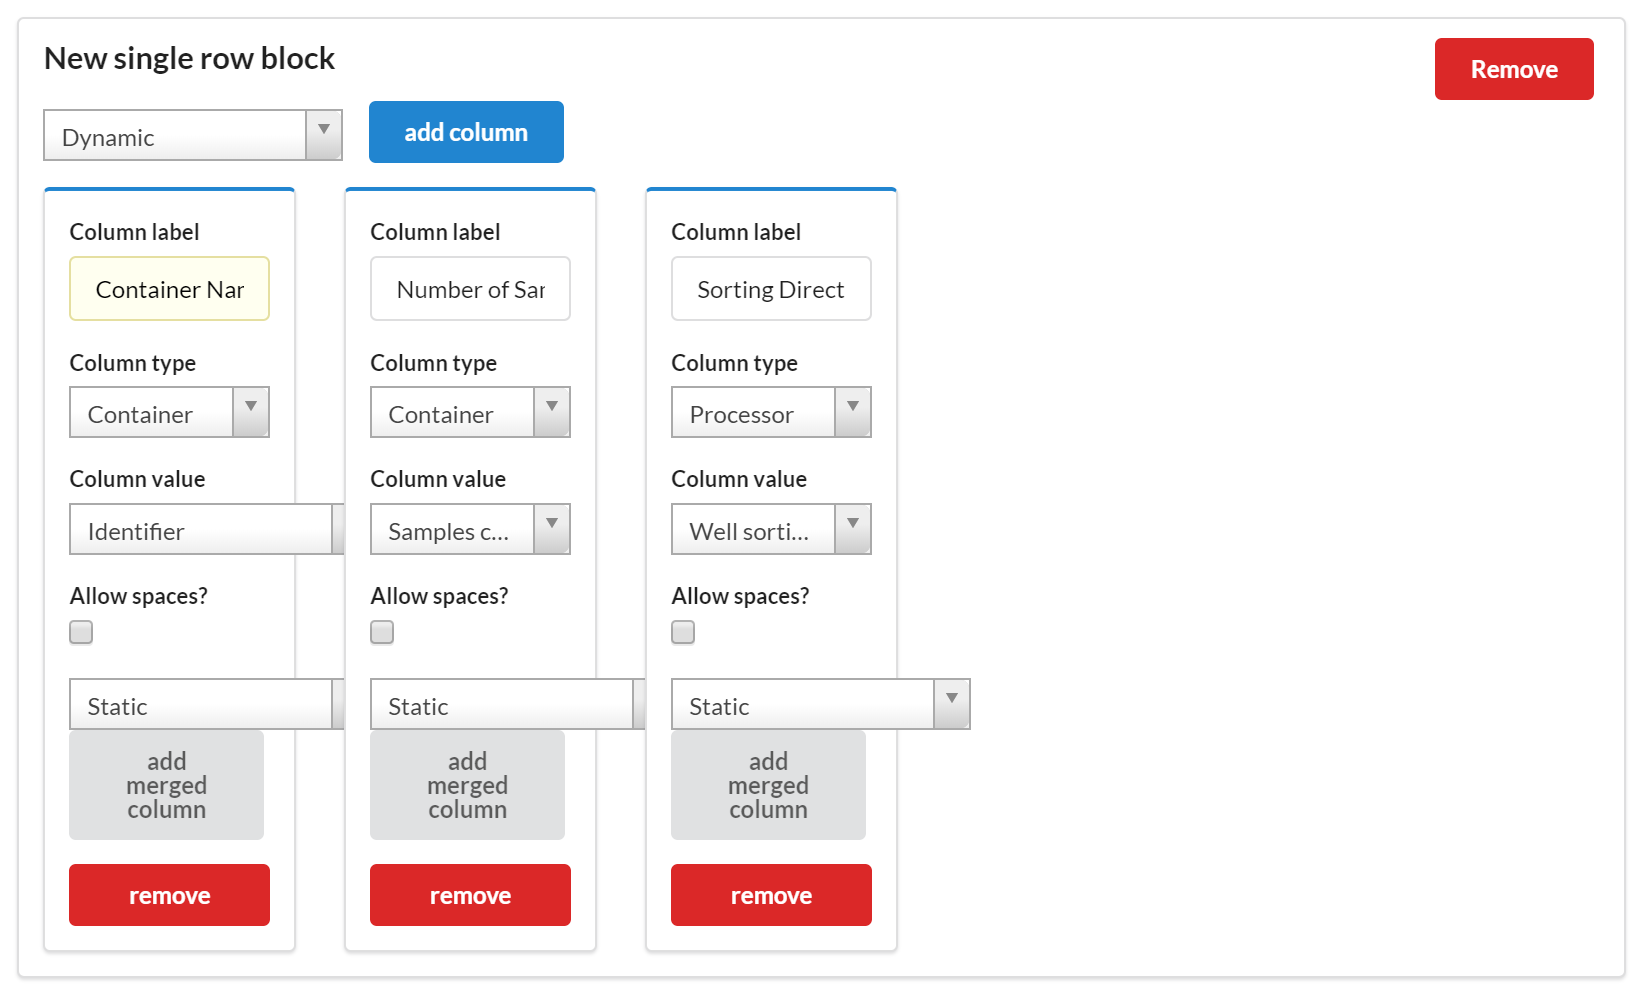
Single Row Block
This part of the file represents column labels and a single row of column values. It may contain static columns that are constant or dynamic columns that pull it’s value from the container or the processor.
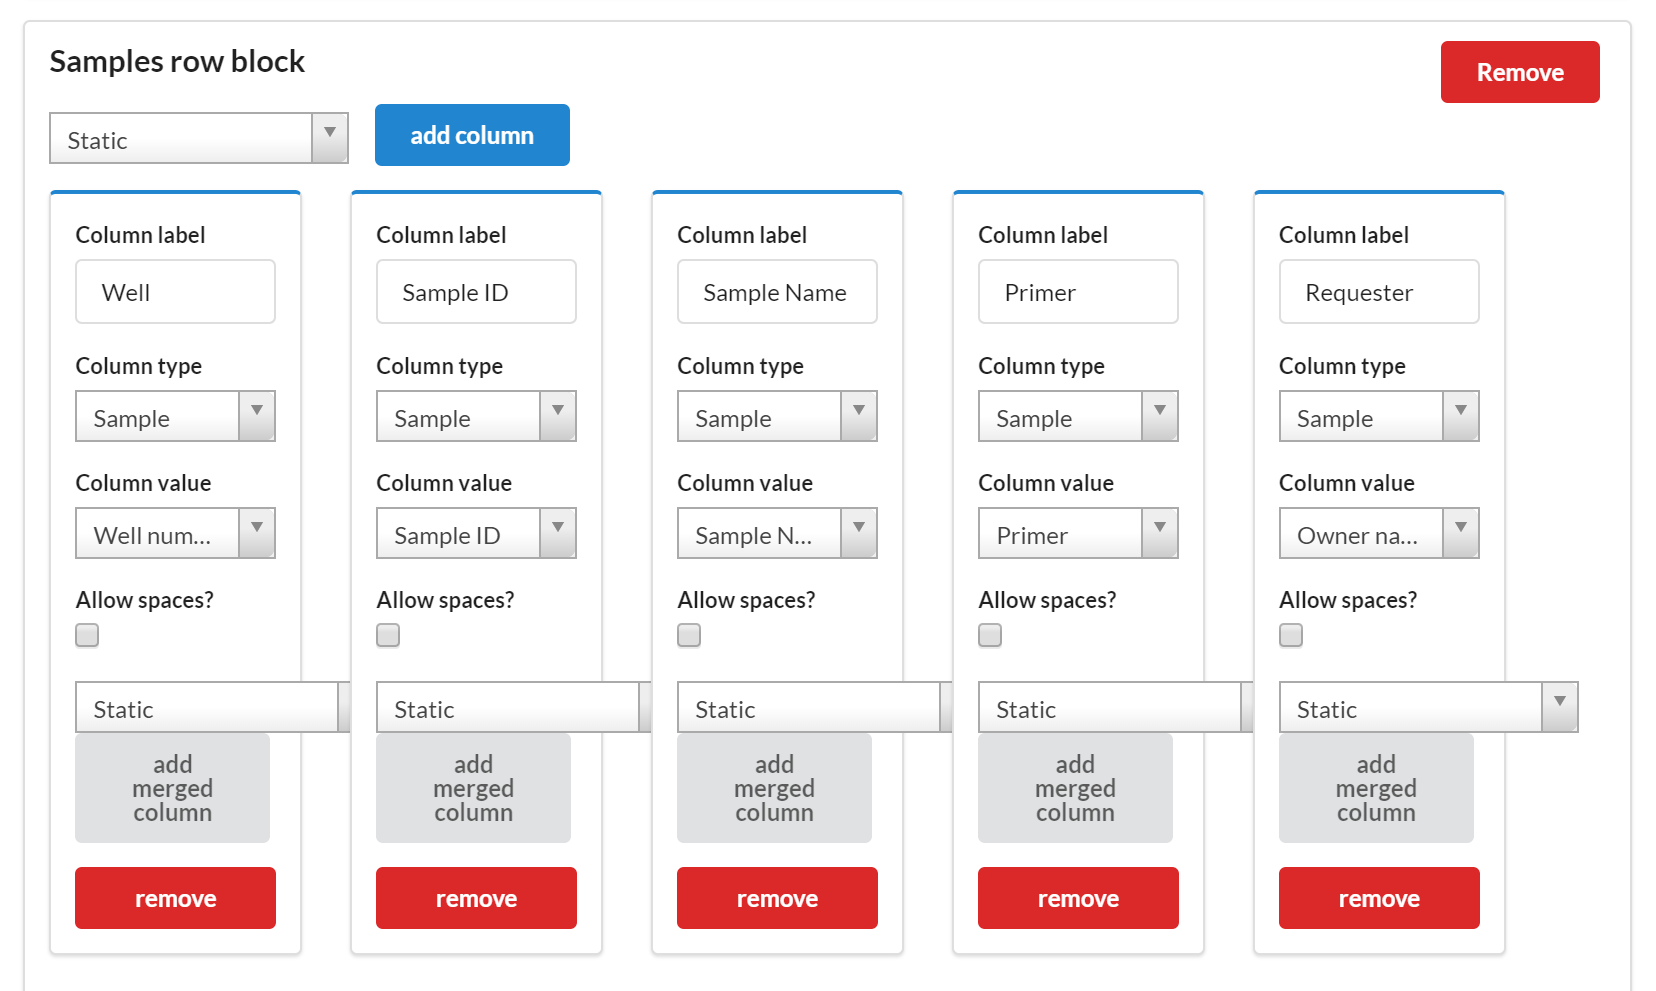
Samples Row Block
This is the most important part of the file. It represents column label and a number of rows. Usually there are as many rows as there are samples assigned on that plate. The values in the rows could be static or dynamic. Dynamic values can be pulled from the container, processor, or from the sample.
Define Column Types
Columns of the file can be static or dynamic.
Static column types
A static column’s value does not change per plate or sample. It is predetermined when the file is built.
Dynamic column types and column values
Dynamic columns populate a value using information from the container, the processor, or the samples. Your selection in the "column type" dropdown of a dynamic column will determine if your column value should pull information from the container, the processor, or the sample.
- Container (or plate) allows you to pull various information about the current plate the samples are on, for example: container ID (plate ID), date it was created, person it was assigned to, run protocol for this plate, etc.
- Option processor allows you pull information about the processor this plate was submitted through, for example: processor name, kind of the container associated with it, default submission type for this processor or even the name of the core.
- Option Samples allows you to pull information from the sample form the user has submitted to the core. It has all grid columns as a choice plus Well Number, Owner name, PI, Request ID.
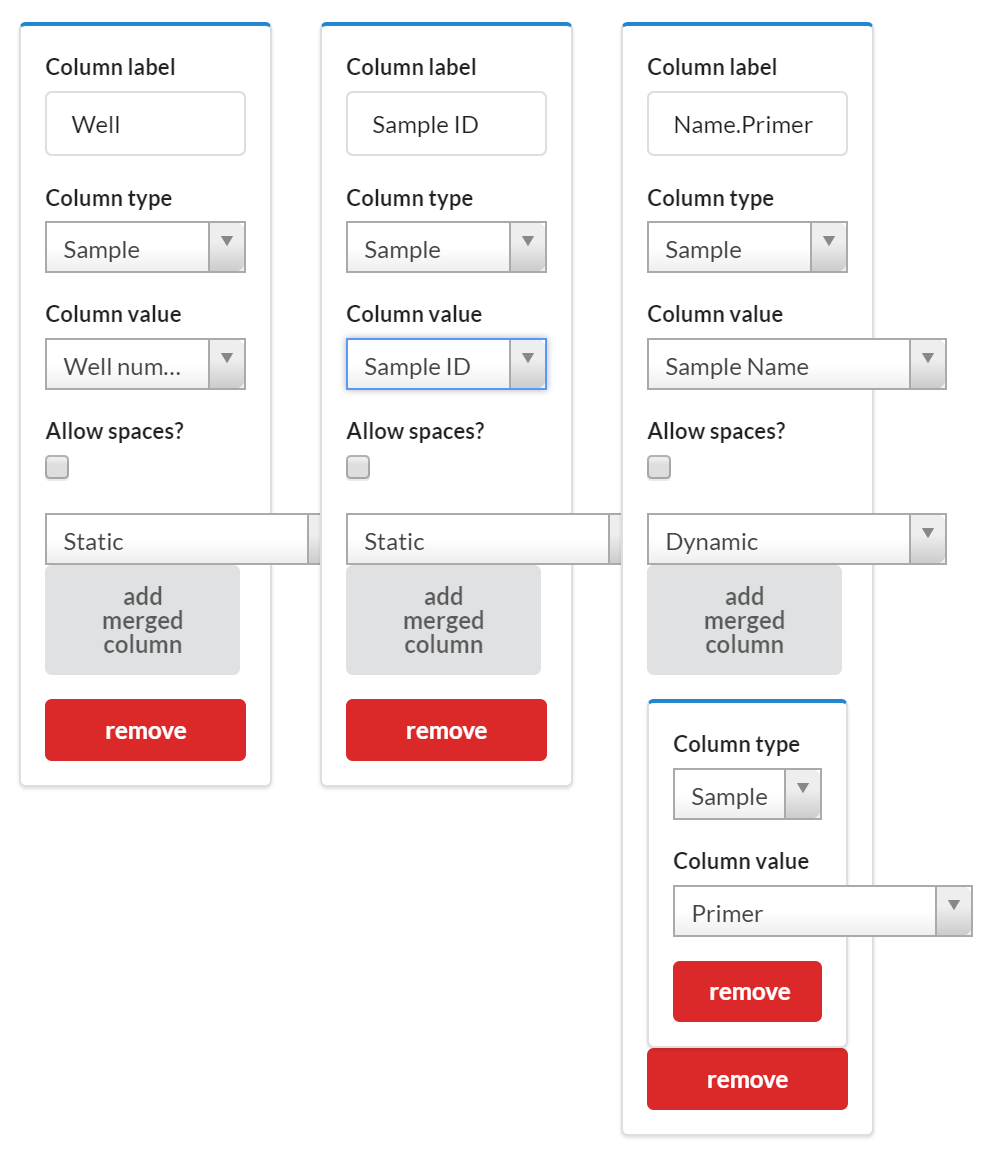
Merged Columns
Merged columns allow information entered separately by the user to be combined into one value for the instrument. For example, there may be separate columns on the sample form for the user to enter “Sample name” and “Primer name”, but the instrument requires that information to be in one column as “Sample name.Primer name”.
To build merged column, add a regular column (static or dynamic) representing the first value, then click “add merged column” and enter the second value in the bottom 'column value'.
Download the File
Once you have completed these steps, you have now created your file template. Once you have finalized your plate, you'll be able to download your file template.
Select the plate's details using the magnifying glass icon next to the plate name.

Scroll down and select the "download plate file" button. If you have multiple file template options, you'll get a dropdown allowing you to select the appropriate file.
