Cores can be configured to only allow access to potential customers after they have been explicitly granted access to your core. The typical workflow consists of the user visiting your core and then submitting an Access Request, which you then approve or decline. However, you can also proactively grant access to one or multiple users before they visit your core.
- Customer Experience of Access Requests
- Approve/Reject Access Requests
- Proactively Grant Access to Users
Customer Experience of Access Requests
When a customer visits a core with Access Requests enabled, they will be presented with the following screen:
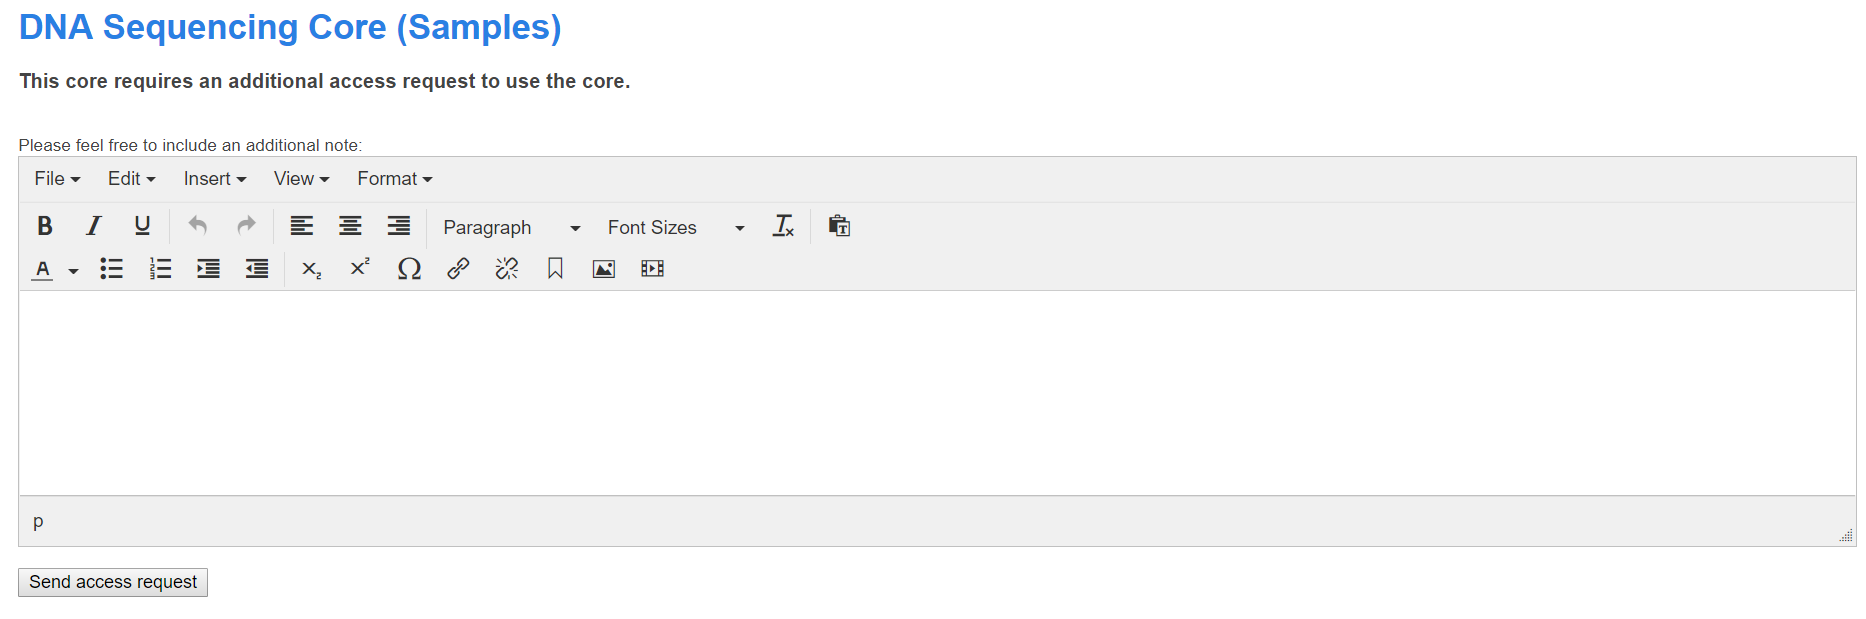
The customer can include a note to the core administrators and then clicks the "Send access request" button to submit the request. Until the Core Administrator has approved the request, the user will see the following notice when visiting the core.

Approve/Reject Access Requests
As a Core Administrator, you will be notified by e-mail if your core receives any new Access Requests. You can also easily see if there are any pending requests from your home page:
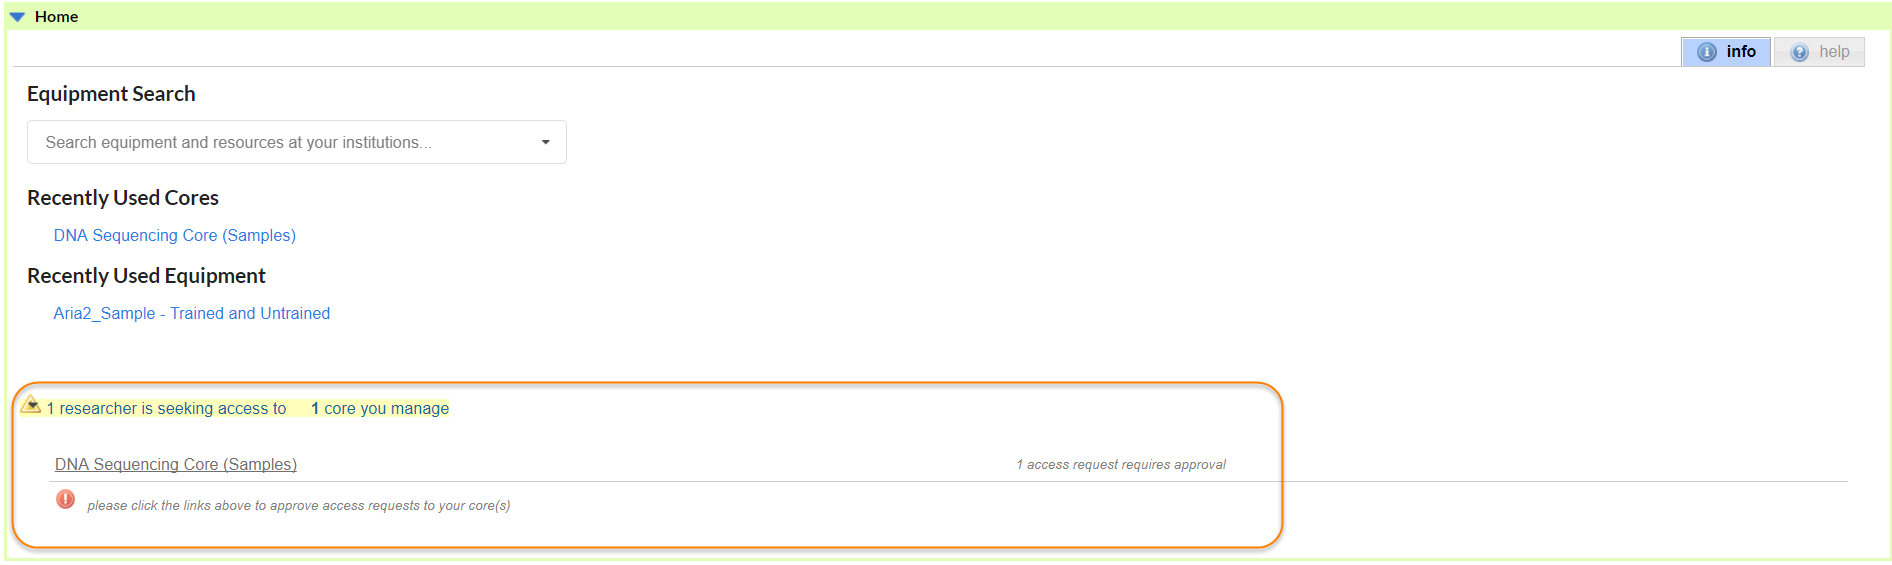
Clicking on an access request will bring you to the Access Requests interface on the core's Administration tab. Note that you can also go to this interface directly at any time to view and manage all open access requests.
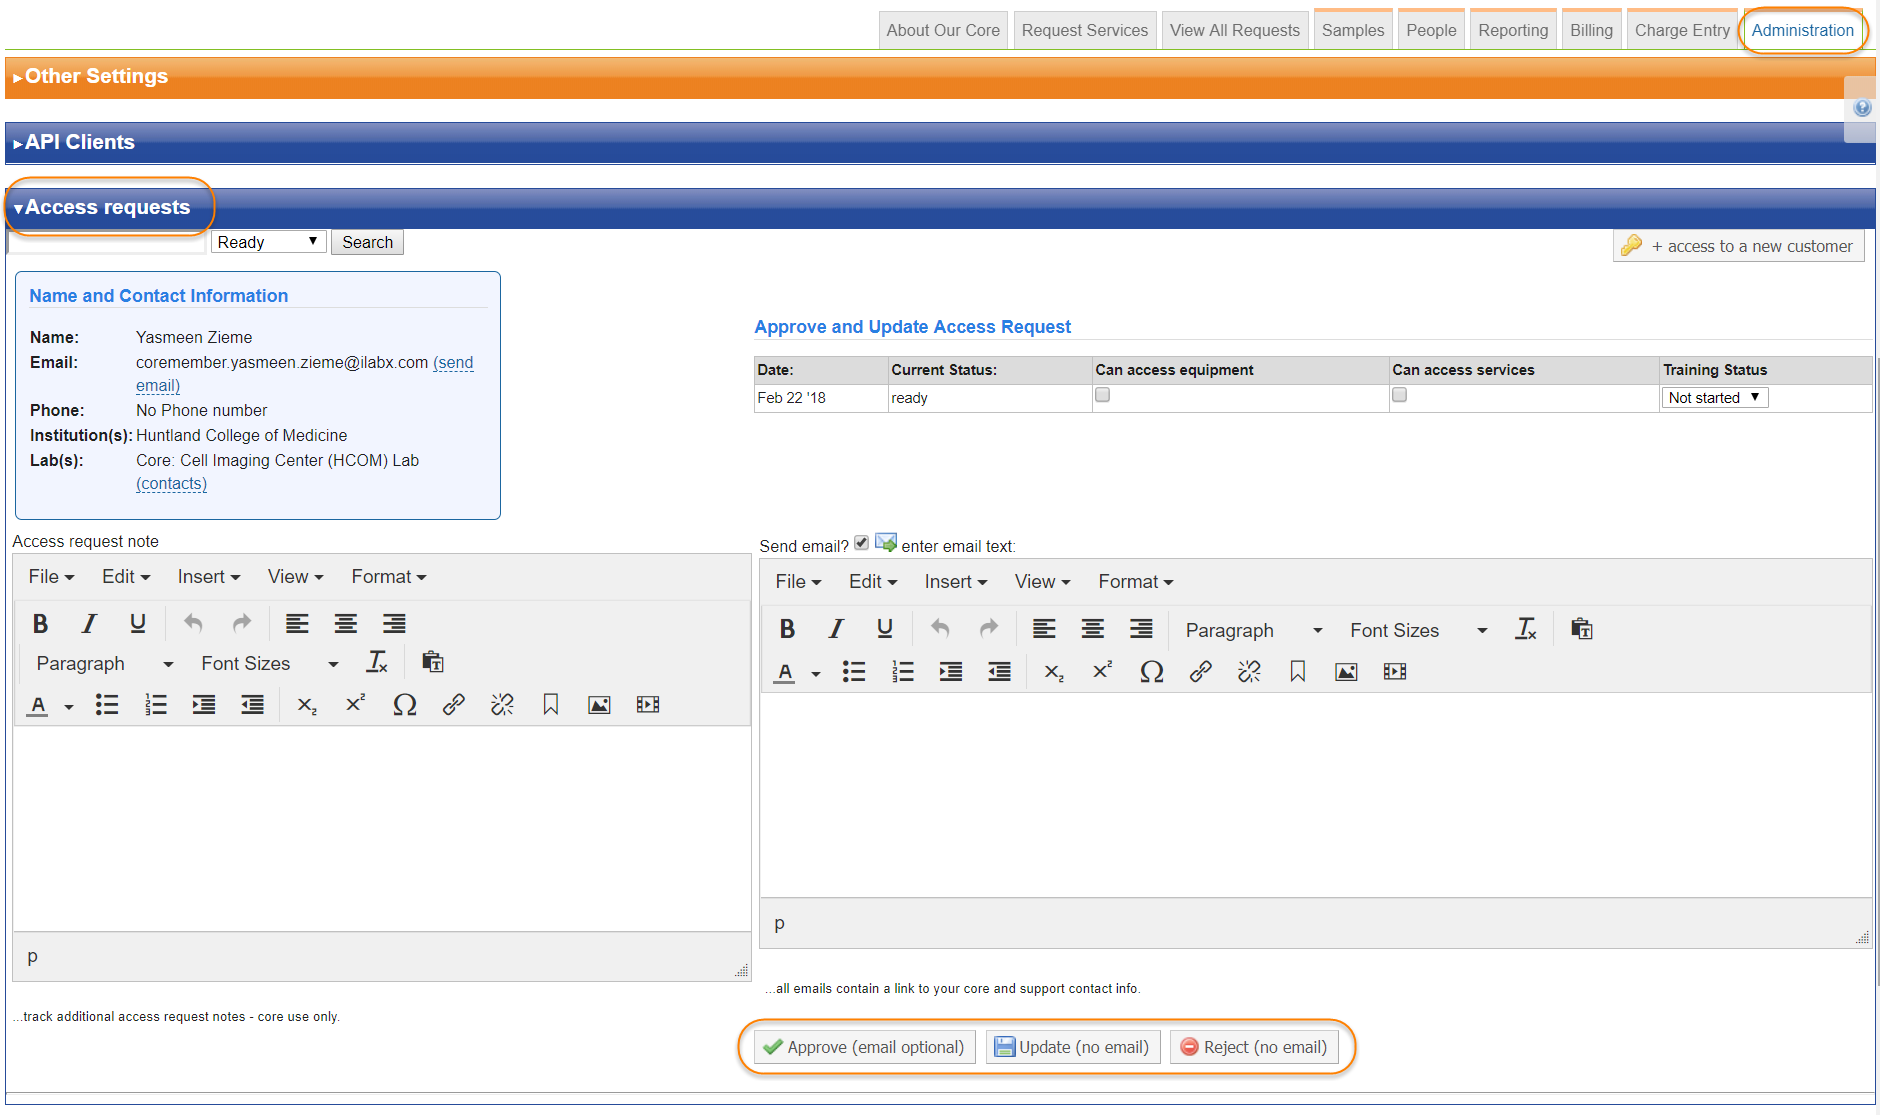
This interface lists the information of the requester in the upper-left under Name and Contact Information, while the Approve and Update Access Requests panel in the upper-right allows you to set the user's ability to access the equipment tab and access the service request tab, as well as the user's training status (for more information on the latter, see Managing Training Status).
You can add some notes the Access request note field, which will only be visible to core staff, and you can optionally enter text that will be e-mailed to the user under the Send e-mail panel (only if the check box is checked).
Then click either the "Approve (email optional)" button, "Update (no email)" or "Reject (no email)" button to finalize the Access Request and update the user's status.
Proactively Grant Access to Users
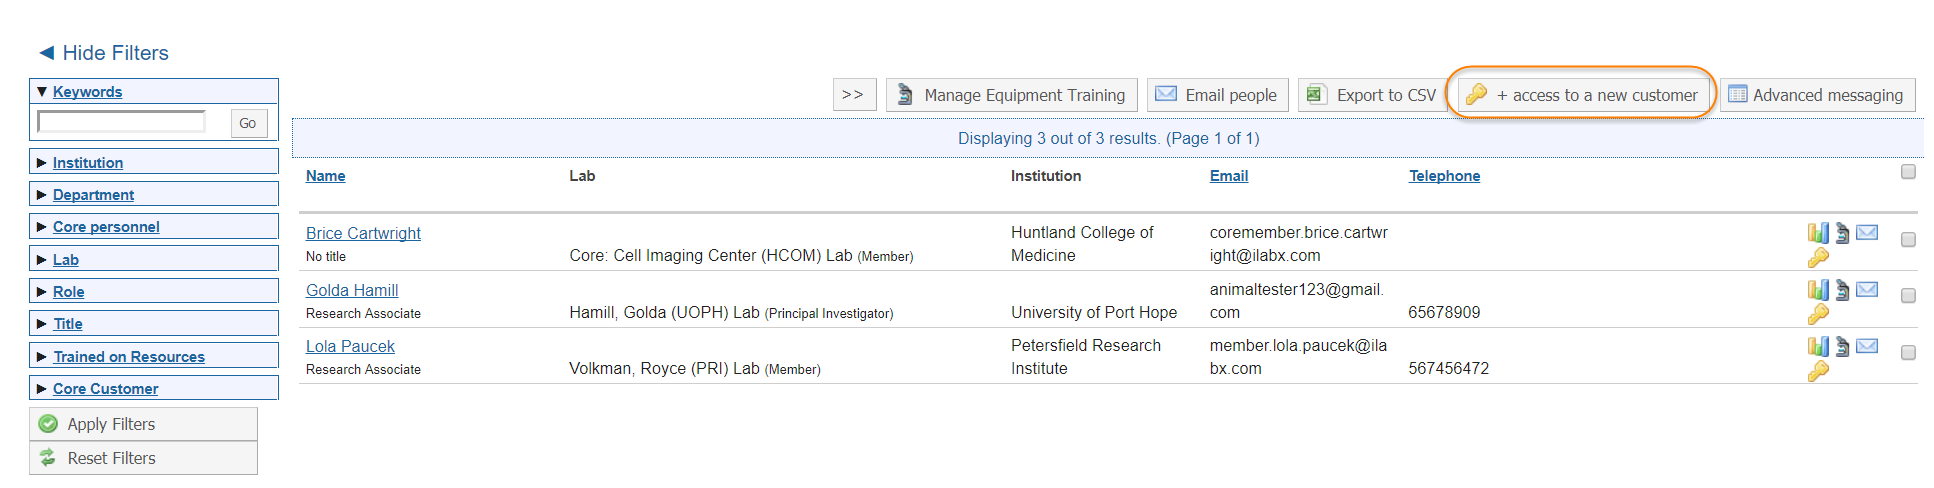
Proactively setting the access request status for multiple users is typically done from the People Tab of your core (though it can also be accessed from the People Search interface access from the left-hand navigation). To do so, first select the users you want to update by clicking the check-boxes on the right-hand side of the screen (you can click the check box in the top-right to select all listed users). Then click the "+ access to a new customer" button at the top of the interface.
This brings up an interface that lets you select the core that access will be granted to as well as the users you had previously selected. You can use the "Search for a user" bar at the top to search for and add additional users.

Once you have all users added and the correct core selected, click on "Grant Access". This expands the screen to show the Access Requests below.
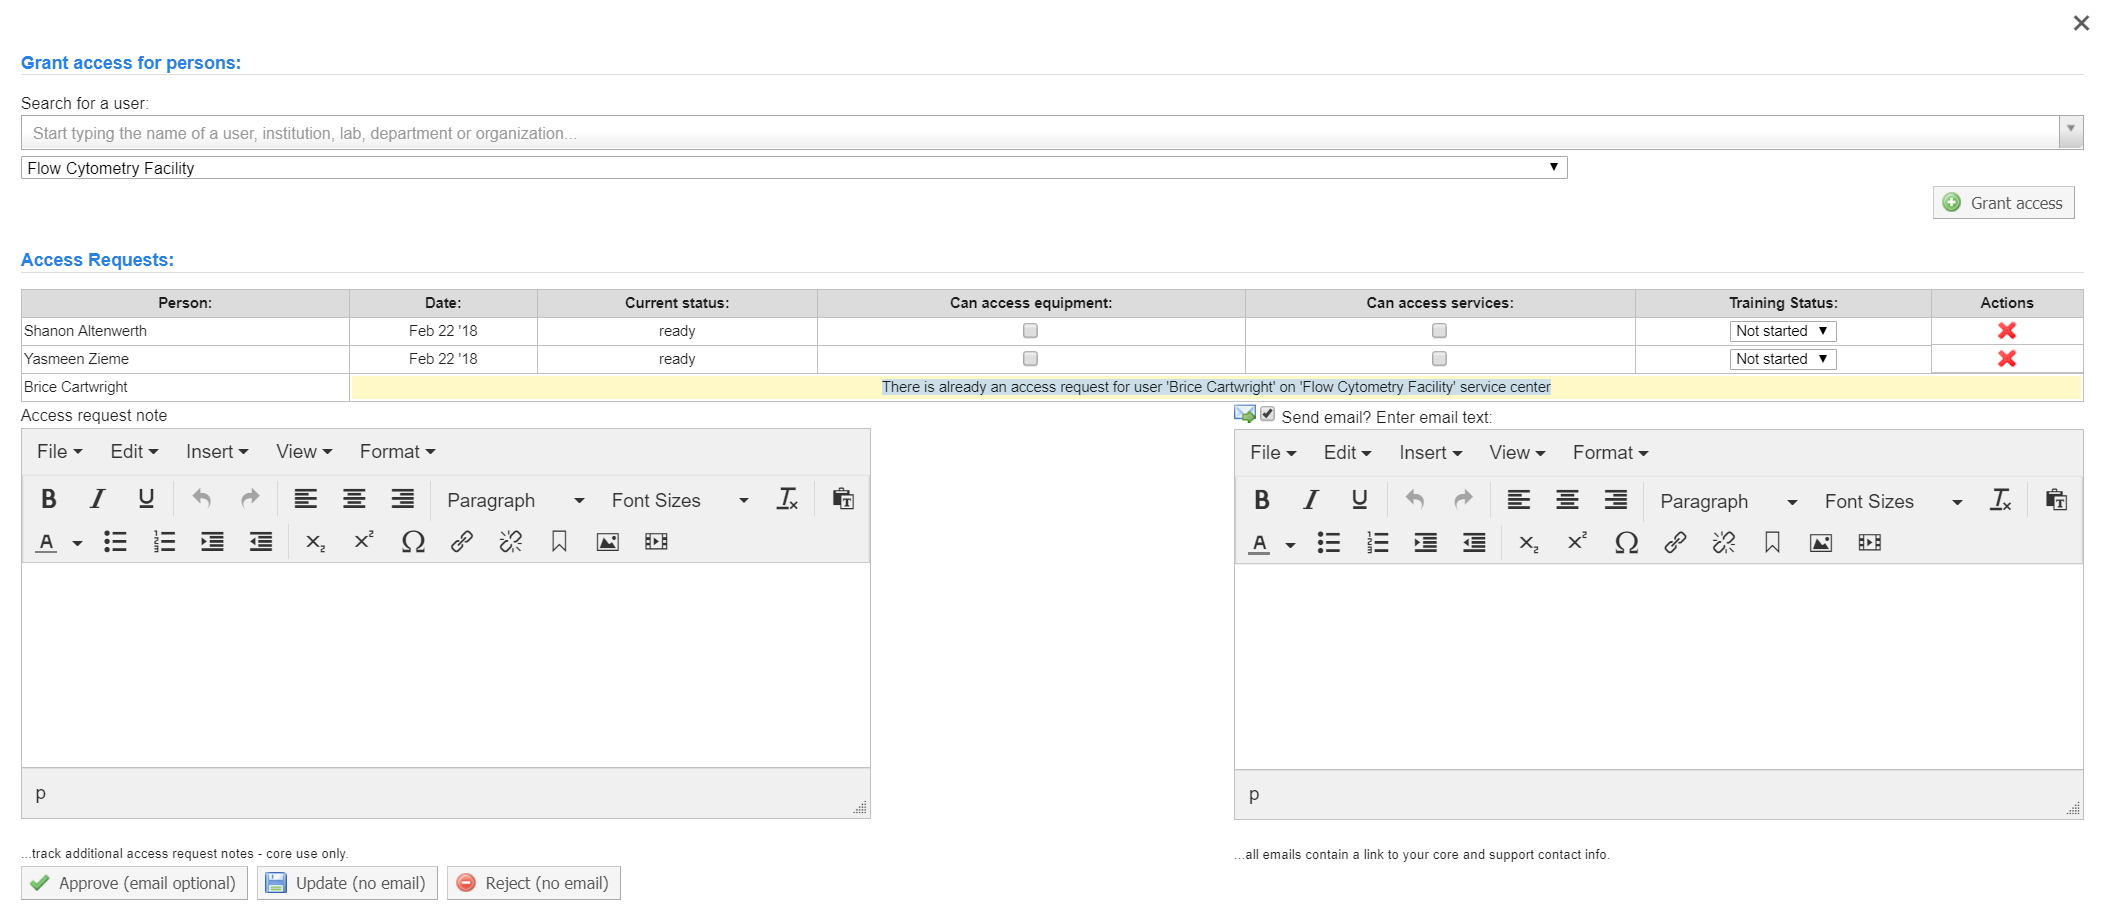
The first panel allows you to set the user's ability to access the equipment tab and access the service request tab, as well as the user's training status (for more information on the latter, see Managing Training Status). Note that if a user already had a pending access request, it will need to be accepted/rejected as discussed in the Approve/Reject Requests section above.
You can add some notes the Access request note field, which will only be visible to core staff, and you can optionally enter text that will be e-mailed to the user under the Send e-mail panel (only if the check box is checked).
Then click either the "Approve (email optional)" button, "Update (no email)" or "Reject (no email)" button to finalize the Access Request and update the user's status.
You can also grant access to an individual user by clicking the key icon to their right on a People page. This will bring up an interface very similar to the one described above, and will allow you to grant access to this user.
