Sometimes after a service is invoiced, charges are found to be incorrect and need a refund. If the billing file has already been processed, a refund must be entered to resolve the incorrect charge. Refunds add a new line item that can be sent to the ERP to refund the original charge. Refunds can be entered from the Billing tab.
NOTE: Refunds are an Institutional Setting that must be turned on by iLab staff. Contact your Institutional Administrator to determine if Refunds are accepted at your institution. Implementing this feature may also require coordination with your institution’s finance group.
Eligibility For a Refund
A refund can only be initiated if the invoice has been marked as paid. This can be done by an automatic file transfer (certain integrations only) or manually by marking an invoice as paid (Managing Invoices). You then open the invoice using the magnifying glass to view the invoice.

Enter a Refund
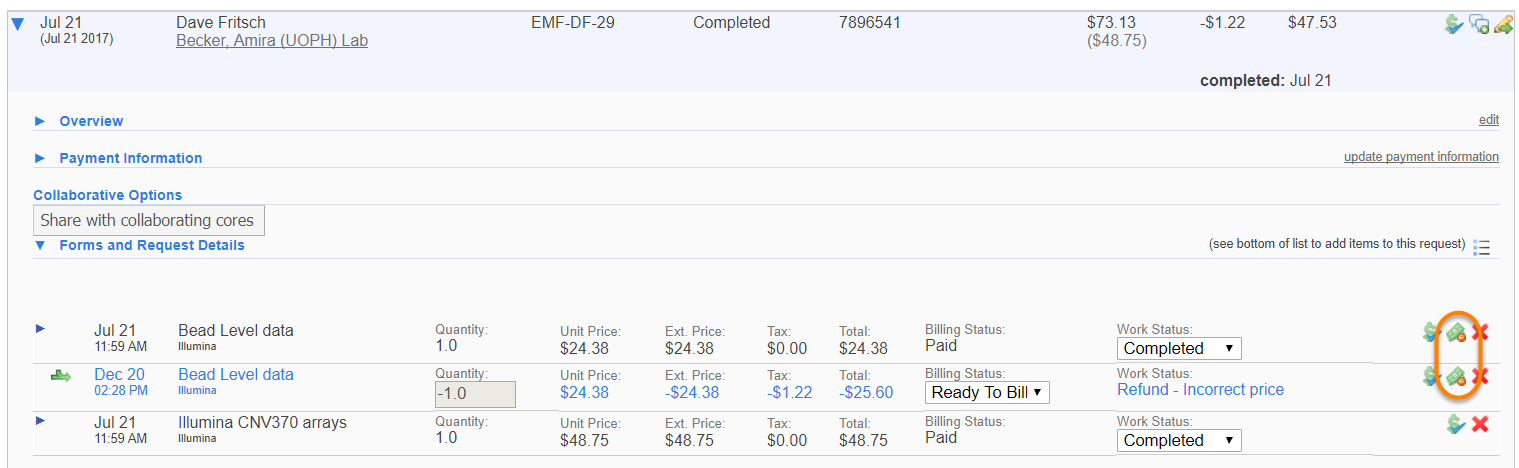
Administrators can search for the invoice which requires a refund either from the billing event list view or from the invoices list view on the left side of their iLab page. After navigating to the invoice, hover over the charge that needs to be refunded to display the initiate refund icon.
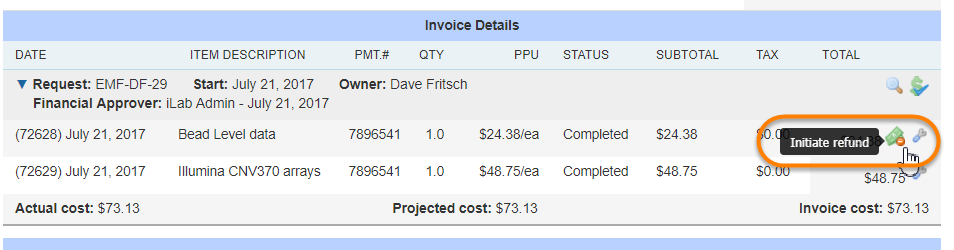
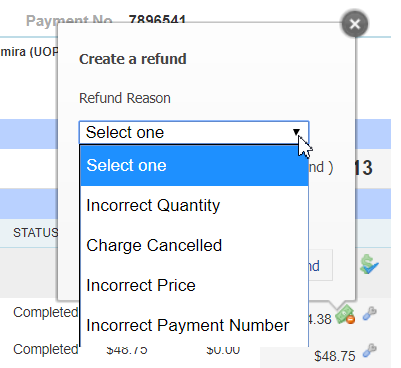
Once the refund icon is clicked you will be prompted to select the reason for the refund from the drop down box for tracking purposes and then enter in the quantity of the charge the needs to be refunded.
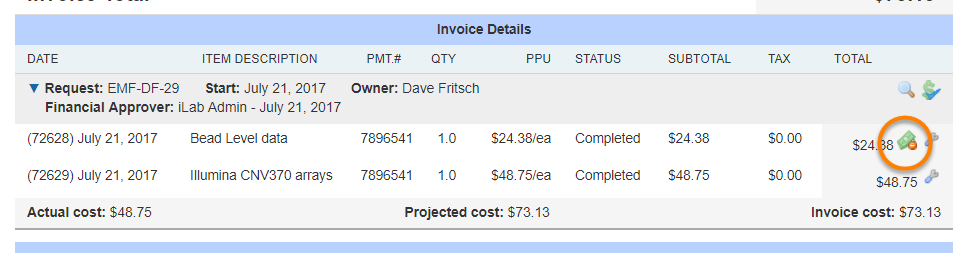
Once you click the Initiate Refund button, the refund icon will remain on the refunded line item as a visual indicator that a refund has been entered for the charge.
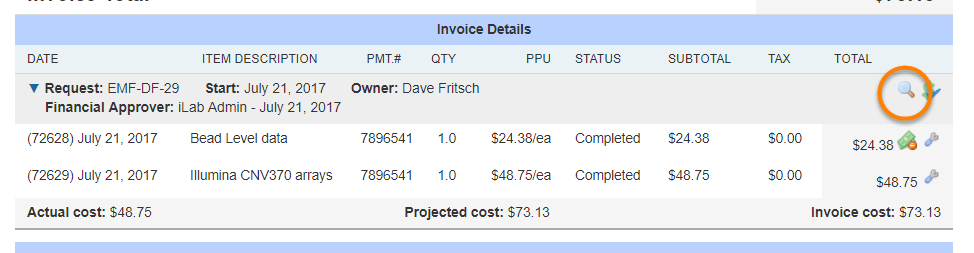
To view the newly created refund line item click on the magnifying glass icon above the line item. The request view will open in a new tab.
Click on the blue triangle to open the request and view the list of charges. The refunded line item will be flagged with a refund icon and the list of refund line items for the original charge will be listed below.
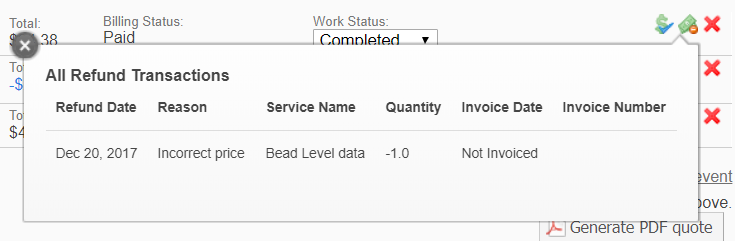
If you click on the refund icon of a refunded charge on the request or on an invoice, you will see a summary of the refunds for the charge and see links to invoices for all of the line items.
Once a charge is refunded, the refunded charge and added refund line items will be visible on the request and invoice. All administrators, including customer administration, with access to the request or invoice will be able to see the refund icon and click on it to review the refund summary.
Process a Refund
Once the refund is initiated, a refund line item is added to the request with a negative quantity. This line item is automatically added as "ready to bill" and will be available to add to the next billing event. The institution can elect to allow refund line items to be added to the same invoices as other charges or to be added to separate invoices once the new billing event is created. Once the refund line item is added to an invoice from the new billing event creation, it will be included in the next billing file that can be sent to the institution ERP, depending on the integration specific settings.