The Invoices view is accessible from the left-hand side navigation. It provides a comprehensive way for all users to review their invoices. Note that this interface has a number of features only available to Core Administrators and Staff, as indicated in the article.
Invoices Layout
The layout of the Invoices interface is illustrated below:

- Filter: The filter panel, as discussed in more detail below.
- Invoice list: This panel displays all (filtered) invoices.
- Bulk actions: Actions that can be performed on all selected invoices, as discussed in more detail below.
Apply Filters
You can filter invoices on a wide variety of other attributes using the Filters panel. If the filter panel is not visible, click on the "Show filters" link in the upper-left. To use filters, use the black arrow to the left of each category to expand the filter you would like to search on. Then, select from the available entries.
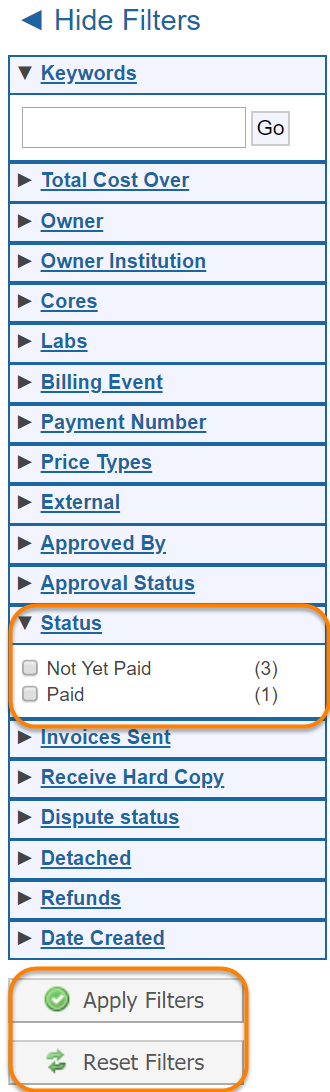
With the appropriate criteria selected, click "Apply Filters" and your refined list will display. You can also reset all filters with the "Reset Filters" button.
View Invoice Information
The main panel of the Invoices interface shows the (filtered) invoices.
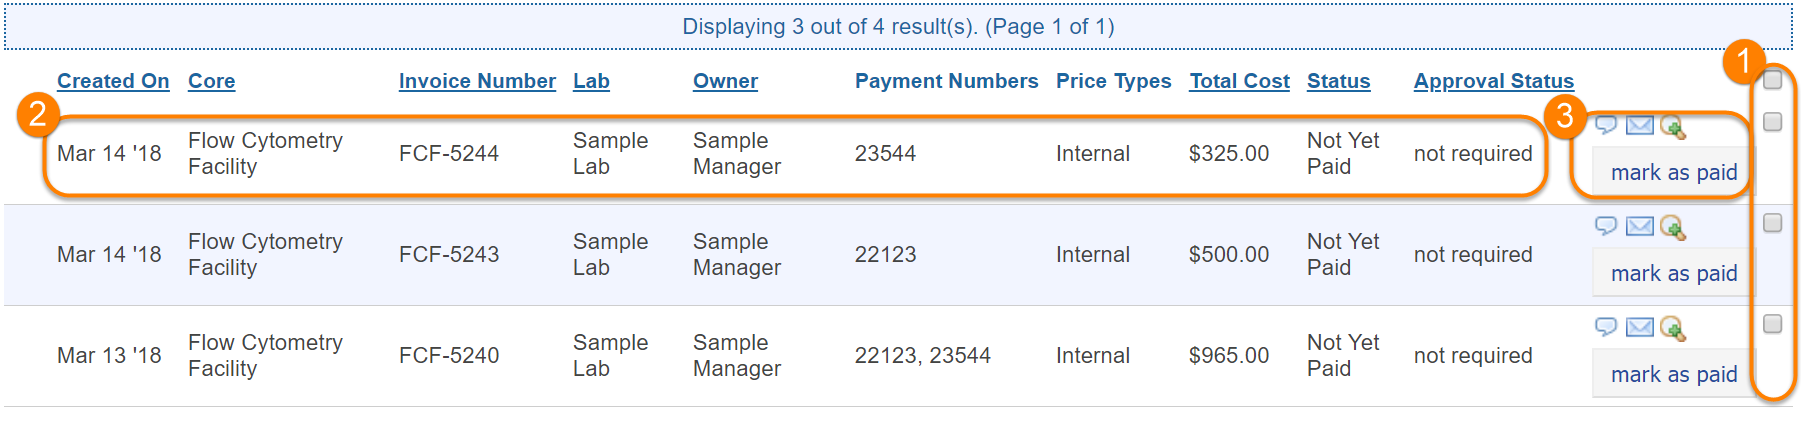
- Invoice selection: Each invoice has a check-box at the far right that can be toggled to include/exclude it for subsequent bulk actions (see below). The very top check-box (at the height of the panel header) can be used to select/deselect all visible invoice at once.
-
Invoice attributes: Lists various attributes of the invoice:
- Created on: The date the invoice was created.
- Core: The core that issued the invoices for services rendered
- Invoice Number: The number assigned to the invoice.
- Lab: The lab that is responsible for payment of the invoice.
- Owner: This is the person responsible for this invoice in the lab (the Primary Contact defined in the Group Settings)
- Payment Numbers: The various funds used to pay for charges on this invoice
- Price Types: Each service will be charged at a specific price type, depending on the nature of the customer (in some case overridden by the Core administrator).
- Total Cost: Total amount charged on the invoice.
- Status: The status of the invoice (Paid or Not Yet Paid).
- Approval Status: Certain institutions require that the lab formally approves the invoice. In these cases, the approval status is listed in this column. Otherwise, it will show as not required.
-
Invoice actions: Various actions that can be performed for individual invoice:
-
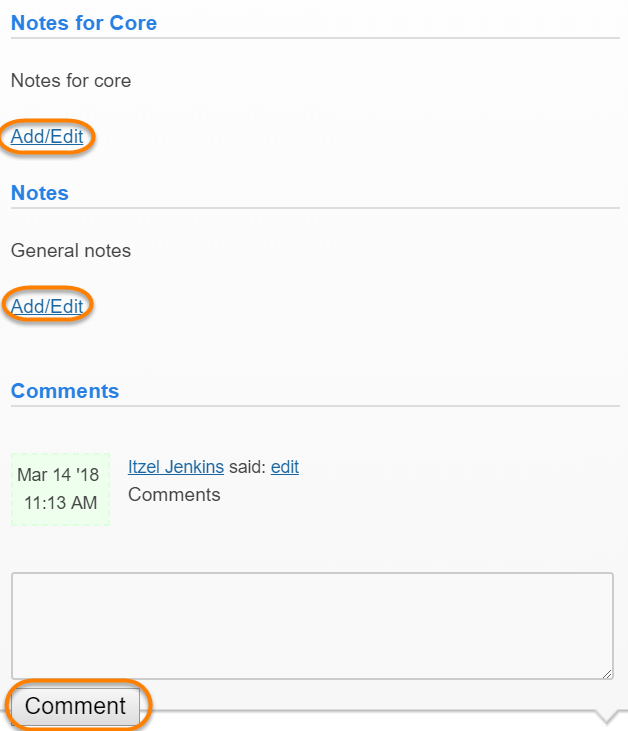
Notes and comments (text bubble icon): The pop-up panel lets you add and edit notes and comments. The Notes for Core panel is only visible to core staff and can be used for internal notes. The Notes panel is used for general notes visible to both core and others. The Comments panel can be used for back and forth conversation between all users who have access to the invoice.
-
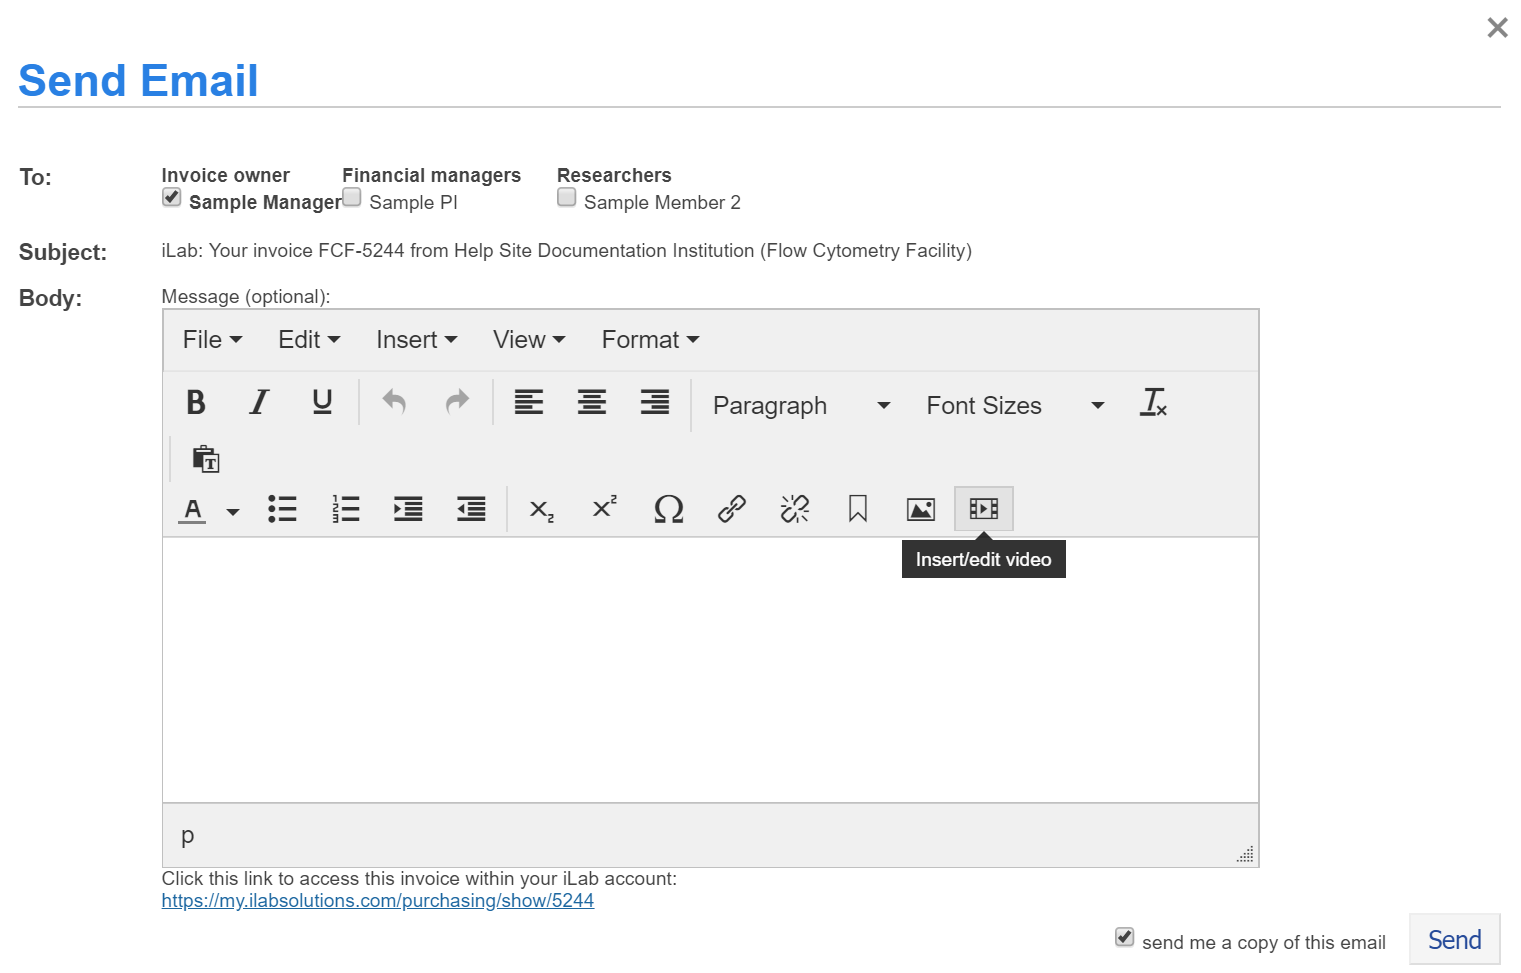
E-mail (letter icon): For Core Administrators and Staff only. Send the invoice by e-mail to selected recipients, together with an optional message:
- View invoice detail (magnifying glass icon): Open up the full invoice (as discussed further in the Invoice Detail section)
- Mark as paid / billed (button): For Core Administrators and Staff only. Clicking "Mark as paid" will change the status of the invoice to Paid. The button will change to "Mark as billed", and clicking it again will revert the invoice to Not yet Paid.
-
Notes and comments (text bubble icon): The pop-up panel lets you add and edit notes and comments. The Notes for Core panel is only visible to core staff and can be used for internal notes. The Notes panel is used for general notes visible to both core and others. The Comments panel can be used for back and forth conversation between all users who have access to the invoice.
Bulk Actions
A number of actions can be applied in bulk to all selected invoices. You may need to click the "Bulk Actions" button to display these actions if not already visible.
- Get PDF of Invoices: Generate a PDF version of all selected invoices. These will be e-mailed to you once they have been generated.
-
Download results as CSV: Download a CSV file with the attributes of the selected invoices:

-
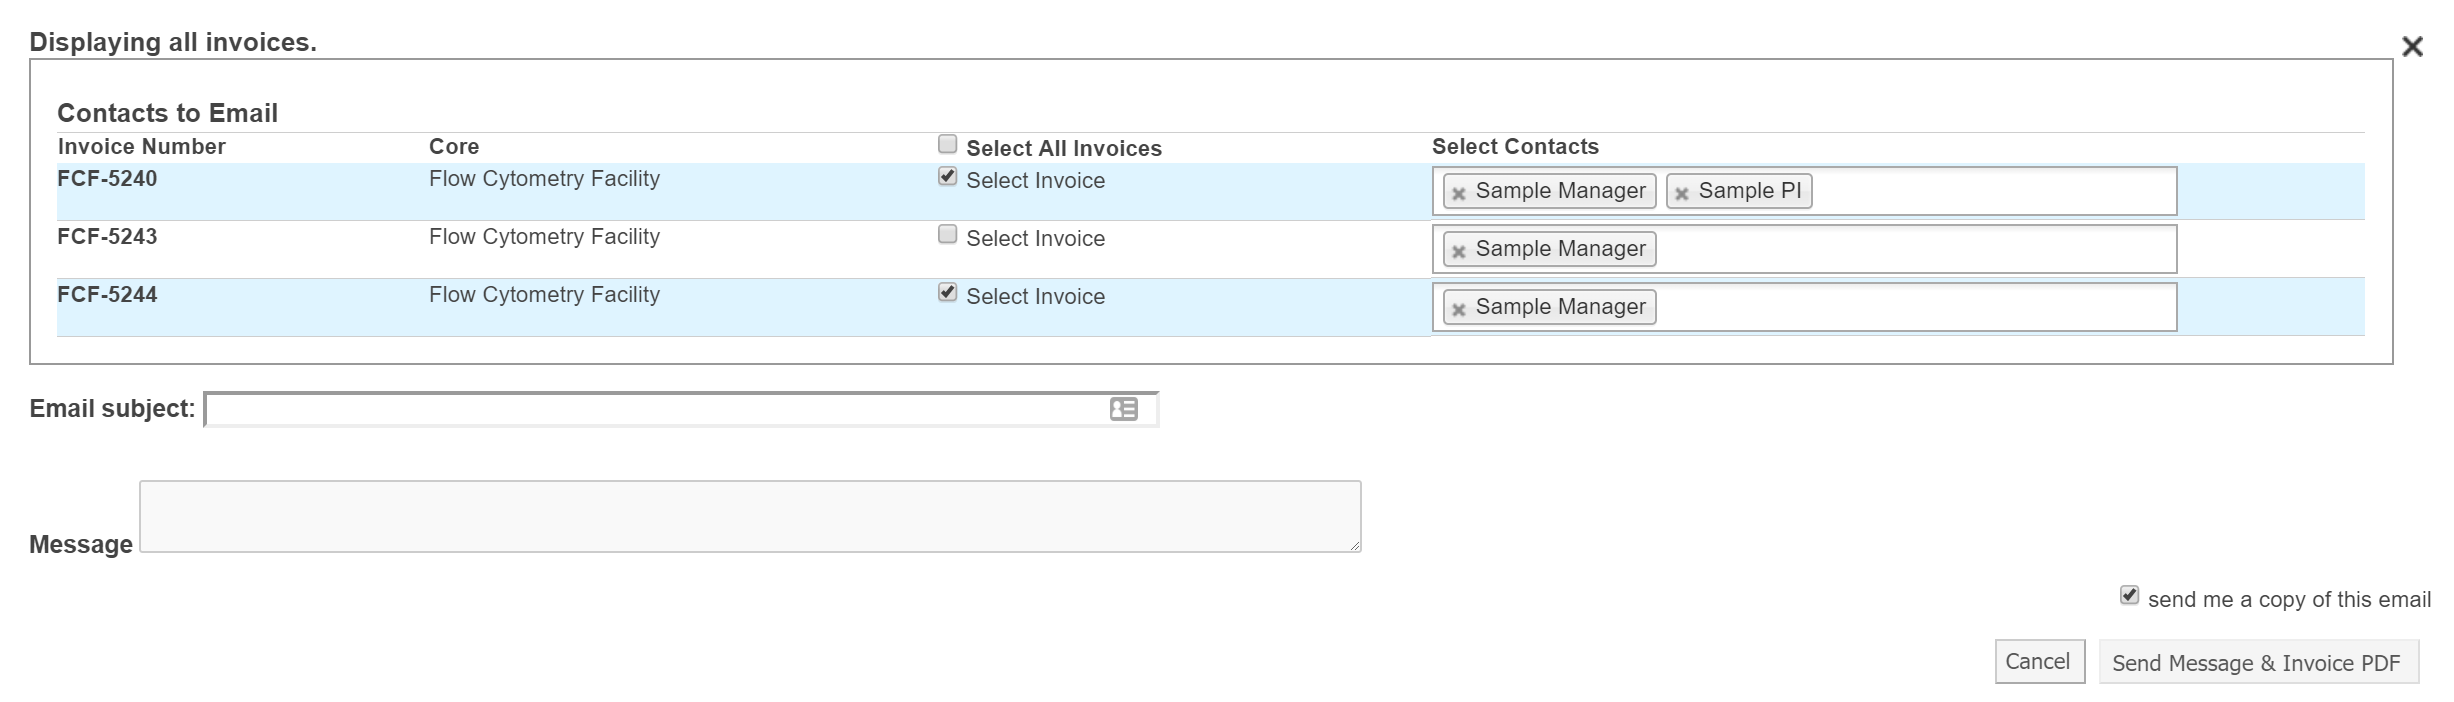
Email Admins with Access to Invoices: For Core Administrators and Staff only. Send a message to invoice contacts. Select which invoices to send with the "Select Invoice" check-marks, and add/remove recipient for each invoice in the "Select Contacts" column. Provide a customized subject and message, and click "Send Message & Invoice PDF" to send an e-mail to all recipient, with a PDF copy of their invoice attached.
- Mark selected invoices as paid: For Core Administrators and Staff only. Mark all selected invoices as Paid.
- Mark selected invoices as billed: For Core Administrators and Staff only. Mark all selected invoices as Not Yet Paid.