The initial interlock set up will require close collaboration between the core, the iLab team, and the institution IT members. After the initial set up process, interlock is managed by core administrators.
Accessing Interlocks
To set up and manage your interlock, click on the "More" button on the Schedule Equipment tab.
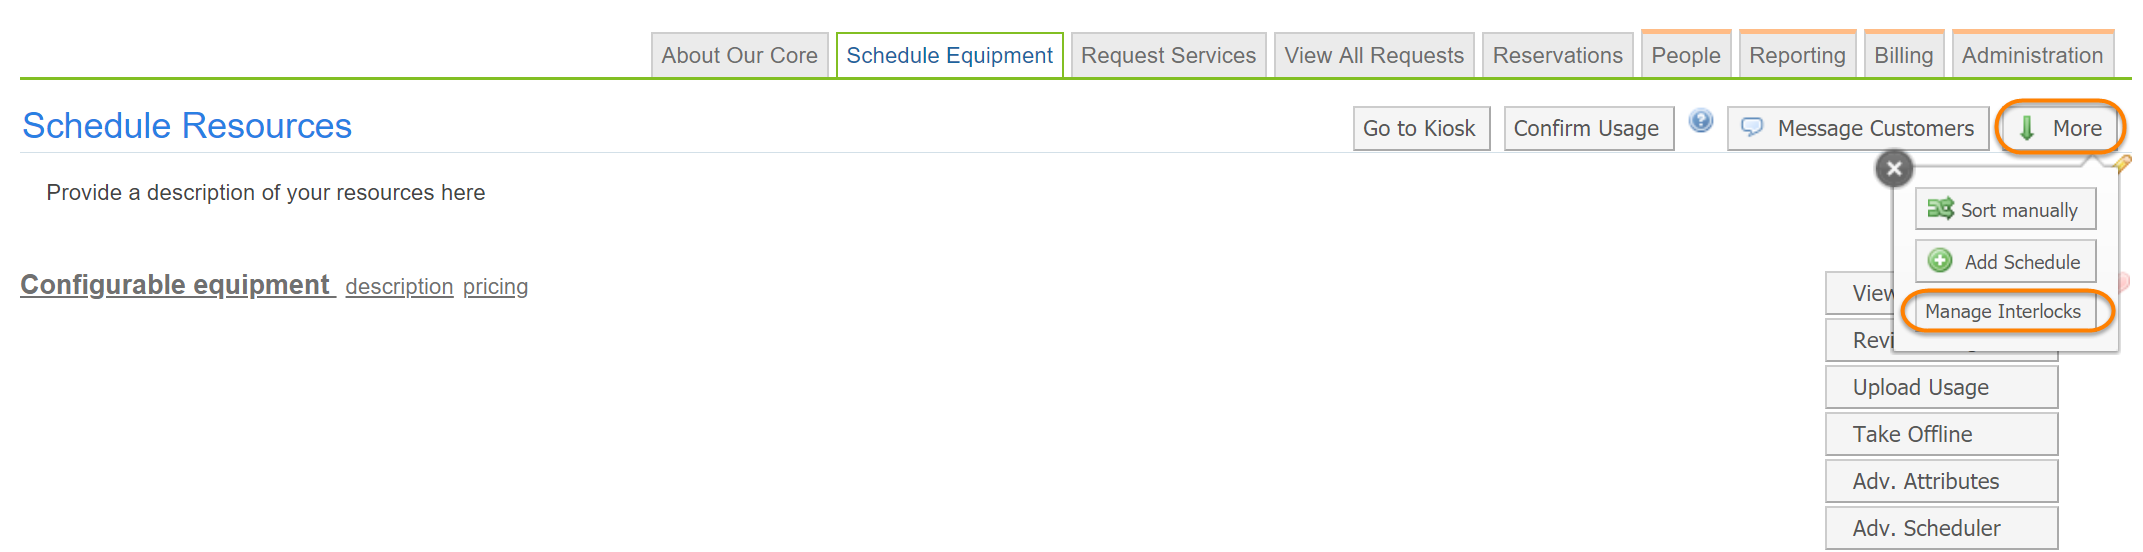
The interlock tool displays. From here, you can add new interlock devices and/or edit existing devices.

- Default to On: To be turned on in the event of a network outage.
- Add New Interlock: To add a new interlock, click on the "Add New Interlock" button and follow the directions below for adding a hardware interlock.
Adding a New Hardware Interlock
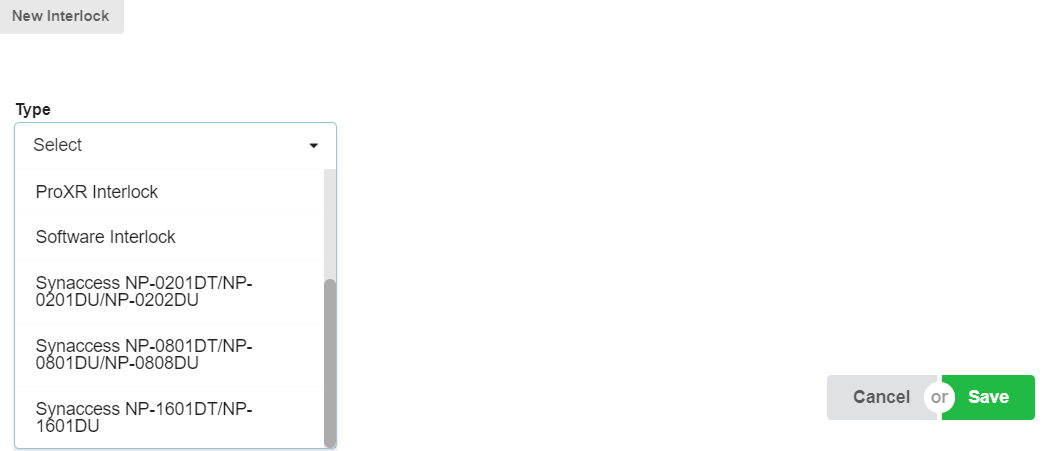
To add a hardware interlock, click on the "Add New Interlock" button as described above. Then, select the type of interlock box you have purchased from the pull down menu.
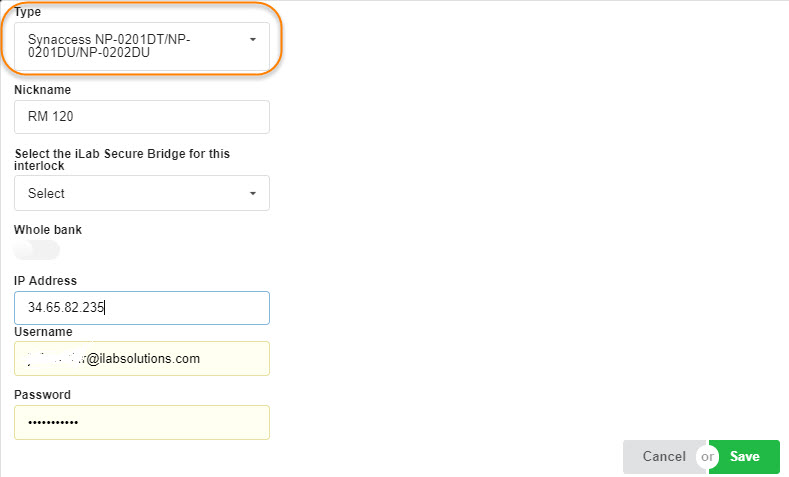
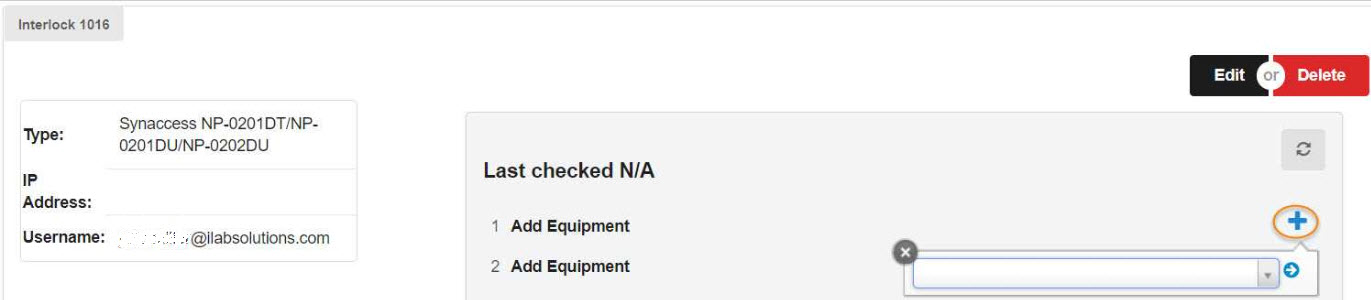
Additional fields will display depending on the hardware selected. You will be asked to enter a nickname (a way to quickly identify this interlock), the interlock IP address, the iLab bridge, a username and a password.
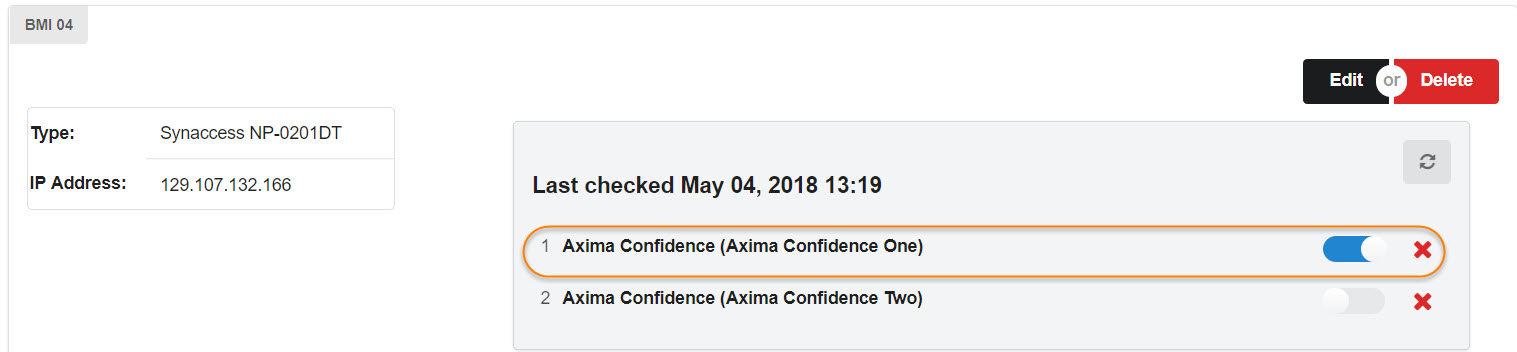
After the new interlock is added, use the blue plus icon and select from the drop down menu to assign a resource to the device. When your instrument it selected, click on the blue arrow to save.
Interlock connection can be turned on or off per instrument by sliding the blue toggle switch.