Permission groups have replaced what was formerly trained user levels. Permission groups allow the core to assign users to different groups and then add those groups to usage types that will enable or limit access to a calendar. Permission groups are not hierarchical and can be assigned to multiple usage types. Permission groups are assigned at a core level but users/research groups may be added per resource. For more information on specific calendar settings that have been updated, please see Schedule Settings.
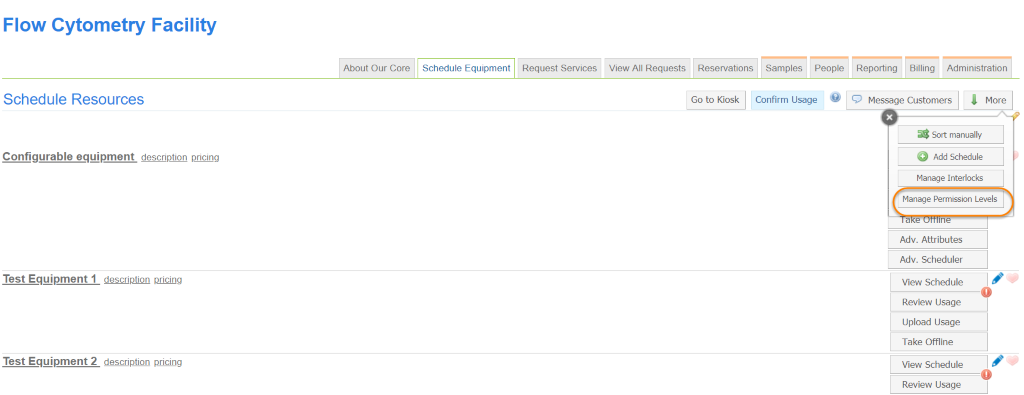
The first step in setting up resource calendars is to create permission groups. These permission groups will apply across all calendars and will be tied to usage types within each individual calendar. No more than 10 permission groups may be added. To create a permission, navigate to the ‘More’ button on the Schedule Equipment tab. Click on ‘Manage Permission Levels’.
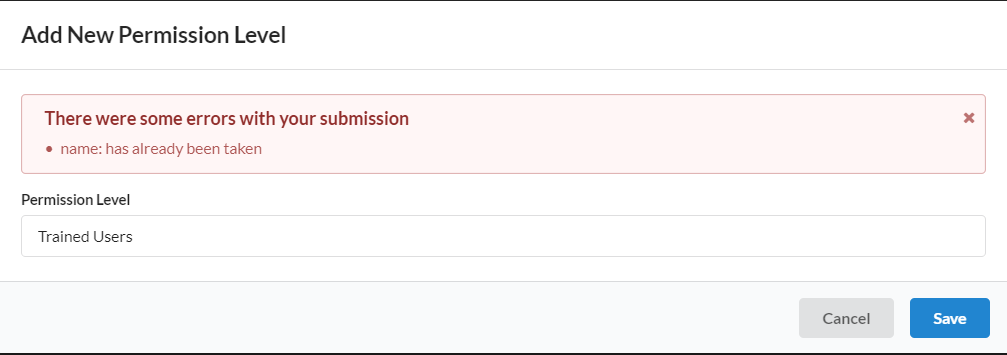
A new interface will open. This new page will allow up to 10 permissions to be created, edited, and deleted. All cores will have a Trained permission that can be renamed, and each core is required to retain at least one permission level. The system will still utilize a level of Untrained which is not visible on this page. To add a new permission, click on 'New Permission Level'. Add the name of the permission group and click 'Save'.

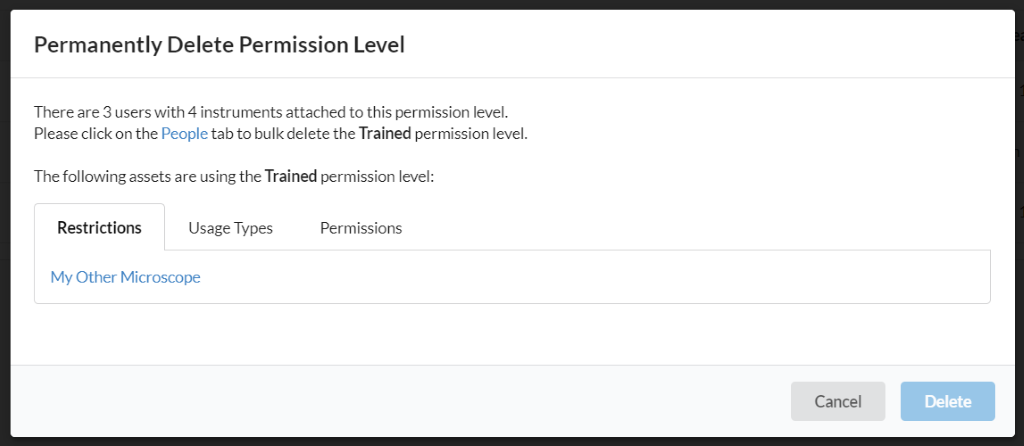
Validations will ensure permission names are not duplicated. The system will also ensure a permission is not deleted if actively assigned to a group/person or resource setting. The system will inform the user when this occurs, and the action button will be disabled.
Once all permission levels have been added, you can manage the permissions groups on the following interface.
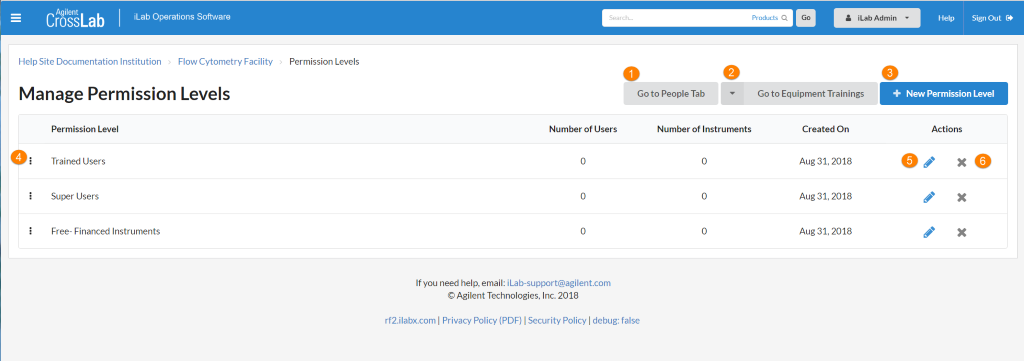
- Go to People Tab: Navigate to the People tab to bulk manage permissions.
- Go to Equipment Trainings: Choose and navigate to a specific calendar to manage permissions.
- New Permission Level: Add a new permission name up to 10 different permissions. This button will be grayed out if 10 permissions are present.
- Three dots: Click and drag on the dots to sort the order of the permissions. Although the permissions are not hierarchical, this will affect the order the permissions appear in selection lists (i.e- reservation details for the calendar).
- Edit Pencil: Click the blue edit pencil to edit the name of the permission level.
-
Delete X: Click the X to delete the permission. The system will not allow you to delete a permission that has users assigned to it.