Time entry allows cores to account for the time spent on various projects. Core members can log hours in an easy-to-use time sheet module. The core can then bill for their services on an ongoing basis, and the customer can report on usage.
Because Time Entry is integrated into the Core Facility Management module, completed entries can be viewed on the corresponding Service Request on the View All Requests tab. Also, these entries will create charges that will populate in the New Billing Event interface.
NOTE: Time Entry must be enabled by iLab.
- Time Entry Overview
- Set up a Project for Time Entry
- Set up a Service for Time Entry
- Initiate a Project
- Start Tracking Time
- Enter Time
- Delete a Row
- Add a Comment
- Enter Time for a Previous or Future Week
- Billing Time Entries
- Create a Time Sheet Report
Time Entry Overview
To use time entry, you need to configure Time Entry at two levels:
- Project Template: A project will serve as the "container" for all the work tracked over time. The corresponding Project Template needs to be setup to allow for Time Entry, and associated with core staff who can track their time against the project.
- Service Template: Within a project, time will be billed against specific services. Each service may have different hourly pricing and may be associated with specific core staff that can perform the service. Each service used for hourly tracking needs to be enabled for Time Entry.
Set up a Project Template for Time Entry
You will need to create a new Project Template (or edit an existing template) to capture the work completed for the customer. To do so, navigate to the Request Services tab on the core’s page. Click on "Add a Service Project Template", or use the yellow pencil to edit an existing template.
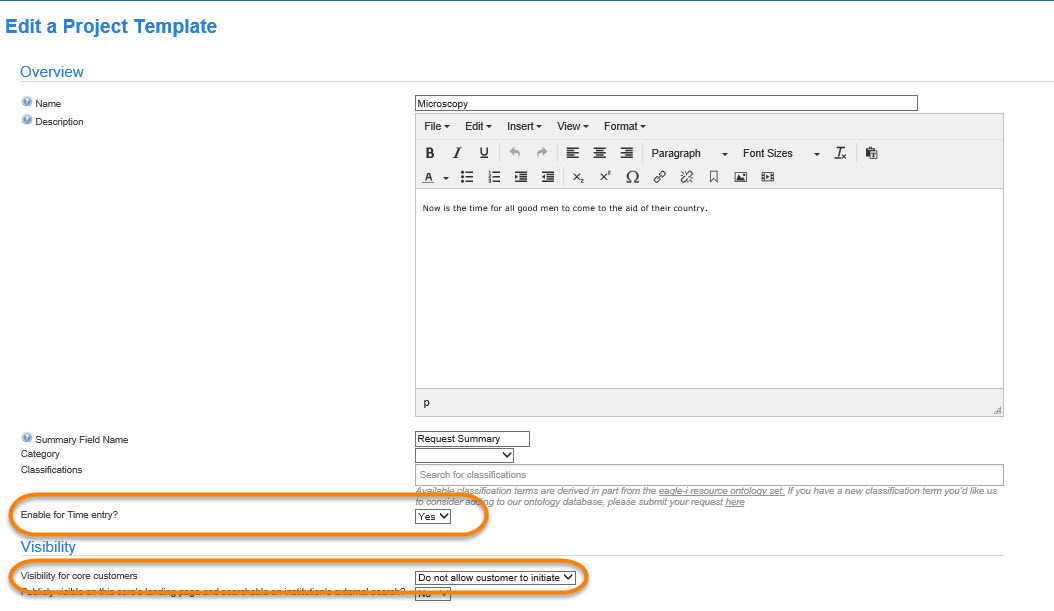
If adding a new template, give the project a name and description (optional) in the Overview section, as discussed in Editing the Service Requests panel. The setting to "Enable for Time Entry" must be changed to "Yes". In the Visibility section, you may also want to select "Do not allow customers to initiate" if core staff only should be able to initiate this request.
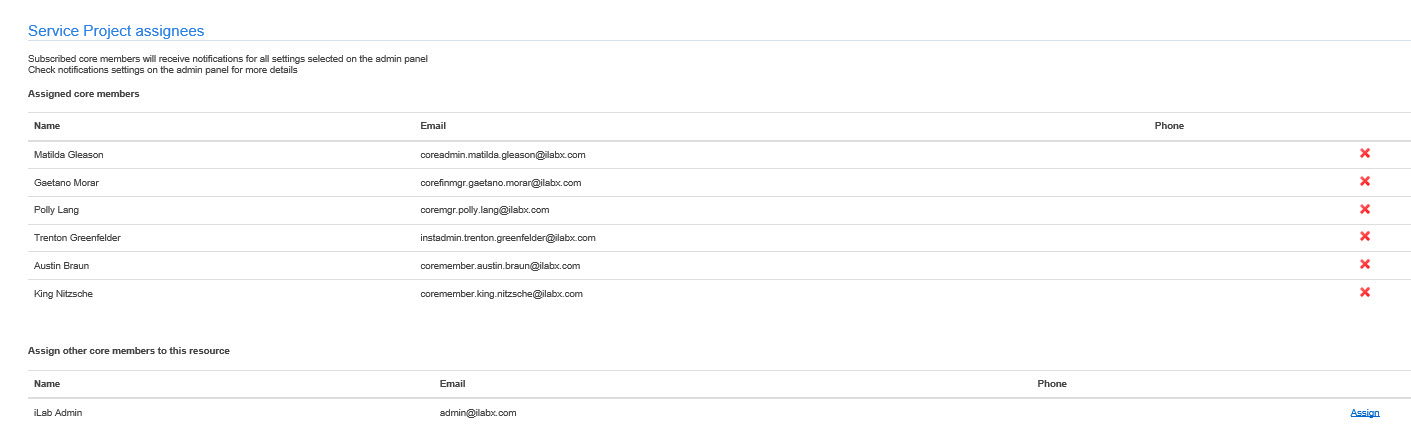
Next, in the Service Project assignees section you will see a list of core staff . Select the core staff that should be able to track their time against this type of project by clicking "Assign" to the right of their name. This will move them to the Assigned core members section. You can remove the assigned members using the red "X" to the far right.
Set up a Service Template for Time Entry
You will also need to enable the individual service for Time Entry. To do so, navigate to the Request Services tab on the core’s page. Click on "Add a Service Template", or use the yellow pencil to edit an existing template.
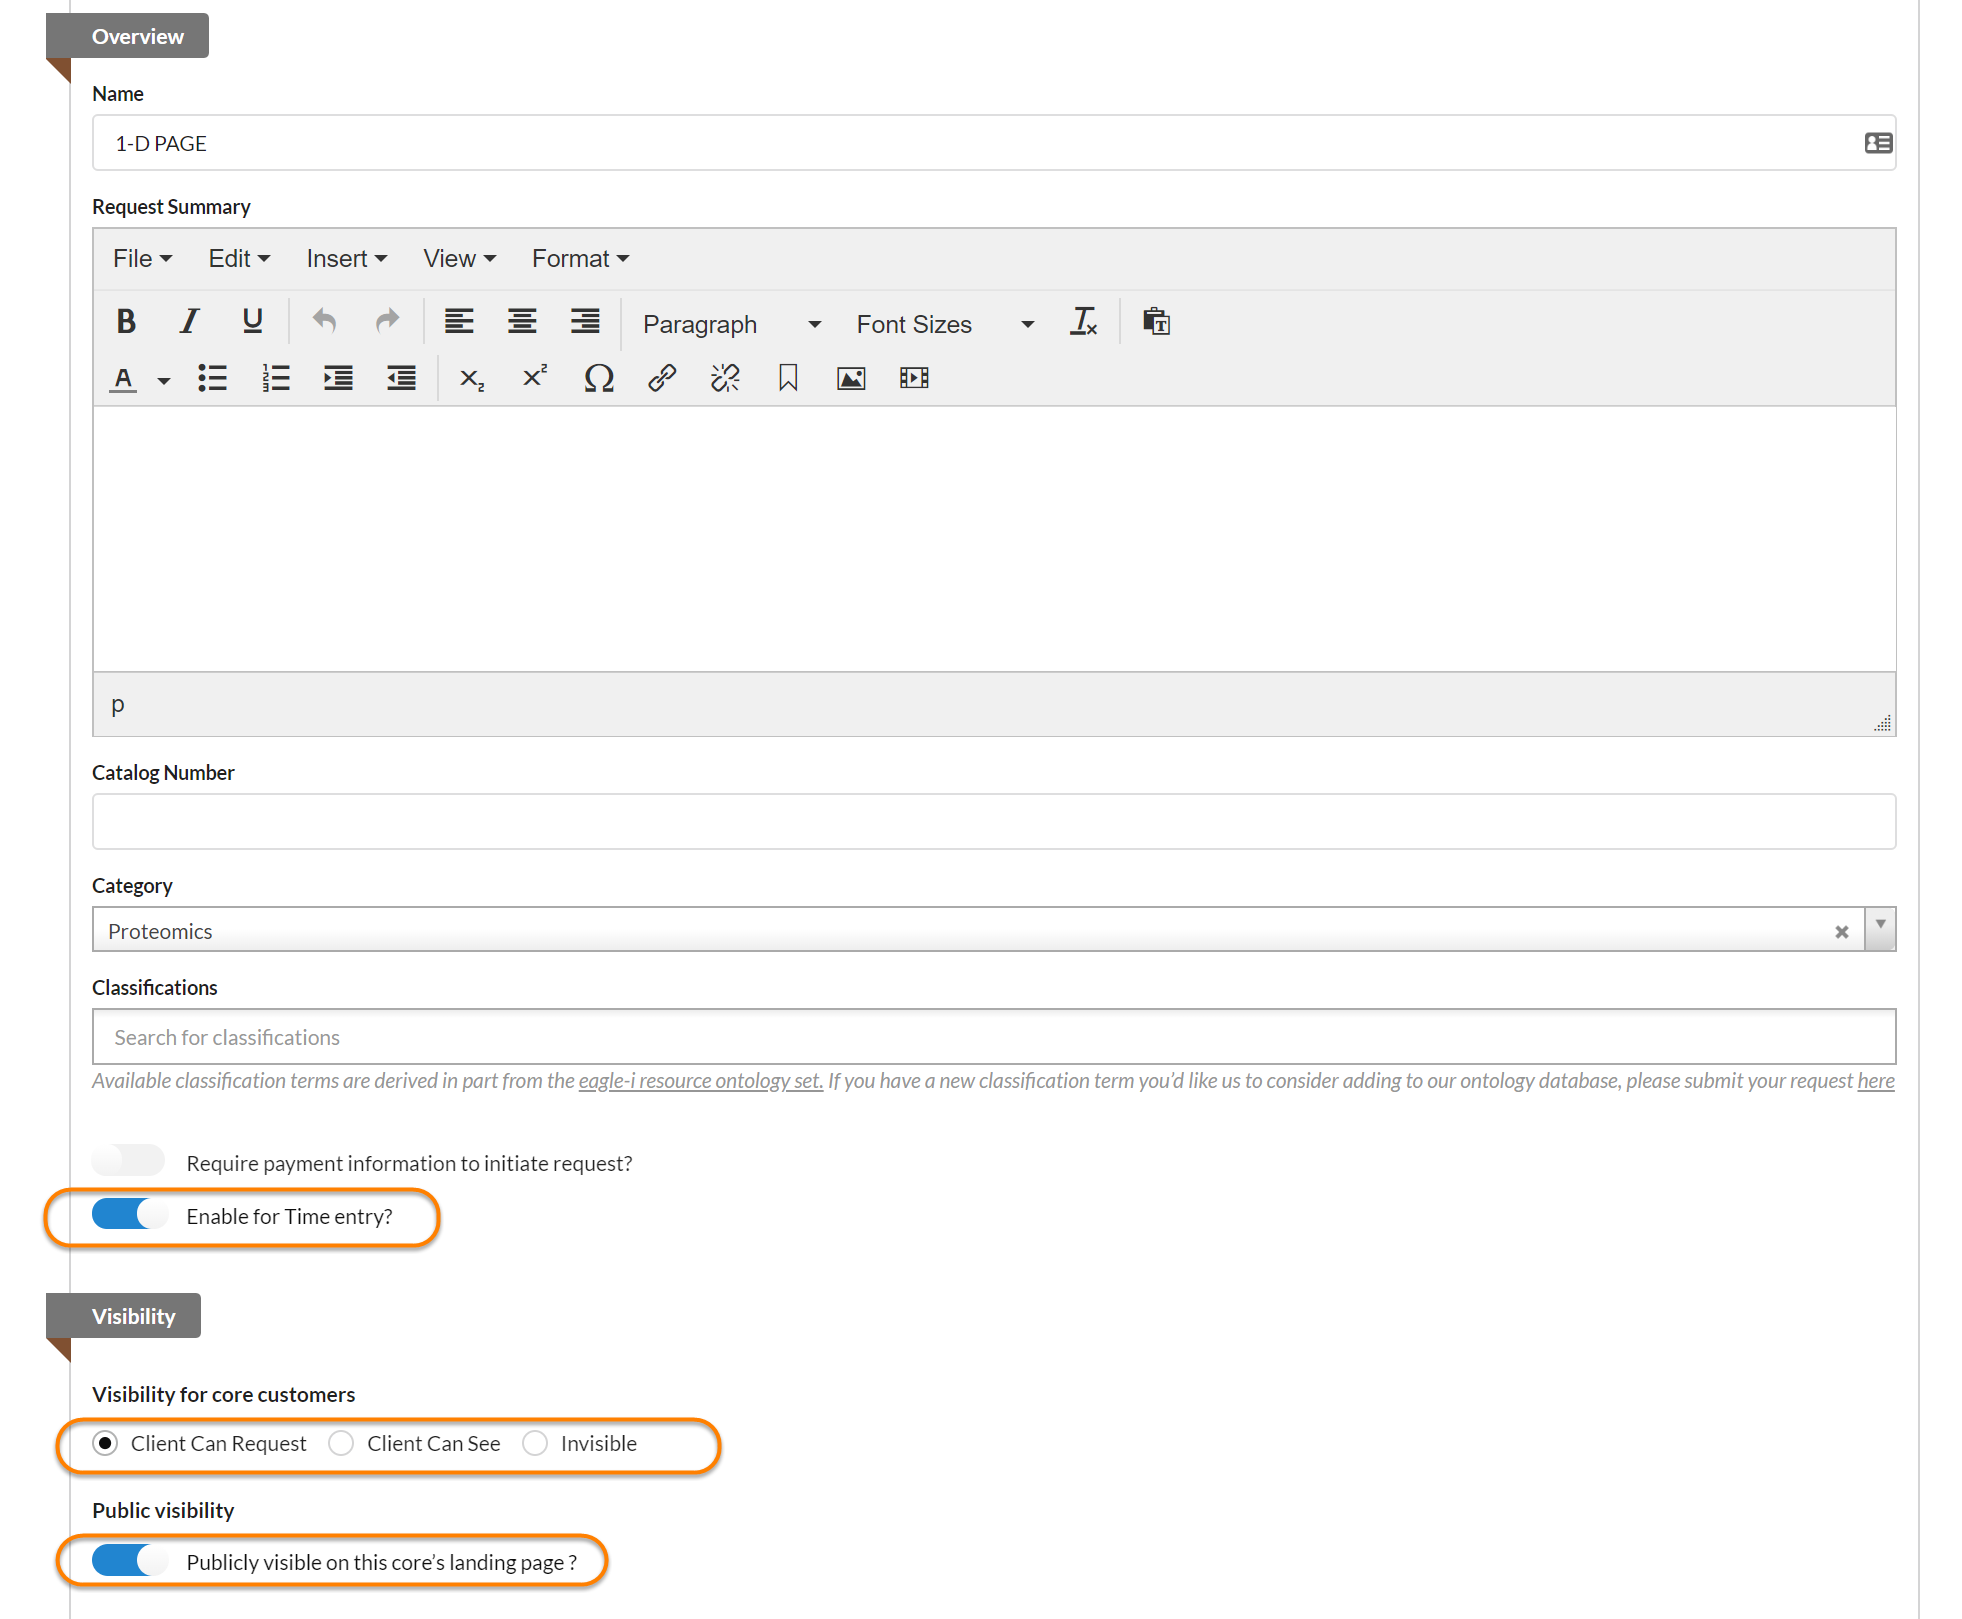
If adding a new service template, update the fields necessary to define the service (as discussed in Editing the Service Requests panel). Time Entry must be enabled in the Overview section. You may also want to limit the customer visibility of the service item in the Visibility section.
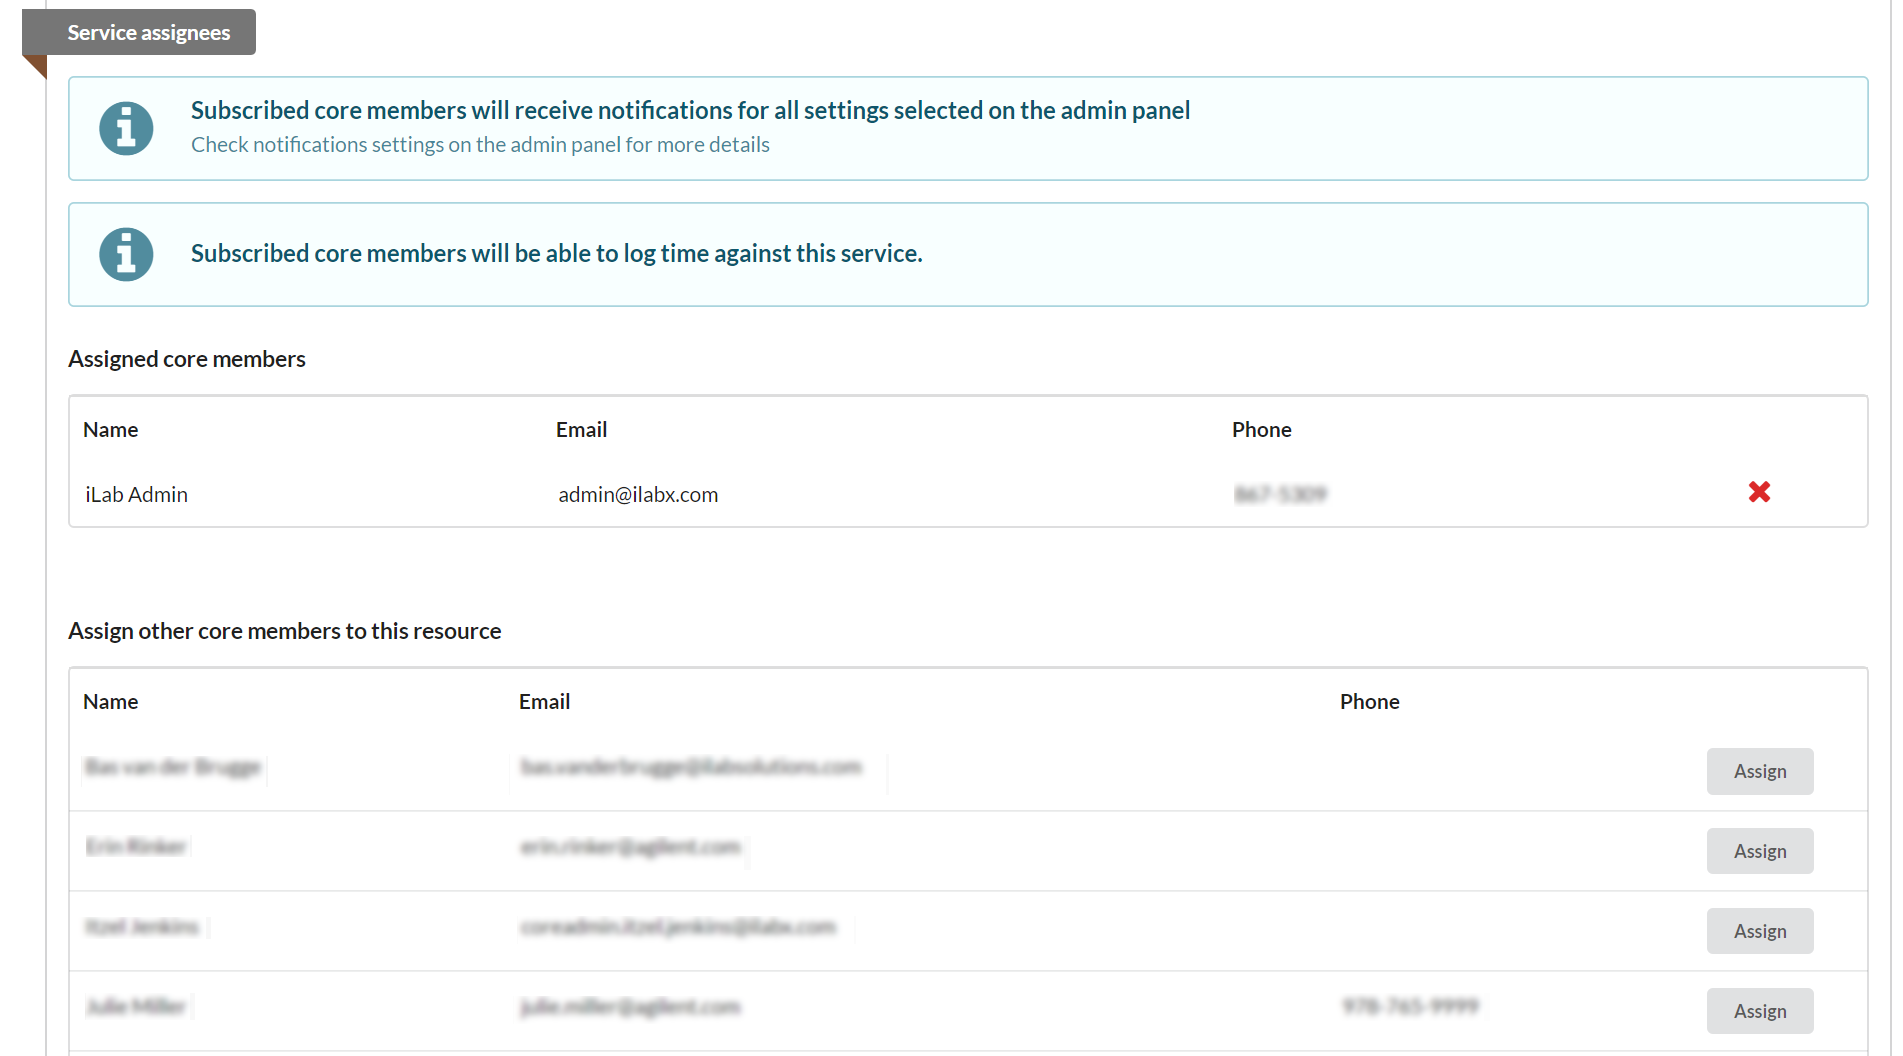
Next, in the Service assignees section you will see a list of core staff. Select the core staff that should be able to track their time against this type of project by clicking "Assign" to the right of their name. This will move them to the Assigned core members section. You can remove the assigned members using the red "X" to the far right.
Initiate a Project
Initiating a "job" with time entry is the same as creating any other project in your core. The job can be initiated by a customer, or created by core staff, as discussed in Request Services.
Once the core has updated the status of the job to "processing", staff can begin tracking time against the project.
Start Tracking Time
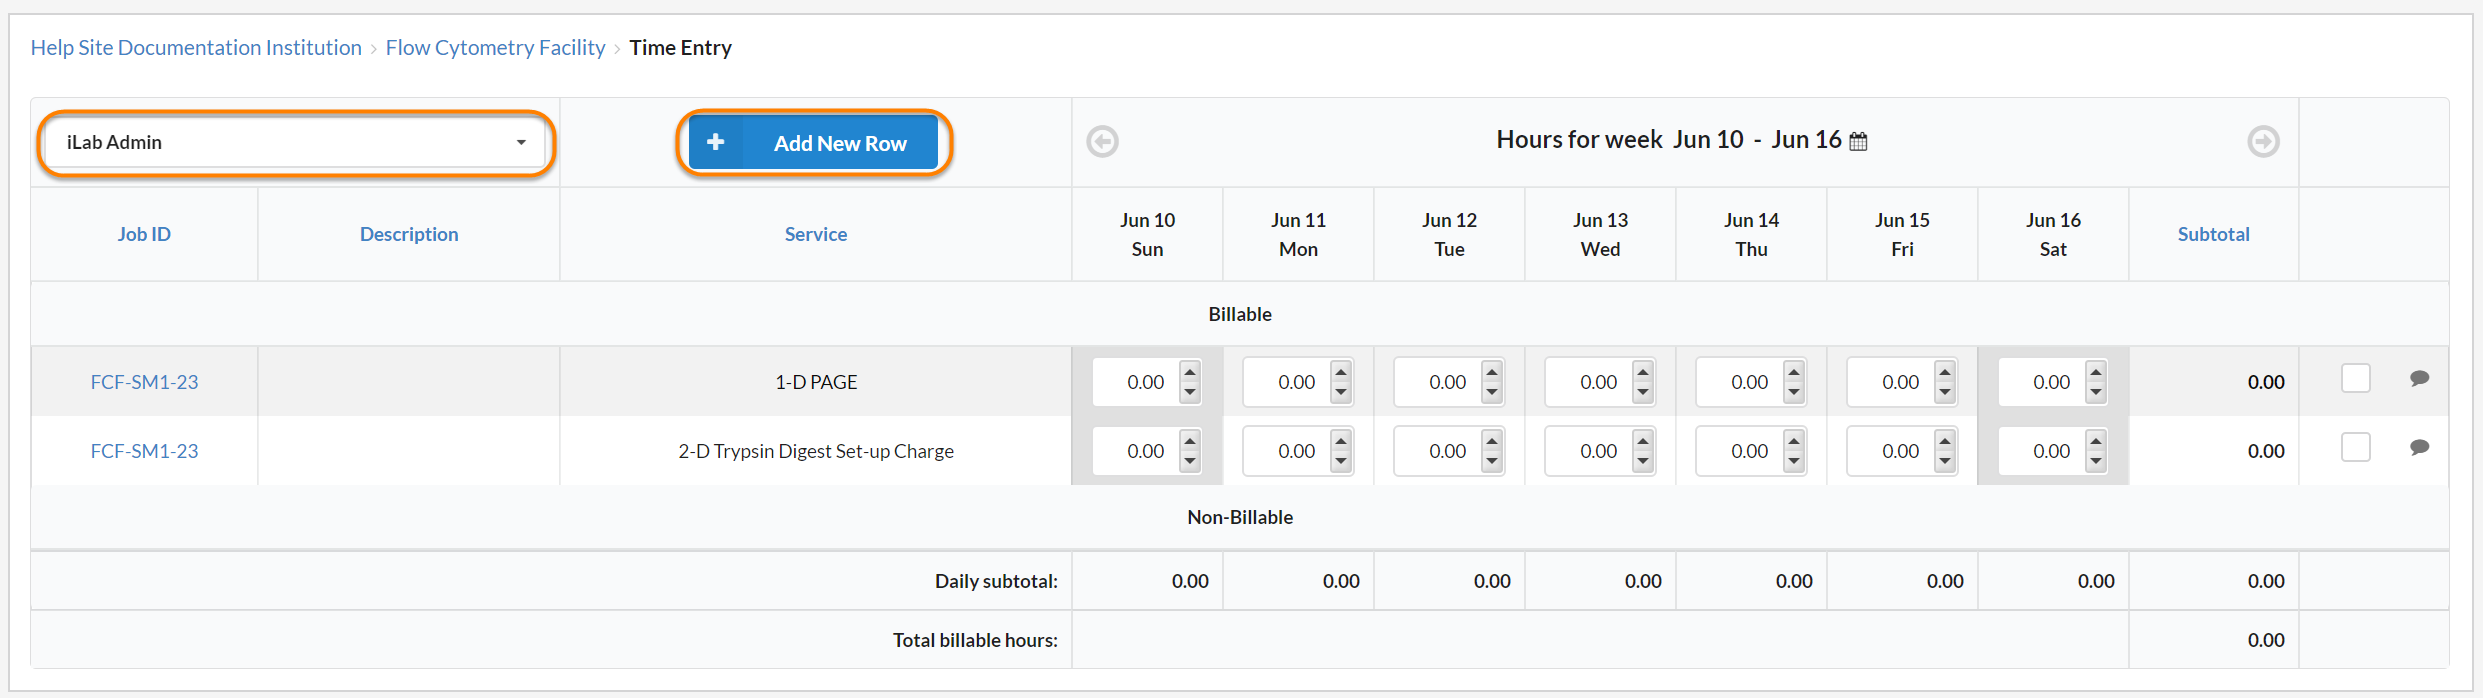
Once project templates have been configured and a specific job has been created for the user, core staff can begin tracking time for various services. Select Time Entry from the left menu or the Time Entry tab.

Next, select the appropriate core staff member using the drop-down list in the upper left and click "Add New Row".
A popup window will display. Enter at least two characters of the Request ID or customer name, and select the desired project.
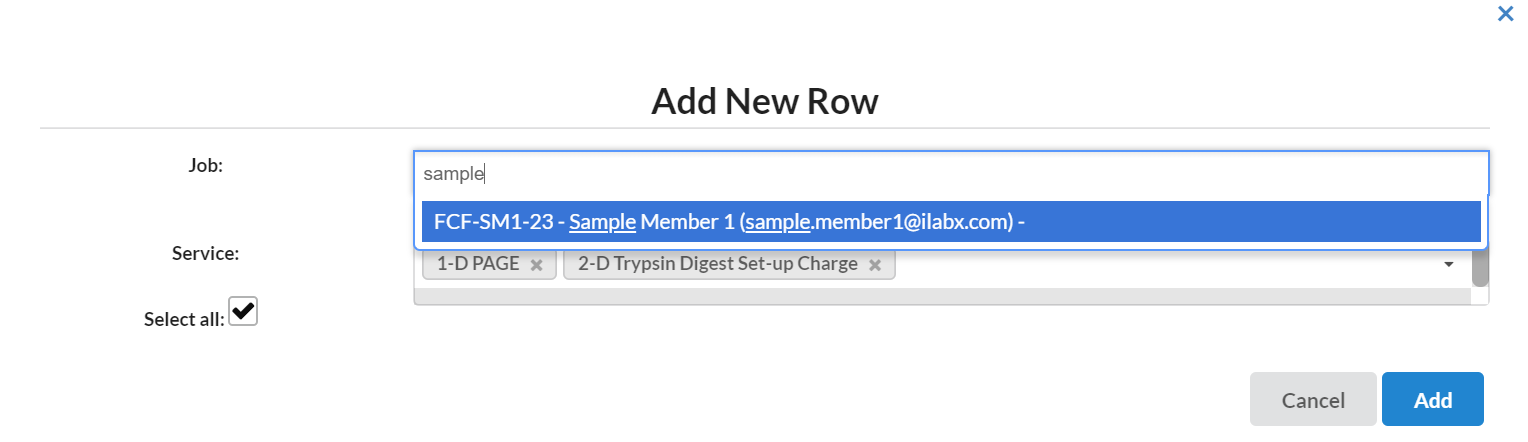
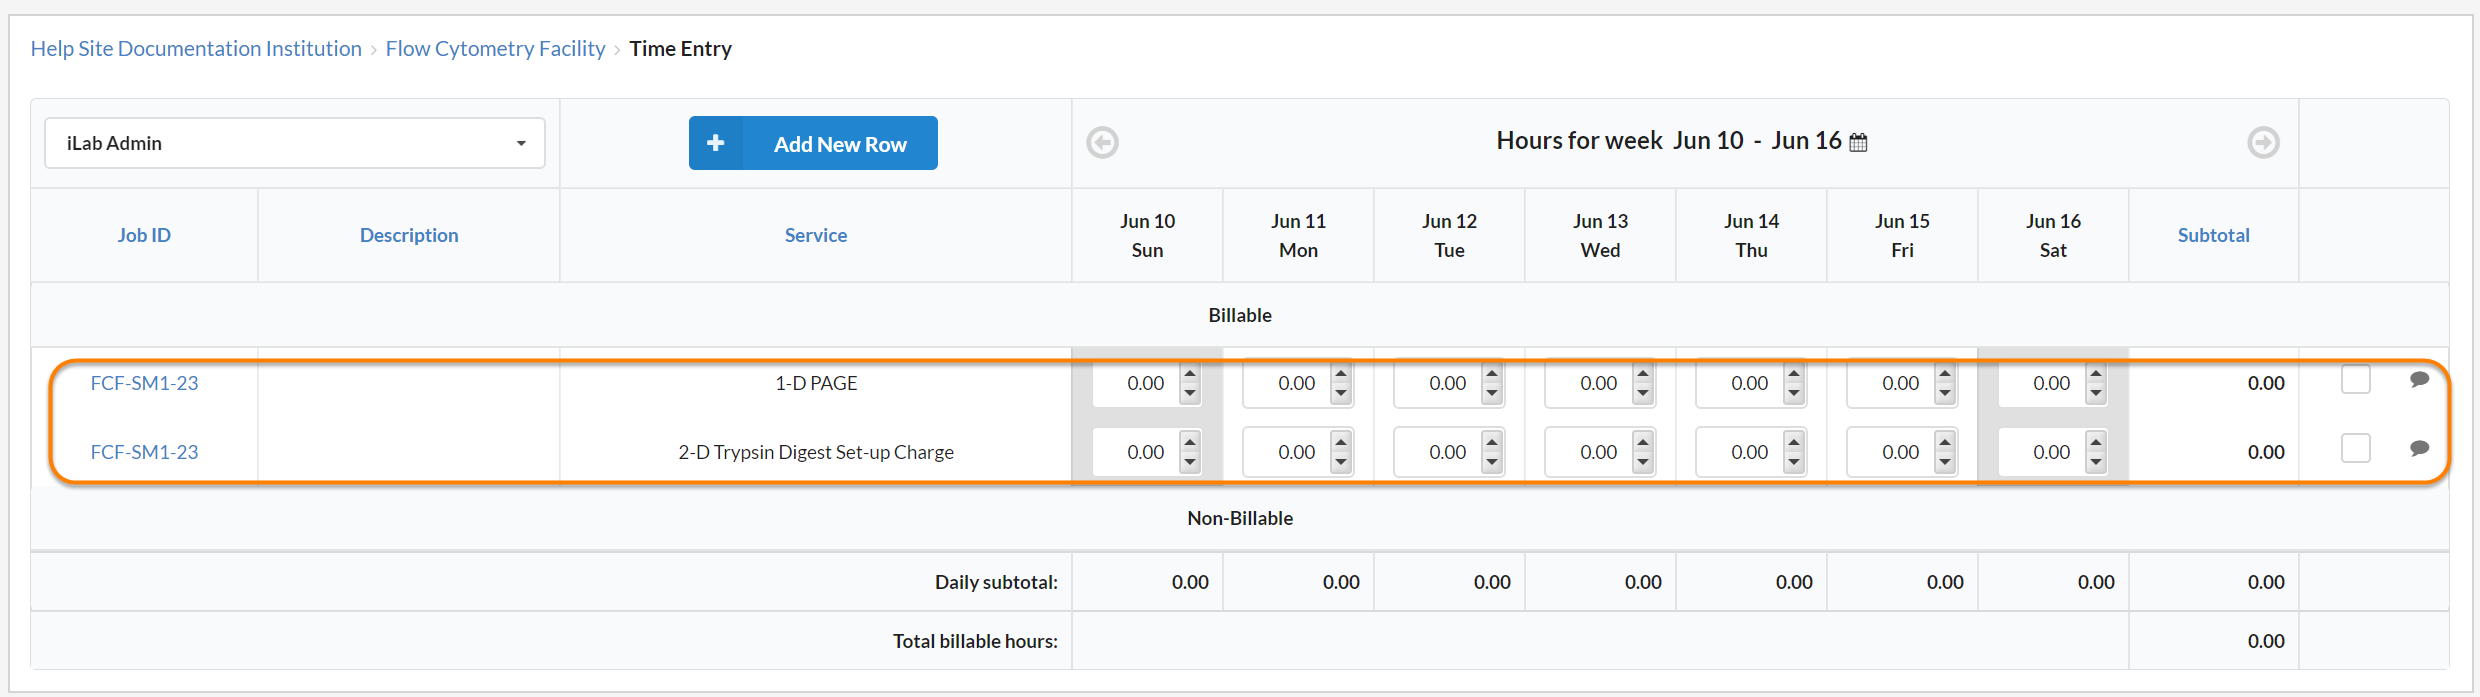
Available services that have been assigned to the selected core staff member will display. Delete any service items that do not apply to this project, or that you do not wish to track time against. Then, click "Add" to add the job to the time sheet. One row will be added for each service.
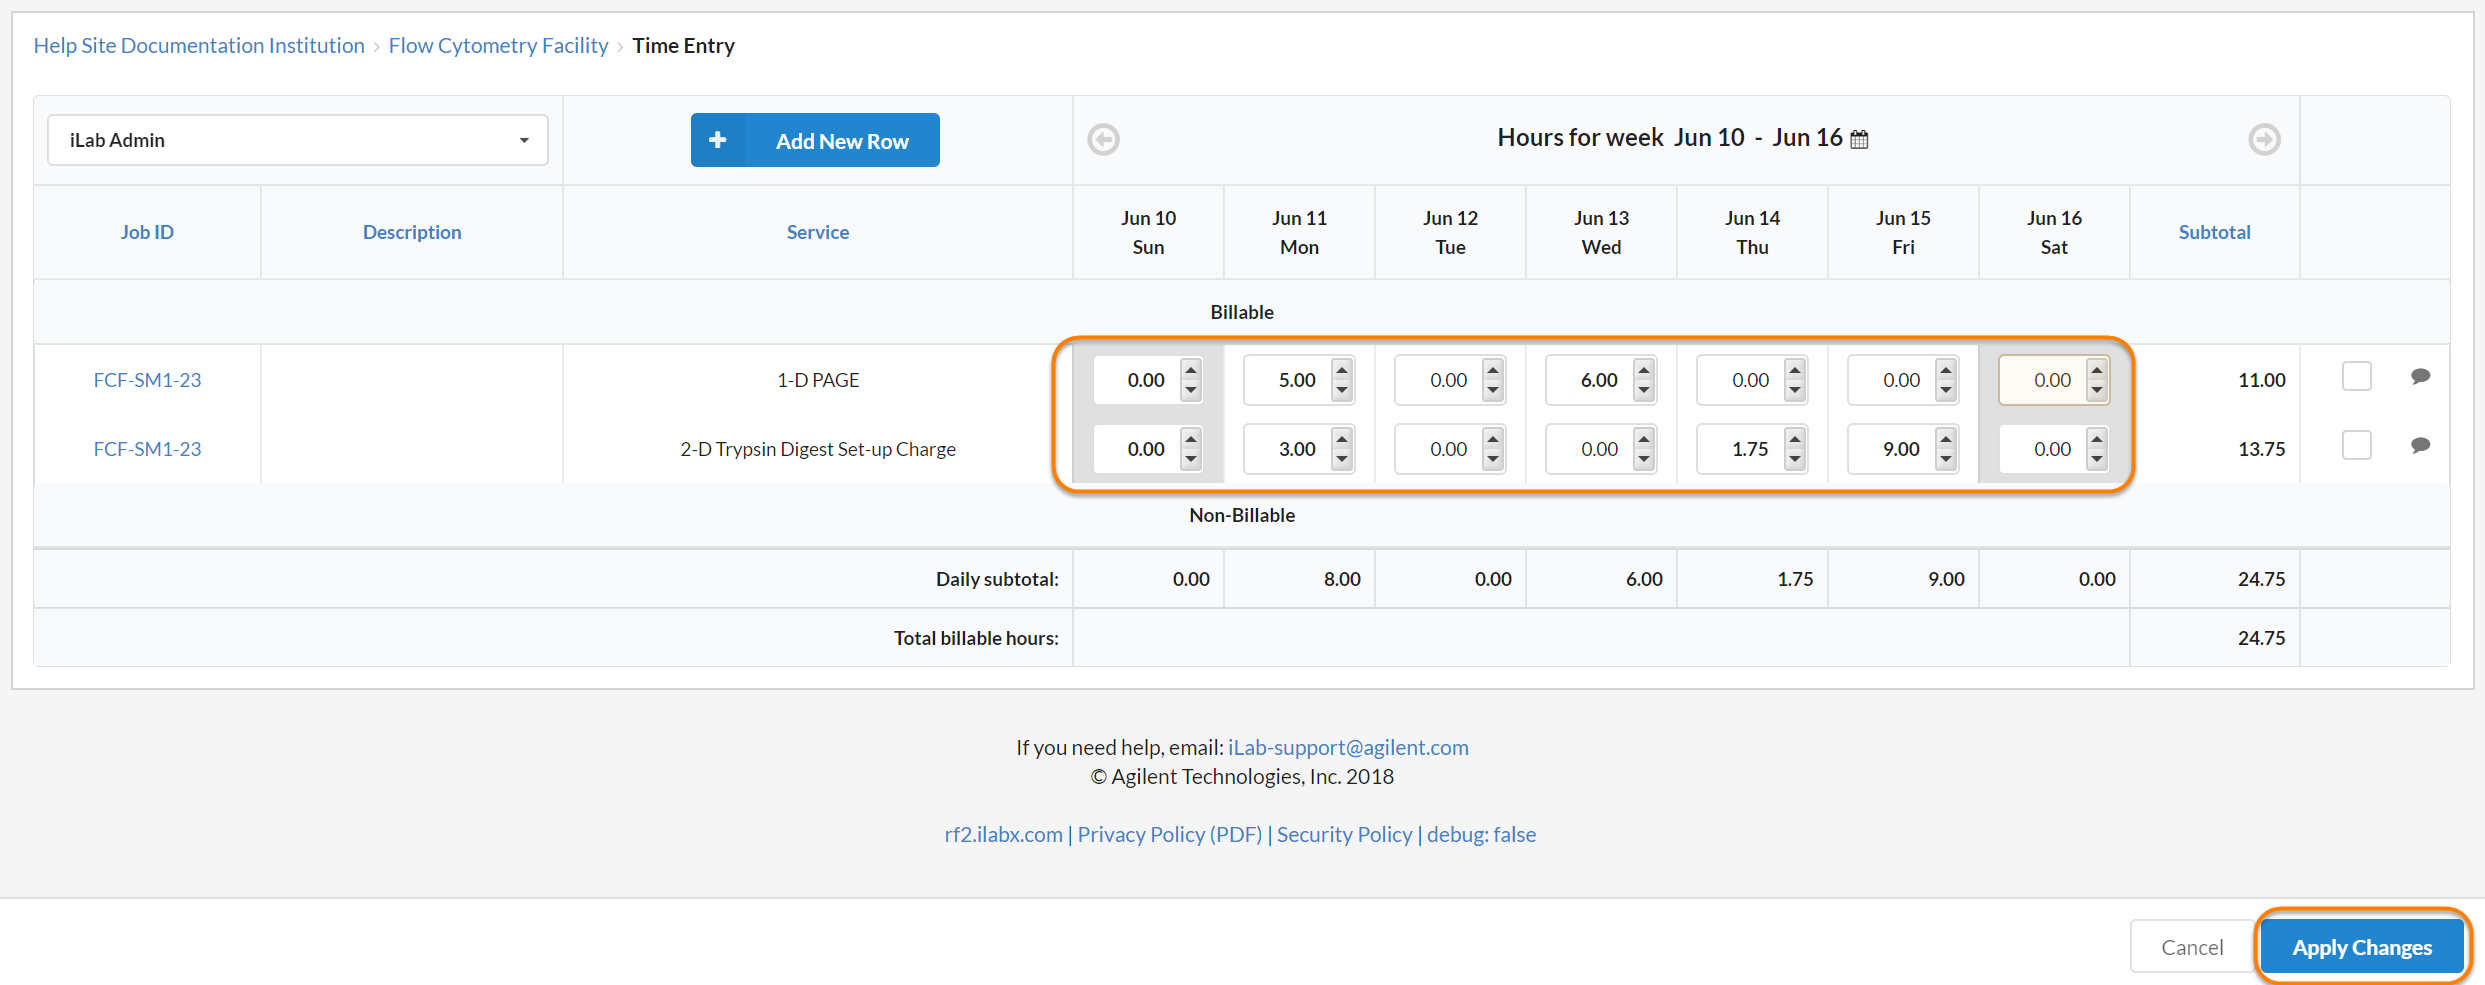
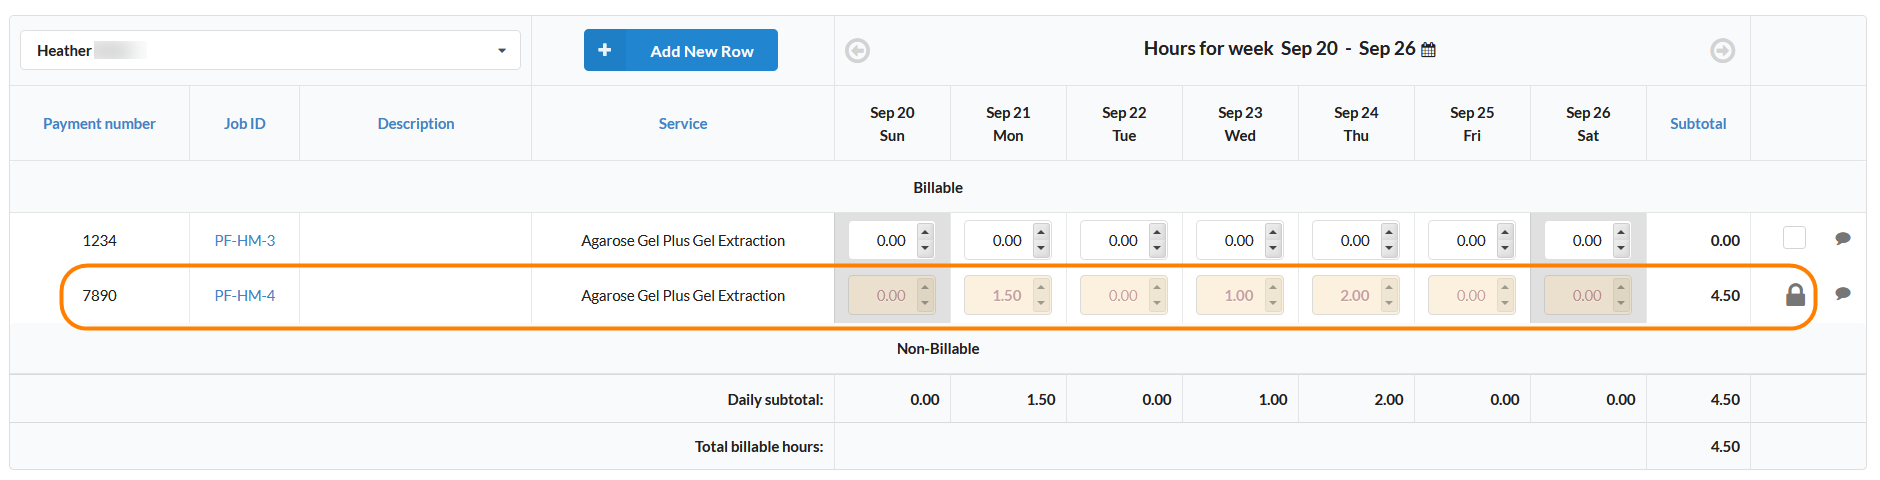
Enter Time
To enter time for any day of the selected week, either click the up/down arrow in the appropriate cell or manually enter the hours. Time must be entered in quarter hour increments. Once done, click "Apply Changes" at the bottom.
Delete a Row
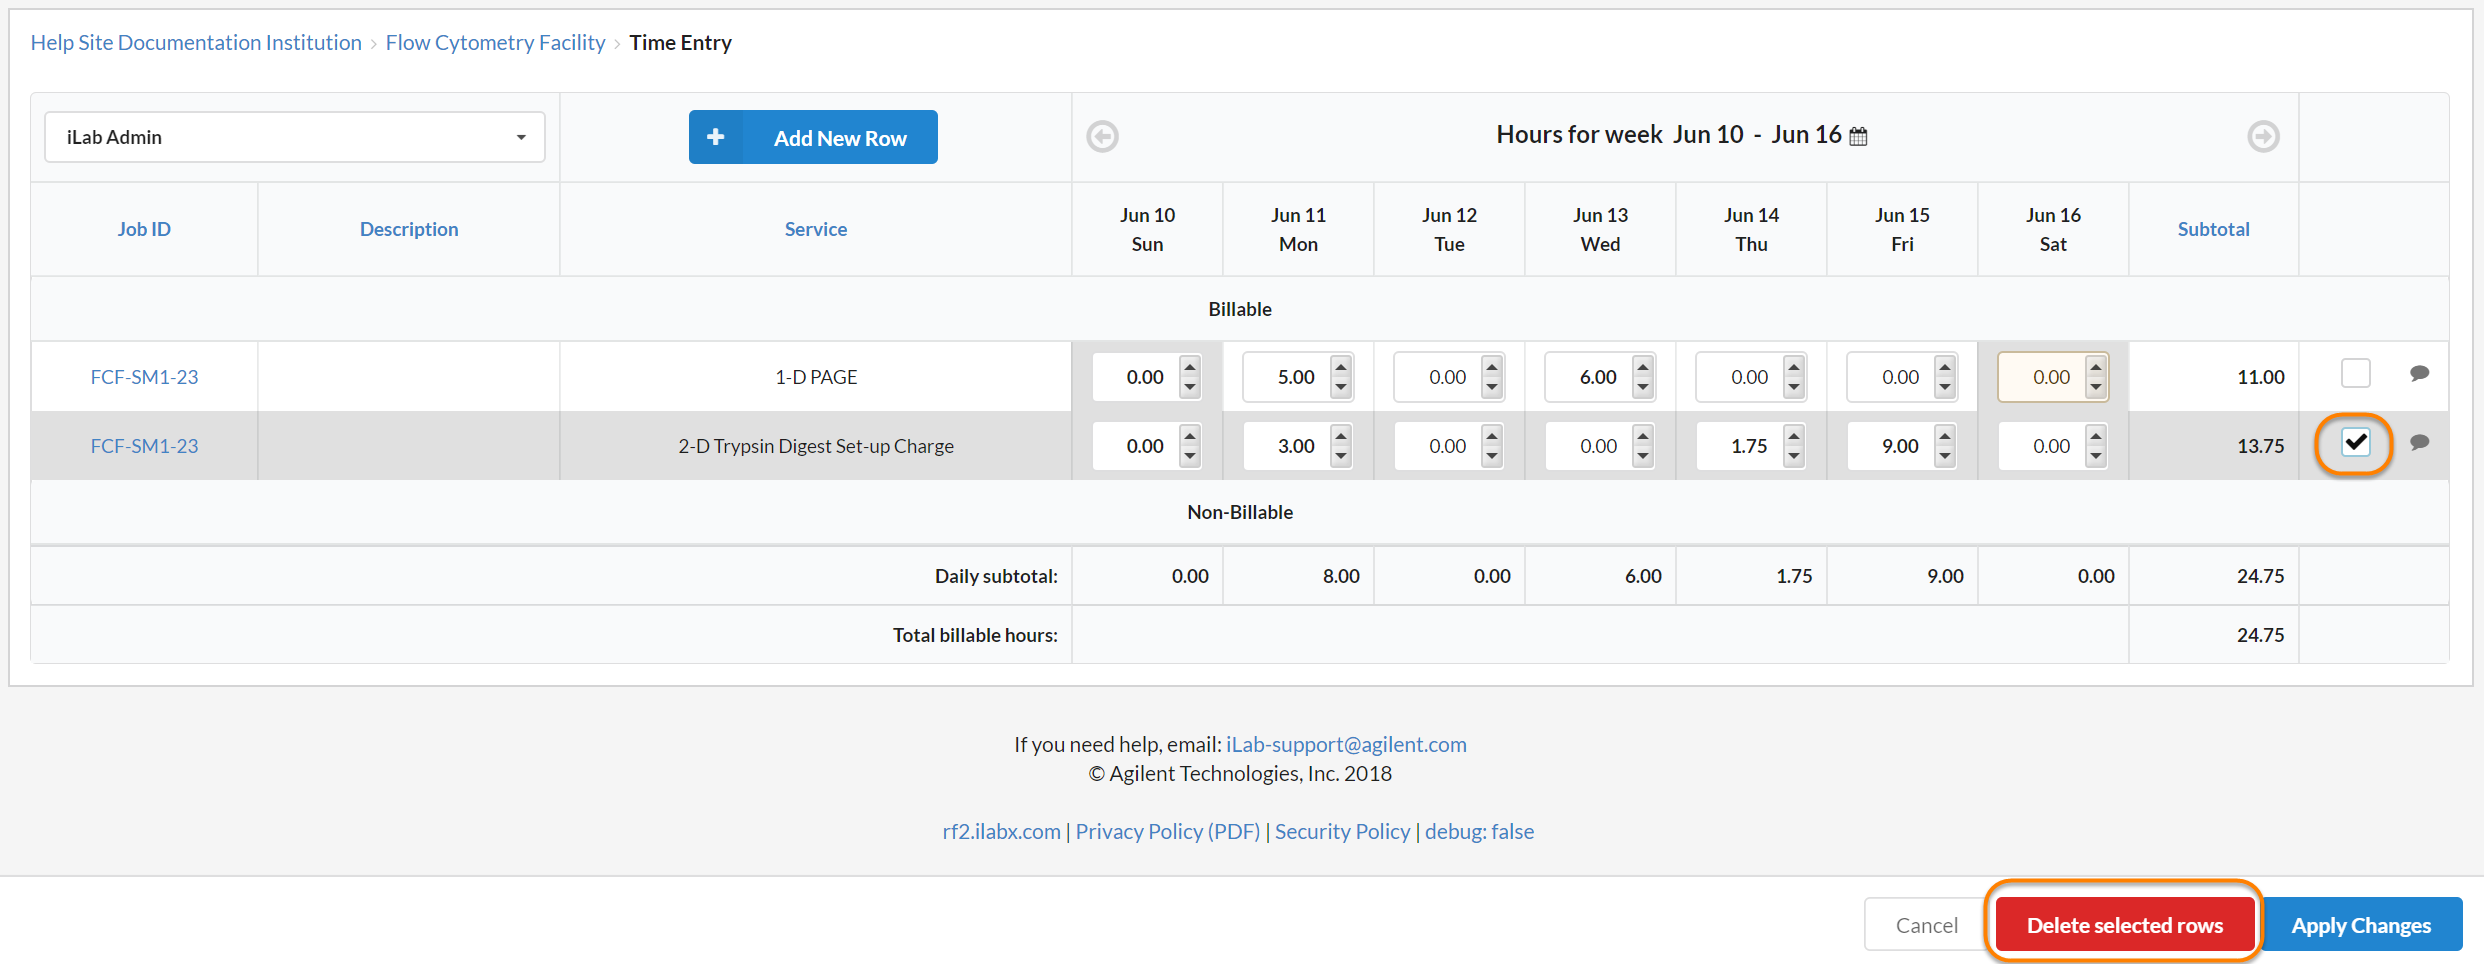
If you need to delete a row, click on the checkbox at the right on the desired row and then click "Delete selected jobs". Note that rows on a closed week cannot be deleted.
Add a Comment
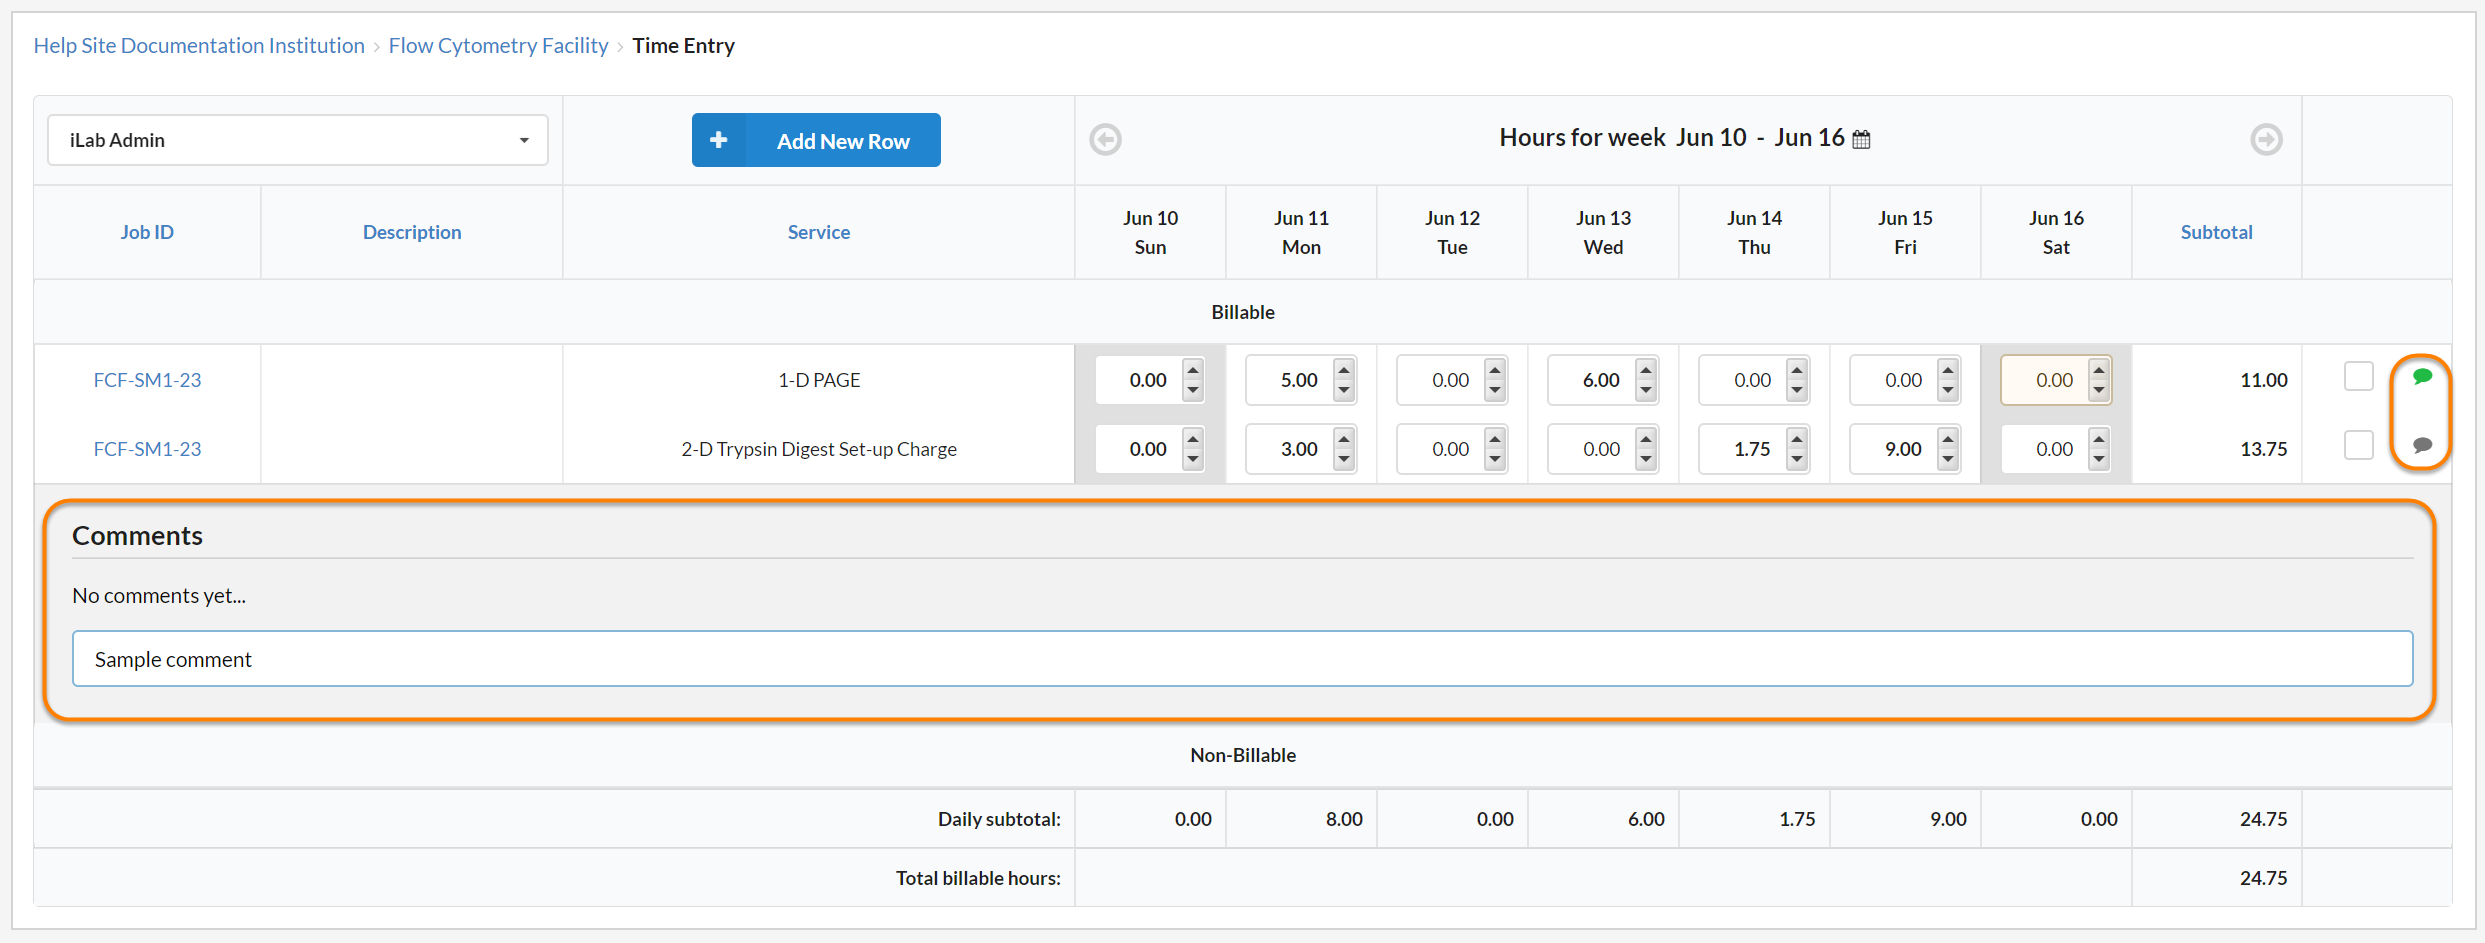
As an administrator, you have to ability to add a comment to a service entry. The member associated with the service entry will be able to view it when they log into Time Entry. To add a comment, click on the text bubble icon to the right. Enter a comment and press Enter when done. A green icon indicates a comment has been added. Comments can be viewed by clicking in the text bubble icon.
Enter Time for a Previous or Future Week
Sometimes it may be necessary to add or update time on a previous time sheet, or to add charges to a time sheet in the future. Use the arrows at the top of the window to navigate:
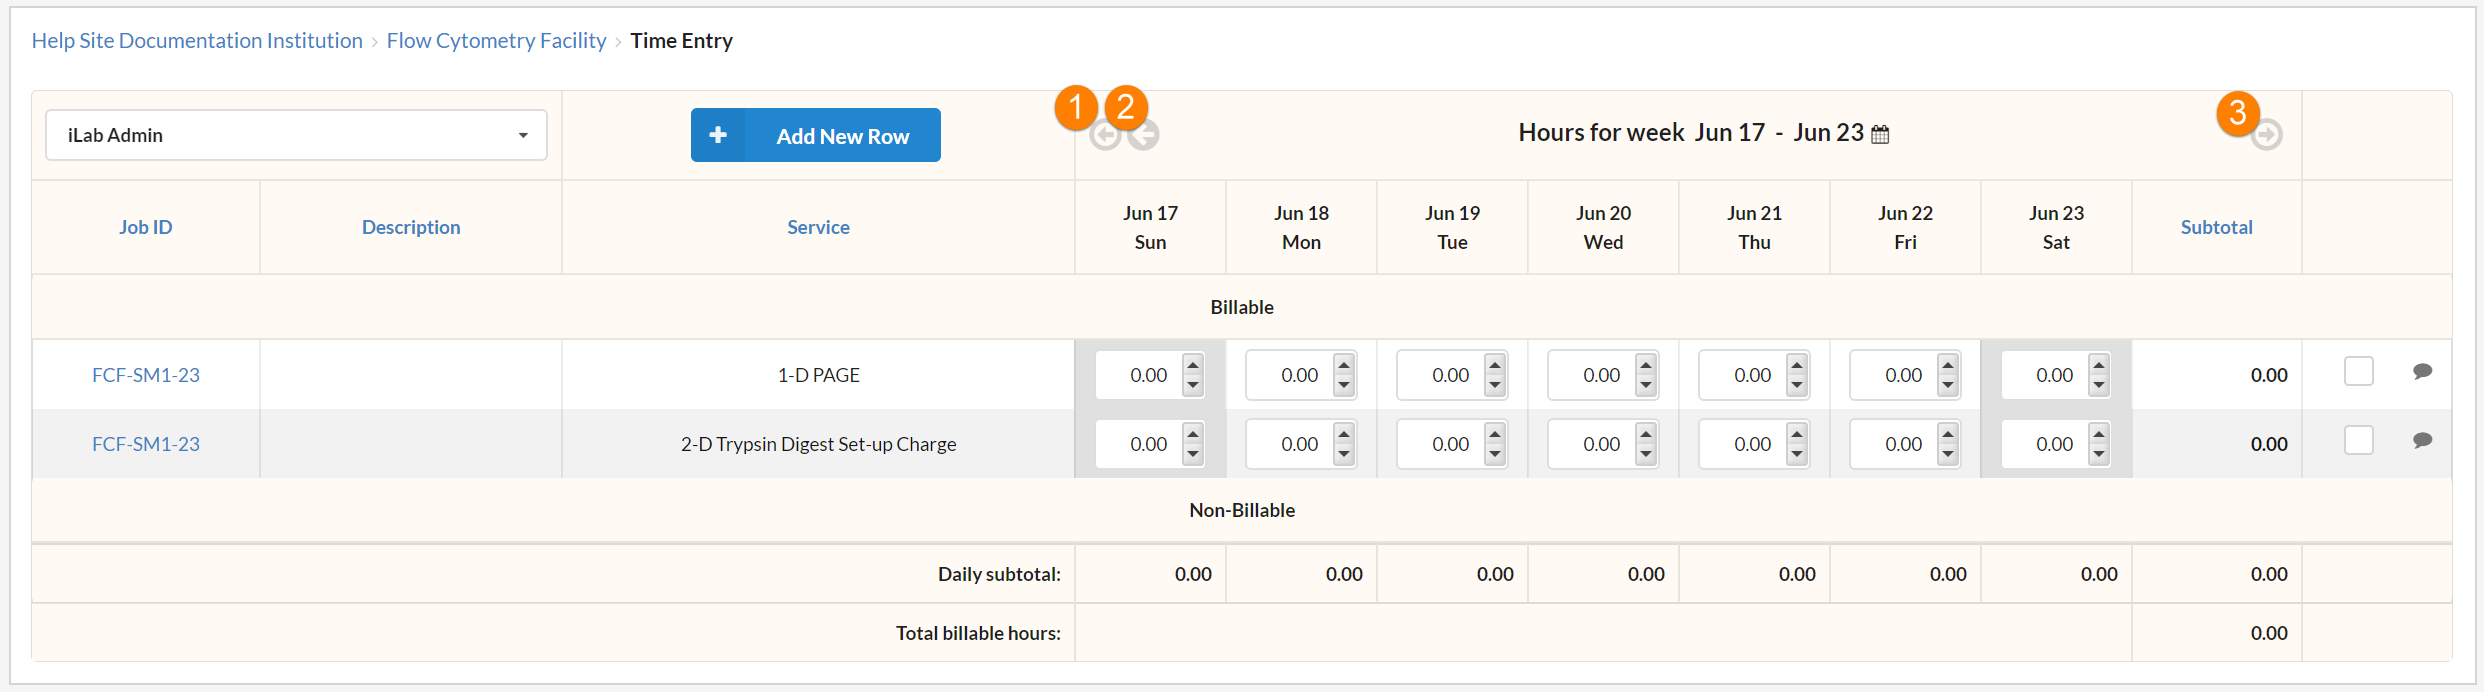
- Left arrow: Go back one week
- Bold arrow: Jump to the current week
- Right arrow: Go forward one week
Now enter time and comments as detailed above.
Billing Time Entries
A time entry can be billed for after the entry is locked, which occurs on Tuesday evenings at 5pm PT for the week prior for requests that are in the Processing status. Once the times are locked for the prior week you will no longer be able to edit them.
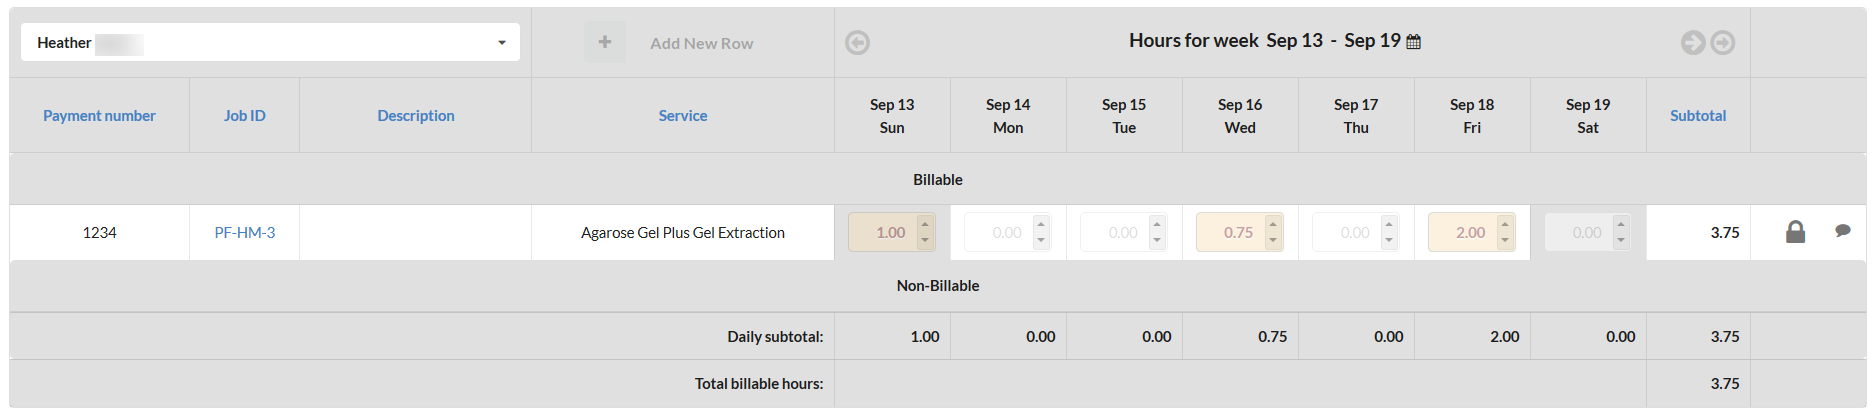
If you Complete a job/request that has unlocked times for the current week or future weeks, it will lock those times and add them as charges to the request. You will not be able to edit these times on the time sheet.
The locked times will be added to the job/request as charges.
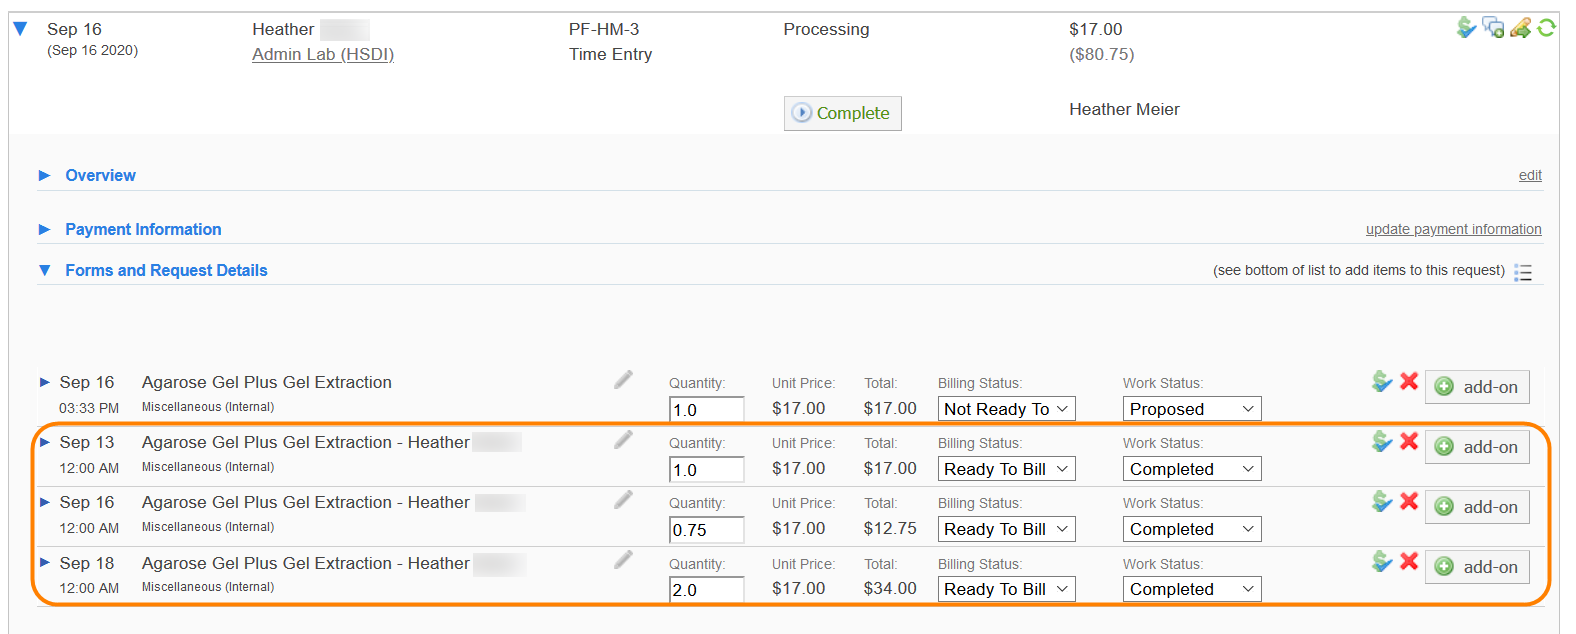
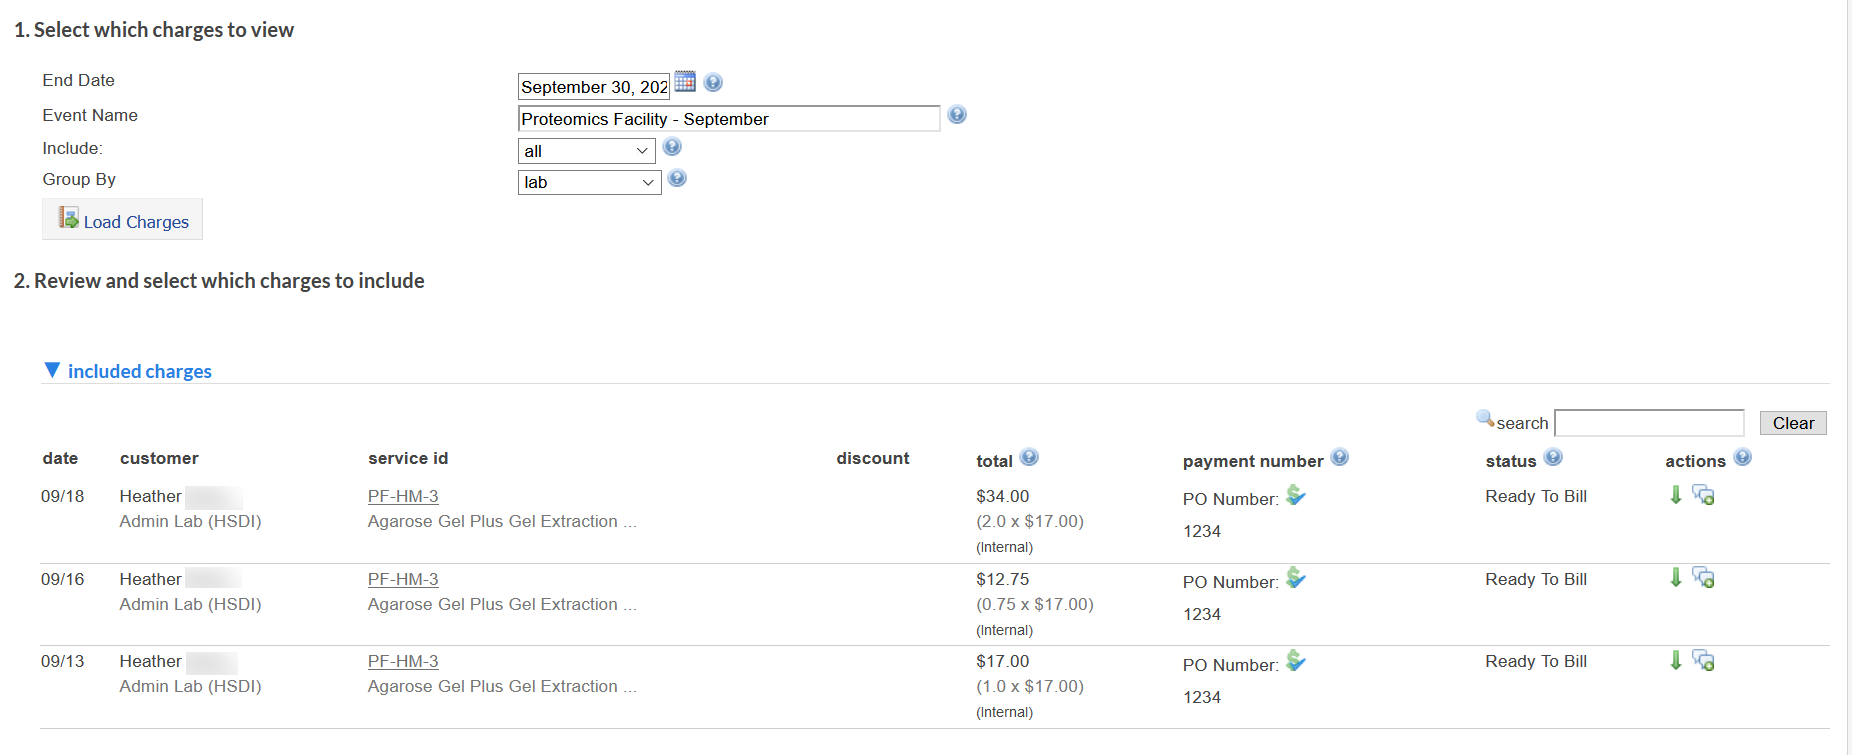
The time charges will be set as Ready to Bill and Completed. When you are ready to create a new billing event the charges will show when you load charges and can be included in the billing event.
Create a Time Sheet Report
Core members can see the time sheet entries in the reporting interface. To do so, click on the Reporting tab and select the "Time Entries" sub-tab:

The filters on the left-hand side can be used to narrow down the selected charges, and the data can be exported to CSV using the "Download as CSV" button. For more general information on the reporting module, see Reporting.