A configurable reservation provides advanced attributes that allow the core to set up specific parameters for a calendar. This feature allows administrators to plan specific configurations for complex equipment and allows users to request specific details to be assigned to a reservation or a resource that go beyond the normal availability for user type and hours of operation. Cores with instrumentation that requires significant setup would find the most benefit from this feature. Example: A core can set specific time on the calendar to one configuration (e.g. specific microscope head and specific material needed will only be available on Tuesday from 9 am- 3 pm) and then set another time on the calendar for another configuration of the instrument with different materials.
NOTE: Configurable reservations and advanced attributes must be turned on by an iLab associate.
Set Up Resource Schedules
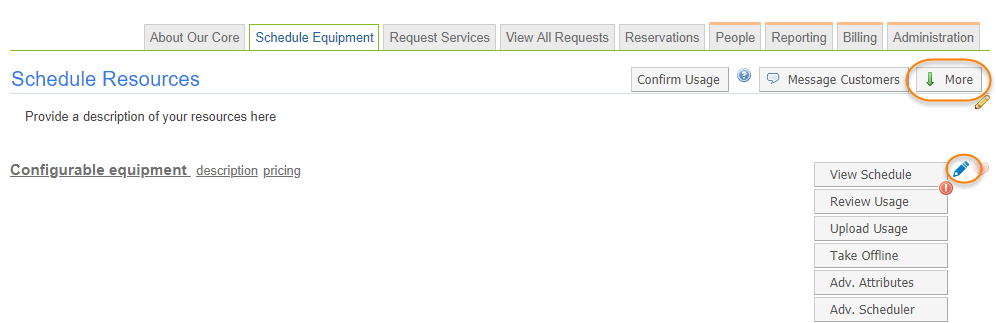
Once the feature has been turned on for your facility, you can configure your schedules under the equipment edits. To do this, navigate to your core’s Schedule Equipment tab and either click on "More" to add a new schedule or click on the pencil (edit) icon for existing equipment to access the schedule settings.
NOTE: Advanced attributes must be turned on by an iLab associate in order to utilize configurable reservations.
If Advanced Attributes is turned on in the calendar, the calendar page updates with additional buttons. Click the "Advanced Attributes" button to set up the requirements.

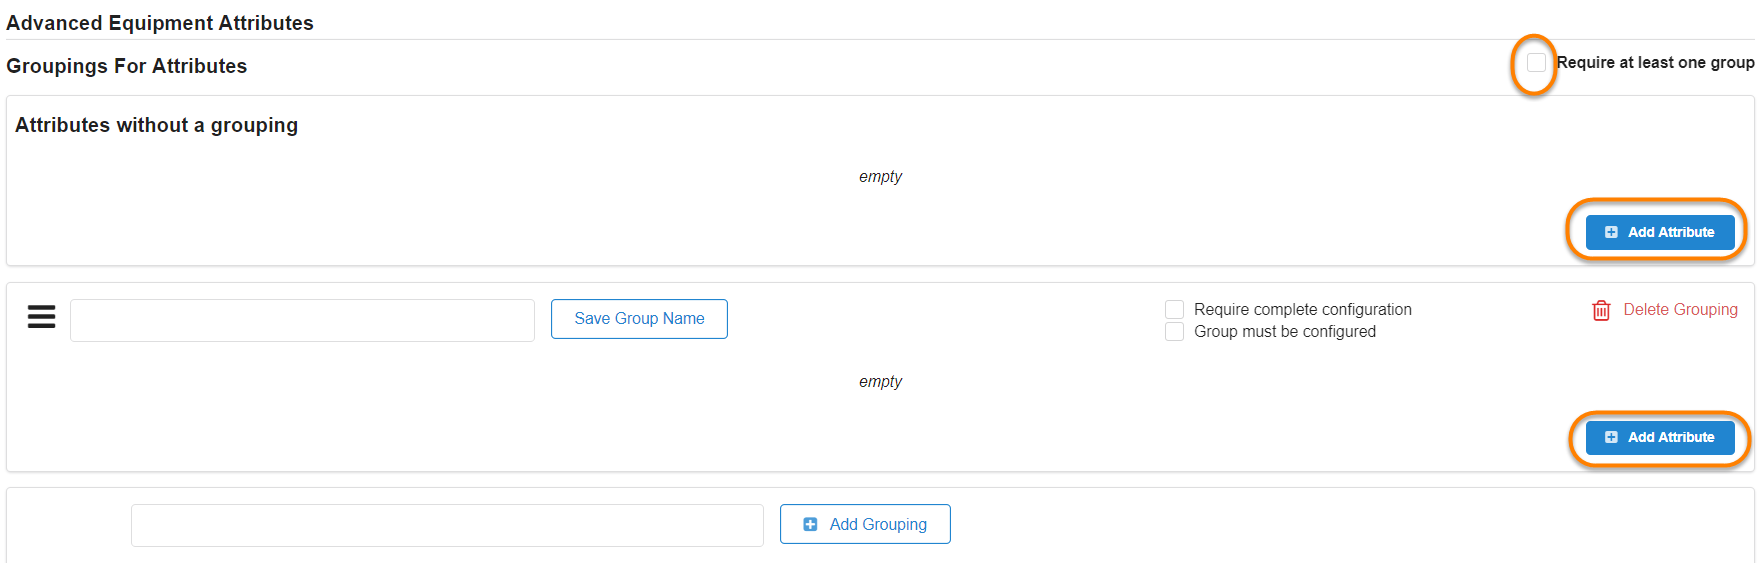
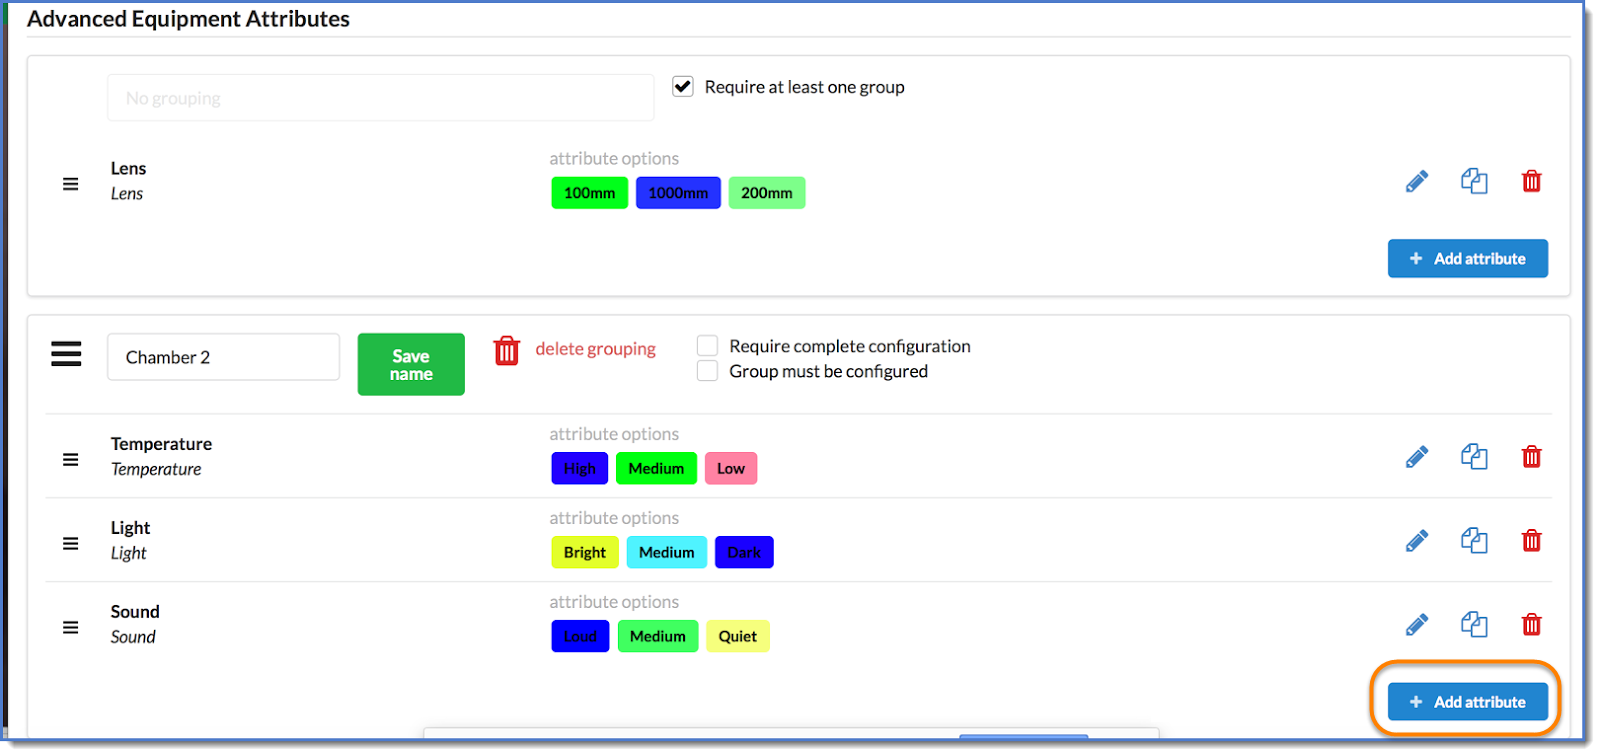
The first page allows the user to set up a attributes and arrange them into groupings. The top section is for general attribute(s) (i.e. attributes without a grouping).
If you do not have one, start with your first grouping by typing a name and pressing the "Add grouping" button. If you want to require at least one grouping to be selected by users, click the "Require at least one group" check box. To create attributes under each grouping, press the "Add attribute" button.
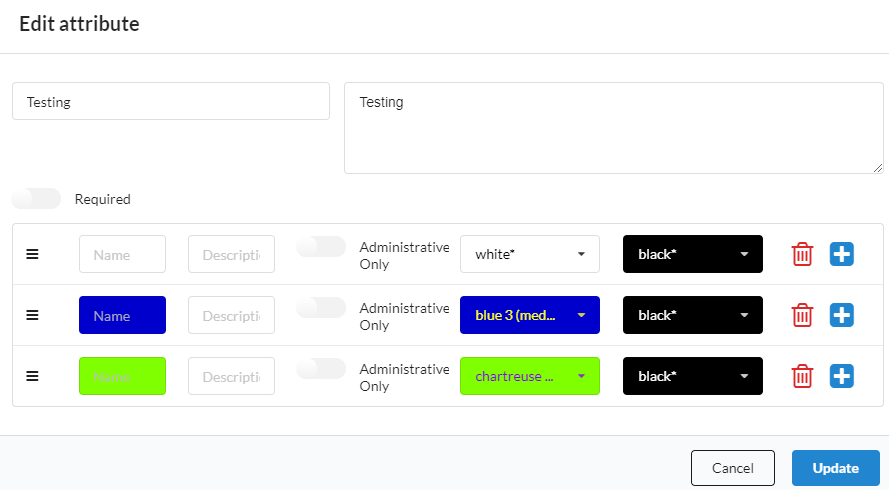
For each attribute, you must have a name, a description and at least one item to be selected. You can make selecting the attribute mandatory by toggling the "Required" switch to on. You can also make the attribute visible only to core staff by toggling on the "Administrative only" switch.
Different attributes can be color coded. Press the "Plus" button to add more options to be configured.
Press the Add attributes button to add another attribute and follow the steps above to add the selections under the attributes.
Once you have all your groupings and attributes built for your calendar, you can begin assigning requirements on the calendar. Click the "Back to core" button in the upper-right to return to the Schedule Equipment tab.
Assign Attributes to a Resource Schedule
To schedule attributes on the calendar, click on the "Advanced Scheduler" button.

On the calendar page, click the "Manage configurations" button.

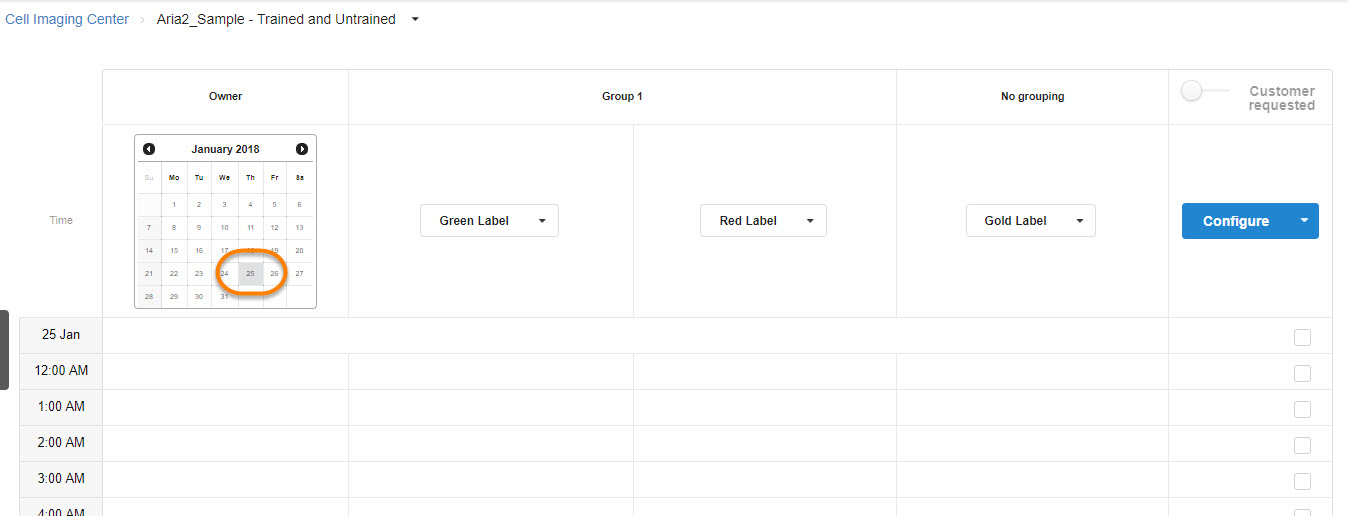
On the configuration view, click the day you wish to configure. Check the times of day that must be configured by clicking the check boxes. Then, select the attribute(s) that must be configured for that time. Finally, press the "Configure" button once the attributes and times are selected.

You will see the attributes that have been assigned to the specific time of the day display on the configuration table below.

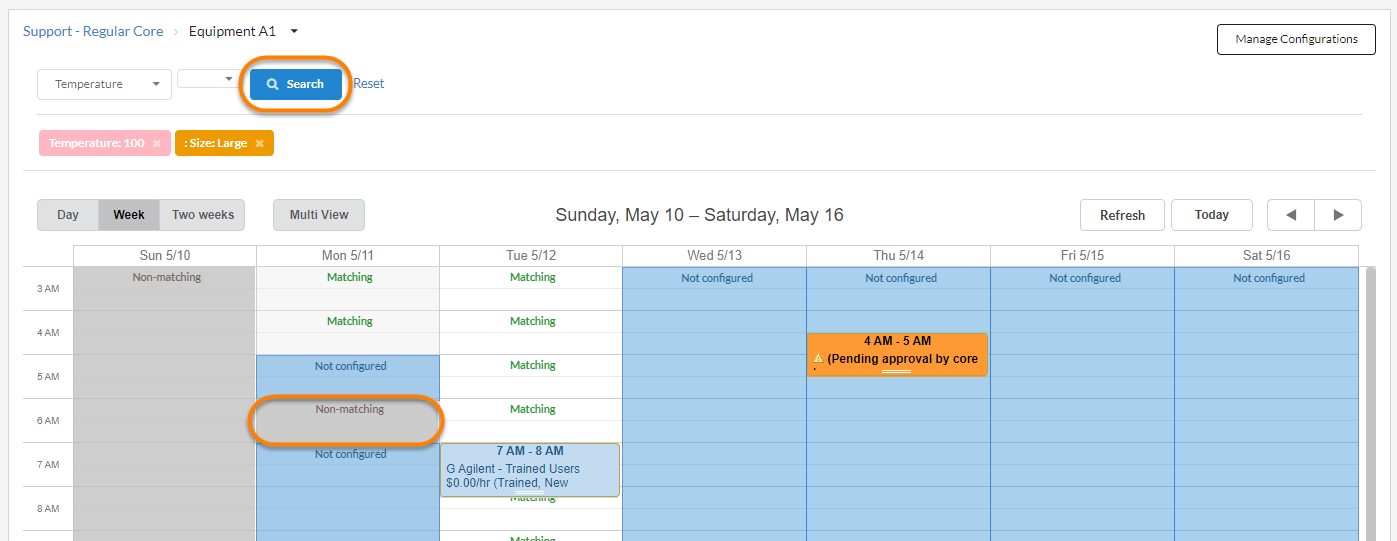
Click the View Calendar button to go back to the calendar. On this page, to view when an attribute is configured, select an option from the drop down and then press "Search". You will see where your attribute matches, does not match, and where the calendar is open.
From this screen, you can schedule on the times where you have a match or where no configuration is set.
To configure the calendar based on a reservation, press the Manage Configuration button on the calendar page. Then click on the day of the reservation on the calendar.
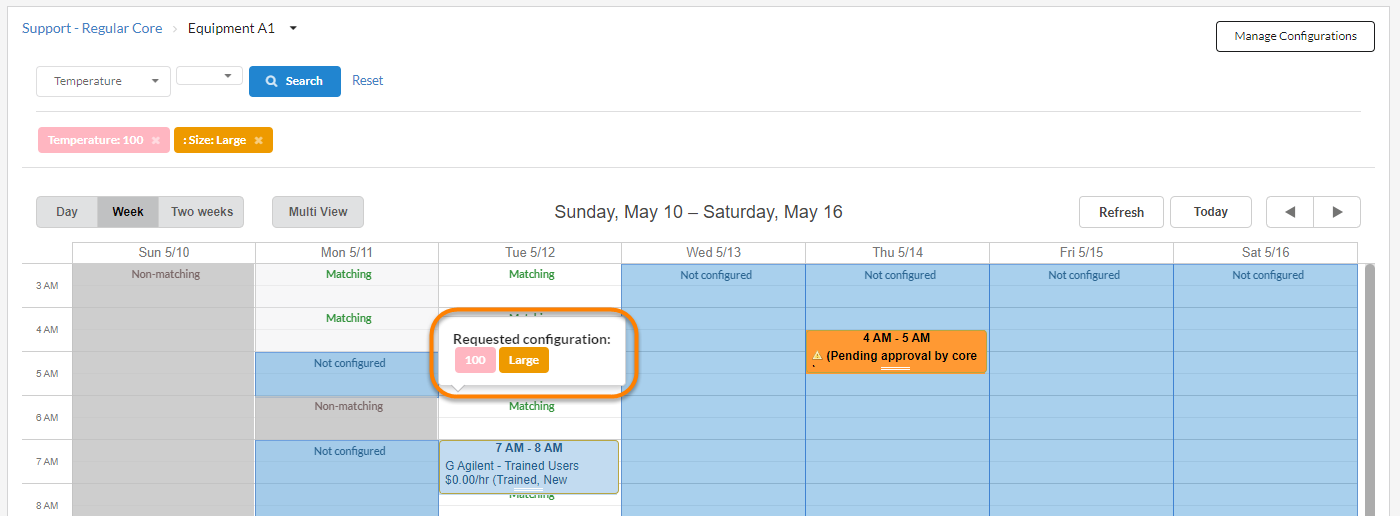
Go to the reservation to which you would like to match the day’s attributes. Press the "Copy config" button on the right.

Go to the top. The configuration of the reservation displays at the top section. Check the boxes for the times that you wish to have that configuration. Press the "Configure" button.

The appropriate times then reflect the attributes of the user’s reservation.
Once the configuration is set for that day, any reservations that do not match the core set configuration will be canceled.