The Reservations tab is the best place for core customers and facility managers to view the activity in the facility across all resources. It may not always be available to customers, depending on core settings. The Reservations tab can be viewed from your core's homepage.
- Layout of reservations tab
- Select time frame
- Print reservations or schedules
- Set view options
- Select resources
Layout of Reservations Tab
The Reservation tab consists of several panels:
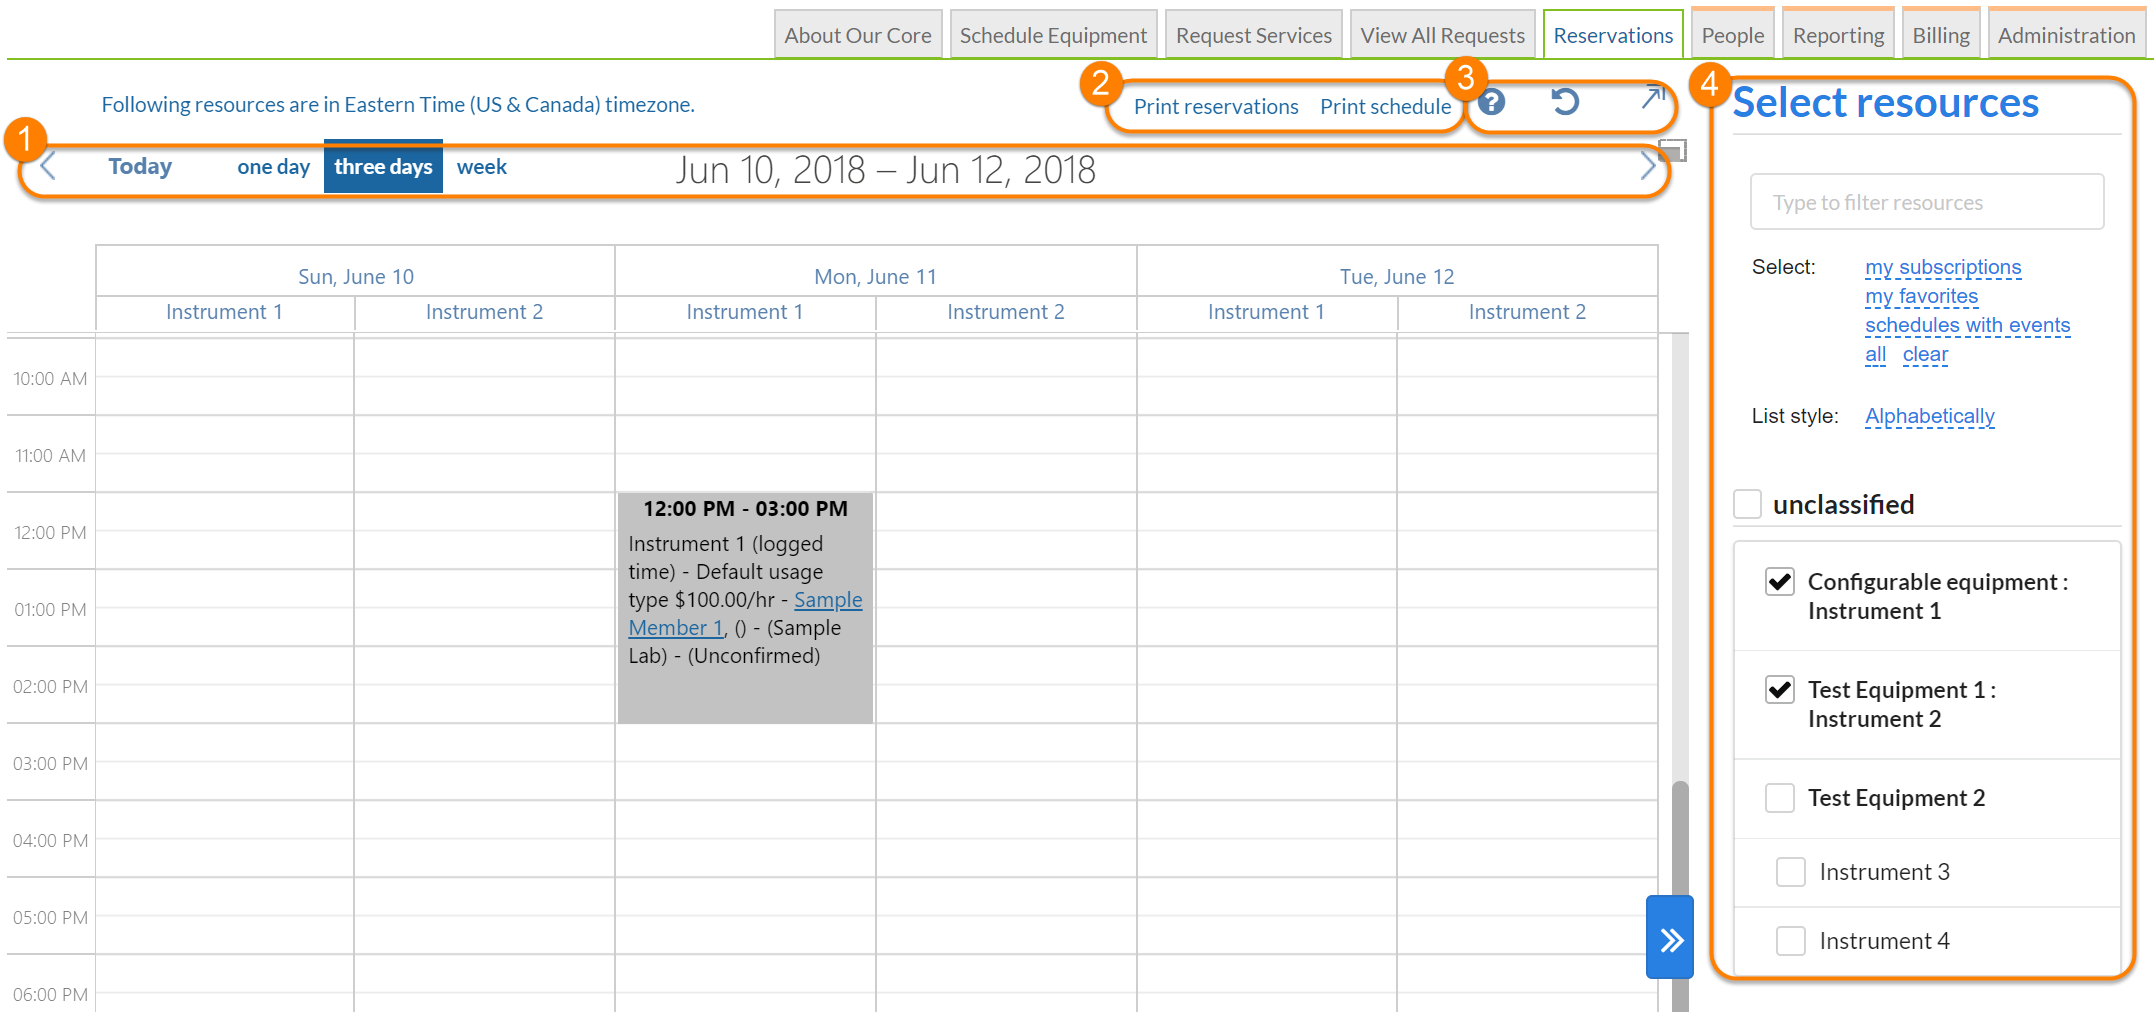
- Time frame selection options
- Print reservations or schedules
- Various view options (legend, refresh and full screen view)
- Resource selector panel
Select Time Frame
The time frame panel allows you to select the specific window for which you can see reservations:

- Back in time: Step back in time by the number of days selected under item 3.
- Today: Go to today's date
- Time frame: Select to view one day, three days or week at a time
- Current range: Shows the currently active date range
- Forward in time: Step forward in time by the number of days selected under item 3 (Note: if this arrow is not visible, going into and out of full screen mode may make it visible again).
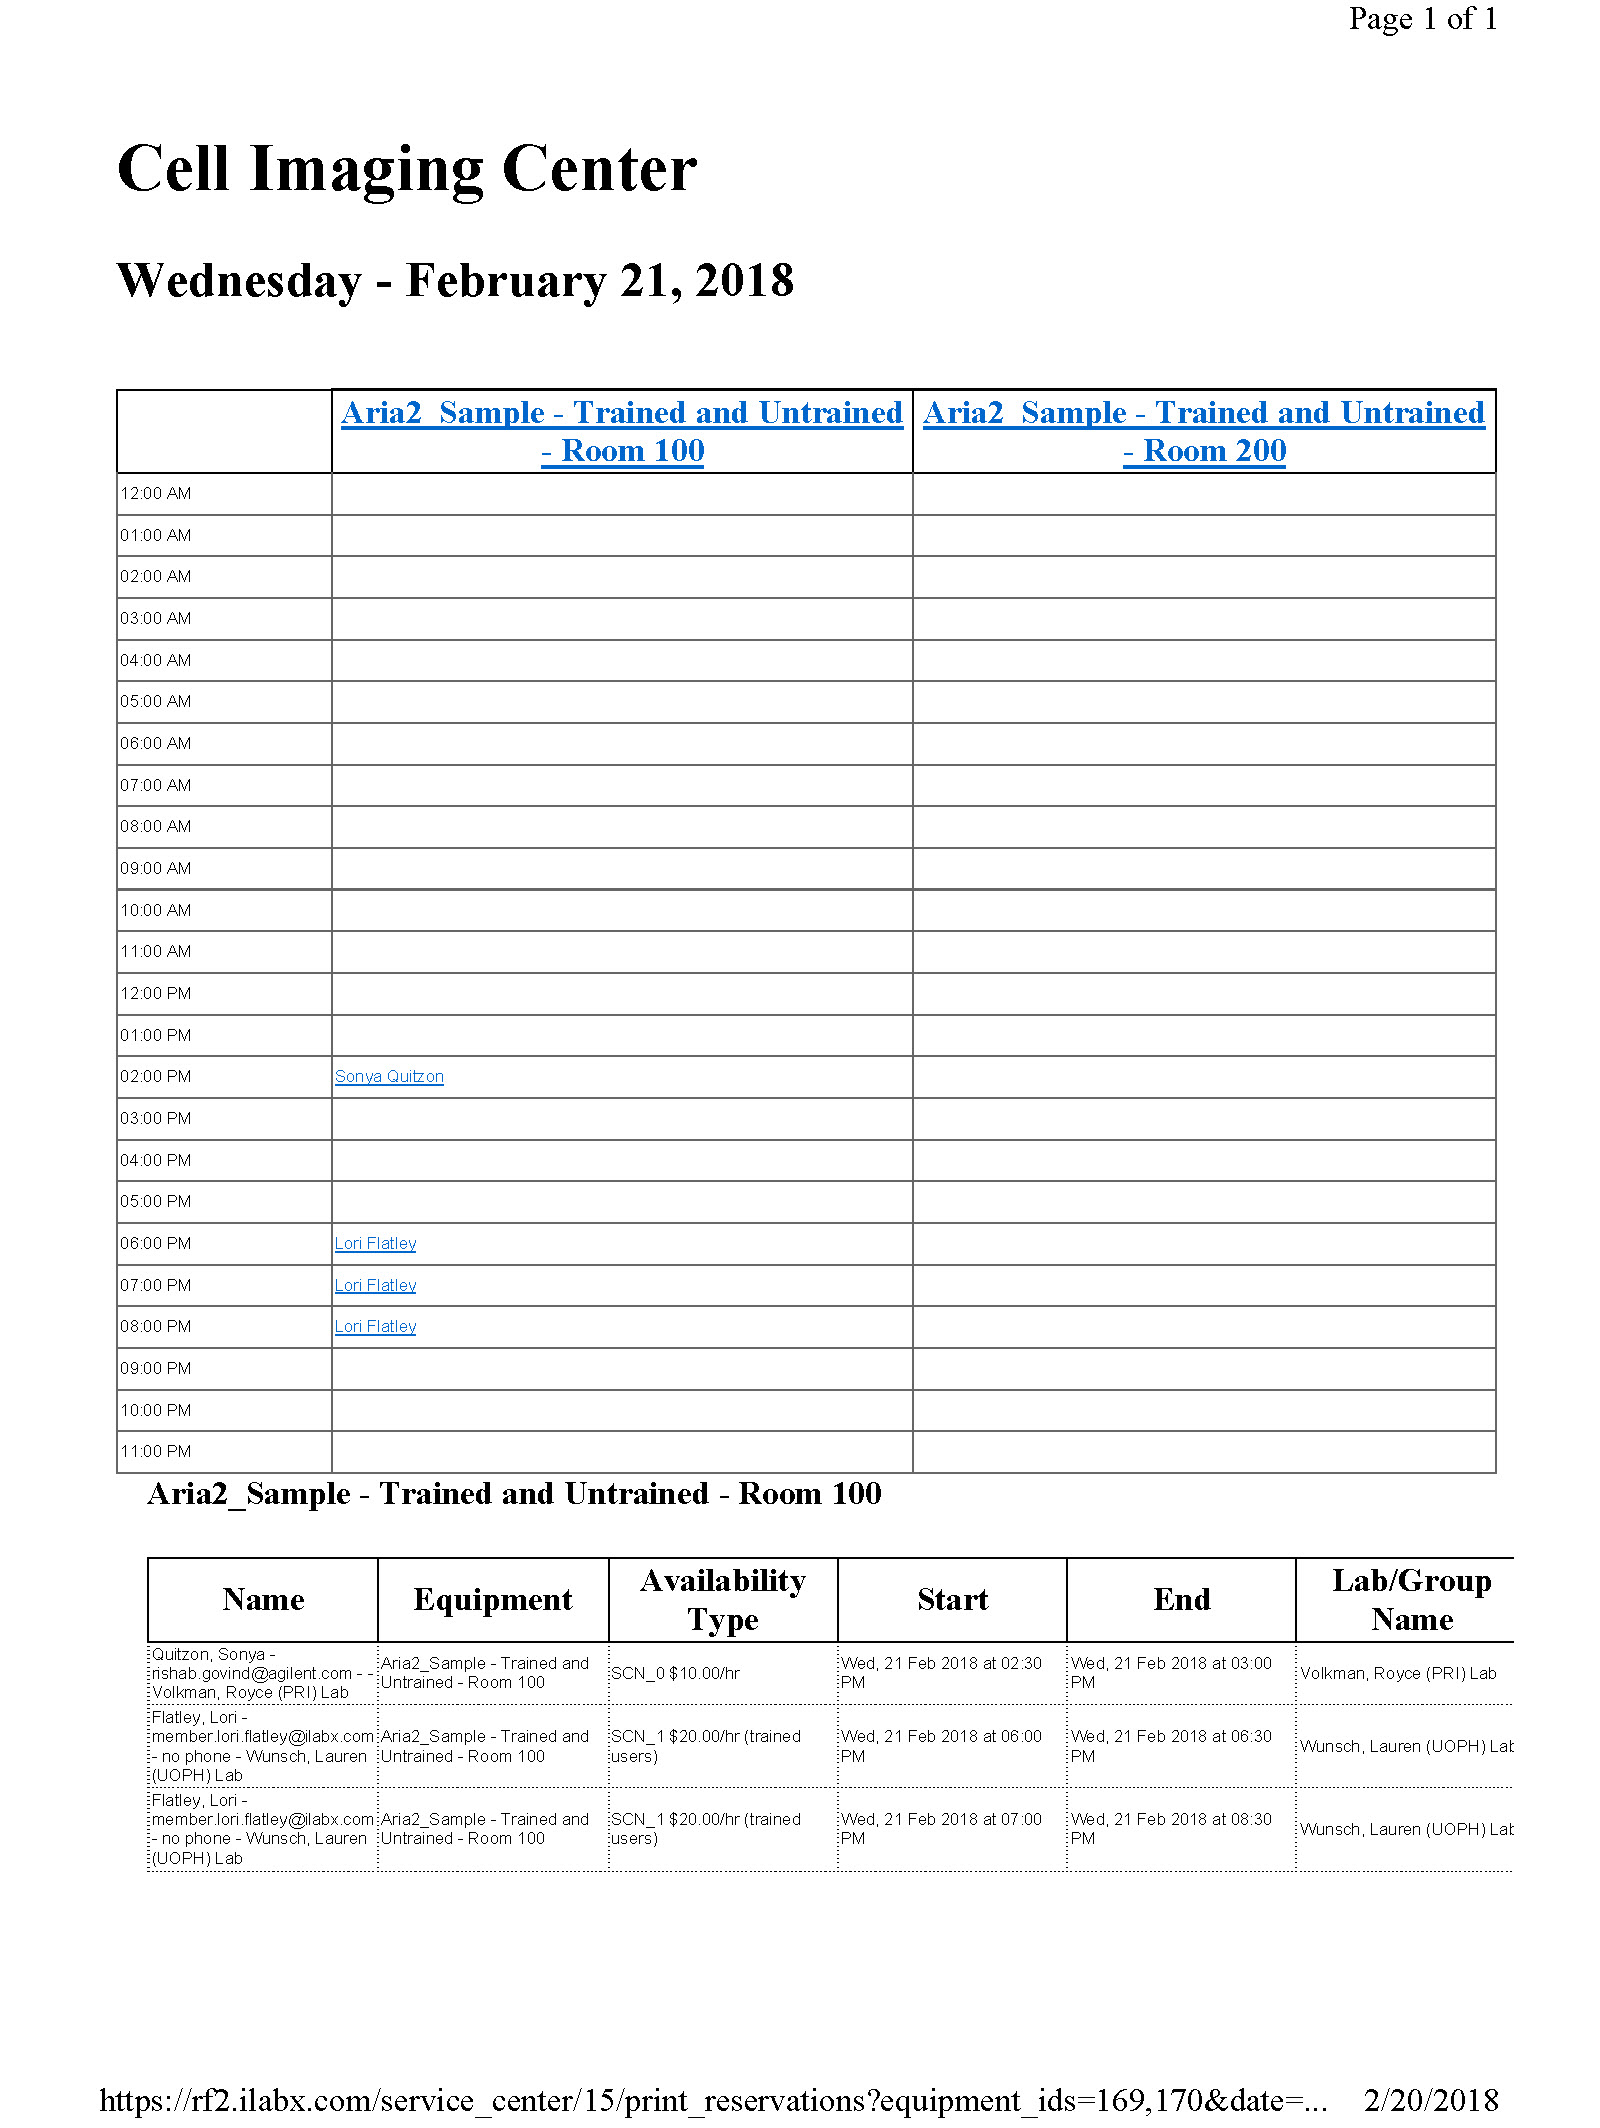
Print Reservations or Schedules
You may print all reservations or a full schedule for a given day:

- You may print reservations for the day across resources by using the "print reservations" link. First, you must select the "one day" view and navigate to the day you wish the print. Then click on "print reservations". The printer window will display. Select your printer and click "OK". Your selected day will print the details of each reservation for the selected day.

- The "Print Schedules" link allows you to print the entire day's schedule for a single resource. First, you must select the "one day" view and navigate to the day you wish to print. Then click on "Print Schedule". The schedule prints with both a calendar view of the reservations, and a chart print of the reservations.
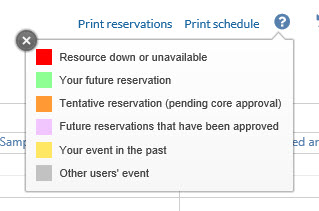
Set View Options
There are various options available related to the Reservations view:

-
Legend: If you click on the question mark icon, a key will display that details what each color on the calendar means.
- Refresh: The circular arrow icon will refresh the reservation view and any recent changes
- Full screen: Click on the diagonal arrow icon to switch the screen to full screen view. In full screen view, click this icon again to return to the windowed view.
Select Resources
On the right side of the calendar, you will see the Select Resources panel. This panel provides several different ways to search for and select resources to display.

- Search: If you would like to search for a specific resource, enter the name of the resource here. As you type, your results will automatically filter below (in panel 4)
-
Select: In the Select section, you may select any one of the pre-defined filter parameters to view.
- "My subscriptions" displays calendars of resources to which you have subscribed.
- "My favorites" displays calendars of resources you have designated as a favorite.
- "Schedules with events" will display only calendars that have future reservations.
- "All" displays all resource calendars.
- "Clear" clears all previous calendar selections.
- List Style: You may select to display resources either alphabetically or by category.
- Select by category: You may select to display resources by their category/classification (designated in their Settings ). All categories/classifications will display in this section. Click the tick box beside the category to see all resources associated with that category. Click it again to de-select.
- Hide/Show: Click this arrow to hide or show the resource selection panel.