Linked resources are resources that need to be scheduled in tandem. Linked resources can be made as optional or as required based on your facilities workflow. The schedule settings for the for the resources must be similar to ensure that any reservation made meets the limitations of each resource.
- Setting Up Linked Resources
- Scheduling Linked Resources
- Managing Linked Reservations
- Billing Linked Usage
Setting Up Linked Resources
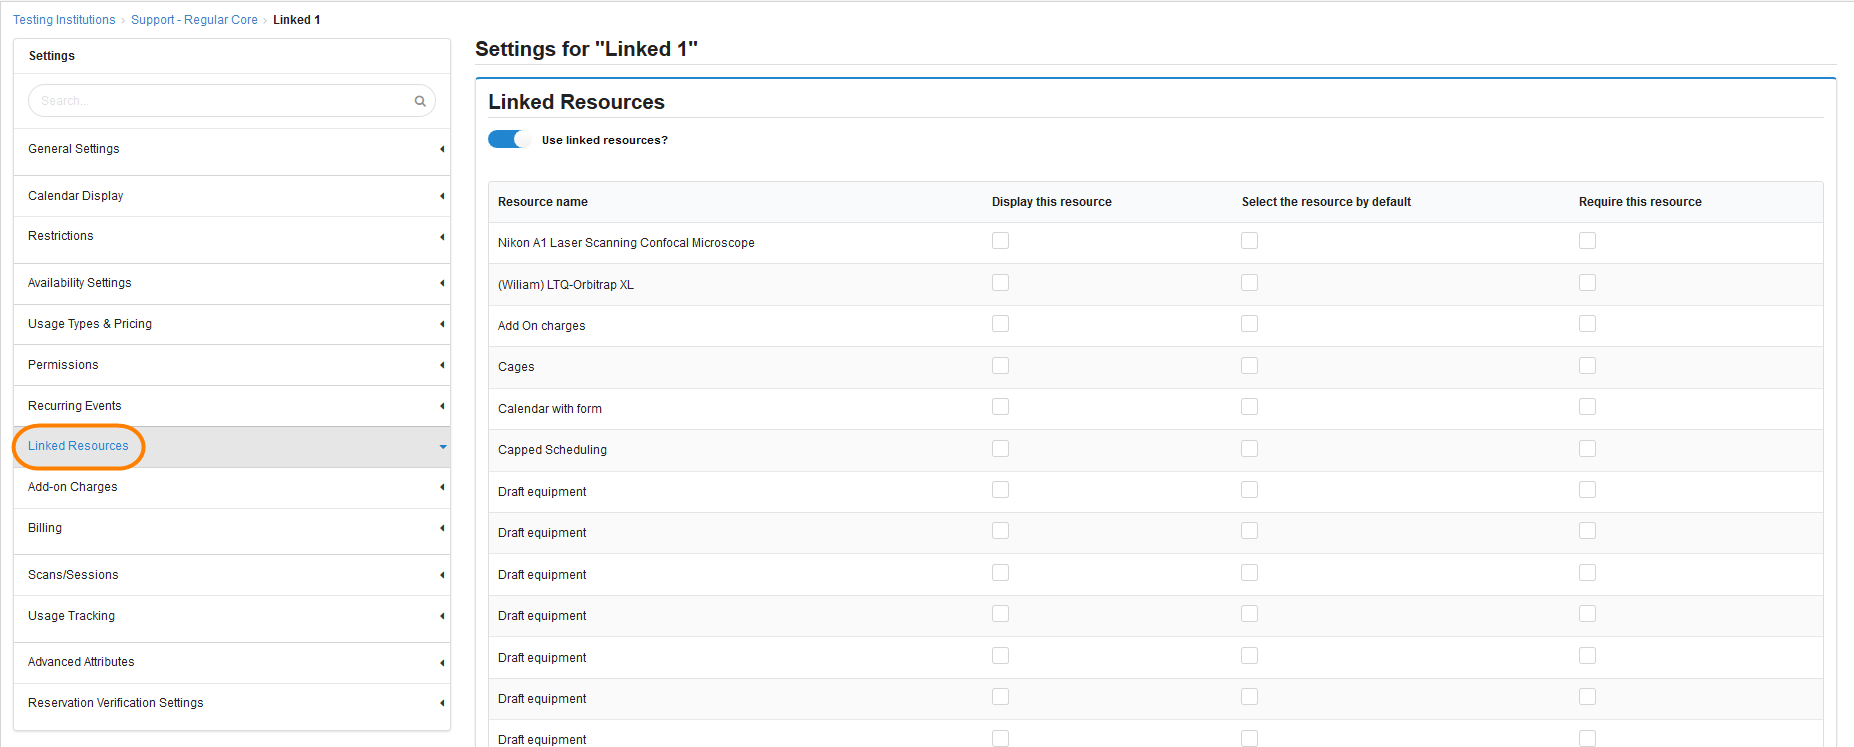
To set up a linked resource open the schedule settings of the resource using the Edit Schedule pencil to the right of the View Schedule button on the Schedule Equipment tab. Once you are in schedule settings click on Linked Resources from the left side settings categories. In the Linked Resources section you will have the ability to turned on linked resources for this schedule, select which resources will be displayed as options to book in tandem with this resource and if the linked resource is a default or required.
Once you have selected the resources to link ensure that their schedule settings are similar, this will ensure that the resources can be scheduled together. A few settings to keep in mind are permission levels, minimum and maximum reservation times, and user access. The most restrictive resource will set the limitations for scheduling.
Scheduling Linked Resources
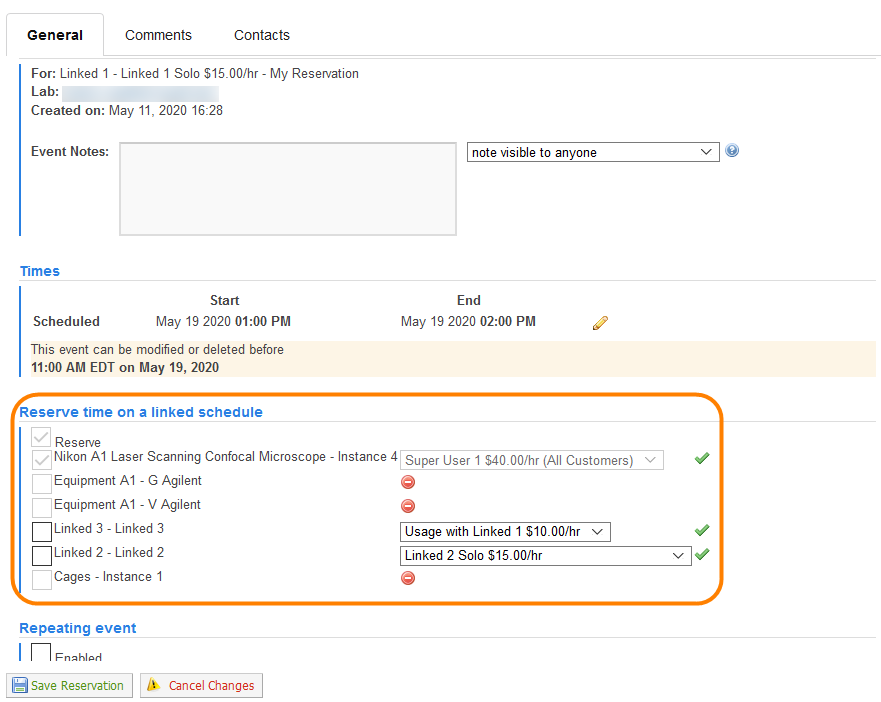
When a user initiates a reservation on a resource that has linked resources the section Reserve time on a linked schedule will be displayed. When a linked resource is available a green check mark will show to the right of the resource, if it is unavailable a red warning circle will show in place of the usage type and pricing. If a resource is required to be scheduled with the current reservation a user will not be able to uncheck the resource. More than one linked resource can be selected from the list as long as a green check mark is present for it.
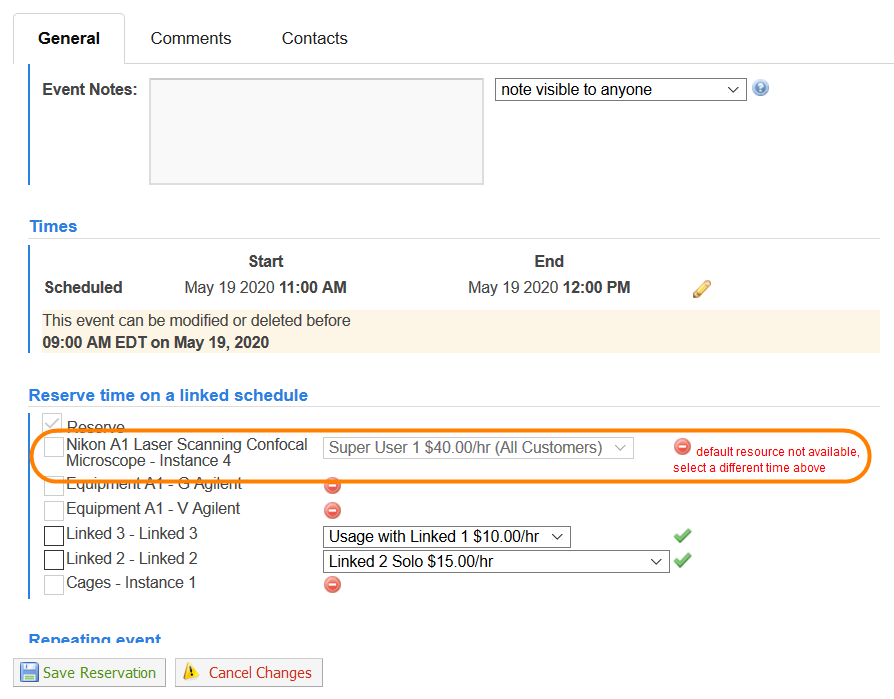
If a user attempts to make a reservation and the required linked resource is not available, an alert message will be displayed letting them know that they must select a different time. As a core administrator you will have the ability to override selections that users are unable to.
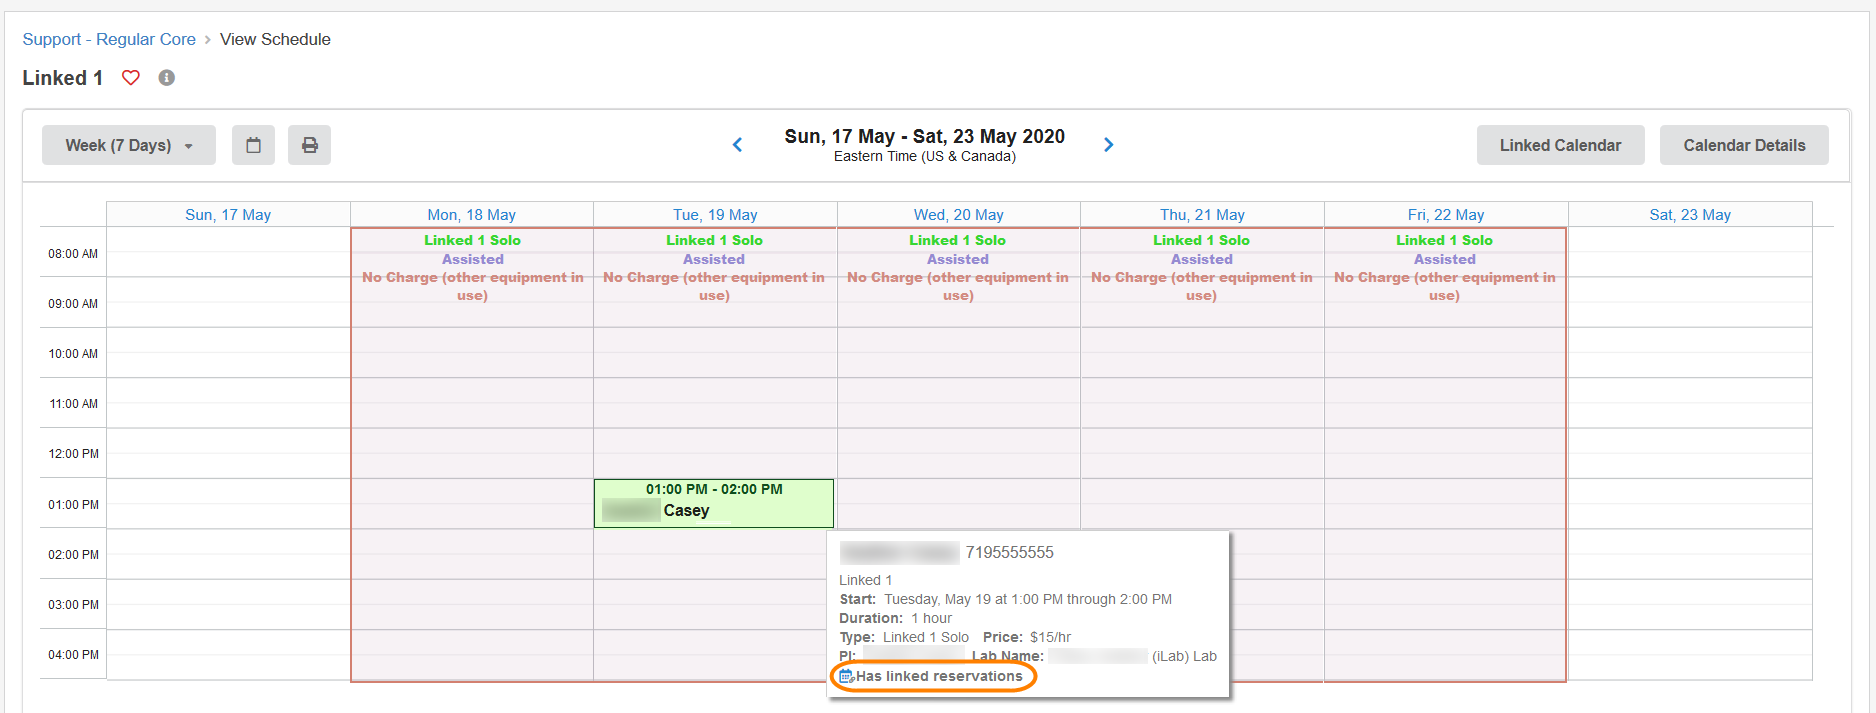
Once the reservation is saved one reservation will show on the initial resources' schedule and also a reservation on the linked resource's schedule. If you hover over the reservation you will see in the details that it has linked reservations. Pricing for each resource will be honored.
If your core has usage capping set up on the service center level or resource level these rules will continue to apply to linked reservations. The current usage that is already scheduled for a user will show up in the reservation details on by using the View my usage statistics on the Schedule Equipment tab.
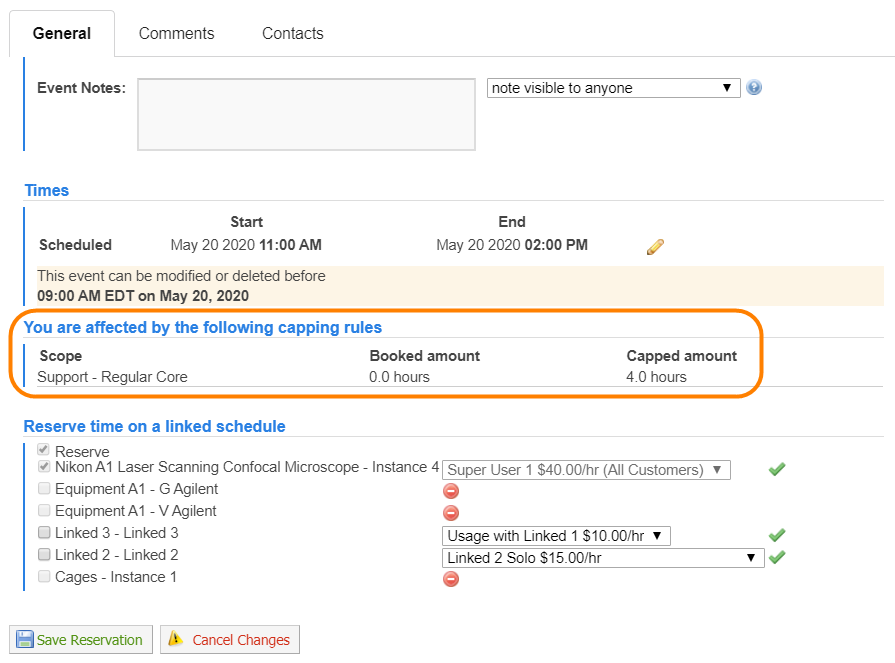
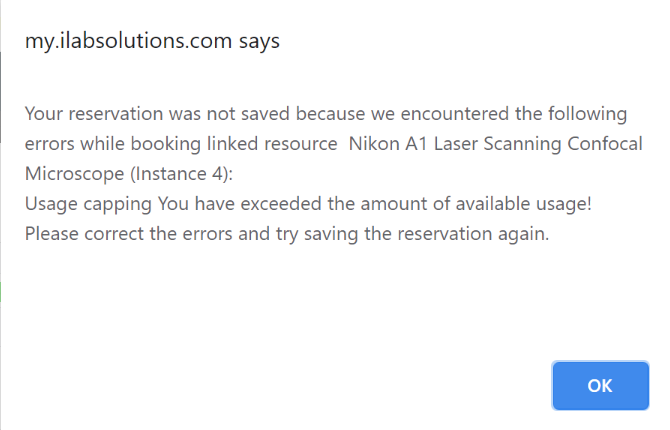
If your core has a usage cap of 4 hours for the service center and the user attempts to make a reservation for 3 hours with a linked resource this will count as 3 hours for each resource. They will be unable to save their reservation as their usage cap has been exceeded with their reservation adding up to a total of 6 hours. When the Save Reservation button is clicked, a pop-up warning will be displayed identifying the usage capping issue.
Once a reservation has begun, the total amount of time reserved returns to the user's time allowance for further scheduling.
After scheduling, you can see on the calendar that it is a linked calendar by hovering over the reservation and there is a popup that shows a notification on the bottom, the resource is linked.
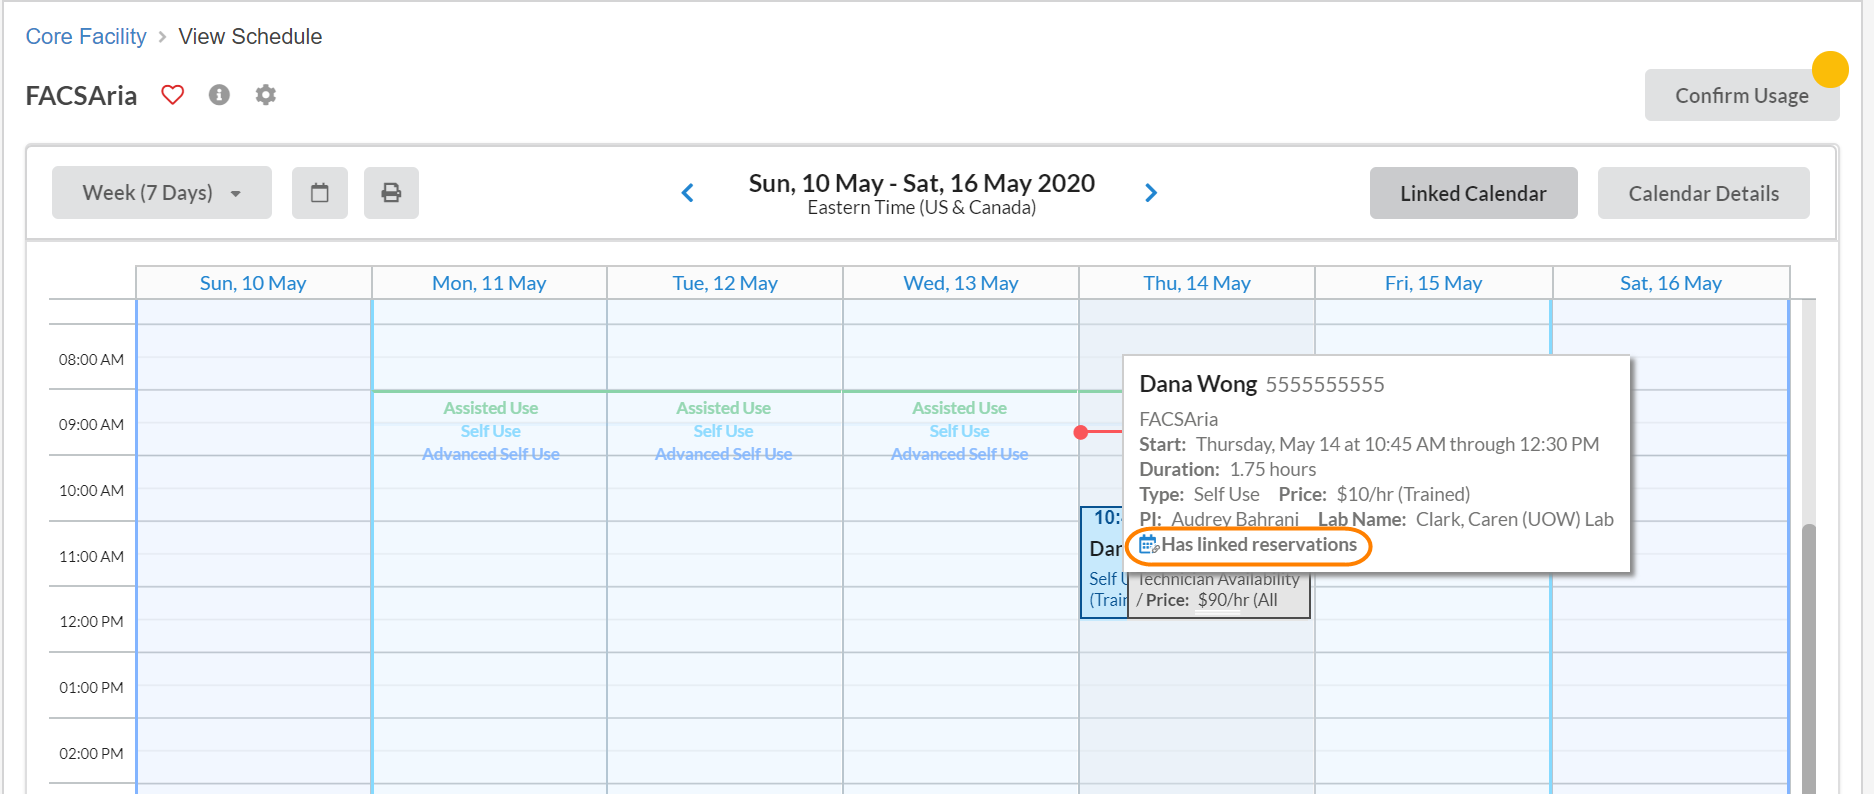
Once you turn on linked resources for a schedule you can view reservations from the selected linked resources on the initial schedule by clicking the Linked Calendar button. After clicking the button all the reservations from the resources linked to this schedule will be displayed along side reservations for schedule being viewed.
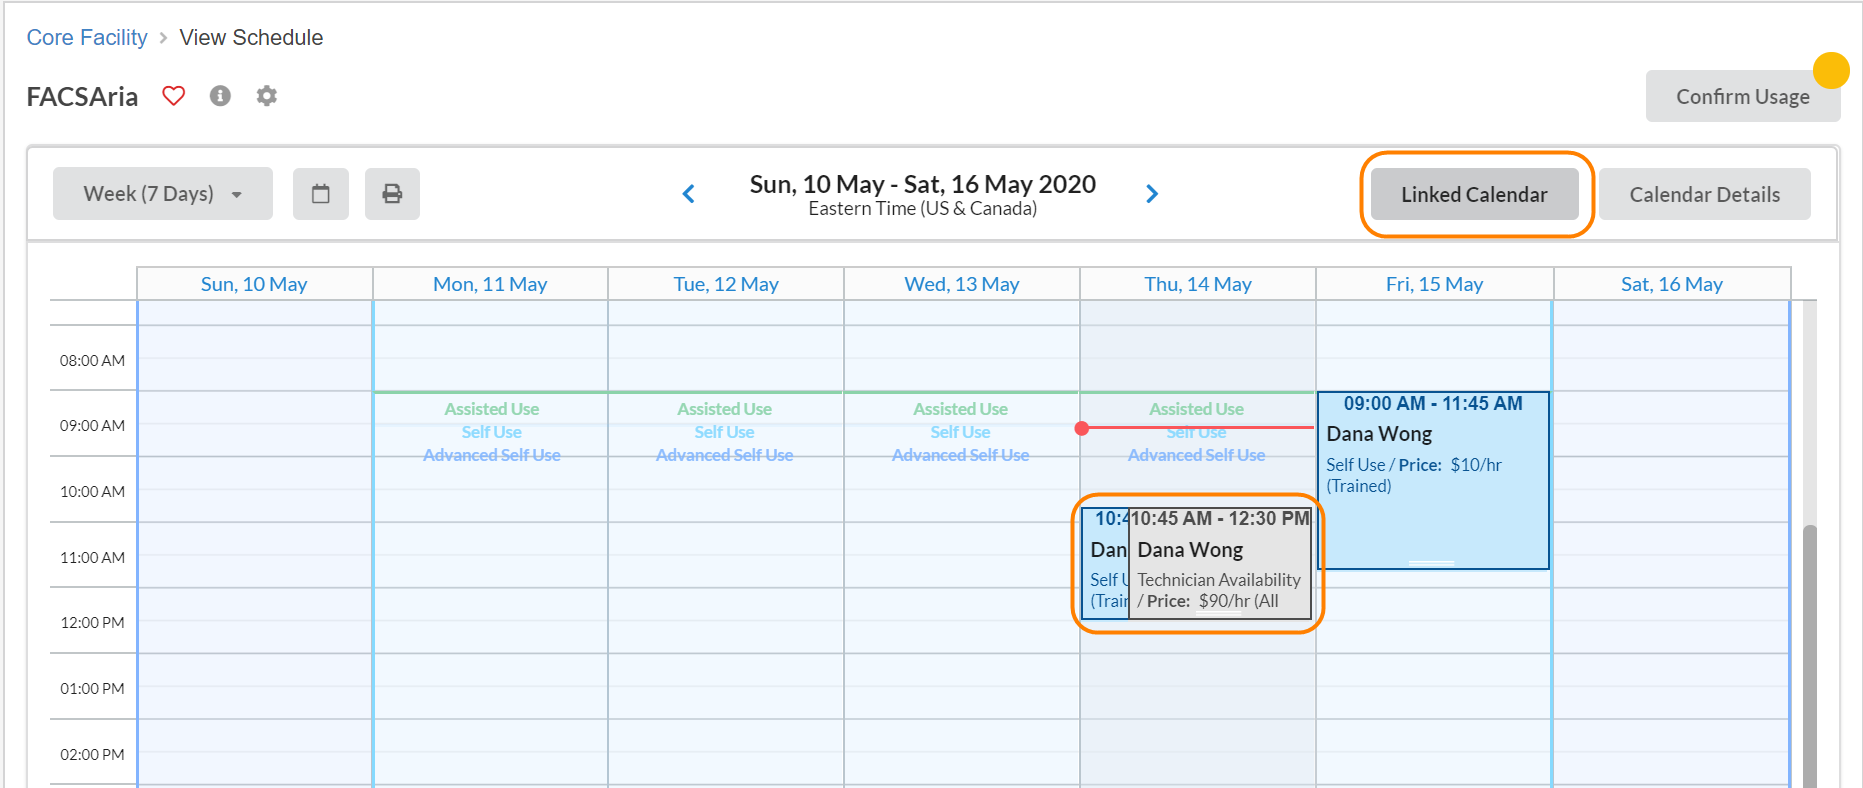
Click the Linked Calendar button again to stop displaying the reservations from linked resources.
Managing Linked Reservations
Linked reservations will all have a parent reservation and at least one child reservation. The parent reservation will be on the initial schedule the reservation was initiated on. The child reservation(s) will show on the schedule(s) that were selected in the linked resources section when creating the initial reservation. If you need to edit a child reservation it must be done from the parent reservation and all changes made to the parent reservation will be made to the child reservation(s).
If you click the child reservation you will be prompted to determine if you would like to navigate to the parent reservation to make any changes.
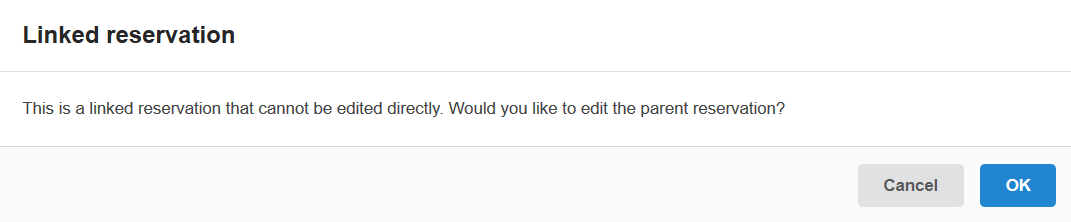
Once you click OK you will be directed to the reservation detail for the parent reservation. You can then make the needed changes and click Save Reservation, this will apply the changes to both the parent reservation and child reservation(s).
Billing Linked Usage
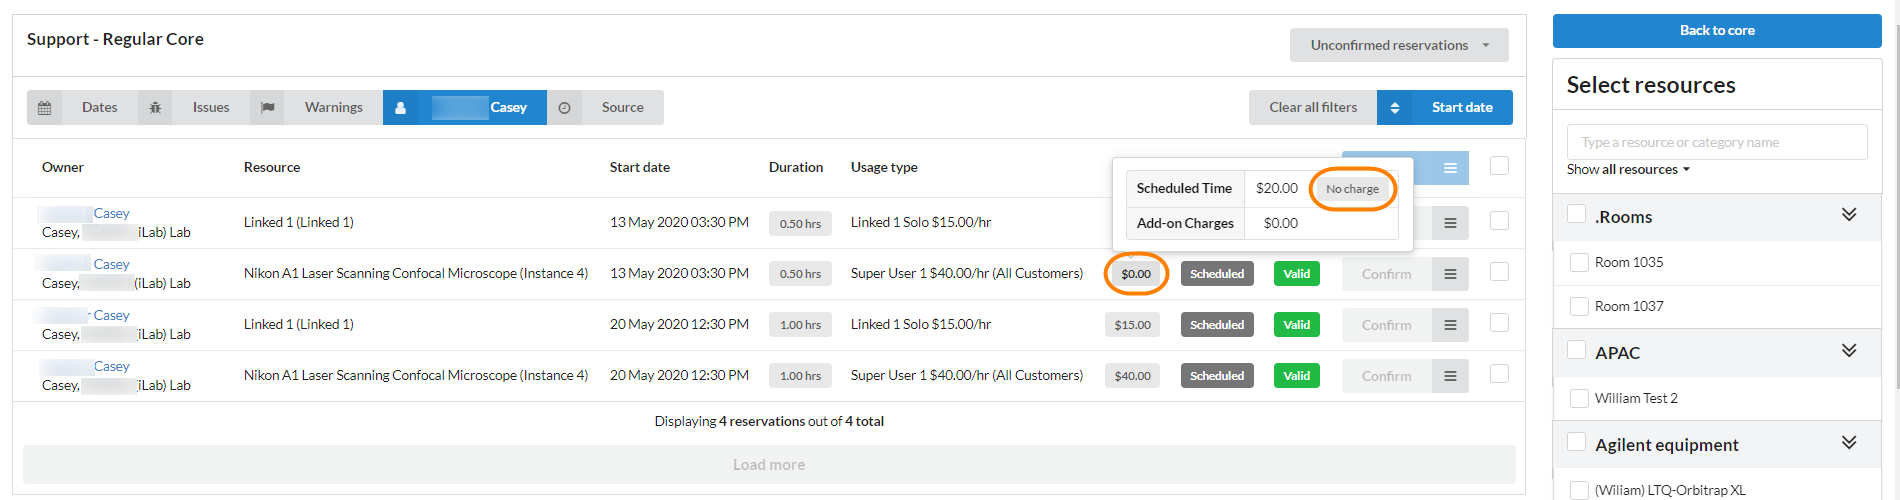
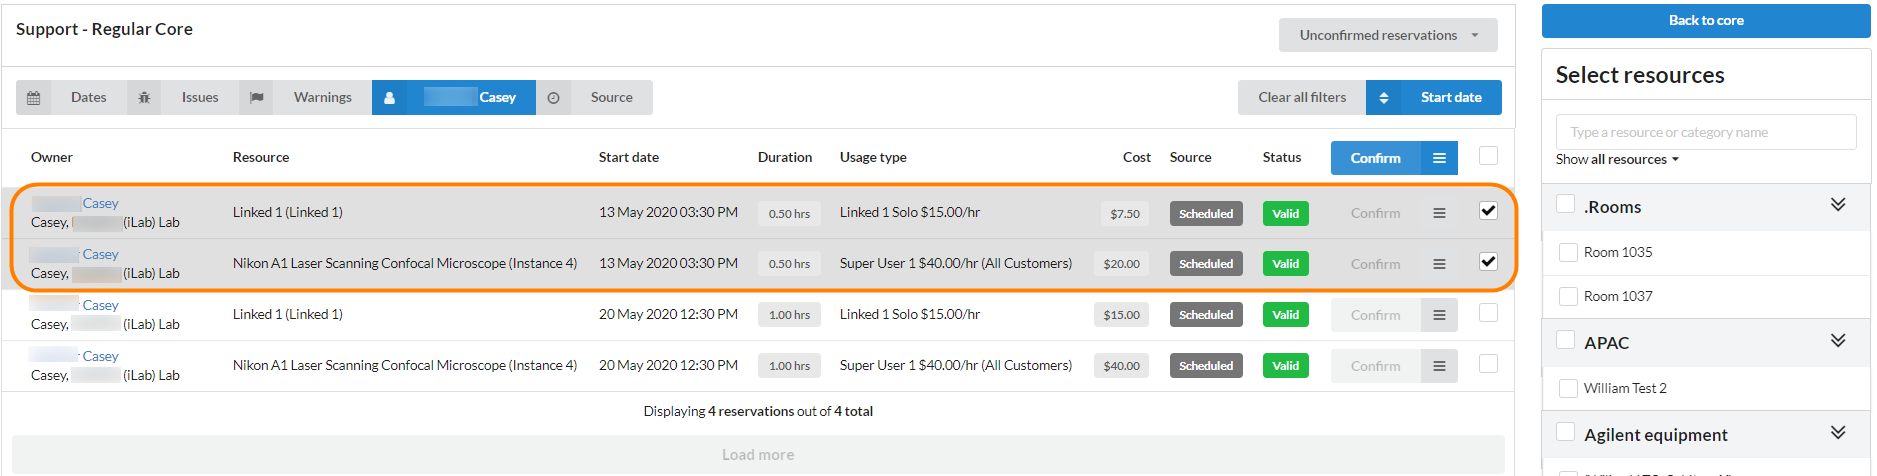
Each linked reservation, parent and child reservation(s), will create its own usage line with the calculated cost based on the pricing of the resource. Each individual linked resource usage will need to be confirmed on the Confirm Usage or Review Usage pages before it can be included in a billing event.
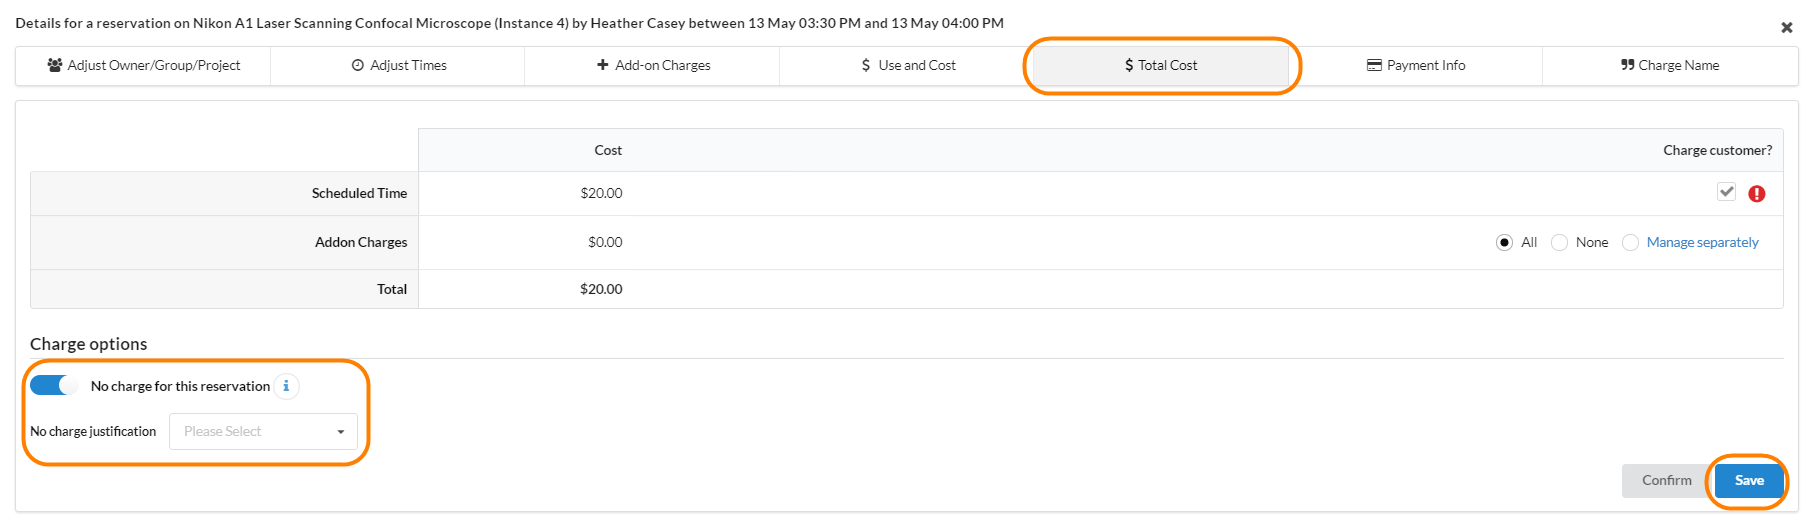
If you do not want to charge for the child reservation(s) you can mark the usage as no charge. To do this click on the usage details on the confirm usage page and on the Total Cost tab under Charge Options, turn on No charge for this reservation, select an option from the No charge justification list and click Save. The No charge justification setting may not be present based on your institution's settings. This will not delete the usage but will make the cost zero.
The no charge usage will continue to show on the unconfirmed reservations list. Once the usage is confirmed you can then create a billing event to include the charges associated with the linked reservations.