In the Members tab, you can set financial auto-approval thresholds, add new users, and manage current memberships to your group.
Layout of Members Tab
The layout of the Members tab is illustrated below:
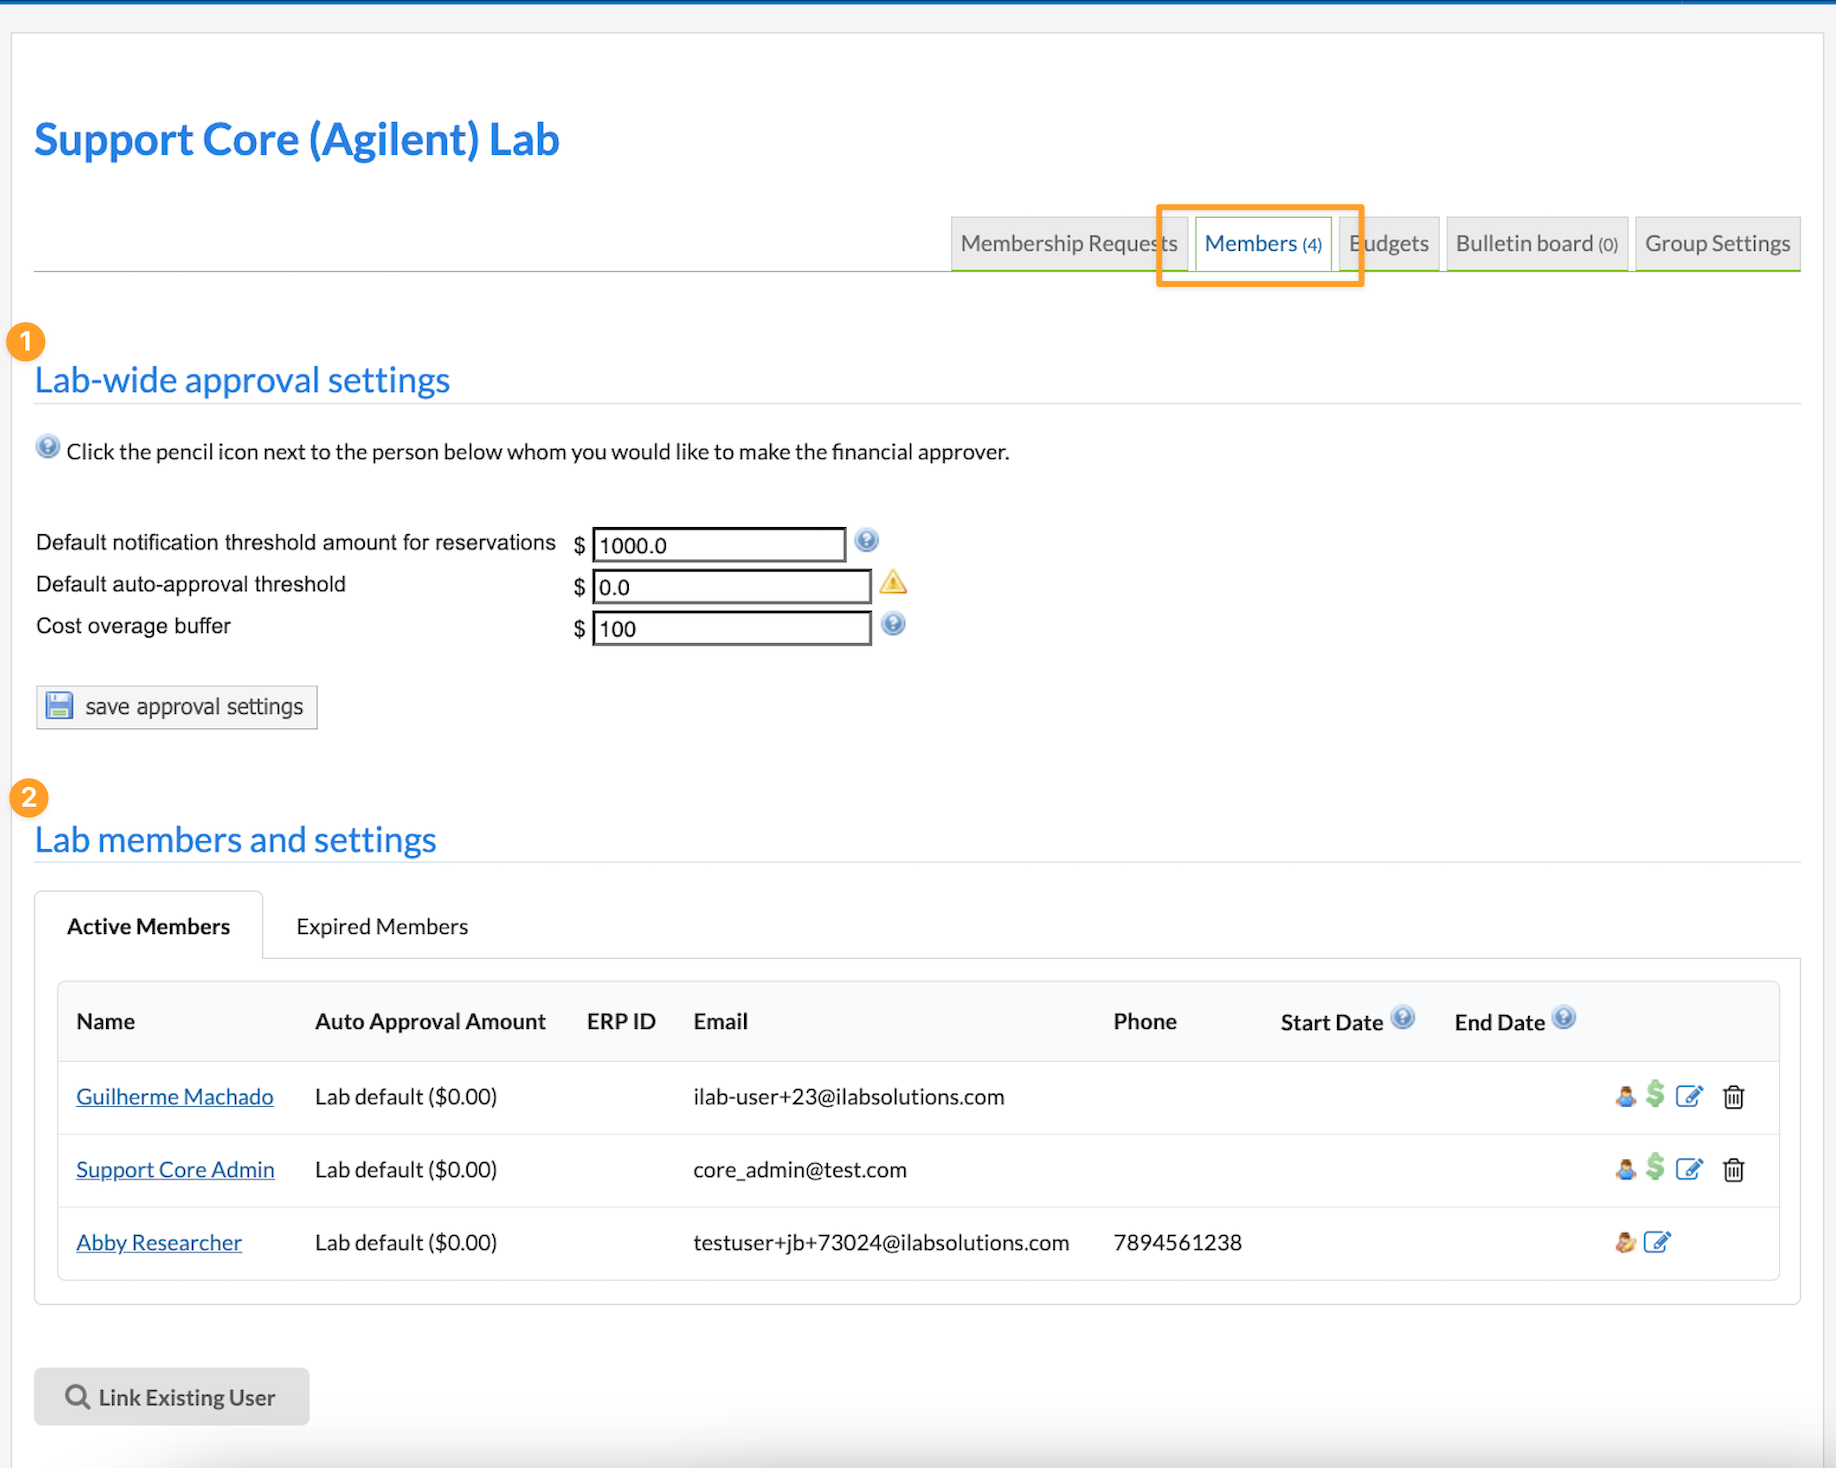
- Lab-wide approval settings: Set the financial approval thresholds for the group altogether.
- Lab member and settings: Add/remove users from the group and manage their current memberships.
Set Approval Thresholds
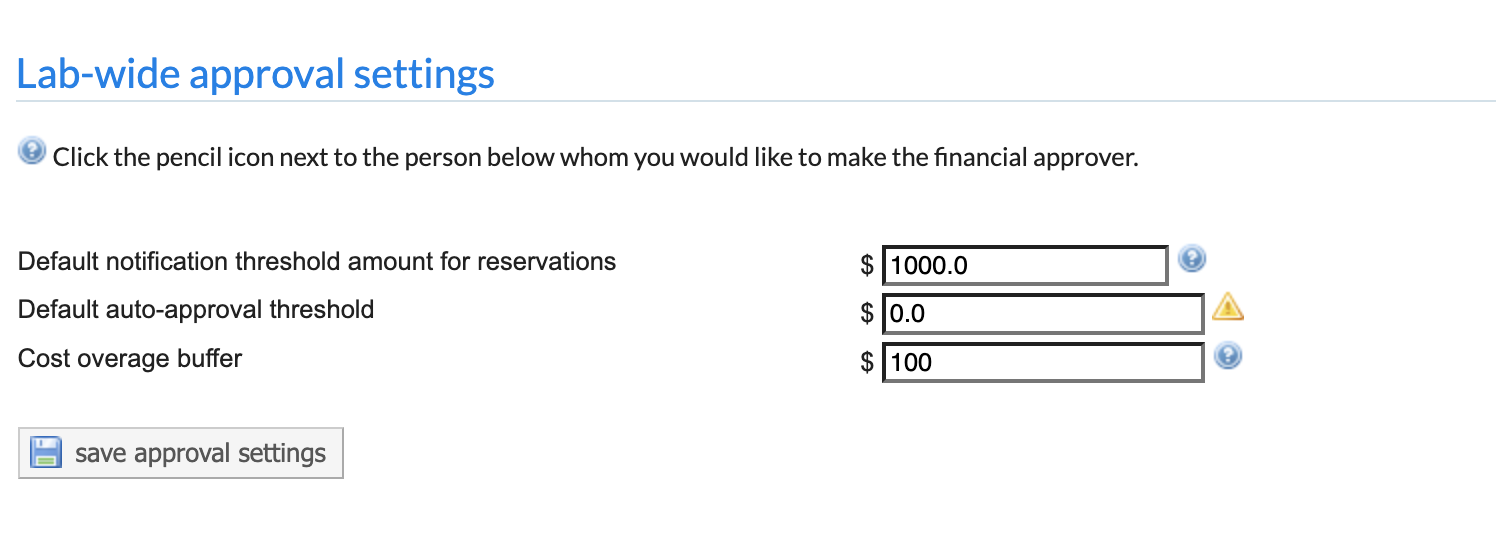
Financial approvals are required from lab administrators when the cost of the service requests submitted by the members exceeds the auto-approval threshold (for more information see Request Services). You can adjust your lab threshold in the Lab-wide Approval Settings section:
-
Default notification threshold for reservations: An email notification is sent to the lab’s financial administrators each time the cost of a lab member’s reservation exceeds the set threshold. The notification is triggered based on the total cost, of the reservation combining scheduled time and any add-on charges. The default threshold is set to $1000.
-
Default auto-approve threshold: The maximum cost of a service request that can be automatically approved. In the example above, a service request can have a price of up to $500 to receive auto-approval.
- Cost overage buffer: The amount that a service request can go over the original agreed-upon cost before a notification is sent to the lab administrators. In the example above, a service request cost can exceed up to $100 of the initial price before requiring financial re-approval.
Manage Memberships
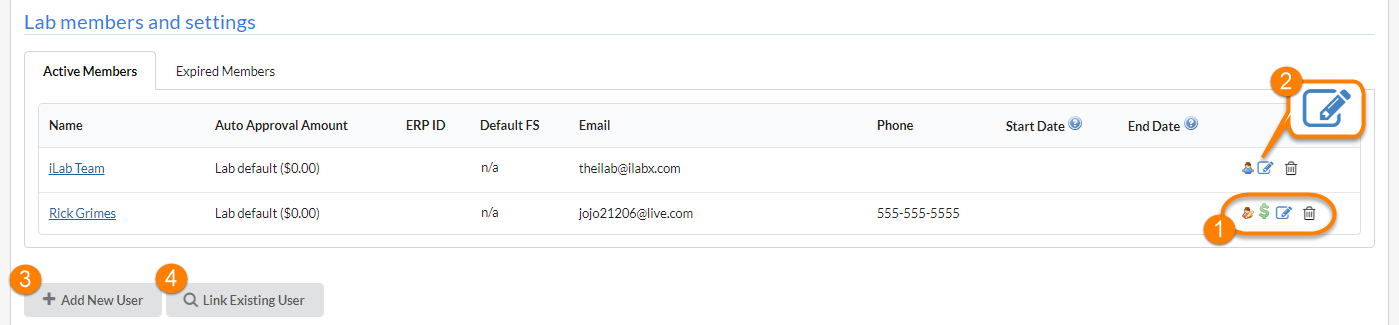
The Lab Members and Settings section allows you to add/remove members from the group and manage the existing memberships.
-
Member icons:
- Role (person icon): Hover your mouse over this icon to display the role of the user. When blue, this icon is identifying PIs and Members. The yellow version of the icon will represent Lab Managers. See also Key iLab Terms.
- Financial contact (dollar icon): ): This icon indicates that the user is also the lab financial contact and will receive all e-mail notifications requiring the lab administrator's attention. The PI or any additional Manager can still approve pending requests. It also lists the user as a financial contact for Core Staff, so they can be more easily communicated when needed.
- Edit member (pencil icon): Allows you to edit the membership settings of any member (see item 2 below).
-
Remove member (red X icon): Remove the user from the lab. Note that this does not delete their account from the system.
-
Edit member: When you click on the 'edit pencil' icon, you will be able to adjust:
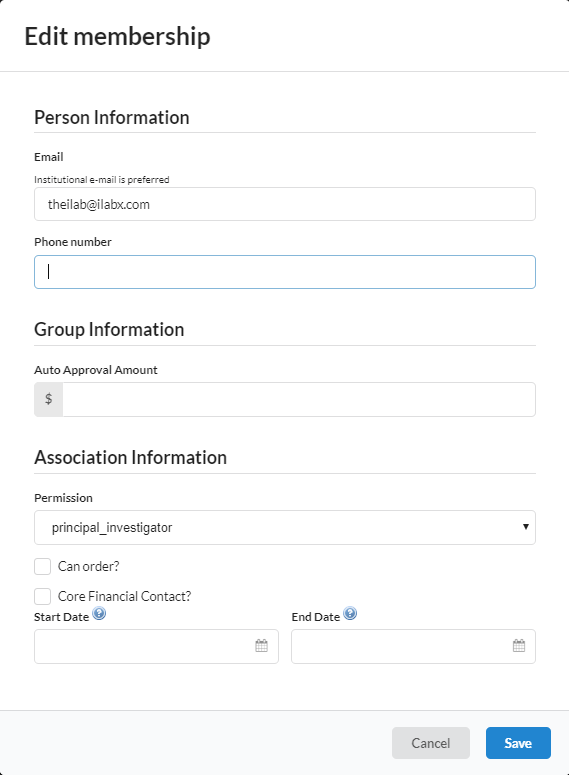
- Email: iLab communications for this user are sent to this e-mail address. (Changing this will not affect their e-mail used to access iLab).
- Phone number: Contact phone number for the user.
- Auto-approval Amount: Overrides the lab default auto-approval threshold and sets different limits per member, at your discretion.
- Permission: This drop-down specifies the role of the lab member, i.e. Member, Manager or Principal Investigator (see Key iLab Terms).
- Can order?: This setting applies to iLab's Materials Management module and indicates that this member can order supplies. Typically, not enabled for core facility users.
- Core Financial Contact?: Email notifications for the lab are sent to this member.
- Start Date: The start date for the user as a member of the lab. If set to a point in the future, the user will not be associated with the lab until the start date. Used to set up lab members in advance, without giving them access until their start date. When left empty, the user will be active immediately.
-
End Date: The end date for the user as a member of the lab. After that, the user will be removed from the lab and will not be allowed to pay for services using any lab fund. When left empty, the membership will have an indefinite duration.
Note: For expired users, outstanding charges will still follow the normal billing process. To review or reactivate expired memberships, click on the 'Show expired memberships' link (only visible when your lab has any expired memberships).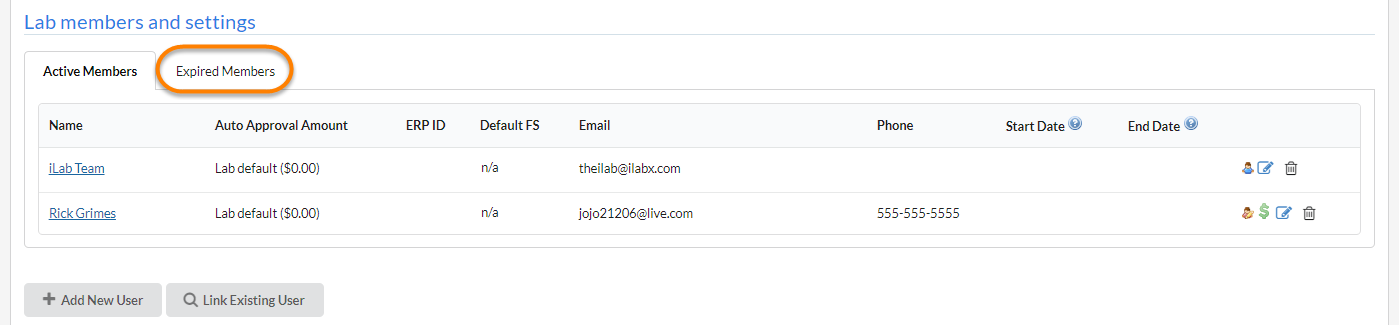
-
Save/Cancel: Use this to save or cancel any change made to their membership settings.
-
Add new user: When enabled for your institution, create a new user and add them to your lab. Complete the fields as described above under Edit member and click 'Add'. The user will receive a welcome e-mail containing instructions and their login information.
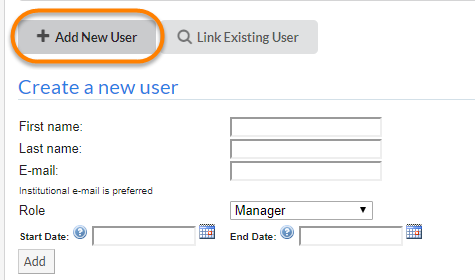
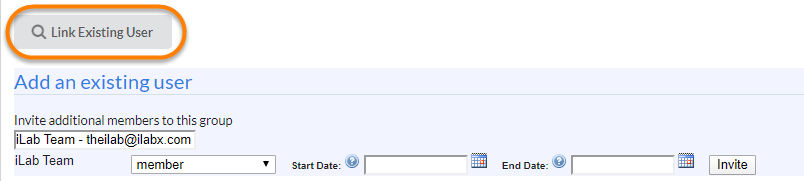
- Link existing user: Add an existing iLab user to your group. Type their name in the search field, select the user from the search results, adjust their role, start and end date fields, when applicable, and click 'Invite'.